AEG L 87490 FL User Manual
Hide thumbs
Also See for L 87490 FL:
- User manual (76 pages) ,
- User manual (36 pages) ,
- User manual (28 pages)
Table of Contents
Advertisement
Available languages
Available languages
Quick Links
Advertisement
Chapters
Table of Contents

Related Manuals for AEG L 87490 FL


Summary of Contents for AEG L 87490 FL
- Page 1 EN User manual L 87490 FL ES Manual de instrucciones...
-
Page 2: Table Of Contents
13. INSTALLATION ............27 FOR PERFECT RESULTS Thank you for choosing this AEG product. We have created it to give you impeccable performance for many years, with innovative technologies that help make life simpler –... -
Page 3: Safety Information
ENGLISH 1. SAFETY INFORMATION Before the installation and use of the appliance, careful- ly read the supplied instructions. The manufacturer is not responsible if an incorrect installation and use cau- ses injuries and damages. Always keep the instructions with the appliance for future reference. 1.1 Children and vulnerable people safety WARNING! Risk of suffocation, injury or permanent disability. -
Page 4: Safety Instructions
• If the supply cord is damaged, it must be replaced by the manufacturer, its service agent or similarly quali- fied persons in order to avoid a hazard. • The operating water pressure (minimum and maxi- mum) must be between 0,5 bar (0,05 MPa) and 8 bar (0,8 MPa) •... -
Page 5: Technical Information
ENGLISH Water connection • Do not put a container to collect pos- sible water leakage under the appli- • Make sure not to cause damage to the ance. Contact the Service to ensure water hoses. which accessories can be used. •... -
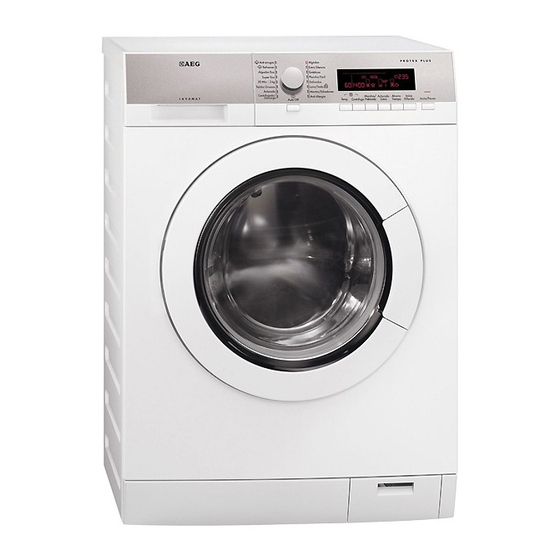
Page 6: Product Description
Spin speed Maximum 1400 rpm 1) Connect the water inlet hose to a water tap with a 3/4'' thread. 4. PRODUCT DESCRIPTION Worktop Feet for the appliance level Detergent dispenser Water drain hose Control panel Water inlet valve Door handle... -
Page 7: Control Panel
ENGLISH 5. CONTROL PANEL On/Off button (Auto Off) The AUTO OFF function automatically deactivates the appliance to stop the en- Programme knob ergy consumption when: Display • You do not use the appliance for 5 mi- Start Pause button (Inicio/Pausa) nutes before you press button Delay start button (Inicio Diferido) –... - Page 8 5.3 Display The display shows: The temperature of the set programme Cold water The spin speed of the set programme No Spin symbol Rinse Hold symbol 1) Only available for Spin/Drain programme. Prewash phase Washing phase Rinses phase Spin phase The phase symbols •...
- Page 9 ENGLISH You cannot open the appliance door when the symbol is You can open the door only when the symbol goes off. If the programme is completed but the symbol stays • The 'Rinse Hold' function is on. • There is water in the drum. The delay start symbol comes on when you set the delay start function.
- Page 10 10 www.aeg.com The indicator bar is fully filled when you set to the maxi- mum number of rinses. The Stain symbol comes on when you activate the function. The Prewash symbol comes on when you activate the func- tion. The indicator bar is not fully filled when you set only one of the functions.
-
Page 11: Programmes
ENGLISH 5.11 Acoustic signals function • To deactivate the function, press but- and button at the same You can hear the acoustic signals when: time until the symbol goes off. • You activate the appliance. You can activate the function: •... - Page 12 12 www.aeg.com Programme Type of load Cycle descrip- Functions Temperature Max. weight of tion load Sintéticos Synthetic or mixed Wash SPIN REDUC- 60° - 0° fabric items with Rinses TION normal soil. Short spin RINSE HOLD max. load 4 kg...
- Page 13 ENGLISH Programme Type of load Cycle descrip- Functions Temperature Max. weight of tion load Anti-Alergia White cotton items. Wash SPIN REDUC- 60° This programme re- Rinses TION moves micro-organ- Long spin RINSE HOLD isms thanks to the PREWASH washing by 60° C STAINS and adds on rinse.
- Page 14 14 www.aeg.com 1) If you use liquid detergent, set a programme without PREWASH. 2) The Stain function is not available with a temperature lower than 40°C. 3) If you set the ‘Extra Quick’ duration, we recommend that you decrease the quantity of the load.
-
Page 15: Consumption Values
ENGLISH 7. CONSUMPTION VALUES At programme start the display shows the duration programme for the max- imum load capacity. During the washing phase the programme duration is automatically calcula- ted and can greatly be reduced if the laundry load is lower than the maxi- mum load capacity (e.g. -
Page 16: Using The Appliance
16 www.aeg.com Put a small quantity of detergent in temperature without laundry. This the main wash compartment of the removes all possible dirt from the detergent dispenser. Set and start a drum and the tub. programme for cotton at the highest 9. - Page 17 ENGLISH The detergent compartment for the washing phase. If you use a liquid detergent, put it immediately before you start the programme. Liquid additives compartment (fabric conditioner, starch). Put the product in the compartment before you start the pro- gramme. This is the maximum level for the quantity of liquid additives.
- Page 18 18 www.aeg.com To use liquid detergent, turn the flap down. With the flap in the position DOWN: – Do not use gelatinous or thick liquid detergents. – Do not put more liquid deter- gent than the limit showed in the flap.
- Page 19 ENGLISH • The acoustic signals operate. Press button , the appliance starts the countdown of the delay • In the display comes on. start. • The indicator of the Start/Pause but- When the countdown is completed, goes off. the programme starts automatically. •...
-
Page 20: Hints And Tips
20 www.aeg.com 10. HINTS AND TIPS 10.1 The laundry load 10.3 Detergents and additives • Divide the laundry in: white, coloured, • Only use detergents and additives synthetics, delicates and wool. specially made for washing machines. • Obey the washing instructions that are •... -
Page 21: Care And Cleaning
ENGLISH Water hardness table Water hardness Level Type °dH °T.H. mmol/l Clarke soft 0-15 0-1.5 medium 8-14 16-25 1.6-2.5 10-16 hard 15-21 26-37 2.6-3.7 17-25 very hard > 21 > 37 >3.7 >25 11. CARE AND CLEANING WARNING! CAUTION! Do not use alcohol, solvents or chemical products. - Page 22 22 www.aeg.com 11.6 Detergent dispenser To clean the dispenser: Press the lever. Pull the dispenser out. Remove the top part of the liquid additive compartment. Clean all the parts with water. Clean the dispenser recess with a brush. Put back the dispenser in the recess.
- Page 23 ENGLISH To clean the drain pump: Open the drain pump door. Pull the flap out to remove it. Put a container below the recess of the drain pump to collect the water that flows out. Press the two levers and pull for- ward the drainage duct to let the water flow out.
- Page 24 24 www.aeg.com Clean the filter under the water tap and put it back in the pump into the special guides. Make sure that you tighten correctly the filter to prevent leakages. Put the flap back and close the drain pump door.
-
Page 25: Troubleshooting
ENGLISH Put the drainage duct back and close the Close the water tap. drain pump flap. Remove the water inlet hose When you drain the water with the emer- Put the two ends of the inlet hose in gency drain procedure, you must acti- a container and let the water flow vate again the drain system: out of the hose. - Page 26 26 www.aeg.com Problem Possible cause Possible solution The appliance The water drain hose is Make sure that the water drain does not drain the damaged. hose has no damages. water. The filter of the drain Clean the filter of the drain pump is blocked.
-
Page 27: Installation
ENGLISH Problem Possible cause Possible solution Leakages from the drain Make sure that the drain pump pump. filter is tight. The water drain hose is Make sure that the water inlet damaged. hose has no damages. You cannot open The washing pro- Let the washing programme the appliance gramme is in operation. - Page 28 28 www.aeg.com 13.2 Unpacking Use the gloves. Remove the external film. If necessary, use a cutter. Remove the cardboard top. Remove the polystyrene packaging materials. Remove the internal film. Open the door. Remove the poly- styrene piece from the door seal...
- Page 29 ENGLISH Put one of the polystyrene packag- ing elements on the floor behind the appliance. Carefully put down the appliance with the rear side on it. Make sure not to damage the ho- ses. Remove the polystyrene protection from the bottom. Pull up the appliance in vertical po- sition.
- Page 30 30 www.aeg.com Put the plastic caps in the holes. You can find these caps in the user manual bag. WARNING! We recommend that you keep Remove all the packaging and the packaging and the transit the transit bolts before you install bolts for when you move the ap- the appliance.
- Page 31 ENGLISH 13.4 The inlet hose • Connect the hose to the appliance. Turn the inlet hose only left or right. Loose the ring nut to set it in the cor- rect position. • Connect the water inlet hose to the cold water tap with 3/4 thread.
- Page 32 32 www.aeg.com With the plastic hose guide. • On the edge of a sink. • Make sure that the plastic guide can- not move when the appliance drains. Attach the guide to the water tap or the wall. • To a stand pipe with vent-hole.
- Page 33 ENGLISH You can extend the drain hose to maximum 400 cm. Contact the service centre for the other drain hose and the extension. 14. ENVIRONMENT CONCERNS Recycle the materials with the appliances. Do not dispose symbol . Put the packaging in appliances marked with the symbol applicable containers to recycle it.
- Page 34 13. INSTALACIÓN ............. 61 PARA OBTENER RESULTADOS PERFECTOS Gracias por escoger este producto AEG. Este artículo ha sido creado para ofrecer un rendimiento impecable durante muchos años, con innovadoras tecnologías que facilitarán su vida y prestaciones que probablemente no encuentre en electrodomésticos corrientes.
-
Page 35: Información Sobre Seguridad
ESPAÑOL 1. INFORMACIÓN SOBRE SEGURIDAD Antes de instalar y utilizar el aparato, lea atentamente las instrucciones facilitadas. El fabricante no se hace responsable de los daños y lesiones causados por una instalación y uso incorrectos. Guarde siempre las ins- trucciones junto con el aparato para futuras consultas. 1.1 Seguridad de niños y personas vulnerables ADVERTENCIA Existe riesgo de sufrir asfixia, lesiones o incapaci-... -
Page 36: Instrucciones De Seguridad
36 www.aeg.com • Respete la carga máxima de 9 kg (consulte el capítulo “Tabla de programas”). • Si el cable eléctrico sufre algún daño, el fabricante, su servicio técnico o un profesional tendrán que cam- biarlo para evitar riesgos. • La presión de trabajo del agua (mínima y máxima) de-... -
Page 37: Información Técnica
ESPAÑOL • No desconecte el aparato tirando del • No toque el cristal de la puerta mien- cable de conexión a la red. Tire siem- tras esté en marcha un programa. El pre del enchufe. cristal puede estar caliente. • No toque el cable de red ni el enchufe •... -
Page 38: Descripción Del Producto
38 www.aeg.com Presión del suministro Mínima 0,5 bares (0,05 MPa) de agua Máxima 8 bares (0,8 MPa) Agua fría Suministro de agua Carga máxima Algodón 9 kg Velocidad de centrifuga- Máxima 1400 rpm 1) Conecte la manguera de entrada de agua a un grifo con rosca de 3/4 pulgadas. -
Page 39: Panel De Mandos
ESPAÑOL 4.1 Accesorios Llave inglesa Para retirar los pasadores de trans- porte. Tapones de plástico Para cerrar los orificios de la parte posterior del armario, después de extraer los pasadores de transporte. Tubo de entrada antiinundación Para evitar posibles fugas. Guía de plástico de la manguera Para conectar el tubo de desagüe en el borde de un fregadero. - Page 40 40 www.aeg.com Botón de ahorro de tiempo (Ahorra • No se utiliza el aparato durante 5 mi- Tiempo) nutos antes de pulsar el botón Botón de aclarado extra (Aclarado – Se cancelan todos los ajustes. Extra) – Pulse la tecla para encender el Botón Prelavado/Manchas (Man-...
- Page 41 ESPAÑOL Fase de aclarados Fase de centrifugado Los símbolos de la fase • Cuando se ajusta un programa, todos los símbolos de las fases co- rrespondientes al programa se encienden. • Cuando empieza el programa, solo parpadea el símbolo de la fase en curso.
- Page 42 42 www.aeg.com Barras gráficas La barra indicadora vacía aparece solo si la función corres- pondiente está disponible para el programa ajustado. La barra indicadora se rellena según las funciones progra- madas. Si se realiza una selección incorrecta, el mensaje Err indica que la selec- ción no es posible.
- Page 43 ESPAÑOL Pulse repetidamente el botón para acti- • Se pulsan las teclas. var una o dos opciones. El símbolo co- • El programa se termina. rrespondiente y la barra indicadora se • Se ha producido algún fallo. encienden en la pantalla. Para desactivar/activar las señales acús- MANCHAS ticas, pulse el botón...
-
Page 44: Programas
44 www.aeg.com 6. PROGRAMAS Programa Tipo de carga Descripción de Funciones Temperatura Peso máx. de la ciclo carga Algódon Algodón blanco y Lavado REDUCCIÓN 95° - 0° de color con sucie- Aclarados DEL CENTRI- dad normal. Centrifugado lar- FUGADO Carga máxima 9 kg PROLONGA- CIÓN DE... - Page 45 ESPAÑOL Programa Tipo de carga Descripción de Funciones Temperatura Peso máx. de la ciclo carga Delicados Tejidos delicados Lavado REDUCCIÓN 40 - 0° como acrílicos, vis- Aclarados DEL CENTRI- cosa o poliéster con Centrifugado cor- FUGADO suciedad normal. PROLONGA- Carga máxima 4 kg CIÓN DE ACLARADO PRELAVADO...
- Page 46 46 www.aeg.com Programa Tipo de carga Descripción de Funciones Temperatura Peso máx. de la ciclo carga Aclarado Todos los tejidos. Un aclarado con REDUCCIÓN 0° Carga máxima 9 kg fase de DEL CENTRI- centrifugado adi- FUGADO cional PROLONGA- CIÓN DE...
- Page 47 ESPAÑOL 5) Ajuste la velocidad de centrifugado. Asegúrese de que coincide con la colada. Para seleccionar solo el programa DESCARGA, ajuste la función en SIN CENTRIFUGADO. 6) Pulse el botón ACLARADO EXTRA para añadir aclarados. Con una velocidad de centrifugado baja, el aparato realiza aclarados delicados y un breve centrifugado. 7) Seleccione este programa para reducir la duración y el consumo de energía y agua.
-
Page 48: Valores De Consumo
48 www.aeg.com 7. VALORES DE CONSUMO Al inicio del programa, la pantalla muestra la duración para la capacidad de carga máxima. Durante la fase de lavado, la duración del programa se calcula automática- mente y se puede reducir mucho si la carga es inferior a la capacidad de carga máxima (p. -
Page 49: Antes Del Primer Uso
ESPAÑOL 8. ANTES DEL PRIMER USO Para activar el sistema de desagüe, pal del dosificador. Ajuste e inicie un vierta 2 litros de agua en el compar- programa para algodón a la tempe- timento de lavado principal del dosi- ratura más alta sin colada. De esta ficador de detergente. - Page 50 50 www.aeg.com El compartimento de detergente para la fase de prelavado y el programa de remojo. Añada el detergente para el prelavado y remoje antes de iniciar el programa. El compartimento de detergente para la fase de lavado. Si utiliza detergente líquido, introdúzcalo inmediatamente antes de iniciar el programa.
- Page 51 ESPAÑOL Para usar detergente líquido, gire la tapa hacia abajo. Con la tapa en posición BAJA- – No utilice detergentes líquidos gelatinosos ni gruesos. – No ponga más detergente lí- quido que el límite mostrado en la tapa. – No ajuste la fase de prelavado. –...
- Page 52 52 www.aeg.com 9.6 Cambio de una función Si la temperatura y el nivel de agua del tambor son demasiado Puede cambiar únicamente algunas fun- elevados, el símbolo de bloqueo ciones antes de usarlas. de la puerta permanece encendi- do y no se puede abrir la puerta.
-
Page 53: Consejos
ESPAÑOL Para descargar el agua: Apague el aparato. Si fuera necesario, reduzca la veloci- El aparato vacía el agua y centri- dad de centrifugado. fuga automáticamente después Pulse el botón Inicio/Pausa . El de unas 18 horas. aparato vacía el agua y centrifuga. Cuando el programa termina y el símbolo de bloqueo de la puerta se apaga, puede abrir la puerta. -
Page 54: Mantenimiento Y Limpieza
54 www.aeg.com Póngase en comunicación con las autori- • Grados alemanes (°dH). dades correspondientes para conocer la • Grados franceses (°TH). dureza del agua de su zona. • mmol/l (milimol por litro, unidad inter- Siga siempre las instrucciones que se en- nacional de la dureza del agua). - Page 55 ESPAÑOL 11.4 Junta de estanqueidad de la puerta Examine periódicamente la junta y ex- traiga todos los objetos de la pieza inte- rior. 11.5 Tambor Proceda de la siguiente manera: • Limpie el tambor con un producto es- Examine periódicamente el tambor para pecial para acero inoxidable.
- Page 56 56 www.aeg.com 11.7 Bomba de desagüe ADVERTENCIA Desenchufe el aparato de la Examine periódicamente la bom- toma de red. ba de desagüe y asegúrese de No quite el filtro mientras el que está limpia. aparato esté en funciona- miento. No limpie la bomba Limpie la bomba si: si el agua del electrodomés-...
- Page 57 ESPAÑOL Retire las pelusas y objetos de la bomba. Asegúrese de que el rotor de la bomba gira. Si no es así, póngase en contacto con el servicio técnico. Limpie el filtro con agua corriente y vuelva a colocarlo en la bomba en las guías especiales.
-
Page 58: Solución De Problemas
58 www.aeg.com Retire el tubo de entrada situado detrás del aparato. Limpie el filtro de la válvula con un cepillo rígido o una toalla. Vuelva a colocar el tubo de entrada. Cerciórese de que las conexiones están bien apretadas para evitar fu- gas. - Page 59 ESPAÑOL Con algunos problemas, las señales • - El dispositivo anti inundación acústicas funcionan y la pantalla se ha puesto en marcha. muestra un código de alarma: ADVERTENCIA • - El aparato no carga agua. Apague el aparato antes de reali- •...
- Page 60 60 www.aeg.com Problema Causa posible Posible solución La fase de centri- La fase de centrifugado Seleccione el programa de cen- fugado no funcio- está apagada. trifugado. El filtro de la bomba de Limpie el filtro de la bomba de desagüe está obstruido.
-
Page 61: Instalación
ESPAÑOL Problema Causa posible Posible solución El aparato se llena El extremo de la man- Asegúrese de que el tubo de de agua y desa- guera de desagüe está desagüe se encuentra en la po- gua inmediata- demasiado bajo. sición correcta. mente. - Page 62 62 www.aeg.com Retire la cubierta de cartón. Retire los materiales del embalaje de poliestireno. Retire la película interna. Abra la puerta. Retire la pieza de poliestireno de la junta de la puerta y todos los elementos del tambor. Extienda uno de los materiales de embalaje de poliestireno en el suelo detrás del aparato.
- Page 63 ESPAÑOL Retire la protección de poliestireno de la base. Levante el aparato hasta la posición vertical. Retire el cable de alimentación y el tubo de desagüe de los soportes de los tubos. Suelte los tres pernos. Utilice la llave suministrada con el aparato. Extraiga los separadores de plásti- Coloque los tapones de plástico en los orificios.
- Page 64 64 www.aeg.com ADVERTENCIA Se recomienda guardar el emba- Retire todo el embalaje y los pa- laje y los pasadores de transpor- sadores de transporte antes de te para cuando traslade el apara- instalar el aparato. 13.3 Colocación y nivelado • Instale la lavadora en el suelo sobre una superficie plana y rígida.
- Page 65 ESPAÑOL 13.4 El tubo de entrada • Conecte el tubo al aparato. Gire el tu- bo de entrada solo a la derecha o a la izquierda. Suelte la tuerca anular para ajustarla en la posición correcta. • Conecte el tubo de entrada de agua fría a una toma de agua fría con rosca de 3/4.
- Page 66 66 www.aeg.com Con la guía de plástico. • En el borde de un fregadero. • Asegúrese de que la guía de plástico no se mueva cuando el aparato desa- gua. Acople la guía al grifo de agua o a la pared.
- Page 67 ESPAÑOL Puede extender el tubo de desa- güe hasta un máximo de 400 cm. Póngase en contacto con el ser- vicio técnico para el otro tubo de desagüe y la extensión. 14. ASPECTOS MEDIOAMBIENTALES Recicle los materiales con el símbolo electrónicos.
- Page 68 www.aeg.com/shop...
Need help?
Do you have a question about the L 87490 FL and is the answer not in the manual?
Questions and answers