AEG L 87480 FL User Manual
Hide thumbs
Also See for L 87480 FL:
- User manual (40 pages) ,
- User manual (32 pages) ,
- User manual (36 pages)
Table of Contents
Advertisement
Advertisement
Table of Contents

Related Manuals for AEG L 87480 FL


Summary of Contents for AEG L 87480 FL
- Page 1 L 87480 FL WASHING MACHINE USER MANUAL L 87680 FL...
-
Page 2: Table Of Contents
CONTENTS 4 SAFETY INFORMATION 6 ENVIRONMENT CONCERNS 7 TECHNICAL INFORMATION 8 PRODUCT DESCRIPTION 8 ACCESSORIES 9 CONTROL PANEL 14 PROGRAMMES 18 BEFORE FIRST USE 18 USING THE APPLIANCE 18 LOADING THE LAUNDRY 19 FILLING THE DETERGENT AND ADDITIVES 20 SETTING AND STARTING A PROGRAMME 21 AT THE END OF THE PROGRAMME 23 HINTS AND TIPS 25 CARE AND CLEANING... - Page 3 ENGLISH FOR PERFECT RESULTS Thank you for choosing this AEG product. We have created it to give you impeccable performance for many years, with innovative technologies that help make life simpler – features you might not find on ordinary appliances. Please spend a few minutes reading to get the very best from it.
-
Page 4: Safety Information
SAFETY INFORMATION Before the installation and use, read this manual carefully: • For your safety and the safety of your property • To help the environment • For the correct operation of the ap- pliance. Always keep these instructions with the appliance also if you move or give it to GENERAL SAFETY a different person. -
Page 5: Water Connection
ENGLISH internal components and cause leak- • Always use a correctly installed ages or malfunctions. shockproof socket. • Do not install and connect a dam- • Do not use multiple plugs and exten- aged appliance. sion cables. There is a risk of fire. •... -
Page 6: Environment Concerns
ENVIRONMENT CONCERNS • Always start a washing programme PACKAGING MATERIALS with the maximum load of laundry. Recycle the materials with the symbol • If necessary, use a stain remover when you set a programme with a Put the packaging in applicable con- low temperature. -
Page 7: Technical Information
ENGLISH TECHNICAL INFORMATION Dimensions Width / Height / Depth 600 / 850 / 605 mm Total depth 640 mm Electrical connection: Voltage 230-240 V Overall power 2200 W Fuse 10 A Frequency 50 Hz Level of protection against ingress of solid particles IPX4 and moisture ensured by the protective cover, except where the low voltage equipment has no protection... -
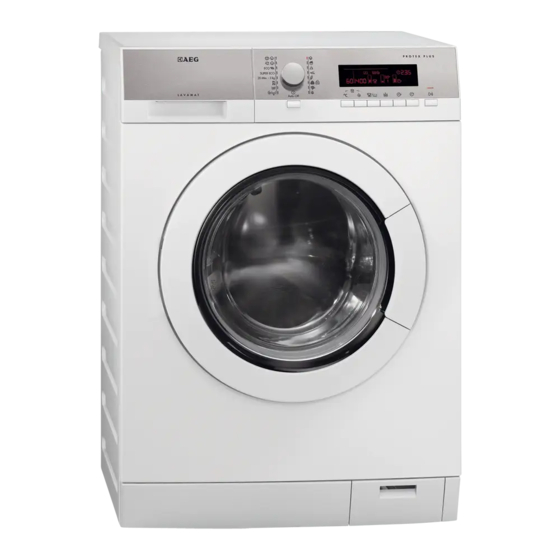
Page 8: Product Description
PRODUCT DESCRIPTION Worktop Feet for the appliance level Detergent dispenser Water drain hose Control panel Water inlet valve Door handle Mains cable Rating plate Transit bolts Drain pump Feet for the appliance level ACCESSORIES Spanner To remove the transit bolts. Plastic caps To close the holes on the rear side of the cabinet after the removal of... -
Page 9: Control Panel
ENGLISH CONTROL PANEL Anticrease Cottons Refresh Extra Silent Economy Synthetics Super Eco Easy Iron 20 Min. - 3 kg Delicates Jeans Wool/Silk Rinse Duvet Anti-Allergy Spin/Drain Auto Off On/Off button Time Save button Programme knob Extra Rinse button Display Stain/Prewash button Start Pause button Spin reduction button Delay Start button... - Page 10 DISPLAY The display shows: The temperature of the set programme Cold water The spin speed of the set programme No Spin symbol Rinse Hold symbol 1) Only available for Spin/Drain programme. Prewash phase Washing phase Rinses phase Spin phase The phase symbols •...
- Page 11 ENGLISH You cannot open the appliance door when the symbol is on. You can open the door only when the symbol goes off. If the programme is completed but the symbol stays on: • The 'Rinse Hold' function is on. •...
-
Page 12: Delay Start Button
The indicator bar is fully filled when you set to the maximum number of rinses. The Stain symbol comes on when you activate the function. The Prewash symbol comes on when you activate the func- tion. The indicator bar is not fully filled when you set only one of the functions. -
Page 13: Acoustic Signals
ENGLISH - -, the appliance does not heat the until the display shows the symbol water. • To deactivate the function, press but- ACOUSTIC SIGNALS and button at the same FUNCTION time until the symbol goes off. You can activate the function: You can hear the acoustic signals when: •... -
Page 14: Programmes
PROGRAMMES Programme Type of load Cycle de- Functions Temperature Max. weight of load scription Cotton White and coloured cotton with Wash SPIN REDUCTION 95° - Cold normal soil. Rinses RINSE HOLD max. load 8 kg Long spin PREWASH STAIN EXTRA RINSE TIME SAVE Extra Silent White and coloured cotton with... - Page 15 ENGLISH Programme Type of load Cycle de- Functions Temperature Max. weight of load scription AntiAllergy White cotton items. Wash SPIN REDUCTION 60° This programme removes micro- Rinses RINSE HOLD organisms thanks to the washing Short spin PREWASH by 60° C and adds one rinse. In STAIN this way the wash is more effec- EXTRA RINSE...
-
Page 16: Consumption Values
6) Set this programme to decrease the time and the consumption of energy and water. Use a special detergent for very low temperature. 7) Set this programme to have a good washing results and decrease the energy consumption. The time of the washing programme is extended. STEAM PROGRAMMES Type of load Max load... - Page 17 ENGLISH The actual water temperature may differ from the declared cy- cle temperature.
-
Page 18: Before First Use
BEFORE FIRST USE 1. To activate the drain system, put 2 detergent dispenser. Set and start litre of water in the main wash com- a programme for cotton at the partment of the detergent dispens- highest temperature without laun- dry. This removes all possible dirt from the drum and the tub. -
Page 19: Filling The Detergent And Additives
ENGLISH FILLING THE DETERGENT AND ADDITIVES The detergent compartment for the prewash phase and the soak programme. Add the detergent for prewash and soak before the start of the programme. The detergent compartment for the washing phase. If you use a liquid detergent, put it immediately before you start the programme. -
Page 20: Setting And Starting A Programme
3. To use powder detergent, turn the flap up. 4. To use liquid detergent, turn the flap down. With the flap in the position DOWN: – Do not use gelatinous or thick liquid detergents. – Do not put more liquid deter- gent than the limit showed in the flap. -
Page 21: At The End Of The Programme
ENGLISH CANCEL A PROGRAMME CANCEL THE DELAY START 1. Press button 1. Press button to cancel the pro- . The related indi- gramme and to deactivate the ap- cator flashes. pliance. 2. Press button again and again 2. Press button again to activate until the display shows 0’. - Page 22 • Keep the door ajar, to prevent mil- 2. Press the Start/Pause button dew and odours. The appliance drain the water and spin. • Close the water tap. 3. When the programme is comple- The washing programme is ted and the door lock symbol goes completed, but there is water in the off, you can open the door drum:...
-
Page 23: Hints And Tips
ENGLISH HINTS AND TIPS THE LAUNDRY LOAD DETERGENTS AND ADDITIVES • Divide the laundry in: white, col- • Only use detergents and additives oured, synthetics, delicates and wool. specially made for washing machines. • Obey the washing instructions that • Do not mix different types of deter- are on the laundry care labels. - Page 24 Water hardness table Water hardness Level Type °dH °T.H. mmol/l Clarke soft 0-15 0-1.5 medium 8-14 16-25 1.6-2.5 10-16 hard 15-21 26-37 2.6-3.7 17-25 very hard > 21 > 37 >3.7 >25...
-
Page 25: Care And Cleaning
ENGLISH CARE AND CLEANING WARNING! CAUTION! Do not use alcohol, solvents or chemical products. Disconnect the appliance from the mains supply before you clean it. MAINTENANCE WASH DESCALING With the low temperature programmes it is possible that some detergent stays The water we use contains limescale. -
Page 26: Detergent Dispenser
DETERGENT DISPENSER To clean the dispenser: 1. Press the lever. 2. Pull the dispenser out. 3. Remove the top part of the liquid additive compartment. 4. Clean all the parts with water. 5. Clean the dispenser recess with a brush. 6. -
Page 27: To Clean The Drain Pump
ENGLISH To clean the drain pump: 1. Open the drain pump door. 2. Pull the flap out to remove it. 3. Put a container below the recess of the drain pump to collect the water that flows out. 4. Press the two levers and pull for- ward the drainage duct to let the water flow out. -
Page 28: Inlet Hose Filter And Valve Filter
9. Clean the filter under the water tap and put it back in the pump into the special guides. 10. Make sure that you tighten correct- ly the filter to prevent leakages. 11. Put the flap back and close the drain pump door. -
Page 29: Frost Precautions
ENGLISH When you drain the water with the 2. Close the water tap. emergency drain procedure, you must 3. Remove the water inlet hose activate again the drain system: 4. Put the two ends of the inlet hose 1. Put 2 litres of water in the main in a container and let the water wash compartment of the deter- flow out of the hose. -
Page 30: Troubleshooting
TROUBLESHOOTING The start of the appliance does not oc- • - The appliance does not drain cur or it stops during operation. the water. First try to find a solution to the prob- • - The appliance door is open or lem (refer to the table). - Page 31 ENGLISH Problem Possible cause Possible solution The anti-flood de- • Disconnect the appliance. vice is on. • Close the water tap. • Contact the service centre. The spin phase The spin phase is off. Set the spin programme. does not operate. The filter of the drain Clean the filter of the drain pump is blocked.
- Page 32 Problem Possible cause Possible solution The appliance fills The end of the drain Make sure that the drain hose is with water and hose is too low. in the correct position. drain immediately. The washing re- The detergent you used Increase the detergent quantity sults are not satis- was not sufficient or cor-...
-
Page 33: Installation
ENGLISH INSTALLATION UNPACKING 1. Use the gloves. Remove the exter- nal film. If necessary, use a cutter. 2. Remove the cardboard top. 3. Remove the polystyrene packaging materials. 4. Remove the internal film. 5. Open the door. Remove the poly- styrene piece from the door seal and all the items from the drum. - Page 34 6. Put the front piece on the floor be- hind the appliance. Carefully put down the appliance with the rear side on it. Make sure not to dam- age the hoses. 7. Remove the polystyrene protection from the bottom. 8. Pull up the appliance in vertical po- sition.
-
Page 35: Positioning And Levelling
ENGLISH 12. Replace the plastic spacers with the plastic caps. You can find these caps in the user manual bag. WARNING! We recommend that you keep Remove all the packaging and the packaging and the transit the transit bolts before you in- bolts for when you move the ap- stall the appliance. -
Page 36: Water Pressure
Installation on a not hard floor tach it to the beams of the floor with minimum 2 screws. When you install the appliance on a not The plinth must extend of some cm hard floor (wooden planks floor), put a more than the edges of the appliance. -
Page 37: Water Drainage
ENGLISH Water-stop device The inlet hose has a water stop device. This device prevents water leaks in the hose because of its natural ageing. The red sector in the window «A» shows this fault . If this occur, close the water tap and contact the service centre to replace the hose. - Page 38 • If the end of the drain hose is this (see the drawing), you can push it di- rectly into the stand pipe. Without the plastic hose guide. • To a sink spigot. Refer to the illustration. Put the drain hose in the spigot and tighten it with a clip.
- Page 39 ENGLISH...
- Page 40 132939730-A-112011...
Need help?
Do you have a question about the L 87480 FL and is the answer not in the manual?
Questions and answers