Table of Contents
Advertisement
Quick Links
Advertisement
Table of Contents

Subscribe to Our Youtube Channel
Related Manuals for Canon Oce VarioPrint i Series


Summary of Contents for Canon Oce VarioPrint i Series
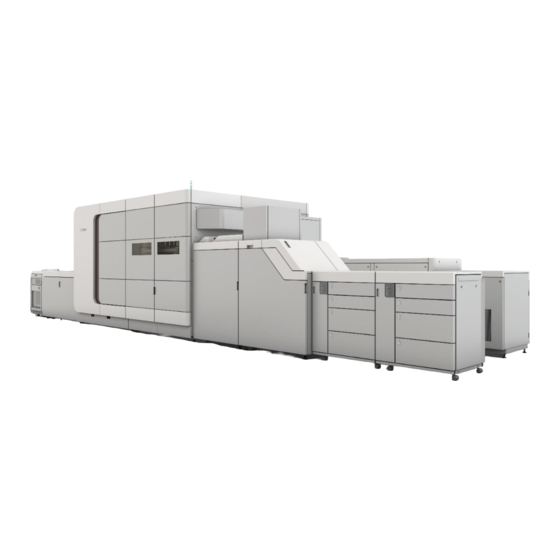
- Page 1 Ver 0.2 Level 1 Uptime Optimization Océ VarioPrint i-series. User Guide...
-
Page 2: Introduction
1 Introduction In order to keep the VPi-series running the day-to-day maintenance, is be covered by you, a trained operator. Only in case of malfunction or in case of scheduled service-maintenance, the local service organization is involved. The actions below are considered to be normal maintenance actions which can be executed by every trained operator. - Page 3 In this document, a couple of times we ask you to ‘inform service’ in case you notice something during a check. Note that you supposed to inform the service engineer via the logbook at the rear of this document. Only submit a service call in case the system is not working according expectation/specification. In the procedures there are differences, depending on the ‘revision’...
-
Page 4: Table Of Contents
2 Table of Contents Introduction Table of Contents Daily Maintenance Check the environment. 3.1.1 Check the print room conditions 3.1.2 Check the media storage conditions. 3.1.3 Check the supplies storage conditions. Weekly Maintenance. Check the ink handling. 4.1.1 Check the ink buffer reservoirs 4.1.2 Check the ink supply cans. -
Page 5: Daily Maintenance
3 Daily Maintenance 3.1 Check the environment. 3.1.1 Check the print room conditions Check the temperature and humidity of the environment of the system. Print room conditions: Description Value Temperature 20 – 26 68 – 78.8 Relative Humidity 30 – 50 % Air Pressure 840 –... -
Page 6: Weekly Maintenance
4 Weekly Maintenance. 4.1 Check the ink handling. 4.1.1 Check the ink buffer reservoirs Rev 1 – open the top cover of the ink handling and check for leakage Rev 2,3,4 – no action In case you find leakage, inform local service. 4.1.2 Check the ink supply cans. -
Page 7: Check The Maintenance
4.2 Check the maintenance Before you start, switch of the system with the ‘moon button’ on the operator panel. 4.2.1 Check the manifolds Rev 1 - Open the maintenance door at the rear of the system. Use a flashlight to check if you see air in the ink hoses or in the top of the reservoir from the manifold. -
Page 8: Check The Degassing Tray
4.2.3 Check the degassing tray. Rev 1,2,3,4 – Open the maintenance door at the rear of the system. Pull the degassing tray towards you and use a flashlight to check the degas tray for leakage. In case you find ink leakage, stop printing and submit a service call. -
Page 9: Check The Print Unit
4.3 Check the print unit Before you start, switch of the system with the ‘moon button’ on the operator panel. 4.3.1 Check the print-belt for contamination Rev 1,2,3,4 – Open the lower and middle front doors from the print unit. Use a flashlight to check if the print belt is contaminated with ink. -
Page 10: Clean The Registration Units
4.4 Clean the Registration units. Before you start, switch of the system with the ‘moon button’ on the operator panel. 4.4.1 Clean the Z-registration sensors. Rev 1,2,3,4 – Clean the Z-registration units in the Paper path module, Registration input module Unit (2x) and Registration output module. This action is considered to be normal maintenance actions which can be executed by every trained operator. -
Page 11: Check The Paper Input Module
4.5 Check the Paper Input Module 4.5.1 Check the PIM water bottle(s) Rev 1,2,3 - Remove the top cover from the water bottle at the rear side of the Paper Input Module. Check if the water looks clear and if algae’s are visible. Rev 4 –... -
Page 12: Clean The Paper Path Rollers
4.6 Clean the paper path rollers. 4.6.1 Clean the paper path rollers of the HTU Rev 1,2,3,4 – Open the Horizontal Transport Unit. Check if the paper path rollers are contaminated. Note that some discoloration is allowed. The example on the photo is not causing a problem. -
Page 13: Clean The Paper Path Rollers In The Hcs
4.6.3 Clean the paper path rollers in the HCS. Rev 1,2,3,4 – Open the front door of the High Capacity Stacker and check if the paper path rollers are contaminated. Note that some discoloration is allowed. The example on the photo is not causing a problem. -
Page 14: Monthly Maintenance
5 Monthly Maintenance. 5.1 Check the chillers. Before you start, switch of the system with the ‘moon button’ on the operator panel. 5.1.1 Clean the heat exchanger of the chillers. Rev 1,2 – Remove the cover on the rear of the system from the chiller cabinet. -
Page 15: Check The Level Of The Coolant
5.1.2 Check the level of the coolant. Rev 1,2 – Remove the cover on the rear of the system from the chiller cabinet. Check the level of the coolant at the reading glass on the front side of the chiller. In case the level is too low, add cooling fluid until the marking. -
Page 16: Check The Air System
5.2 Check the air system 5.2.1 Check the waste reservoirs of the air system Rev 1,2,3,4 – Check if the waste reservoirs from the air inlet unit, contains fluid. In case there is waste in the reservoirs, put a cup below the nozzles and open them to collect any waste. -
Page 17: Clean The Exterior Of The System
5.3 Clean the exterior of the system. 5.3.1 Clean the air grids of the system Rev 1,2,3,4 – Use a vacuum cleaner to clean all the air grids on the outside of the system. Please find the location of the air grids in the pictures below. -
Page 18: Logbook
6 Logbook. Date: O = Checked and no action needed. X = Checked and executed action. Daily Maintenance Check the environment. 3.1.1 Check the print room conditions 3.1.2 Check the media storage conditions. 3.1.3 Check the supplies storage conditions. ... - Page 19 Date: O = Checked and no action needed. X = Checked and executed action. Daily Maintenance Check the environment. 3.1.1 Check the print room conditions 3.1.2 Check the media storage conditions. 3.1.3 Check the supplies storage conditions. ...
- Page 20 Date: O = Checked and no action needed. X = Checked and executed action. Daily Maintenance Check the environment. 3.1.1 Check the print room conditions 3.1.2 Check the media storage conditions. 3.1.3 Check the supplies storage conditions. ...
- Page 21 Date: O = Checked and no action needed. X = Checked and executed action. Daily Maintenance Check the environment. 3.1.1 Check the print room conditions 3.1.2 Check the media storage conditions. 3.1.3 Check the supplies storage conditions. ...
- Page 22 Date: O = Checked and no action needed. X = Checked and executed action. Daily Maintenance Check the environment. 3.1.1 Check the print room conditions 3.1.2 Check the media storage conditions. 3.1.3 Check the supplies storage conditions. ...
-
Page 23: Operator Notes
7 Operator Notes Date Remark ... - Page 24 Date Remark ...
- Page 25 Date Remark ...
- Page 26 Date Remark ...
- Page 27 Date Remark ...
- Page 28 Date Remark ...
- Page 29 Certificate This is to certify that has successfully completed the VPi-series advanced Key Operator Training Date: Trainer name: Trainer signature:...
Need help?
Do you have a question about the Oce VarioPrint i Series and is the answer not in the manual?
Questions and answers