Advertisement
Table of Contents
- 1 What's in the Box
- 2 Getting Started
- 3 Step 2. Connect Devices to Your TV
- 4 Front View
- 5 Insert the Batteries
- 6 Remote Control Range Information
- 7 Pairing the Remote Control
- 8 Step 4. Power on the TV
- 9 Step 6. Establish a Network Connection
- 10 Troubleshooting
- 11 Product Specifications
- 12 Certification and Compliance
- 13 Environmental Protection
- Download this manual
Advertisement
Table of Contents

Related Manuals for Hisense 55U6K


Summary of Contents for Hisense 55U6K
- Page 1 Before using the TV, please read this guide thoroughly and retain it for future reference. English ES-A23031M-1...
- Page 2 Congratulations on the purchase of your Hisense TV! If you would like to know 'all things Hisense', contact us using the support info: The model and serial number of the TV is located on the back and/or on one side of the TV.
-
Page 3: What's In The Box
This TV is equipped with this quick setup guide and embedded E-Manual ( > Settings > System > Advanced System > E-Manual On the website (www.hisense.com), you can get the User Manual. E-Manual support functions QR Code Scan to open the E-Manual on your mobile device. -
Page 4: Getting Started
Getting started Step 1. Attach stand or mount Before you start using your TV, attach your TV stand or mount it on the wall. CAUTION: • Disconnect the AC power cord before installing a stand or a wall mount bracket. • The LED display on your TV is fragile. Make sure the TV screen is not scratched or damaged by hard objects or from pressure. • After the installation is complete, make sure the TV is steady on a table or firmly attached to a wall mount, before removing all protective film, if any. Attach the TV stand To attach the TV stand legs to your TV: 1. Carefully place your TV face down on a clean, soft and flat surface. - Page 5 65" (165.1cm) / 75" (190.5cm) Note: If your table is long enough to place the TV on top of, then insert the stands into the screw holes ‘A’ that are shown in the illustration. If your table is NOT long enough, then insert the stands into the screw holes ‘B’...
- Page 6 Attach the wall mount bracket (not included) Before you begin the third-party manufacturer instructions, be sure to do the following things: Screw (not included) 1. Place the TV face down on a clean, safe and cushioned surface. 2. Remove the TV stand if you have already attached it.
-
Page 7: Step 2. Connect Devices To Your Tv
Step 2. Connect devices to your TV Check to ensure that you have connected right cables for right ports securely. Loose connections can affect the quality of the picture image and color. TV Front TV Back Power Input DIGITAL • Power indicator AUDIO OUT HDMI 4(4K@60Hz) • Power button(Standby/Source) -
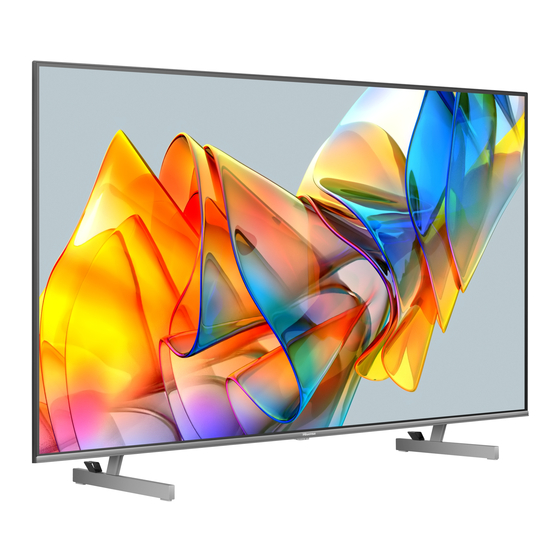
Page 8: Front View
Step 3. Get to know controls Control on the TV Front view Microphone Power indicator Built-in microphone Voice indicator control button The Google Assistant can answer your questions or help you change TV configuration. Before using this function, connect the TV to the Internet and sign in your Google account. - Page 9 Get your remote ready The following table shows the buttons on your remote control and describes what they are for. BUTTON DESCRIPTION Power on/off Microphone / Indicator INPUT Change TV input source Google Assistant of TV Accounts & Sign In or switch profile Access the settings (direct or through the dashboard in GTV) from any place in the system ˄ / ˅ / ˂ / ˃...
-
Page 10: Insert The Batteries
Insert the batteries 1. Take off the back cover to open the battery compartment of the remote control. 2. Insert two AA or AAA (1.5Vcc) size batteries. Make sure to match the (+) and (-) ends of the batteries with the (+) and (-) ends indicated in the battery compartment. 3. -
Page 11: Step 4. Power On The Tv
Step 4. Power on the TV Connect your power cord to the TV and plug it into a power outlet. Your TV will display a launch screen showing the Hisense logo. 55" (139.7cm) / 65" (165.1cm) 75" (190.5cm) Power Cord... - Page 12 1. Press the [ INPUT ] button on your remote, select TV. 2. Next, press the menu button to select Video Description to turn Video Description on or off by selecting the appropriate choice that is presented. Text-to-Speech(TTS) and Audio Description functionalities on Google TV - Hisense USA (hisense-usa.com)
-
Page 13: Troubleshooting
Troubleshooting If you are having trouble with your TV, first try turning it off and on again. If this does not fix the problem, check the tips in the following table. If your problem is not listed in the following table, then contact us at one of the phone numbers on page before. -
Page 14: Product Specifications
Product specifications 55U6K / 55U65K / 65U6K / 65U65K / 65U67K / Model Name 55U67K / 55U68KM 65U68KM Dimension Without Stand 48.5 × 28.2 × 3.0 inches 57.1 × 33.1 × 3.1 inches (W × H × D) (1 232 × 716 × 77 mm) (1 451 ×... -
Page 15: Certification And Compliance
Declaration of conformity Trade Name: Hisense Model: 55U6K / 55U65K / 55U67K / 55U68KM / 65U6K / 65U65K / 65U67K / 65U68KM / 75U6K / 75U65K / 75U67K / 75U68KM Responsible Party: Hisense USA Corporation Service Address: 105 Satellite BLVD Suite I, Suwanee, GA 30024... -
Page 16: Environmental Protection
©2023. All rights reserved. Hisense and the Hisense logo are registered trademarks of Hisense. Other brand and product names are registered trademarks of their respective owners.
Need help?
Do you have a question about the 55U6K and is the answer not in the manual?
Questions and answers
Здравствуйте матрица треснула на телевизоре Hisense 55U6K и как быть не магу найти производителя этой фирмы может у них есть матрица не подскажете
The provided information does not include details on how to find a replacement screen for the Hisense 55U6K television. For screen replacement, contact Hisense customer support or an authorized service provider.
This answer is automatically generated