Philips 107E Electronic User's Manual
Philips 107e: user guide
Hide thumbs
Also See for 107E:
- Mode d'emploi (109 pages) ,
- User manual (19 pages) ,
- Specifications (2 pages)

Related Manuals for Philips 107E


Summary of Contents for Philips 107E
- Page 1 [2002/7/7 ?? 11:03:58]...
-
Page 2: Safety And Troubleshooting Information
Do not place objects on top of the monitor cabinet, objects could fall into vents or cover them and prevent proper cooling of the monitor's electronic devices. To avoid the risk of shock or permanent damage to the set, do not expose the monitor to rain or excessive moisture. - Page 3 Other Documents You May Need About This Guide This electronic user's guide is intended for anyone who uses the Philips Color Monitor. It describes the monitor's features, setup, operation and all other information, which is the same exact information described in our printed version.
- Page 4 ©2002 Koninklijke Philips Electronics N.V. All rights reserved. Reproduction, copying, usage, modifying, hiring, renting, public performance, transmission and/or broadcasting in whole or in part is prohibited without written consent of Philips Electronics N.V. file:///D|/Rita/LF3/lf3manual/english/107E/ABOUT/ABOUT.HTM (2 of 2) [2002/7/7 ?? 11:04:10]...
-
Page 5: Product Information
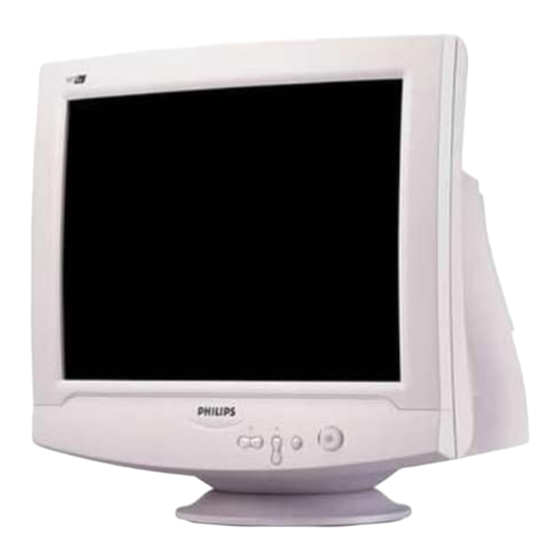
Product Features 107E40 17-inch (16.0" VIS) color monitor with excellent front of screen performance for use with MACs and Autoscan covers horizontal frequencies up to 70 kHz offering a maximum resolution of 1280 x 1024 with flicker free display of 1024 x 768 at up to 88 Hz Flat square High Contrast CRT with high-resolution 0.27 mm dot pitch (0.23 hdp). -
Page 6: White Color Temperature
Using a standard unified color space, sRGB will help represent pictures taken by an sRGB compatible device correctly on your sRGB enabled Philips monitors. In that way, the colors are calibrated and you can rely on the correctness of the colors shown on your screen. -
Page 7: Energy Star
* These information are subject to change without notice. Automatic Power Saving If you have VESA's DPMS compliance display card or software installed in your PC, the monitor can automatically reduce its power consumption when not in use. And if an input from a keyboard, mouse or other input device is detected, the monitor will automatically "wake up". -
Page 8: Pin Assignment
Ground Red video ground Green video ground Blue video ground Views Follow the links to see various views of the monitor and its components. Front View file:///D|/Rita/LF3/lf3manual/english/107E/PRODUCT/PRODUCT.HTM (4 of 5) [2002/7/7 ?? 11:04:10] 5% to 95% ° , full white pattern. -
Page 9: Rear View
107E Product Information Rear View RETURN TO TOP OF THE PAGE file:///D|/Rita/LF3/lf3manual/english/107E/PRODUCT/PRODUCT.HTM (5 of 5) [2002/7/7 ?? 11:04:10]... -
Page 10: Installing Your Monitor
• 6G3B11 Multimedia Base (option) Front View Power button switches your monitor on. OK button which when pressed will take you to the OSD controls Contrast hotkey. When the UP arrow is pressed, the adjustment controls for the CONTRAST will show up. - Page 11 Installing your Monitor UP and DOWN buttons are used when adjusting the OSD of your monitor Brightness hotkey. When the RIGHT arrow is pressed, the adjustment controls for BRIGHTNESS will show up. LEFT and RIGHT buttons, like the UP and DOWN buttons, are also used in adjusting the OSD of your monitor.
- Page 12 Installing your Monitor Power in - attach power cable here. Video In - this is a cable which is already attached to your monitor. Connect the other end of the cable to your PC. file:///D|/Rita/LF3/lf3manual/english/INSTALL_2/INSTALL.HTM (3 of 3) [2002/7/7 ?? 11:04:10]...
-
Page 13: On-Screen Display
Description of the On Screen Display What is the On-Screen Display? This is a feature in all Philips monitors which allows an end-user to adjust screen performance of monitors directly through an on-screen instruction window. The user interface provides user-friendliness and ease-of-use when operating the monitor. - Page 14 On-Screen Display The OSD Tree Below is an overall view of the structure of the On-Screen Display. You can use this as reference when you want to later on work your way around the different adjustments. file:///D|/Rita/LF3/lf3manual/english/OSD/OSDDESC.HTM (2 of 4) [2002/7/7 ?? 11:04:10] RETURN TO TOP OF THE PAGE...
- Page 15 On-Screen Display file:///D|/Rita/LF3/lf3manual/english/OSD/OSDDESC.HTM (3 of 4) [2002/7/7 ?? 11:04:10]...
- Page 16 On-Screen Display RETURN TO TOP OF THE PAGE file:///D|/Rita/LF3/lf3manual/english/OSD/OSDDESC.HTM (4 of 4) [2002/7/7 ?? 11:04:10]...
-
Page 17: Customer Care And Warranty
Customer Care and Warranty Customer Care & Warranty PLEASE SELECT YOUR COUNTRY/AREA TO READ THE WARRANTY COVERED: WESTERN EUROPE: Austria • Belgium • Cyprus • Denmark • France • Germany • Greece • Finland • Ireland • Italy • Luxembourg • the Netherlands • Norway • Portugal • Sweden • Switzerland •... - Page 18 USB peripherals. Where can I buy a USB hub for my Philips monitor? Philips provides an optional USB hub (type number: PCUH411) which can be attached to the base or file:///D|/Rita/LF3/lf3manual/english/FAQ.HTM (1 of 12) [2002/7/7 ?? 11:04:11]...
- Page 19 Philips monitors. Contact your dealer/reseller for details. What models are Mac compatible? All listed Philips monitors are Mac compatible. BUT, you may need an adapter to connect the monitor to your Mac system. Please contact your dealer/reseller for details.
- Page 20 Go to 'My Computer' and select 'Control Panel' followed by 'Monitor Control.' Select "All default selection' and choose your Philips monitor model from the default driver list. Plug and Play will automatically enable the EPA tick box for you. In DOS or Windows 3.1, you must first make sure your PC supports power saving.
- Page 21 " LightFrame is a Philips technology breakthrough which offers a unique and revolutionary solution for boosting a monitor 's brightness and sharpness. With LightFrame performance for video or photos without deterioration to the monitor 's performance in windows used for other applications.
- Page 22 Only a Philips driver can determine if your monitor is equipped with LightFrame driver cannot. Install the special Philips driver that came with your monitor. If the warning continues to flash after your Philips driver is installed, ignore the message. LightFrame 22.
- Page 23 25. What is Philips monitors' solution for audio? Not all users need multimedia capabilities. To give users freedom of choice, Philips provides an optional Multimedia Base (type number: 6G3B10). The Multimedia Base replaces the easily removable standard pedestal of the monitor.
- Page 24 Only the monitor's height is increased by only 3 centimeters. 29. Where can I buy a multimedia base to incorporate with my Philips monitor? Please contact your dealer/reseller for details.
- Page 25 Calibration should be performed after the monitor is warmed up. Auto Calibration takes place when a monitor receives a signal indicating an imminent switch to its sleep mode/stand-by mode. 34. Which models of Philips monitors are equipped with Auto Calibrate feature? Auto Calibrate is currently available in the new 201P, 201B and 109P.
- Page 26 This is an intentional design and is an industry standard, not just for Philips monitors. file:///D|/Rita/LF3/lf3manual/english/FAQ.HTM (9 of 12) [2002/7/7 ?? 11:04:11]...
- Page 27 Frequently Asked Questions Please be aware that not all models in the Philips range has this manual degauss function. Some models are built with an auto degauss feature which automatically degausses the monitor when it is switched on. 42. How do I adjust the picture on the screen?
- Page 28 Frequently Asked Questions This phenomenon can occur with Philips 107P, 109P and 201P monitors and is normal. Your monitor is using an Aperture Grille, which consists of fine vertical wires to align the electron beams with the phosphors on the screen. To prevent these vertical wires from vibrating and to keep them properly aligned with the picture tube, two horizontal damper wires are required.
- Page 29 50. Why does the picture disappear after I press the on/off button quickly? This is a unique Philips feature designed to preserve the life of your monitor. Please allow 5 seconds between powering off and on your monitor, your picture will then be restored.
- Page 30 L M N O P Autoscan A microprocessor-based feature of Philips Brilliance monitors is able to detect automatically horizontal and vertical frequencies of input signals with those of the installed video card. An autoscan monitor can thus operate with a wide range of video cards. MultiSync, a registered trademark of NEC, provides a similar function.
-
Page 31: Color Temperature
A way of describing the color of a radiating source in terms of the temperature (in degrees Kelvin) of a black body radiating with the same dominant frequency as the source. Most Philips monitors offer the possibility of setting the color temperature to any desired value. Contrast The ratio between the brightness of the brightest and darkest parts of a picture. - Page 32 TV and monitor picture tube. CustoMax Philips proprietary monitor control software that allows users to control parameters (e.g., Size, Color, Geometry) using software running in Windows. CustoMax is compatible with existing VGA cards. See CrystalClear FAQ and USB Bay FAQ.
-
Page 33: Digital Control
DDC is implemented as part of the new Plug & Play approach introduced into the PC market to increase user friendliness. The three levels developed for Plug & play are: (1) DDC1, monitor send data to the PC; (2) DDC2B, PC can request information from monitor; and (3) DDC2Bi which is a two-way communication - monitor can be addressed and PC or graphics board can give commands to monitor. - Page 34 MPR-II defines maximum permitted electrostatic, magnetic and electric field levels measured at a distance of 50 cm from the center of the monitor (see table). file:///D|/Rita/LF3/lf3manual/english/GLOSSARY/GLOSSARY.HTM (5 of 18) [2002/7/7 ?? 11:04:12]...
- Page 35 The problem can, however, be eliminated by increasing the refresh rate (number of frames/second) of the monitor to a value above around 70 Hz. Sensitivity to flicker appears to diminish with increasing age.
- Page 36 Glossary Also called line frequency and expressed in kHz, it is the number of video lines written on the screen every second (from left to right). The higher the horizontal scanning frequency, the better the resolution (i.e., the higher the resolution and/or the higher the refresh rate). INF File INF file (Information File) Information (INF) files store information in a specific format.
-
Page 37: Line Frequency
Alternating fields generated by the deflection yoke. These are subject to increasing attention, notably by governing authorities, the trade and the press. Although there is no scientific evidence that monitor emissions are harmful, much effort has gone into reducing emissions on the principle of better safe than sorry. - Page 38 A fringe pattern arising from the interference between two superimposed line patterns. In a monitor it comes from the interference between the shadow mask pattern and the video information (video moiré), and between the shadow mask pattern and the horizontal line pattern (scan moiré). It shows itself as wavy patterns on the screen and becomes more noticeable as monitor resolution increases.
- Page 39 Abbreviation for picture element, the smallest element of the picture that can be displayed on the screen. The smaller the pixel size, the better the resolution of the monitor. Pixel size is determined by the size of the electron spot on the screen and not necessarily by the phosphor dot pitch (the size of the triad). Thus, a monitor with a large electron spot covering several triads can exhibit poor resolution even though its dot pitch is small.
-
Page 40: Refresh Rate
Rotation function The feature that allows users to adjust the whole screen rotating to be horizontal. Because of the magnetic field of earth, the screen of monitor will be tilt when the screen faces toward the different direction. Screen coatings file:///D|/Rita/LF3/lf3manual/english/GLOSSARY/GLOSSARY.HTM (11 of 18) [2002/7/7 ?? 11:04:12]... - Page 41 Glossary Anti-Static coatings Due to bombardment by beam electrons, monitor screens become electrically charged when in use. Electrically charged screens surfaces can attract dust particles. An Anti-Static coating is a conductive coating deposited on the screen (or on a glass panel immediately in front of the screen) that conducts away the charge and prevents screen dust build-up.
-
Page 42: Self-Test Function
AGRAS (Anti-Glare anti-Reflection Anti-Static) coating. A combined anti-reflection, anti-glare, anti-static coating. Self-test function A monitor equipped with hardware or software to automatically detect cable connection status. Shape Deviation of a reproduced picture from its intended shape. The following types of distortion are most common: file:///D|/Rita/LF3/lf3manual/english/GLOSSARY/GLOSSARY.HTM (13 of 18) [2002/7/7 ?? 11:04:12]... -
Page 43: Tilt Function
A properly functioning color monitor requires five kinds of signals: horizontal sync pulse, vertical sync pulse, red color signal, green color signal and blue color signal. Signals from a PC are transmitted to a monitor using one of three methods: 1. - Page 44 A TTL-driven monitor can thus display a maximum of 64 colors. Video standards such as MDA, CGA and EGA are based on TTL level.
- Page 45 It also has hardware support for reset and suspend/resume signaling. The controller provides the interface registers to allow communication to/from the host. Hub specific status and control commands permit the host to configure a hub and to monitor and control its ports.
- Page 46 A card equipped with a character or graphic generator and video memory, which maps to the screen. A microprocessor scans video memory and translates bit information from the computer into displayable video signals for the monitor. These cards comply with various standards that determine the nature and quality of the display.
- Page 47 The real screen dimensions that users can see measured diagonally. The VIS of a monitor is always less than the so called screen size of a monitor. For example, the VIS of a 17-inch monitor is only about 16 inches. It depends on the useful screen size of CRT and the opening of a monitor's front cabinet.
-
Page 48: Download And Print
'source', choose 'source'). Printing instructions: To print the manual: 1. With the manual file open, follow your printer's instructions and print the pages you need. 105E.pdf 107B.pdf 107E.pdf 107F.pdf 107P.pdf 107S.pdf 107T.pdf 107X.pdf file:///D|/Rita/LF3/lf3manual/english/DOWNLOAD/DOWNLOAD.HTM (1 of 2) [2002/7/7 ?? 11:04:12] Mac. - Page 49 Download and Print 109B.pdf 109S.pdf file:///D|/Rita/LF3/lf3manual/english/DOWNLOAD/DOWNLOAD.HTM (2 of 2) [2002/7/7 ?? 11:04:12]...
- Page 50 [2002/7/7 ?? 11:04:12]...
-
Page 51: Troubleshooting
No color or intermittent color Color appears blotchy Missing one or more colors file:///D|/Rita/LF3/lf3manual/english/107E/SAFETY/saf_troub.htm (1 of 2) [2002/7/7 ?? 11:04:30] • Troubleshooting • Regulatory Information Check these items Make sure the Power cable is plugged into the power outlet and back of the monitor. - Page 52 Problem with On Screen Display For further assistance, refer to the distributor. file:///D|/Rita/LF3/lf3manual/english/107E/SAFETY/saf_troub.htm (2 of 2) [2002/7/7 ?? 11:04:30] Adjust the Brightness and Contrast controls. Check your video card and it's owner's manual instructions for it may be a non-VESA-DDC Standard card.
-
Page 53: Regulatory Information
Information for UK only Safety Precautions and Maintenance TCO '99 Information (for 107E40 only) • TCO '99 : Available on 105S, 105B, 107E, 107T, 107B, 107P, 109S, 109B. Congratulations! labeled product! Your choice has provided you with a product developed for professional use. Your purchase has also contributed to reducing the burden on the environment and also to the further development of environmentally adapted electronics products. -
Page 54: Environmental Requirements
Cadmium damages the nervous system and is toxic in high doses. The relevant TCO'99 requirement states that batteries, the color-generating layers of display screens and the electrical or file:///D|/Rita/LF3/lf3manual/english/107E/SAFETY/regs/regulat.htm (2 of 11) [2002/7/7 ?? 11:04:30] RETURN TO TOP OF THE PAGE... -
Page 55: Ce Declaration Of Conformity
** Lead, Cadmium and Mercury are heavy metals which are bio-accumulative. CE Declaration of Conformity Philips Consumer Electronics declare under our responsibility that the product is in conformity with the following standards - EN60950:1992+A1+A2+A3+A4+A11 (Safety requirement of Information Technology Equipment) - Page 56 NERGY NERGY We recommend you switch off the monitor when it is not in use for quite a long time. Federal Communications Commission (FCC) Notice (U.S. Only) file:///D|/Rita/LF3/lf3manual/english/107E/SAFETY/regs/regulat.htm (4 of 11) [2002/7/7 ?? 11:04:31] RETURN TO TOP OF THE PAGE...
- Page 57 Changes or modifications not expressly approved by the party responsible for compliance could void the user's authority to operate the equipment. Use only RF shielded cable that was supplied with the monitor when connecting this monitor to a computer device.
-
Page 58: Vcci Notice (Japan Only)
Information technology equipment. If this equipment is used near a radio or television receiver in a domestic environment, it may cause radio Interference. Install and use the equipment according to the instruction manual. Class B ITE file:///D|/Rita/LF3/lf3manual/english/107E/SAFETY/regs/regulat.htm (6 of 11) [2002/7/7 ?? 11:04:31] RETURN TO TOP OF THE PAGE RETURN TO TOP OF THE PAGE... -
Page 59: Class B Device
Polish Center for Testing and Certification Notice The equipment should draw power from a socket with an attached protection circuit (a three-prong socket). All equipment that works together (computer, monitor, printer, and so on) should have the same power supply source. - Page 60 FÖRSÄKRA DIG OM ATT HUVUDBRYTARE OCH UTTAG ÄR LÄTÅTKOMLIGA, NÄR DU STÄLLER DIN UTRUSTNING PÅPLATS. Placering/Ventilation ADVARSEL: SØRG VED PLACERINGEN FOR, AT NETLEDNINGENS STIK OG STIKKONTAKT ER NEMT TILGÆNGELIGE. file:///D|/Rita/LF3/lf3manual/english/107E/SAFETY/regs/regulat.htm (8 of 11) [2002/7/7 ?? 11:04:31] RETURN TO TOP OF THE PAGE...
- Page 61 Vorschriften über die Bauart von Störstrahlern nach Anlage III ¤ 5 Abs. 4 der Röntgenverordnung erfüllt sind. Damit Ihr Monitor immer den in der Zulassung geforderten Werten entspricht, ist darauf zu achten, daß Reparaturen nur durch Fachpersonal durchgeführt werden.
-
Page 62: Warning! This Appliance Must Be Earthed
Your new monitor contains materials that can be recycled and reused. Specialized companies can recycle your product to increase the amount of reusable materials and to minimize the amount to be disposed of. Please find out about the local regulations on how to dispose of your old monitor from your local Philips dealer. - Page 63 Regulatory Information file:///D|/Rita/LF3/lf3manual/english/107E/SAFETY/regs/regulat.htm (11 of 11) [2002/7/7 ?? 11:04:31] have a value of 5A. If a plug without a fuse is used, the fuse at the distribution board should not be greater than 5A. Note: The severed plug must be destroyed to avoid a possible shock hazard should it be inserted into a 13A socket elsewhere.
-
Page 64: Other Related Information
Use a Cord Set rated minimum 5 A, 250 V ( for units set at 230V ) or 10A, 125V (for units set at 115V). The Cord Set should have the appropriate safety approvals for the country in which the equipment will be installed. file:///D|/Rita/LF3/lf3manual/english/107E/SAFETY/saf_other.htm [2002/7/7 ?? 11:04:31] • Troubleshooting •... - Page 65 6G3B11 Multimedia Base (option) 6G3B11 Multimedia Base (option) Front View • Rear View • Technical Specifications your Multimedia Base • Power adapter Installation Technical Specifications* • Output power • Bass Boost • Headphone connection • Microphone in/out • Includes • Dimension •...
- Page 66 1. To INSTALL Slide the pedestal, aligning with the holes on the side. Then click the back hook into the corresponding hole on the bottom plate of your monitor. Microphone jack Attach your microphone here. Audio In Connect this to the audio output of your PC.
-
Page 67: Power Adapter Installation
Multimedia Base DC input Note: Please keep least 50 cm ) to avoid cansing unstable monitor picture. file:///D|/Rita/LF3/lf3manual/english/INSTALL_2/mm_pede/mm_inst.htm (3 of 4) [2002/7/7 ?? 11:04:51] 2. To UN-INSTALL Lift the back hook from the hole on the bottom plate of your monitor. - Page 68 6G3B11 Multimedia Base (option) RETURN TO TOP OF THE PAGE file:///D|/Rita/LF3/lf3manual/english/INSTALL_2/mm_pede/mm_inst.htm (4 of 4) [2002/7/7 ?? 11:04:51]...
- Page 69 Take out the USB hub from the box. Take off the USB hub cover. Slightly tilt and lift the base of your monitor. Attach the USB hub by clipping into the base. You can reposition the USB hub along the base to suit your needs.
- Page 70 USB Hub (Optional Feature) file:///D|/Rita/LF3/lf3manual/english/INSTALL_2/usbhub/usb_inst.htm (2 of 2) [2002/7/7 ?? 11:04:51] RETURN TO TOP OF THE PAGE of the Multimedia Pedestal. Attach the USB hub by sliding-in to the Multimedia base.
- Page 71 To adjust your screen's brightness, follow the steps below. Brightness is the overall intensity of the light coming from the screen. A 50% brightness is recommended. 1) Press the button on the monitor. The BRIGHTNESS window appears. 2) Press the button to adjust the brightness.
- Page 72 The ON SCREEN DISPLAY shows its settings in one of eight languages. The default is English, but you can select French, Spanish, German, Italian, Simplify-Chinese, Korea, or Brazilian Portuguese. 1) Press the button on the monitor. The MAIN CONTROLS window appears. LANGUAGE should be highlighted. 2) Press the button again.
- Page 73 The OSD Controls 3) Press the button until the desired language is highlighted. 4) Press the button to confirm your selection and return to MAIN CONTROLS window. CLOSE MAIN CONTROLS will be highlighted... After returning to MAIN CONTROLS ..
-
Page 74: Input Signal Selection
INPUT B.? 1) Press the button on the monitor. The MAIN CONTROLS window appears. 2) Press the button until INPUT SIGNAL SELECTION is highlighted. - Page 75 ZOOM increases or decreases the size of the images on your screen. To adjust the ZOOM follow the steps below. 1) Press the button on the monitor. The MAIN CONTROLS window appears. 2) Press the button until ZOOM is highlighted.
- Page 76 1) Press the button on the monitor. The MAIN CONTROLS window appears. 2) Press the button until ADJUST HORIZONTAL is highlighted.
- Page 77 The OSD Controls 3) Press the button. The ADJUST HORIZONTAL window appears. POSITION should be highlighted. 4) Press the button to move the image to the left or right. 5) When the position is adjusted, press the to highlight SIZE. file:///D|/Rita/LF3/lf3manual/english/OSD/osd_cont.htm (7 of 27) [2002/7/7 ?? 11:05:02] button to return to MAIN CONTROLS window, or press the...
- Page 78 1) Press the button on the monitor. The MAIN CONTROLS window appears. 2) Press the button until ADJUST VERTICAL is highlighted.
- Page 79 The OSD Controls 3) Press the button. The ADJUST VERTICAL window appears. POSITION should be highlighted. 4) Press the button to move the image up or down. 5) When the position is adjusted, press the to highlight SIZE. file:///D|/Rita/LF3/lf3manual/english/OSD/osd_cont.htm (9 of 27) [2002/7/7 ?? 11:05:02] button to return to MAIN CONTROLS window, or press the...
- Page 80 PINCUSHION and BALANCED pincushion. Note: use these features only when the picture is not square. 1) Press the button on the monitor. The MAIN CONTROLS window appears. 2) Press the button until ADJUST SHAPE is highlighted. file:///D|/Rita/LF3/lf3manual/english/OSD/osd_cont.htm (10 of 27) [2002/7/7 ?? 11:05:02] button.
- Page 81 The OSD Controls 3) Press the button. The ADJUST SHAPE window appears. ADJUST SIDE CURVE should be highlighted. 4) Press the button. The SIDE CURVE window appears. PINCUSHION should be highlighted. file:///D|/Rita/LF3/lf3manual/english/OSD/osd_cont.htm (11 of 27) [2002/7/7 ?? 11:05:02]...
- Page 82 The OSD Controls 5) To adjust the pincushion, press the 6) When the pincushion is adjusted, press the to return to the ADJUST SHAPE window. 7) To adjust the balanced pincushion, press the 8) When the balanced pincushion is adjusted, press the window.
- Page 83 TRAPEZOID and PARALLELOGRAM. Note: use these features only when the picture is not square. 1) Press the button on the monitor. The MAIN CONTROLS window appears. 2) Press the button until ADJUST SHAPE is highlighted. 3) Press the button.
- Page 84 The OSD Controls 4) Press the button to highlight ADJUST SIDE ANGLES. 5) Press the button. The SIDE ANGLES window appears. TRAPEZOID should be highlighted. 6) To adjust the trapezoid, press the 7) When the trapezoid is adjusted, press the button to return to the ADJUST SHAPE window.
- Page 85 PINCUSHION and BALANCED pincushion. Note: use this feature only when the picture is not square. 1) Press the button on the monitor. The MAIN CONTROLS window appears. 2) Press the button until ADJUST SHAPE is highlighted. file:///D|/Rita/LF3/lf3manual/english/OSD/osd_cont.htm (15 of 27) [2002/7/7 ?? 11:05:02] button.
- Page 86 The OSD Controls 3) Press the button. The ADJUST SHAPE window appears. ADJUST SIDE CURVE should be highlighted. 4) Press the arrow until ROTATE IMAGE is highlighted. 5) Press the button. The ROTATE IMAGE window appears. ROTATE should be highlighted. file:///D|/Rita/LF3/lf3manual/english/OSD/osd_cont.htm (16 of 27) [2002/7/7 ?? 11:05:02]...
-
Page 87: Adjust Color
...to exit completely, press the ADJUST COLOR Your monitor has three preset options you can choose from. The first option is for GENERAL USE, which is fine for most applications. The second option is for IMAGE MANAGEMENT, which includes projects such as desktop publishing, viewing a DVD from your DVD player or pictures on the World Wide Web, and playing video games. - Page 88 The OSD Controls 3) Press the button. The ADJUST COLOR window appears. 4) Press the button to highlight 9300K for GENERAL USE, 6500K for IMAGE MANAGEMENT, 5500K for PHOTO RETOUCH, or USER PRESET. 5) Once you have highlighted GENERAL USE, IMAGE MANAGEMENT, or PHOTO RETOUCH, press the button to confirm you selection and return to the MAIN CONTROLS window.
-
Page 89: Reset To Factory Settings
The OSD Controls 6a) If USER PRESET is highlighted, press the button to adjust the color red. 6b) When finished with RED, press the to adjust the color green. 6c) When finished GREEN, press the adjust the color blue. 6d) When all adjustments are complete, press the MAIN CONTROLS window. - Page 90 The OSD Controls RESET TO FACTORY SETTINGS returns everything in all the windows to factory presets. 1) Press the button on the monitor. The MAIN CONTROLS window appears. 2) Press the button until RESET TO FACTORY SETTINGS is highlighted. 3) Press the button.
- Page 91 EXTRA CONTROLS is a set of three features, including DEGAUSS. Degaussing removes electromagnetic build up that may distort the color on your screen. 1) Press the button on the monitor. The MAIN CONTROLS window appears. 2) Press the button until EXTRA CONTROLS is highlighted.
- Page 92 Note: Use only if necessary. By activating ADJUST MOIRE, sharpness can be affected. 1) Press the button on the monitor. The MAIN CONTROLS window appears. 2) Press the DOWN CURSOR button until EXTRA CONTROLS is highlighted. file:///D|/Rita/LF3/lf3manual/english/OSD/osd_cont.htm (22 of 27) [2002/7/7 ?? 11:05:02] button.
- Page 93 The OSD Controls 3) Press the button. The EXTRA CONTROLS window appears. ADJUST MOIRE will be highlighted. 4) Press the button. The ADJUST MOIRE window appears. HORIZONTAL will be highlighted. file:///D|/Rita/LF3/lf3manual/english/OSD/osd_cont.htm (23 of 27) [2002/7/7 ?? 11:05:02]...
- Page 94 The OSD Controls 5) To adjust the horizontal moire, press the 6) When the horizontal moire is adjusted, press the 7) To adjust the vertical moire, press the 8) When the vertical moire is adjusted, press the BACK TO MAIN CONTROLS will be highlighted. After returning to MAIN CONTROLS .
- Page 95 The OSD Controls on the LIGHTFRAME function to activate in full screen mode. 1) Press button on the monitor. The MAIN CONTROLS window appears. 2) Press the button until EXTRA CONTROLS is highlight. 3) Press the button. The EXTRA CONTROLS window appears. ADJUST MOIRE will be highlighted.
- Page 96 The OSD Controls 5) Pess the button. LIGHTFRAME will be activated. 6) Press button to go back to MAIN CONTROLS. Press CLOSE MAIN CONTROLS file:///D|/Rita/LF3/lf3manual/english/OSD/osd_cont.htm (26 of 27) [2002/7/7 ?? 11:05:02] button again to exit the OSD. RETURN TO TOP OF THE PAGE...
- Page 97 The OSD Controls RETURN TO TOP OF THE PAGE file:///D|/Rita/LF3/lf3manual/english/OSD/osd_cont.htm (27 of 27) [2002/7/7 ?? 11:05:02]...
- Page 98 - the monitor is not defective and is within the specification - the monitor has been altered or repaired by non authorised persons If warranty claims are determined to be invalid, Philips may invoice the customer for all related repair, verification and transportation costs.
-
Page 99: Your International Guarantee
12 months from date of purchase. This international Philips guarantee complements the existing national guarantee obligations to you of dealers and Philips in the country of purchase and does not affect your statutory rights as a customer. -
Page 100: Limited Warranty
A product that has been modified from the original design. Where IS SERVICE AVAILABLE? Warranty service is available in all countries where the product is officially distributed by Philips Consumer Electronics. In countries where Philips Consumer Electronics does not distribute the product, the local Philips service organization will attempt to provide service (although there may be a delay if the appropriate spare parts and technical manual(s) are not readily available). - Page 101 Please contact Philips at: (800) 479-6696 One year free parts and one year free labor will be provided at Philips Canada depot or any one of its authorized service centers. REMEMBER... Please record the model and serial numbers found on the product below.
- Page 102 If you have any problems with your monitor within the second or third year of purchase, we will repair it after it has been sent to the service provider at your expense and returned to you within five working days, free of charge.
- Page 103 Philips Consumer Electronics. reception problems caused by signal conditions or cable or antenna systems outside the unit.
- Page 104 Please contact Philips at: (800) 479-6696 Three years free parts and three years free labor will be provided at Philips Canada depot or any one of its authorized service centers. (In Canada, this warranty is given in lieu of all other warranties. No other warranties are expressed or implied, including any implied warranties of merchantability or fitness for a particular purpose.
- Page 105 Just a phone call away Philips’ customer help desks are located worldwide. You can contact Philips Monday - Friday from 08.00 - 20.00 hrs Central European Time (CET) and on Saturdays and Sundays from 10.00 to 18.00 hrs CET by using one of the toll-free numbers.
Need help?
Do you have a question about the 107E and is the answer not in the manual?
Questions and answers