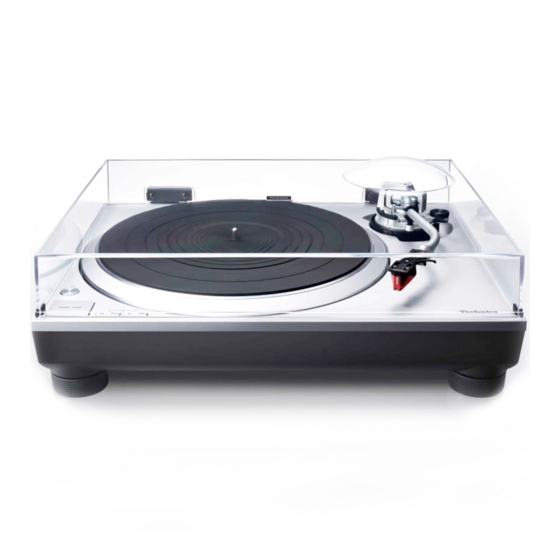
Technics SL-1500C Manual
Premium direct drive turntable system
Hide thumbs
Also See for SL-1500C:
- User manual ,
- Operating instructions manual (224 pages) ,
- Owner's manual (65 pages)

Related Manuals for Technics SL-1500C


Summary of Contents for Technics SL-1500C
- Page 1 P r e m i u m D i r e c t D r i v e Tu r n t a b l e S y s t e m S L ‐ 1 5 0 0 C Technical Information for Hi‐Fi Audio System...
- Page 2 Lineup Turntable Turntable Server CD Player NW Player Speaker All in one System Music System 2018 2018 2018 2018 2014 2014 2014 2014 2014 2014 Wireless (NW + Pre Amp) Reference Reference Speaker System Class Class • SB‐R1 • SP‐10R • SL‐1000R • SU‐R1 • SE‐R1 2016 2016 2016 2016 2016...
- Page 3 A complete direct drive turntable system inheriting the high-sound-quality technology of Technicsʼ acclaimed direct drive system The SL‐1500C inherits the brand's high‐end sound quality concept and adds a host of original Technics technologies, such as a coreless direct drive motor and high‐‐ sensitivity tonearm. To simplify the playing of analogue records, the built‐in Phono EQ connects to a wide variety of devices. The SL‐1500C also comes equipped with a high‐quality Ortofon 2M Red phono cartridge. The SL‐1500C is a complete turntable system designed for a wide range of users, even outside of strictly dedicated audio enthusiasts. Technical Information for Hi‐Fi Audio System...
- Page 4 SL-1500C Premium Direct Drive Turntable System • Accurate rotation of phono records and accurate tracking of record grooves for faithful sound reproduction SL‐1500C ‐ Coreless direct drive motor and motor control technology for accurate and Premium Class Direct Drive Turntable System stable rotation ‐ Two‐layer structure platter offering excellent vibration damping performance ‐ High‐sensitivity tonearm with a height adjustment mechanism ‐ High‐rigidity cabinet and high‐damping insulator to shut out vibrations • Complete package for the enhancement of record playing enjoyment ‐ Built‐in phono equalizer ‐ High‐sound‐quality phono cartridge (Ortofon 2M Red) included • Superb operability for comfortable record playing and an attractive, high‐ grade design ‐ High‐grade, simple design ‐ Auto lifter for the prevention of unnecessary wear on records and stylus Technical Information for Hi‐Fi Audio System...
- Page 5 Coreless Direct Drive Motor Achieves stable rotation Coreless Direct Drive Motor The high‐quality sound realised by the exceptional S/N ratio and high rotation accuracy of the direct drive system employed in Technics turntable products has captivated the hearts of audiophiles the world over. The SL‐1500C inherits the same high‐quality sound found in Technics’ high‐end turntable models. It uses a single‐rotor, coreless direct drive motor in which the stator has no core and eliminates the rotation irregularity called cogging. In this motor, the magnetic force of the rotor magnets was improved to the highest possible level, and the gap between the coreless stator and rotor magnets was optimised, thus achieving high torque performance equalling that of the SL‐1200MK5 while eliminating cogging. Furthermore, the motor control was Turntable Shaft optimised in accordance with the platter weight. As a result, the SL‐1500C has realised high rotation accuracy and high Rotor Yoke performance, and eliminated the need for parts replacement Magnet and maintenance. Another advantage of the direct drive Back Yoke Housing Shaft Bearing system is its long‐lasting, high reliability. Technical Information for Hi‐Fi Audio System...
- Page 6 Coreless Direct Drive Motor SL‐1200mk7/SL‐1500C Platter shape optimised by simulation High Accuracy Motor Control In the direct drive system, the motor is connected directly to the platter so that the motor rotation speed becomes the rotation speed of the phono record. Therefore, it is extremely important to control the drive motor’s rotation speed to ensure stability. The SL‐1500C utilises the latest motor control technology refined through the development of Blu‐ray disc products. Furthermore, the FG coil pattern of the full‐ circumference detection FG system was improved in precision to achieve more detailed measurement of platter rotation speed. SL‐1200mk5 Accurate sine wave output by the microcomputer is used as the control waveform for constant rotation speed operation. This sine wave is smoother than the simplified sine wave generated by the external coil used in the SL‐1200MK5, thus ensuring accurate motor control. The SL‐1500C also utilises the newest motor control technology refined through the development of Blu‐ray disc products. Furthermore, it incorporates technologies used in high‐end models to correct variations of characteristics in the parts of the motor drive circuit and magnetic circuit. Technical Information for Hi‐Fi Audio System...
- Page 7 Turntable Platter Platter shape optimised by simulation Two-layer Structure with Improved Vibration Damping Performance The platter on which a vinyl record is placed features a two‐layer structure with deadening rubber on the entire back surface to eliminate unwanted resonance in the aluminium die‐cast platter. The platter offers high rigidity and outstanding vibration‐ damping characteristics to prevent harmful vibration from being transmitted to the record and delivers clear sound. To increase the inertial mass and minimise vibration, the shape of the aluminium die‐cast section was optimised through simulation. For extra rigidity, reinforcing ribs were added to the back side. The increased area of contact with the deadening rubber contributes to the outstanding vibration‐damping characteristic that is more than two times higher than that of the SL‐ 1200MK5. 0.02 0.04 0.06 0.08 0.1 0.12 0.14 0.16 0.18 0.2 0.22 0.24 0.26 0.28 0.3 ‐50 : 1500C ‐100 ︓1200MK5 ‐150...
- Page 8 Tonearm phono cartridge A Accurately reads signals from the groove on the record High Sensitive Tonearm The tonearm, which is responsible for accurately reading the signal by tracking the groove on the phono record, is a static‐balance universal S‐shape tonearm, another Technics tradition. The tonearm pipe is made of lightweight, high‐rigidity aluminium. The bearing section of the gimbal suspension construction tonearm consists of a machined housing and high‐precision bearing to provide high initial sensitivity. All in all, the tonearm accurately traces the groove on the record and reads the signal. High‐sound‐quality MM cartridge provided Phono Cartridge The supplied universal head shell is mounted with an Ortofon 2M RED cartridge. So, you can play a record immediately after purchasing the SL‐1500C. The tonearm height can be easily adjusted within a range of 6 mm to enable the use of various other phono cartridges. Using the auxiliary weight that comes with the product, a cartridge weighing 14.3 to 25.1 g (including the supplied head shell) can be used. Technical Information for Hi‐Fi Audio System...
- Page 9 Auto Lifter Function Equipped with an Auto Lifter Function That Allows You to Enjoy Playing Records More Comfortably When the tonearm reaches the end of the record, the Auto Lifter function automatically raises the cartridge. This prevents unnecessary wear on your valuable vinyl records and stylus. By embedding the Auto Lifter function in the base portion of the tonearm, it eliminates impacts to the tonearm. Due to a simple design that doesn’t use motor power, there is no electrical or vibrational impact and it will not prevent the movement of the tonearm. In response to requests from many users regarding the Auto Lifter function, a design that prioritizes sound quality was adopted. The functions required to playback records were kept to a bare minimum, achieving simple and easy‐to‐use operability. Technical Information for Hi‐Fi Audio System...
- Page 10 Built-in Phono Equalizer and Cartridge Connects to a variety of devices Built‐in Phono EQ The SL‐1500C has a built‐in phono equalizer amp compatible with MM cartridges so it can be connected to an audio product that does not have phono input terminals. The dedicated power supply for the phono equalizer is isolated from the power supply for the motor and control circuitry to reduce the effect of noise. Furthermore, the shield structure suppresses the effect of external noise. As a result, high‐purity signal amplification is realized. Using the SL‐1500C and the audio equipment you have, you can enjoy music from a vinyl record in high sound quality. Technical Information for Hi‐Fi Audio System...
- Page 11 Turntable Platter Cabinet featuring an anti‐vibration construction for thorough shut‐out of all vibrations High Rigidity Cabinet and High Damping Insulator The chassis, an essential part for reducing external vibrations, inherits the audio quality enhancement technology fostered through the development of high‐end turntables. The aluminium die‐cast chassis is rigidly integrated with a special material consisting of ABS mixed with glass fiber to achieve a two‐layer construction. The combination of this special high‐rigidity material and a metal chassis raised the rigidity and vibration‐damping performance to higher levels, realising a robust cabinet for beautiful sound reproduction. The insulator is comprised of a spring and rubber to provide optimal frequency characteristics. This not only assures high sound quality and superb howling resistance, but also effectively shuts out external vibrations under high sound level conditions. Technical Information for Hi‐Fi Audio System...
- Page 12 High-grade design deepens the enjoyment of listening to music Simple Design with Functional Beauty The SL-1500C sports a simple design without unnecessary frills, while retaining the superb operating feel that is a Technics tradition. The attractive appearance lets you enjoy playing records to your heartʼs content.
-
Page 13: Specification
Specification Public Info Criteria US/Canada Europe Turntable Section Drive Method Direct Drive Direct Drive Motor Brushless DC motor Brushless DC motor Turntable Speeds 33 1/3, 45, 78 rpm 33 1/3, 45, 78 rpm Adjust Range Starting Torque 0.18 N・m / 1.8 kg・cm (1.56 lbs‐in) 0.18 N・m / 1.8 kg・cm Build-up Characteristics 0.7 s. from standstill to 33 1/3 rpm 0.7 s. from standstill to 33 1/3 rpm Wow and Flutter 0.025% W.R.M.S. 0.025% W.R.M.S. Aluminum diecast Aluminum diecast Turntable Platter Diameter:332mm (13‐5/64 inch) Diameter:332mm Weight:Approx. 1.8kg (4.0 lbs) (Including slipmat and slipsheet) Weight: Approx. 2.0(4.5lbs)(Including Turntable sheet) Weight: Approx. 2.0(Including rubber sheet) Weight:Approx. 1.8kg (Including Turntable Sheet) Tonearm Section Universal Universal Type... -
Page 14: Parts Name
When playing a record, When playing a record, Parts name remove the stylus cover. remove the stylus cover. Balance weight Turntable mat When replacing stylus, When replacing stylus, Tone arm Center spindle Cue lever remove it as follows. remove it as follows. Arm‐height Anti‐skating control adjuster Adjust the overhang in Adjust the overhang in that the stylus tip is at that the stylus tip is at ON/OFF button 52mm from the head shell 52mm from the head shell mounting end. mounting end. Head shell with cartridge *The head shell comes with a cartridge equivalent to “ortofon 2M Red”. 52mm Turntable Back side Auto lift‐up リフトアップ Speed select buttons switch スイッチ... - Page 15 Service information – Disassembly * Refer to service manual for more details Remove the turntable sheet, Turn the unit upside down, place it turntable and head shell. on a thick pad or dust cover and remove screws. Put a cushion such as what is used for packing products, to fix the tone arm Fix tone arm with completely. the arm clamp Phono Equalizer circuit Release the arm lock. Release the arm lock and then Need Remove 2 screws No need to pull it up. unsoldering remove (5 cables) Technical Information for Hi‐Fi Audio System...
- Page 16 Service information – Auto Lifter Function ■This function automatically lifts up the tone arm after a ①Release the arm clamper ④Lower the cue lever slowly to let the music start record finishes playing. It prevents the last groove from playing back repeatedly. *1 It does not stop the turntable rotation *2 The tone arm just lifts up and it doesn’t return to the original position. ■The optical sensor for detecting the tone arm position, a spring for lifting the tone arm and the electromagnetic coil are equipped inside the tone arm unit. ②Lower the cue lever slowly once By lowering the cue lever, the electromagnetic coil and spring move to the initial position. ⑤The tone arm automatically lifts up after When the tone arm moves to near the innermost a record finishes playing (This may take up circumference, the optical sensor detects it. After the elapse of to approx. 90 seconds) a certain period of time, it activates the electromagnetic coil and lifts the tone arm up. Spring ③Raise the cue lever and move Electromagnetic the tone arm over the record coil Optical sensor * Since these parts require high manufacturing accuracy, they cannot be replaced individually. Please replace the tone arm unit. Technical Information for Hi‐Fi Audio System...
- Page 17 Service information – Service Mode & Adjustment Auto lifter adjustment To enter the service mode *This adjustment is required when replacing the tone arm unit, Main PCB, and 1. Press [Power] while pressing [Start/Stop]. DC motor including when screws of the DC motor are unscrewed. 2. Keep pressing [Start/Stop] and press [Speed select [33]→[33]→ 1. Enter the service mode. [45]→[45]→[33]→[33]]. 2. Keep pressing [45] for more than 3 seconds. 3. [45] LED blinks when entered the service mode properly. 3. [45] LED blinks at 1 sec. interval during Auto lifter adjustment mode. 4. The number of [45] LED blinking shows the software 4. Move the tone arm from outside to inside. version. (First shipment version: 3 blinks) When the tone arm reaches a detection point of the record end, As the number of software version increases, the number of LED [33] LED turns on. blinking increases by one. [33] LED ON 5. To exit the service mode, press [Power]. [33] LED OFF DC motor adjustment *This adjustment is required when replacing the DC motor and/or Measure the distance between the lateral face of spindle and the stylus tip Main PCB. when reached at detection point([33] LED just turns on). 1. Enter the service mode. 2. Mount the turntable and turntable mat. 3. Keep pressing [Start/Stop] for over 3 seconds. The turntable rotates, stops and rotates again. [33] LED blinks for approx. 1 minute during adjustment.
- Page 18 Service information – Service Mode & Adjustment a) In case that detection point of the auto lift-up function is in the c) If the detection point and LED blink are improper, LED blinks once in range between 51.5mm and 56.5mm, it is set in “Position-1”. “Position‐2” or it blinks twice in “Position‐1”. b) In case that detection point of the auto lift-up function is in the Keep pressing [33] for more than 3 seconds and confirm the detection point ...
- Page 19 Service information – LED indication in abnormal condition LED blink Abnormal condition Defect part [33] LED 200ms Motor speed error 700ms DC Motor and/or Main PCB ‐‐> Motor will stop [33] LED 200ms Motor speed error DC Motor and/or Main PCB ‐‐> Motor will stop [45] LED 200ms Abnormal FG signal of motor hall sensor 700ms DC Motor and/or Main PCB ‐‐> Motor will stop [45] LED 200ms Abnormal input signal of motor hall sensor DC Motor ‐‐> Motor will stop [33] and [45] LED 200ms Abnormal motor voltage(+24V line) 700ms SMPS PCB and/or Main PCB ‐‐> Motor will stop [33] and [45] LED 200ms...
- Page 20 Service information – Handling procedure for transportation ・ Since the tone arm is vulnerable to impact, use the original packaging material for transportation and pack it in the reverse manner of unpacking (see below). ・ If there is no original packing material, protect the tone arm according to the following step 1) to 4) and wrap the body with a blanket or soft cloth to prevent from getting scratches. 1) Remove the turntable mat, turntable, head shell and balance weight. [Packing procedure] If no original packing material Put a cushion such as what is used for packing products, to fix the tone arm completely. 3) Tape the clamper to fix. 2) Fasten the tone arm with the arm clamp. 4) Set a bubble wrap under the tone arm and fix it horizontally. *Handle with caution because the tone arm will be deformed if the cushion is too thick. Technical Information for Hi‐Fi Audio System...
- Page 21 Service information – FAQ Question Answer ・ Are device connections and PHONO or external output terminal connections correct? ‐ Connect the PHONO output terminals with the amplifier’s PHONO input terminals. No sound or sound is weak ‐ Connect the external output terminals to the amplifier’s external input terminals. ・ Is the external output switch correctly set? ‐ When connecting the external output terminals, set the external output switch to “ON”. ・ Is the auto lift‐up switch correctly set? ‐ The auto lift‐up switch to ON. ・ For the auto lift‐up function to operate appropriately, the cue lever must be completely Auto lift‐up does not function or lowered after the tone arm is returned to the arm rest following the end of play. Auto lift‐up リフトアップ ・ Depending on the record, it may take some time(up to approx. 90 seconds) the tone arm is lifted during play switch スイッチ for the auto lift‐up to operate after the play finishes, or it may operate while the record is still playing. If the tone arm is lifted during play, set the auto lift‐up switch External PHONO External PHONO earth output output ...
Need help?
Do you have a question about the SL-1500C and is the answer not in the manual?
Questions and answers