Table of Contents
Advertisement
Quick Links
Advertisement
Table of Contents

Related Manuals for CAMERA LINK VC Series


Summary of Contents for CAMERA LINK VC Series
- Page 1 VC series User Manual English VC-5MC-M110H VC-5MC-C110H...
- Page 3 Preface No part of this manual may either be copied, reproduced, translated, or published in any form or by any means (electronic, mechanical, photocopying, or otherwise) without the express written permission of Vieworks, Co., Ltd. (hereinafter ‘Vieworks’). This manual may include the website links to companies other than Vieworks. Vieworks is not responsible for any of these links.
- Page 5 VC-5MC-M/C110H User's Manual Before Using This Product Thank you for choosing a camera in the VC-5MC-M/C110H™. Make sure to read this manual before using the product. Make sure to check whatever a professional engineer has finished installation and configuration. ...
- Page 6 VC-5MC-M/C110H User's Manual About This Manual This manual is intended for VC-5MC-M/C110H™ camera users. It is recommended to refer to the Frame Grabber’s User Manual of yours, with this manual. Convention in This Manual For better understanding, the following conventions are used throughout the manual. Names and Fonts The names and fonts of user interfaces are used as follows: ...
- Page 7 VC-5MC-M/C110H User's Manual Definition of Terms For clarity, this manual defines some terms as follows: Definition Term The introductory part preceding the Table of Contents in this manual Preface The Configurator program from a seller for offering ease of use to control the Configurator camera on Windows®...
-
Page 9: Table Of Contents
Precaution about Blurring Compared to the Center ..........28 Controlling the Camera ....................28 Chapter 7. Camera Interface ................... 29 General Description....................... 29 Camera Link SDR Connector..................30 Power Input and Control I/O Receptacle ..............32 Trigger Input Circuit ......................33 Strobe Output Circuit ....................33 Chapter 8. - Page 10 Chapter 9. Camera Features ................... 56 Region of Interest ......................56 Multi-ROI .......................... 59 Device Tap Geometry ....................62 Camera Link Pixel Clock Speed ................... 63 Pixel Format........................64 Data ROI (Color Camera)..................... 65 White Balance (Color Camera) ................... 66 9.7.1...
- Page 11 VC-5MC-M/C110H User's Manual 9.11 Digital I/O Control ......................73 9.12 Debounce........................75 9.13 Timer Control ........................76 9.14 Counter Control ......................78 9.15 Temperature Monitor ..................... 79 9.16 Status LED ........................80 9.17 Test Pattern ........................80 9.18 Reverse X ......................... 82 9.19 Reverse Y .........................
- Page 12 VC-5MC-M/C110H User's Manual Tables Table 5-1 Specifications of the VC-5MC-M/C110H .................23 Table 7-1 Pin Assignments for Camera Link Connector 1 ...............30 Table 7-2 Pin Assignments for Camera Link Connector 2 ...............31 Table 7-3 Connector Arrangement for the Device Tap Geometry ..........31 Table 7-4 Pin Configurations for Power Input Receptacle .............32...
- Page 13 VC-5MC-M/C110H User's Manual Table 9-18 XML Parameters related to Counter Control #1 ............78 Table 9-19 XML Parameters related to Counter Control #2 ............79 Table 9-20 XML Parameters related to Device Temperature............79 Table 9-21 Status LED ..........................80 Table 9-22 XML Parameter related to Test Pattern ................80 Table 9-23 XML Parameter related to Reverse X ................82 Table 9-24 XML Parameter related to Reverse Y ................82 Table 9-25 XML Parameter related to Device Link Throughput Limit ..........84...
- Page 14 VC-5MC-M/C110H User's Manual Figures Figure 5-1 Camera Block Diagram ....................24 Figure 5-2 Spectral Response for VC-5M/8M Series .................25 Figure 5-3 Spectral Response for VC-18M series ................25 Figure 5-4 VC-5MC-M/C110H Mechanical Dimension ..............26 Figure 7-1 VC-5MC-M/C110H’ Back Panel ..................29 Figure 7-2 Micro-BNC Connector ......................30 Figure 7-3 Pin Assignments for Power Input Receptacle ..............32 Figure 7-4 Trigger Input Schematic ....................33 Figure 7-5 Strobe Output Schematic ....................33...
- Page 15 VC-5MC-M/C110H User's Manual Figure 9-7 Generation and Application of Flat Field Data .............70 Figure 9-8 Bilinear Interpolated Magnification.................70 Figure 9-9 Flat Field Data Selector .....................71 Figure 9-10 User Output ........................73 Figure 9-11 Exposure Active Signal ....................74 Figure 9-12 Debounce ........................75 Figure 9-13 Timer Signal ........................77 Figure 9-14 Grey Horizontal Ramp .....................80 Figure 9-15 Grey Diagonal Ramp ......................81...
-
Page 17: Chapter 1. Precautions
VC-5MC-M/C110H User's Manual Chapter 1. Precautions General Do not drop, disassemble, repair or alter the device. Doing so may damage the camera electronics and cause an electric shock. Do not let children or companion animals touch the device without supervision. ... - Page 18 VC-5MC-M/C110H User's Manual Cleaning the Sensor Surface Avoid cleaning the surface of the camera’s sensor if possible. If you have dust or foreign matter on the sensor surface that will not blow off, use a soft lint free cotton bud dampened with a small quantity of high quality lens cleaner.
-
Page 19: Chapter 2. Warranty
VC-5MC-M/C110H User's Manual Chapter 2. Warranty Do not open the housing of the camera. The warranty becomes void if the housing is opened. For information about the warranty, please contact your local dealer or factory representative. Page 19 of 109... -
Page 20: Chapter 3. Compliance & Certifications
VC-5MC-M/C110H User's Manual Chapter 3. Compliance & Certifications FCC Compliance This equipment has been tested and found to comply with the limits for a Class A digital device, pursuant to part 15 of the FCC Rules. These limits are designed to provide reasonable protection against harmful interference when the equipment is operated in a commercial environment. -
Page 21: Chapter 4. Package Components
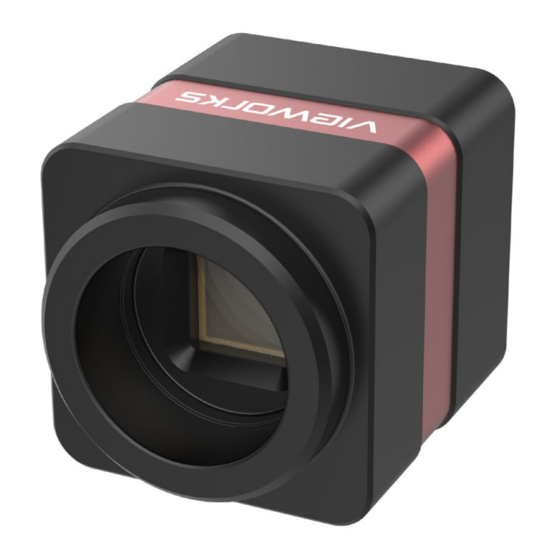
VC-5MC-M/C110H User's Manual Chapter 4. Package Components Package Components A camera in the VC-5MC-M/C110H Page 21 of 109... -
Page 22: Chapter 5. Product Specifications
Product Specifications Overview The VC-5MC-M/C110H cameras, the latest model of the industrial proven VC series, are new 5- megapixel cameras with the Camera Link interface. The VC-5MC-M/C110H cameras use the latest CMOS global shutter image sensor(IMX547) technology from Sony. It offers up to 109.5 frames per second at 2,448 ×... -
Page 23: Specifications
IMX547 Sensor Type1/1.8 (8.8 ㎜) Sensor Size (diagonal) CMOS Image Sensor Sensor Type 2.74 ㎛ × 2.74 ㎛ Pixel size Camera Link Base/Medium/Full/10-taps, 26-pin SDR Connector Interface 2 Tap 31.0 fps Max. Frame Rate (8 bit) 4 Tap 61.2 fps 8 Tap 109.5 fps... -
Page 24: Camera Block Diagram
The Processing & Control logic processes the image data received from the CMOS image sensor and then transmits data through the Camera Link interface. The Processing & Control logic also controls time-sensitive trigger inputs and output signals. -
Page 25: Spectral Response
VC-5MC-M/C110H User's Manual Spectral Response The following graphs show the spectral response of the color and monochrome cameras in the VC-5MC-M/C110H. Figure 5-2 Spectral Response for VC-5M/8M Series Figure 5-3 Spectral Response for VC-18M series Page 25 of 109... -
Page 26: Mechanical Specification
VC-5MC-M/C110H User's Manual Mechanical Specification The camera dimensions in millimeters are shown in the following figure. Figure 5-4 VC-5MC-M/C110H Mechanical Dimension Page 26 of 109... -
Page 27: Chapter 6. Connecting The Camera
Make sure that the power supply is not connected to the camera and your computer is turned off. Plug one end of a Camera Link cable into the Camera Link1 connector on the camera and the other end of the Camera Link cable into the Base connector on the Camera Link frame grabber. -
Page 28: Precaution About Blurring Compared To The Center
You can control the camera easily by executing the Configure.exe file to open the Configurator. You can download the latest Configurator by contacting the manufacturer of your frame grabber. For more information on the Configurator, refer to your Camera Link frame grabber’s manual. Page 28 of 109... -
Page 29: Chapter 7. Camera Interface
③ 6-pin Power Input and Control I/O Receptacle: supplies power to the camera and can be set to operate as an input and output line. ④ 26 pin SDR Connector 2 (Camera Link Medium/Full): transmits video data. ① ② ③... -
Page 30: Camera Link Sdr Connector
VC-5MC-M/C110H User's Manual Camera Link SDR Connector Figure 7-2 Micro-BNC Connector The Camera Link connectors on the camera comply with the Camera Link standard and the following lists show the pin assignments of the connectors. Signal Name Type Description PAIR List... -
Page 31: Table 7-2 Pin Assignments For Camera Link Connector 2
Table 7-3 Connector Arrangement for the Device Tap Geometry Note: When you connect a Camera Link frame grabber to the Camera Link connectors on the camera using Camera Link cables, make sure you connect the cables to their correct connectors. If you connect the Camera Link connector 1 on the camera to a connector... -
Page 32: Power Input And Control I/O Receptacle
VC-5MC-M/C110H User's Manual Power Input and Control I/O Receptacle The power input and control I/O receptacle is a 6-pin connector (part # HR10A-7R-6PB). The pin assignments and configurations are as follows: Figure 7-3 Pin Assignments for Power Input Receptacle Signal Type Description Pin Number... -
Page 33: Trigger Input Circuit
VC-5MC-M/C110H User's Manual Trigger Input Circuit The following figure shows trigger signal input circuit of the 6-pin connector. Transmitted trigger signal is applied to the internal circuit through a photo coupler. With the Debounce feature, you can specify the width of input signal to be considered as a valid input signal. An external trigger circuit example is shown below. -
Page 34: Chapter 8. Acquisition Control
VC-5MC-M/C110H User's Manual Chapter 8. Acquisition Control This chapter provides detailed information about controlling image acquisition. Triggering image acquisition Setting the exposure time Controlling the camera’s image acquisition rate Variation of the camera’s maximum allowed image acquisition rate according to the camera settings Overview This section presents an overview of the elements involved with controlling the acquisition of... -
Page 35: Acquisition Start/Stop Commands And Acquisition Mode
VC-5MC-M/C110H User's Manual Acquisition Start/Stop Commands and Acquisition Mode This section describes function available to use via the followings: Acquisition Start/Stop commands Acquisition Mode The details about each item above is described in the order from the following section. 8.2.1 Acquisition Start/Stop Commands The Acquisition Start command prepares the camera to acquire images. -
Page 36: Exposure Start Trigger
VC-5MC-M/C110H User's Manual 8.2.3 Exposure Start Trigger Applying an exposure start trigger signal to the camera will exit the camera from the waiting for exposure start trigger acquisition status and will begin the process of exposing and reading out a frame (see Figure 8-1). As soon as the camera is ready to accept another exposure start trigger signal, it will return to the waiting for exposure start trigger acquisition status. -
Page 37: Applying Trigger Signals
CC1. At that point, each time an externally generated electrical signal is applied to the camera by using the APIs provided by a Camera Link frame grabber manufacturer, the exposure start trigger signal will be applied to the camera. For more information, refer to your Camera Link frame grabber user manual. -
Page 38: Exposure Time Control
VC-5MC-M/C110H User's Manual 8.2.5 Exposure Time Control When an exposure start trigger signal is applied to the camera, the camera will begin to acquire a frame. A critical aspect of frame acquisition is how long the pixels in the camera’s sensor will be exposed to light during the frame acquisition. - Page 39 VC-5MC-M/C110H User's Manual Trigger Mode = Off When the Trigger Mode parameter is set to Off, the camera will generate all required exposure start trigger signals internally, and you do not need to apply exposure start trigger signals to the camera. If the Trigger Mode parameter is set to Off, the camera will automatically begin generating exposure start trigger signals when it receives an Acquisition Start command.
- Page 40 Output Value parameter between On and Off on your computer. CC1: You can apply an exposure start trigger signal to the camera via CC1 in the Camera Link interface. For more information, refer to your Camera Link frame grabber user manual.
- Page 41 VC-5MC-M/C110H User's Manual Exposure Time Control with Trigger Mode = On When the Trigger Mode parameter is set to On and the Trigger Source parameter is set to Software, the exposure time for each frame acquisition is determined by the value of the camera’s Exposure Time parameter.
-
Page 42: Using A Software Trigger Signal
VC-5MC-M/C110H User's Manual 8.3.2 Using a Software Trigger Signal If the Trigger Mode parameter is set to On and the Trigger Source parameter is set to Software, you must apply a software trigger signal (exposure start) to the camera to begin each frame acquisition. -
Page 43: Using A Cc1 Trigger Signal
For more information, refer to your Camera Link frame grabber user manual. A rising edge or falling edge of the CC1 signal can be used to trigger frame acquisition. The Trigger Activation parameter is used to select rising edge or falling edge triggering. -
Page 44: Using An External Trigger Signal
VC-5MC-M/C110H User's Manual 8.3.4 Using an External Trigger Signal If the Trigger Mode parameter is set to On and the Trigger Source parameter is set to Line0, an externally generated electrical signal injected into the Control I/O receptacle will act as the exposure start trigger signal for the camera. -
Page 45: Figure 8-3 External Trigger Delay
VC-5MC-M/C110H User's Manual External Trigger Delay When you set the Trigger Source parameter to Timer0Active, you can specify a delay between the receipt of a hardware trigger signal and when the trigger becomes effective. Set the Timer Trigger Source parameter in the Counter And Timer Control category to Line0. -
Page 46: Exposure Mode
VC-5MC-M/C110H User's Manual 8.3.5 Exposure Mode If you are triggering the start of frame acquisition with an externally (CC1 or External) generated trigger signal, two exposure modes are available: Timed and Trigger Width. Timed Exposure Mode When the Timed mode is selected, the exposure time for each frame acquisition is determined by the value of the camera’s Exposure Time parameter. -
Page 47: Figure 8-6 Trigger Width Exposure Mode
VC-5MC-M/C110H User's Manual Trigger Width Exposure Mode When the Trigger Width exposure mode is selected, the length of the exposure for each frame acquisition will be directly controlled by the external trigger signal (CoaXPress or External). If the camera is set for rising edge triggering, the exposure time begins when the external trigger signal rises and continues until the external trigger signal falls. -
Page 48: Short Exposure Mode
VC-5MC-M/C110H User's Manual 8.3.6 Short Exposure Mode The VC-5MC-M/C110H camera provides the Short Exposure Mode which allows you to set a shorter exposure time than the normal Exposure Mode. The available setting range of the exposure time (refer to Table 8-2) and the Exposure Offset values (Table 8-1) vary depending on the Short Exposure Mode setting. -
Page 49: Exposure Offset
VC-5MC-M/C110H User's Manual 8.3.7 Exposure Offset The VC-5MC-M/C110H camera adds an Exposure Offset automatically to the exposure time determined by the Exposure Time parameter or the width of the external trigger signal. To acquire an image with the desired exposure time, you must compensate for the Exposure Offset as follows. -
Page 50: Setting The Exposure Time
VC-5MC-M/C110H User's Manual Setting the Exposure Time This section describes how the exposure time can be adjusted manually by setting the value of the Exposure Time parameter. If you are operating the camera in any one of the following ways, you must specify an exposure time by setting the camera’s Exposure Time parameter. -
Page 51: Overlapping Exposure With Sensor Readout
VC-5MC-M/C110H User's Manual Overlapping Exposure with Sensor Readout The frame acquisition process on the camera includes two distinct parts. The first part is the exposure of the pixels in the image sensor. Once exposure is complete, the second part of the process –... - Page 52 VC-5MC-M/C110H User's Manual Determining whether your camera is operating with overlapped exposure and readout is not a matter of issuing a command or changing a setting. Rather a way that you operate the camera will determine whether the exposures and readouts are overlapped or not. If we define the “Frame Period”...
-
Page 53: Global Shutter
VC-5MC-M/C110H User's Manual Global Shutter The VC-5MC-M/C110H camera is equipped with an image sensor that has an electronic global shutter. When an exposure start trigger signal is applied to the camera equipped with a global shutter, exposure begins for all lines in the sensor as shown in the figure below. Exposure continues for all lines in the sensor until the programmed exposure time ends or when the exposure start trigger signal ends the exposure time if the camera is using the trigger width exposure mode. -
Page 54: Maximum Allowed Frame Rate
Camera Link frame grabber in your computer. For example, if the camera is set to 8 Tap (Camera Link Full Configuration), it can typically transfer data out of the camera two times faster than when the camera is set to 4 Tap (Camera Link Medium). -
Page 55: Increasing The Maximum Allowed Frame Rate
VC-5MC-M/C110H User's Manual 8.7.1 Increasing the Maximum Allowed Frame Rate You may find that you would like to acquire frames at a rate higher than the maximum allowed with the camera’s current settings. In this case, you must adjust one or more of the factors that can influence the maximum allowed frame rate and then check to see if the maximum allowed frame rate has increased. -
Page 56: Chapter 9. Camera Features
VC-5MC-M/C110H User's Manual Chapter 9. Camera Features Region of Interest The Image Region of Interest (ROI) feature allows you to specify a portion of the sensor array. You can acquire only the frame data from the specified portion of the sensor array while preserving the same quality as you acquire a frame from the entire sensor array. -
Page 57: Table 9-1 Xml Parameters Related To Roi
VC-5MC-M/C110H User's Manual The XML parameters related to ROI settings are as follows. Value Description XML Parameters SensorWidth Effective width of the sensor ImageFormatControl SensorHeight Effective height of the sensor WidthMax Maximum allowed width of the image with the current camera settings HeightMax Maximum allowed height of the image with the current camera settings... -
Page 58: Table 9-3 Maximum Frame Rates By Roi Changes
VC-5MC-M/C110H User's Manual On the VC-5MC-M/C110H camera, the maximum allowed frame rates depending on Horizontal and Vertical ROI changes are shown below, the values shown below are based on Pixel Format of 8 bit. 2 Tap 4 Tap 8 Tap 10 Tap ROI Size (H ×... -
Page 59: Multi-Roi
VC-5MC-M/C110H User's Manual Multi-ROI The VC-5MC-M/C110H camera provides the Multi-ROI feature which allows you to define up to 8 regions of the sensor array. When an image is acquired, only the pixel information from the defined regions will be readout of the sensor. The pixel data read out of the regions will then be combined together and will be transmitted from the camera as a single image. -
Page 60: Figure 9-2 Multi-Roi
VC-5MC-M/C110H User's Manual In the figure below, for example, three regions have been set. With these settings, the camera would output an image as follows: MultiRoiWidth × the total height of the three regions (Region0 Height + Region1 Height + Region2 Height) Region2 Offset X MultiROI Width... - Page 61 VC-5MC-M/C110H User's Manual There are several things to keep in mind when setting the Multi-ROI feature on the VC-5MC- M/C110H camera: The sum of the MultiRoiOffsetX value plus the MultiRoiWidth value must not exceed the width of the camera’s sensor. ...
-
Page 62: Device Tap Geometry
The number of taps represents the number of pixel data that will be output on each cycle of the Camera Link Pixel Clock. The maximum allowed frame rate will be changed according to the Device Tap Geometry settings. The image data is transmitted in the interleaved order as shown in the figure below. -
Page 63: Camera Link Pixel Clock Speed
Clock speed determines that the rate at which pixel data will be transmitted from the camera to the Frame Grabber in your computer via the Camera Link interface. Setting the camera for a higher Pixel Clock speed will increase the rate at which image data is transferred from the camera to the Frame Grabber. -
Page 64: Pixel Format
VC-5MC-M/C110H User's Manual Pixel Format The VC-5MC-M/C110H camera processes image data in the unit of 12 bit. The pixel format of the image data is available to be chosen among 8 bit, 10 bit, or 12 bit with the Pixel Format parameter. -
Page 65: Data Roi (Color Camera)
VC-5MC-M/C110H User's Manual Data ROI (Color Camera) The Balance White Auto feature provided by the color camera uses the pixel data from a Data Region of Interest (ROI) to adjust the related parameters. The XML parameters related to Data ROI are as follows. Value Description XML Parameters... -
Page 66: White Balance (Color Camera)
VC-5MC-M/C110H User's Manual White Balance (Color Camera) The color camera includes the white balance capability to adjust the color balance of the images transmitted from the camera. With the white balancing scheme used on the VC-25MC-31 I camera, the Red, Green and Blue intensities can be adjusted individually. You can set the intensity of each color by using the Balance Ratio parameter. -
Page 67: Gain And Black Level
VC-5MC-M/C110H User's Manual Gain and Black Level Increasing the Gain parameter increases all pixel values of the image. This results in a higher grey value output from the camera for a given amount of output from the image sensor. Selects the Gain Control (Digital All is only available) to be adjusted by using the Gain Selector parameter. -
Page 68: Defective Pixel Correction
VC-5MC-M/C110H User's Manual Defective Pixel Correction The CMOS sensor may have defect pixels which cannot properly react to the light. Correction is required since it may deteriorate the quality of output image. Defect pixel information of CMOS used for each camera is entered into the camera during the manufacturing process. If you want to add defect pixel information, it is required to enter coordinate of new defect pixel into the camera. -
Page 69: Flat Field Correction
VC-5MC-M/C110H User's Manual 9.10 Flat Field Correction The Flat Field Correction feature improves the image uniformity when you acquire a non- uniformity image due to external conditions. The Flat Field Correction feature of the VC-5MC- M/C110H camera can be summarized by the following equation. IC = IR / IF Level value of corrected image Level value of original image... -
Page 70: Figure 9-7 Generation And Application Of Flat Field Data
VC-5MC-M/C110H User's Manual Flat Field Calibration Scale Down Flat Fielding BilinearInterpolated Magnification M or IM Figure 9-7 Generation and Application of Flat Field Data copied copied copied copied Bounda ry copied block of pixels block of pixels scaled d own data copied Bounda ry Figure 9-8 Bilinear Interpolated Magnification... -
Page 71: 9.10.1 Flat Field Data Selector
VC-5MC-M/C110H User's Manual The XML parameters related to Flat Field Correction are as follows. Value Description XML Parameters FlatFieldCorrection Disables the Flat Field Correction feature. FlatFieldControl Enables the Flat Field Correction feature. FlatFieldData Space0 - Selects a location to save Flat Field data to or Selector Space11 load Flat Field data from. - Page 72 VC-5MC-M/C110H User's Manual Saving Flat Field Data In order to save the active Flat Field data into a reserved location in the camera’s Flash memory, follow the procedure below. Use the Flat Field Data Selector parameter to specify a location to save the active Flat Field data.
-
Page 73: Digital I/O Control
VC-5MC-M/C110H User's Manual 9.11 Digital I/O Control The Control I/O receptacle of the camera can be operated in various modes. The XML parameters related to Digital I/O Control are as follows. Value Description XML Parameters LineSelector Line0 Configures the items related to the pins of No.2 DigitalIOControl and No.3 among 6 of the pins. -
Page 74: Figure 9-11 Exposure Active Signal
VC-5MC-M/C110H User's Manual The camera can provide an Exposure Active output signal. The signal goes high when the exposure time for each frame acquisition begins and goes low when the exposure time ends as shown in the figure below. This signal can be used as a flash trigger and is also useful when you are operating a system where either the camera or the object being imaged is movable. -
Page 75: Debounce
VC-5MC-M/C110H User's Manual 9.12 Debounce The Debounce feature of the VC-5MC-M/C110H cameras allows to supply only valid signals to the camera by discriminating between valid and invalid input signals. The Debounce Time parameter specifies the minimum time that an input signal must remain High or Low in order to be considered as a valid input signal. -
Page 76: Timer Control
VC-5MC-M/C110H User's Manual 9.13 Timer Control When the Line Source parameter is set to Timer0Active, the camera can provide output signals by using the Timer. On the VC-5MC-M/C110H camera, the Frame Active, Exposure Active event or external trigger signal is available as Timer source signal. The XML parameters related to Timer are as follows. -
Page 77: Figure 9-13 Timer Signal
VC-5MC-M/C110H User's Manual For example, when the Timer Trigger Source is set to Exposure Active and the Timer Trigger Activation is set to Level High, the Timer will act as follows. When the source signals set by the Timer Trigger Source parameter are applied, the Timer will start operations. -
Page 78: Counter Control
VC-5MC-M/C110H User's Manual 9.14 Counter Control The VC-5MC-M/C110H camera provides the Counter feature to count certain camera events. For example, you can verify the number of external trigger signals applied to the camera. The XML parameters related to Counter Control are as follows. Value Description XML Parameters... -
Page 79: Temperature Monitor
VC-5MC-M/C110H User's Manual Value Description XML Parameters CounterDuration 1 – 4294967295 Sets the duration or number of events to CounterAnd count before the Counter ends. TimerControl CounterStatus Displays the current status of the Counter. CounterTrigger Disables the Counter Trigger Source Source function. -
Page 80: Status Led
Status LED The camera is not initialized. Steady Red The camera is transmitting image data. Fast Flashing Orange A Camera Link stands by. Steady Green Table 9-21 Status LED 9.17 Test Pattern To check whether the camera operates normally or not, it can be set to output test patterns generated in the camera, instead of image data from the image sensor. -
Page 81: Figure 9-15 Grey Diagonal Ramp
VC-5MC-M/C110H User's Manual Figure 9-15 Grey Diagonal Ramp Figure 9-16 Grey Diagonal Ramp Moving Figure 9-17 Sensor Specific Caution! The test pattern may look different because the region of the test pattern may vary depending on the camera’s resolution. Page 81 of 109... -
Page 82: Reverse X
VC-5MC-M/C110H User's Manual 9.18 Reverse X The Reverse X feature lets you flip images horizontally. This feature is available in almost all of operation modes of the camera, except for the Test Image mode. Value Description XML Parameter ReverseX FALSE Disables the Reverse X feature. -
Page 83: Figure 9-20 Original Image
VC-5MC-M/C110H User's Manual Figure 9-20 Original Image Figure 9-21 Reverse Y Image Caution! After using the Reverse Y feature, you must generate the camera’s correction data (FFC) again, from the beginning. Page 83 of 109... -
Page 84: Device Link Throughput Limit
VC-5MC-M/C110H User's Manual 9.20 Device Link Throughput Limit The Device Link Throughput Limit feature allows you to limit the maximum available bandwidth for data transmission to your computer. The XML parameter related to Device Link Throughput Limit is as follows. Description XML Parameters DeviceLinkThroughputLimit... -
Page 85: Field Upgrade
VC-5MC-M/C110H User's Manual 9.23 Field Upgrade The camera provides a feature to upgrade the Firmware and FPGA logic through the Camera Link interface without disassembling the camera in the field. Refer to Appendix A for more details about how to upgrade. 9.24 User Set Control You can save the current camera settings to the camera’s internal Flash memory. -
Page 86: Figure 9-22 User Set Control
VC-5MC-M/C110H User's Manual The camera settings stored in the Default can be loaded into the camera’s workspace but cannot be changed. The settings set in the workspace will be lost if the camera is reset or powered off. To use the current setting values in the workspace after a reset, you must save the settings to one of the user spaces. -
Page 87: Chapter 10. Camera Configuration
10.1 Serial Communication You can configure all camera settings via RS-644 serial communication of the Camera Link interface. When you want to control the camera by using a terminal or access directly to the camera by using your application, you need to set your network as follows: ... -
Page 88: Figure 10-1 Actual Runtime Of Parameters
VC-5MC-M/C110H User's Manual Setting Recognizing Applying Setting ‘Exposure Time’ Recognizing Parameter Parameter Parameter Parameter Parameter (Ack ‘OK’) (Ack ‘OK’) Applying ‘Exposure Time’ Parameter Parameter Exposure for Image 1 Exposure REQ_Frame Line 1 Line 2 Readout Figure 10-1 Actual Runtime of Parameters Page 88 of 109... -
Page 89: Configurator
Right-click the model name of the camera, and then click the Add to List menu. By adding a Vieworks Camera Link camera which supports XML-based control to the list, you can configure the camera with a newer version of the Configurator. -
Page 90: Figure 10-3 Device Property
VC-5MC-M/C110H User's Manual Double-click the model name of the camera. The DeviceProperty and Configurator Plus windows appear. The DeviceProperty window displays controls for setting camera parameters. Figure 10-3 Device Property Page 90 of 109... -
Page 91: Figure 10-4 Configurator Plus And Device Maintenance
VC-5MC-M/C110H User's Manual In the Configurator Plus window, you can display the Device Property and/or Device Maintenance windows. In the Device Maintenance window, you can download a Defective Pixel Map or upgrade camera’s MCU, FPGA and XML files. Figure 10-4 Configurator Plus and Device Maintenance Page 91 of 109... -
Page 92: Command List
VC-5MC-M/C110H User's Manual 10.4 Command List You can also set all features provided by the VC-5MC-M/C110H cameras by using the following commands. Syntax Return Description Command Value help String Displays a list of all commands. Help sox n X coordinate of start point ROI Set ROI Offset X n: X axis offset Get ROI Offset X... -
Page 93: Table 10-2 Command List #2
2: 1X2-1Y (2 taps) Get Camera Link 4: 1X4-1Y (4 taps) Tap Geometry 8: 1X8-1Y (8 taps) 10: 1X10⁻¹Y (10 taps) sccs 0|1|2|3 Sets the Camera Link Pixel Clock Set Camera Link Clock Speed. Selector gccs 0|1|2|3 0: 32.5 ㎒... -
Page 94: Table 10-3 Command List #3
VC-5MC-M/C110H User's Manual Syntax Return Description Command Value sfr n Sets the rate at which the Set Frame Rate exposure start trigger will be Get Frame Rate generated when the Trigger Mode is set to Off. gast Retrieves internal Get Acquisition acquisition status. -
Page 95: Table 10-4 Command List #4
VC-5MC-M/C110H User's Manual Syntax Return Description Command Value sbl n Sets the black level value. Set Black Level n: Black Level (Setting range: 0 – 255) Get Black Level sdg n Sets the digital gain value. Set Digital Gain n: Gain (Setting range: 1× – 32×) Get Digital Gain Executes the Flat Field Generator. -
Page 96: Table 10-5 Command List #5
VC-5MC-M/C110H User's Manual Syntax Return Description Command Value slns 0|1 Selects a physical line Set Line Selector glns Control Get Line Selector receptacle configure. 0: Line0 1: Line1 glnm Retrieves the mode of Get Line Mode the selected physical line. 0: Input 1: Output slnc 0|4|5|6|10|18|26... -
Page 97: Table 10-6 Command List #6
VC-5MC-M/C110H User's Manual Syntax Return Description Command Value sces 0|4|5|6|14|22 Sets Counter Event Source Set Counter Event 0: Off Source gces 0|4|5|6|14|22 4: Frame Active Get Counter Event 5: Line Active Source 6: Exposure Active 14: CC1 22: Line0 scea 0|1 Sets Counter Event Activation Set Counter Event 0: Falling Edge... -
Page 98: Table 10-7 Command List #7
VC-5MC-M/C110H User's Manual Syntax Return Value Description Command stdu n Sets the duration of the Set Timer Duration gtdu Timer output signal. Get Timer Duration n: 1 – 60,000,000 ㎲ stdl n Sets the delay time for Set Timer Delay gtdl the Timer. -
Page 99: Table 10-8 Command List #8
VC-5MC-M/C110H User's Manual Syntax Return Description Command Value srg r|g|b n Sets the intensity of color pixels. Set RGB Gain grg r|g|b r|g|b: Red / Green / Blue pixels Get RGB Gain n: Gain value (1.0× ~ 4.0×) Automatically adjusts the white balance Auto White Balance once. -
Page 100: Chapter 11. Troubleshooting
If there is a communication failure between the camera and user’s computer, Ensure that the Camera Link cable connections are secure. Ensure that you have configured a frame grabber in your computer and the camera is connected to the frame grabber correctly. -
Page 101: Appendix A. Defective Pixel Map Download
VC-5MC-M/C110H User's Manual Appendix A. Defective Pixel Map Download Create the Defective Pixel Map data in Microsoft Excel format as shown in the left picture below and save as a CSV file (*.csv). The picture in the right shows the created Excel file opened in Notepad. -
Page 102: Appendix B. Field Upgrade
VC-5MC-M/C110H User's Manual Appendix B. Field Upgrade You can upgrade the MCU, FPGA and XML file of the camera by following the procedure below. Run the application provided by your frame grabber, and then find the menu to support the necessary function. Select the PKG tab, on the window below, click the button next to File Path, search and select the MCU, FPGA or XML upgrade file, and then click the Download button. -
Page 103: Appendix C. Index
B Configurator execution........... 87 back panel ..............27 Configurator Plus window ........89 Bayer RG 8/10/12 ...........62 connector of Camera Link ........28 block diagram ............22 Continuous parameter ..........33 controlling cameras ..........87 controlling parameters ........... 87 Page 103 of 109... - Page 104 VC-5MC-M/C110H User's Manual D G defect pixel ..............66 gain value, setting ........... 65 Defective Pixel Map download ........89 generating data of Flat Field correction ....67 Device Maintenance window ........89 H DeviceProperty window ..........88 hardware trigger signal .......... 42 diagram ..............22 Hirose ...............
- Page 105 VC-5MC-M/C110H User's Manual M R main features ............20 reset physically ............82 MCU file upgrade .............89 rising edge ............... 38 mechanical dimension ..........24 ROI ................54 Mono 8/10/12 ............62 ROI-origin position..........55 MultiFrame parameter ..........33 ROI-size setting............55 Multi-ROI, determination ........59 S...
- Page 106 VC-5MC-M/C110H User's Manual T V tilt settings ..............26 VC-5MC-M/C110H specification ......21 Timed ...............36 X Timer0Active ............35 XML file upgrade ............. 89 trigger input ............31 XML parameter Trigger Mode AcquisitionActive ..............77 Analog Control ..............65 off ..................34 AnalogControl............... 64 on ..................
- Page 107 VC-5MC-M/C110H User's Manual Geometry_1X10_1Y .............. 60 PixelFormat ................62 Geometry_1X2_1Y ..............60 ReverseX ................80 Geometry_1X4_1Y ..............60 ReverseY ................80 Geometry_1X8_1Y ..............60 RisingEdge ..............74, 77 GreyDiagonalRamp ............... 78 RoiHeight................63 GreyDiagonalRampMoving ............ 78 RoiOffsetX ................63 GreyHorizontalRamp ............. 78 RoiOffsetY ................
- Page 109 Vieworks Co., Ltd. 41-3, Burim-ro, 170beon-gil, Dongan-gu, Anyang-si, Gyeonggi-do 14055 Republic of Korea Tel: +82-70-7011-6161 Fax: +82-31-386-8631 http://vision.vieworks.com vision@vieworks.com...
Need help?
Do you have a question about the VC Series and is the answer not in the manual?
Questions and answers