Table of Contents
Advertisement
Quick Links
Advertisement
Table of Contents

Related Manuals for CAMERA LINK ADIMEC-1000m


Summary of Contents for CAMERA LINK ADIMEC-1000m
- Page 1 ADIMEC-1000m O p e r a t i n g a n d T e c h n i c a l M a n u a l...
- Page 3 Layout, composing and editorial staff: Adimec Advanced Image Systems BV. Printing: Dereumeaux Eindhoven, The Netherlands Illustrations: Adimec Advanced Image Systems B.V. All rights reserved. No part of this document may be reproduced, stored in a database or retrieval system, or published in any other form or way, electronically, mechanically, by print, photoprint, microfilm or any other means without prior written permission from the publisher.
- Page 4 For more detailed information you can contact your local dealer or one of the following companies: Adimec Advanced Image Systems B.V. Adimec Advanced Image Systems B.V. Adimec Adimec Electronic Imaging Inc. Electronic Imaging Inc. Adimec Adimec Advanced Image Systems B.V. Advanced Image Systems B.V.
- Page 5 ABOUT THIS MANUAL Congratulations with the purchase of your Adimec-1000m camera. Your Adimec camera has been extensively tested in order to be sure that we delivered a high quality product. This manual provides the necessary information for setting-up, operation and troubleshooting of the camera.
-
Page 7: Table Of Contents
CONTENTS 1. GENERAL INTRODUCTION_______________________________________________________________ 9 2. PRECAUTIONS _______________________________________________________________________ 11 Safety precautions..........................11 2.1.1 General ............................11 2.1.2 Safety symbols ..........................11 Handling ............................11 2.2.1 General ............................11 2.2.2 Cleaning of the CCD........................12 2.2.3 Cleaning of the camera........................15 2.2.4 Maintenance ..........................15 2.2.5 Repair and modification........................15 2.2.6 Mounting / Mechanical ........................15 3. - Page 8 4.2.7 Error checking ..........................31 4.2.8 Horizontal readout direction ......................32 4.2.9 Black Level..........................32 4.2.10 Analog gain correction (only applicable for the Adimec-1000m/D) ........... 33 4.2.11 Digital gain..........................34 4.2.12 Output data resolution......................... 35 4.2.13 Overscan pixels........................... 35 4.2.14 Options............................
- Page 9 Data link settings ..........................55 Data flow characters ...........................55 Message format ..........................56 Message acknowledgement .........................56 Reply messages ..........................56 Communication timing........................56 Host system requirements ........................56 8. CAMERA LINK PORTS _________________________________________________________________ 59 9. TECHNICAL SPECIFICATION SUMMARY __________________________________________________ 61 10. MECHANICAL OUTLINE DRAWING _______________________________________________________ 65...
-
Page 11: General Introduction
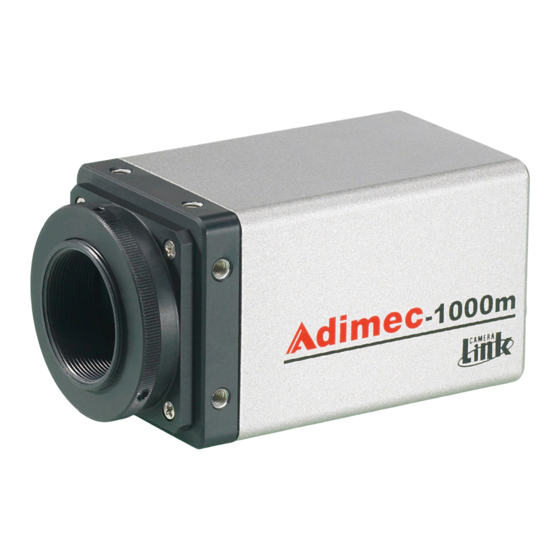
The Adimec-1000m is a monochrome camera module for Industrial Machine Vision and measurement systems. The Camera Link digital interface and the size of the camera make electrical and mechanical interfacing easy. All camera functions are remote controlled. This allows the camera to be optimized for a specific application. -
Page 13: Precautions
2. PRECAUTIONS A CCD camera is a sensitive device. Please read the following precautions carefully before you continue unpacking or operating the camera. 2.1 Safety precautions 2.1.1 General It is advised to unpack and handle the camera in a clean, ESD protected working area. It is advised to read the whole manual before using the camera. -
Page 14: Cleaning Of The Ccd
2.2.2 Cleaning of the CCD Cleaning of a CCD sensor is a rather difficult task. Depending on the aperture of the lens used, any dust particles with a size of 10 µm and larger can show up in your image. All cameras are checked for cleanliness in our factory before shipment. - Page 15 If this step does not result in an acceptable result, continue with step 2. 2. 2. 2. 2. Remove the lens mount by unscrewing the 4 crosshead screws that hold the lensmount (see figure 2-1). 3. 3. 3. 3. Clean the inner screw thread of the lens mount using Alcohol or Hexane and a Q-tip. 4.
- Page 16 Figure 2-1: 4 crosshead screws that hold the lensmount (front view of the camera)
-
Page 17: Cleaning Of The Camera
Take care during handling of the camera. The Camera Link connector and the power connector should not be damaged. The maximum tightening torque for the Camera Link connector may not exceed 0.26 Nm. Prevent the entry of foreign objects or dirt to the connectors, as this will result in unreliable operation or damage. -
Page 19: Installation
Camera power dc return Camera power Connecting power with the wrong polarity will blow the fuse inside the camera. 3.1.2 Camera power cable The Adimec-1000m can be delivered with a power cable (2 meter) as accessory, Adimec part no. 102830... -
Page 20: System Integration
5 mm in the camera front. Too long screws can damage parts in the camera (see chapter 10 for more details). • To prevent defects on Camera Link connector tighten the connector with a maximum torque of 29 cNm. 3.2.3 Electrical Installation •... -
Page 21: Quick Start
Select the appropriate configuration file on the frame grabber. • Grab an image. Factory default settings of the Adimec-1000m/S camera: 30 frames per second, 8 bit, Continuous Mode Factory default settings of the Adimec-1000m/D camera: 50 frames per second, 8 bit, Continuous Mode 3.3.1 Controlling the camera with the Windows application... - Page 22 Normal or Indication of mirrored readout area of Readout frame period and Set digital gain Integration time Partial scan Binning control control Communication state Communication Camera type, serial number and build state per Camera Link Figure 3-2: Windows based control application...
- Page 23 Readout frame period and Set digital gain Integration time Partial scan Binning control control Communication state Communication Camera type, serial number and build state per Camera Link Figure 3-3: Windows based control application with options –DFG, -12 bit, -Delayed Transfer...
- Page 24 The next screen can be used for storage of camera related values / labels, such as calibration data, specific settings, position in the application, etc. Data can be saved as a maximum of 15 integers and a maximum of 15 strings. Load / Save settings as default...
-
Page 25: Functional Description
4. FUNCTIONAL DESCRIPTION This chapter contains a functional description of the Adimec-1000m camera. It describes the main functions and features of the camera using a simplified block diagram. 4.1 Block diagram • Figure 4-1 shows a simplified block diagram of the Adimec-1000m/S camera. - Page 26 The letters written between brackets in the block diagram correspond to the command that is used to control the module concerned. The CCD output is amplified and digitized. In case of the Adimec-1000m/D camera the gain differences between the two CCD outputs is corrected with an analog gain correction (AG)
- Page 27 After the pixel re-map stage the digital gain (GA) is applied. The video data after the gain stage is mapped to the Camera Link ports. The output resolution is set to 8 or 10 bit (optional: 12 bit) (OR). The distribution of the two video outputs for 8 or 10 bit (optional: 12 bit) output is done conform the Camera Link Port specifications.
-
Page 28: Control Of The Camera
4.2 Control of the camera The Adimec-1000m camera is fully software controlled via the Camera Link cable using a simple ASCII based protocol. It is possible to save settings as ‘power-up default settings’ in the camera. Delivered with the camera is a windows based application that can be used to interactively control the camera and load and save power-up default settings. -
Page 29: Camera Command Set
4.2.3 Camera Command set Camera command settings Command Description Range Analog gain (only applicable for the /D) x = correction factor x = -2047 .. +2047 BLx;y Black level x = 12 bit black level setpoint for left output x = 0 .. 4095 y = 12 bit black level setpoint for right output y = 0 .. - Page 30 Mode of operation x = operation mode setting x = 0 continuous mode x = 1 control mode x = 3 delayed transfer mode (optional) x = 4 continuous mode x = 5 control mode x = 7 delayed transfer mode (optional) OPx;y Option bit x = selected option...
-
Page 31: Managing Camera Settings
4.2.4 Managing camera settings Save camera settings Camera settings are directly set by the individual commands. When the camera settings are satisfactory they may be saved as power-up default settings. Command syntax: SC Load camera settings The default settings are restored after power-up but can also be restored during camera operation. Command syntax: LC Load factory defaults At delivery the factory default settings are stored as power-up default settings. -
Page 32: Obtaining The Camera Identification String
The reply message is a string that starts with a double quote “, where x stands for the camera type and zzzzzz stand for the serial number of the camera. Command syntax: ID? Return Message: “Adimec-1000m/xy~y S/N:zzzzzz x indicates the type: - S: Single channel. -
Page 33: Build State
4.2.6 Build state This command returns a string consisting of 4 numbers that exactly describes the camera build state. The string starts with a double quote ”. Command syntax: BS? Return Message: "w.ww;x.xx;y.yy;z.zz The first number (w.ww) is the issue of the camera. Minor changes in the camera will increase the part after the decimal point. -
Page 34: Horizontal Readout Direction
LC or FD command failed. No power-up defaults or factory defaults found. This error indicates an internal NVRAM failure To increase the reliability of the whole system it is good practice to verify each command by executing the ERR? command. 4.2.8 Horizontal readout direction The horizontal readout direction can be set to normal or mirrored readout. -
Page 35: Analog Gain Correction (Only Applicable For The Adimec-1000M/D)
20 gray levels in 12 bit of full dynamic range of the used A/D converters. The current set black level set points can be read back from the camera. Command syntax: BL? For the Adimec-1000m/S only the left black level set point applies (x). 4.2.10 Analog gain correction... -
Page 36: Digital Gain
Right gain =-( x / 2047 ) * 7.5 % Adimec utilizes a real time correction to match the left and right channel at room temperature. This feature is called Adimec Proprietary Matching and is implemented as standard in all Adimec-1000 cameras. -
Page 37: Output Data Resolution
This function only applies on the horizontal timing and data contents of the image. The blanking as well as the Camera Link LVAL timing is set to pass 1004 active image pixels or to pass all the 1024 pixels including the 2*10 dark pixels on the left and right side of the image. - Page 38 Command syntax: OPx;y Option number is 1, 2, 3 or 4 Option off (0) or on (1) Option 1 Option 1 t t t trough 3 Option 1 Option 1 rough 3 rough 3 rough 3 Reserved. Should always be set to 0. Option 4: test image Option 4: test image Option 4: test image...
- Page 39 Figure 4-2: Test Image...
- Page 40 Description of test image 1. 1. 1. 1. The image has a width and height of 1004 image pixels with an internal resolution of 12 bit. Depending on the setting of OR (Output Resolution) the image is being readout with 8, 10 or 12 bit. 2.
- Page 41 Testpattern videolevels (12 bit)
-
Page 42: Image Format [Partial Scan]
Partial Scan and/or vertical binning achieve this. When using partial scan only a programmed number of lines are readout from the CCD. The unwanted lines are dumped and will not appear on the Camera Link output. Also, performing vertical binning can increase the readout speed. This however will reduce the vertical resolution by a factor 2. - Page 43 Figure 4-3: Image Format The camera verifies the specified image format parameters. The specified image size is considered as the most desirable parameter. When the specified image size is not possible the camera sets the image size to the maximum possible.
-
Page 44: Cc1 Polarity
TF,min = 6.5 ms + y * 13.2 4.2.16 CC1 polarity The CC1 signal of the Camera Link interface is used to control the camera in asynchronous mode. The user can set the polarity of the CC1 signal. Command syntax: EPx... -
Page 45: Frame Period In Continuous Mode
Mode # Output Description Dual Continuous mode Dual Control mode Dual Delayed Transfer mode (only models with Delayed Transfer option) Command syntax: MOx Mode of operation [Refer to table above] The current active mode of operation can be read back from the camera Command syntax: MO? When selecting a new (or the same) operation mode the frame period, image format and integration time for continuous mode are verified for the selected mode of operation. -
Page 46: Integration Time In Continuous Mode
The current Frame Period can be read back from the camera Command syntax: FP? The minimum frame period is depending on the number of lines that are read out. The camera checks the specified frame period and adjusts it to the minimum possible if the frame period is set for a too small value for the current image format. - Page 47 The IT command only effects the integration period in the continuous mode. When operating in a different than continuous mode, the value is stored. The settings will become active when the camera is set to continuous mode.
-
Page 49: Modes Of Operation
The timing of the control mode is the below. Figure 5-1: Control mode timing Camera (µ µ µ µ s) (µ µ µ µ s) (µ µ µ µ s) (µ µ µ µ s) ITR1 ITR2 Adimec-1000m 39.3 26.1... -
Page 50: Optional Delayed Transfer Mode
These calculations of Timage apply to both modes of operation. 5.3 Optional Delayed Transfer mode The Adimec-1000m can be ordered with the optional delayed transfer mode. The delayed transfer mode is used in applications where two images must be captured with very little time in between. -
Page 51: Shutter Operation During Image Transfer And Image Readout
5.4 Shutter operation during image transfer and image readout During the image transfer and image readout operations charge is transferred in the CCD. A shutter pulse during these operations can damage the image or cause visible cross-talk of the shutter pulse in the image. If the camera is executing an image transfer or image readout and a shutter operation is required (caused by an external event or even in continuous mode depending on the integration time) the shutter operation is not executed immediately. -
Page 52: Image Transfer Request Prior To Image Readout Completion
During the image readout a shutter operation is executed with a delay ranging from 0...19.6 µs when vertical binning is not used, or 0...26.0 µs when using vertical binning. Note that while not executing an image transfer or image readout the shutter operation is executed immediately. -
Page 53: Camera Link Video Timing
6. CAMERA LINK VIDEO TIMING 6.1 Horizontal timing The Camera Link horizontal video timing at TAP-A is given in Figure 6-1 for Adimec-1000m/S for modes 0/1/3 • without overscan. • The Camera Link horizontal timing video at TAP-A is given in Figure 6-2 for Adimec-1000m/S for modes 0/1/3 with overscan. - Page 54 Figure 6-3: Adimec-1000m/D without overscan Figure 6-4: Adimec-1000m/D with overscan 6.2 Vertical timing The vertical video timing for both Adimec-1000m/S and Adimec-1000m/D modes is given in Figure 6-5:...
- Page 55 Figure 6-5: Vertical timing for Adimec-1000m/xx Note that the LVAL signal is not a continuous signal and that the time between successive LVAL periods (tHBLK in the timing diagram) is not fixed but depends on the image format and possibly inserted shutter operation.
-
Page 57: Communication Protocol
The camera is controlled by a host system connected to the Camera Link interface using the serial communication link of the Camera Link. Commands and resulting data are transferred between the host system and the camera according a communication protocol. -
Page 58: Message Format
ACK or NAK character after the time-out period has elapsed the host system must consider the transmitted message as not being received by the camera. The time-out time to be used for the Adimec-1000m camera should be at least 200 ms. - Page 59 Under normal conditions a NAK or no response from the camera results from damage of the transmitted characters due to noise or communication link hardware problems. In such case the host system should transmit the message again. The number of repeated transmissions after a NAK response or no response must be limited by a retry count to prevent lock-up.
-
Page 61: Camera Link Ports
8. CAMERA LINK PORTS The two digital video outputs of the camera are mapped to the Camera Link ports as defined in the Camera Link specification. The Adimec-1000m uses the Camera Link Base configuration. The mapping for 8, 10 and 12 bit... -
Page 63: Technical Specification Summary
7.4 µm pixels, Interline transfer with micro lenses. Video output : 1 channel digital video via Camera Link, 40 MHz pixel clock. 8 bit, 10 bit or 12 bit resolution, left/right mirror software selectable. : 2 channel digital video via Camera Link, 40 MHz pixel clock. 8 bit, 10 bit or 12 bit resolution, left/right mirror software selectable. - Page 64 Quantum Efficiency 0,50 0,45 0,40 0,35 0,30 0,25 0,20 0,15 0,10 0,05 0,00 1000 Wavelength (nm) Figure 9-1: Typical QE curve, including optical fill factor...
- Page 65 99-0402-00-02 (straight), or 99-0402-70-02 (90 degrees angle). Power dissipation 5 Watt. Electrical interface Camera conforms to Camera Link specification of Camera Link Interface Standard for Digital Cameras and Frame Grabbers – Version 1.1 - January 2004. Maximum cable 10 meter.
- Page 66 Mechanical interface Lens mount Standard C-mount. Camera size 45 mm x 45 mm x 75 mm (excluding connectors). Mounting 2 Mounting holes per side on camera front. Environmental (storage) Temperature - 25 C - + 65 Vibration 10 g sinusoidal, 5 -150 Hz. Shock 25 g in all directions.
-
Page 67: Mechanical Outline Drawing
10. MECHANICAL OUTLINE DRAWING Figure 10-1: Mechanical Outline drawing...