
Related Manuals for Tritech Gemini 720ik


Summary of Contents for Tritech Gemini 720ik
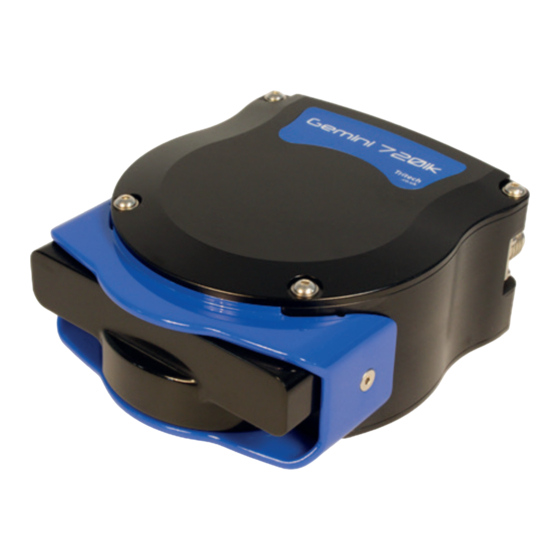
- Page 1 Gemini 720ik Gemini 720ik Product Manual 0742-SOM-00002-02 0742-SOM-00002-2 © Tritech International Ltd.
- Page 2 The copyright in this document is the property of Tritech International Ltd. The document is supplied by Tritech International Ltd on the understanding that it may not be copied, used, or disclosed to others except as authorised in writing by Tritech International Ltd.
-
Page 3: Table Of Contents
5.2.6. Distance Marker ................36 5.2.7. Target Tracking ................37 5.3. Serial Data Input ..................41 5.3.1. Sonars & Sensors ................41 5.3.2. Gemini Hub ..................42 5.3.3. COM Ports ..................43 5.3.4. Aux Power ..................45 0742-SOM-00002-2 © Tritech International Ltd. - Page 4 C. Setting the Gemini Device IP Address in Gemini Software ........75 D. Setting the Gemini Head IP Address in Seanet Pro ..........76 E. Gemini Software String Decode ................78 F. Gemini Software String Encode ................80 Glossary ........................81 0742-SOM-00002-2 © Tritech International Ltd.
-
Page 5: Help & Support
Under no circumstances should a product be returned that is contaminated with radioactive material. The name of the organisation which purchased the system is held on record at Tritech International Ltd and details of new software or hardware packages will be announced at regular intervals. -
Page 6: Warning Symbols
Where this symbol is present there is a serious risk of injury or loss of life. Care should be taken to follow the instructions correctly and also conduct a separate Risk Assessment prior to commencing work. 0742-SOM-00002-2 © Tritech International Ltd. -
Page 7: Head Variations
• Anodised Aluminium Housing • Anodised Aluminium Housing The Gemini 720ik is currently only available with the following connector configurations: • Single Titan Impulse MKS-307-FCR (Single Port Version – MAIN only) • Titan Impulse MKS-307-FCR (Main Port) Titan Impulse MKS-307-FCR (Aux Port) Pin outs for each specific model can be found in later sections of this manual. -
Page 8: Introduction
1. Introduction 1.1. General Overview The Gemini 720ik is a 2D imaging sonar. It is a multibeam sonar, offering a 120° field of view with update rates of up to 97Hz (30Hz typical - range dependant) giving rapid feedback to the user (hardware is capable of 97Hz, Seanet Pro is limited to 15Hz). - Page 9 • Seanet Pro - 2.23 build 540 onwards Screenshots and images within the software may differ slightly from the ones used within this manual. The latest version of software can also be downloaded from www.tritech.co.uk. 0742-SOM-00002-2 © Tritech International Ltd.
-
Page 10: Technical Specification
Depth rating 350m Weight in air 1.40kg Weight in water 0.43kg Temperature rating -10°C to 35°C(operating), -20°C to 50°C (storage) The power consumption range quoted is accurate for a standalone unit and ignores cable losses. 0742-SOM-00002-2 © Tritech International Ltd. -
Page 11: Hardware Installation & Configuration
Caution When deploying the aluminium version of the Gemini 720ik, alloys containing copper such as brasses or bronze should be avoided. 3.2. Electrical & Communication Notes A cable whip supportingEthernet communications can be supplied. -
Page 12: Sonar Head Pin-Out Diagrams
3.3. Sonar Head Pin-Out Diagrams Warning Power should only be applied to the MAIN port of the Gemini. The AUX port, if fitted, provides an un-regulated pass through power supply taken directly from the MAIN port input supply 0742-SOM-00002-2 © Tritech International Ltd. - Page 13 Gemini 720ik Main Port Aux Port Bulkhead view Function Function 0 VDC 0 VDC SHIELD SHIELD Ethernet RX+ TTL IN Ethernet RX- RS232 GND / TTL GND Ethernet TX+ RS232 Tx Ethernet TX- RS232 Rx 0742-SOM-00002-2 © Tritech International Ltd.
-
Page 14: Gemini Software Installation
The Gemini software is supplied on a CD-ROM which has been designed to auto-run upon disc insertion. The latest commercial release of software is always available from www.tritech.co.uk. Once loaded, the main menu of the CD will be shown on screen. 0742-SOM-00002-2 © Tritech International Ltd. -
Page 15: Configuring The Gemini
The address at manufacture is 192.168.2.201 and the process of setting the sonar IP address involves talking to the unit via the 192.168.2.201 address to change the IP address to a value suitable for the network. 0742-SOM-00002-2 © Tritech International Ltd. -
Page 16: Check The Operation Of The Gemini
When the Gemini software is started, select the Advanced tab to show details of the connected Gemini and if it is able to communicate, it will be listed in the status window and automatically go online after five seconds. 0742-SOM-00002-2 © Tritech International Ltd. -
Page 17: Gemini Software Operation
In the middle of the left hand side of the screen is the palette selector. 0742-SOM-00002-2 © Tritech International Ltd. -
Page 18: Online Button
If there are multiple heads that are available, the software will display a message asking you to change the Sonar ID to one of the detected units. 0742-SOM-00002-2 © Tritech International Ltd. -
Page 19: Record Button
163002_IMG.ECD in the directory C:\GeminiData \LD20141018. The software will automatically create any directories needed for recording. 5.1.4. Player Controls The player controls manage the replay of Gemini data previously recorded by the software. 0742-SOM-00002-2 © Tritech International Ltd. - Page 20 When replaying a log file, the filename, together with the date and time of recording, will be displayed at the bottom of the screen (below the Gemini data) in green text, for example: 0742-SOM-00002-2 © Tritech International Ltd.
-
Page 21: Capture Screen
C:\GeminiData\Images\Gemini_2016-05-12-111555.jpg. When the image has been captured, the Gemini software will display a message (as below) giving the name of the file. This message will be displayed for five seconds and then will close automatically. 0742-SOM-00002-2 © Tritech International Ltd. -
Page 22: Record Video
Acoustic Zoom window. The Acoustic Zoom window will show any previously logged Acoustic Zoom data. When enabled, the Acoustic Zoom button will be highlighted as shown. If no Acoustic Zoom data is available the Acoustic Zoom Window will display the following message: 0742-SOM-00002-2 © Tritech International Ltd. -
Page 23: Chirp Button
If the sonar is mounted upside down, the software has the ability to flip the image from left to right as viewed on the computer screen so that the image still appears correctly oriented to the user. The illustration above shows the button in the non-flipped state. 0742-SOM-00002-2 © Tritech International Ltd. -
Page 24: Rotate Image
Acoustic Zoom data will also be recorded in addition to the normal view data. If the Gemini unit does not have CHIRP enabled, the zoom window will show Digital Zoom data. This data is simply a magnified view of the data present on the normal view. 0742-SOM-00002-2 © Tritech International Ltd. -
Page 25: Filter Selector
Clicking on the palette bar opens a palette selector which allows the selection of the palette to use. As the mouse is hovered over the different palettes, the sonar image will preview that palette. 0742-SOM-00002-2 © Tritech International Ltd. -
Page 26: Gain Control
Click and hold the mouse over one of the handles. The clicked handle, and any other handles that will move when the mouse is dragged, will be highlighted. Square shaped handles adjust the edges of the swathe size. Diamond shaped handles adjust the centre of the swathe size. 0742-SOM-00002-2 © Tritech International Ltd. -
Page 27: Measurements
The sonar will continue to operate at full power during a 20 minute countdown period. During the countdown period, toggling the Online button will reset the timer back to the start or immersing the sonar back into water will clear the warning. 0742-SOM-00002-2 © Tritech International Ltd. -
Page 28: Advanced Screen
Online button has been toggled off then on. Note When the Gemini 720ik AUX port is active, the "Out of water" warning is automatically disabled. Over temperature If the temperature sensors within the sonar detect that the internal temperature is too high an "Over temperature"... -
Page 29: System Data
5.2.2. Configuration Options The Configuration Options allow the user to select which Gemini Sonar to use, select the Sound Velocity to be used during image processing, modify sonar data rates, and finally to change the network settings. 0742-SOM-00002-2 © Tritech International Ltd. - Page 30 The Gemini can either use a fixed sound velocity (in which case the sound velocity to be used is entered in the Fixed Velocity box below the sound velocity selector), or use a measured sound velocity. 0742-SOM-00002-2 © Tritech International Ltd.
- Page 31 The live image displayed by the Gemini software immediately shows the effect of the compression. The live image displayed by the Gemini software shows the effect of the compression immediately. Example screenshot of sonar imagery with no compression. 0742-SOM-00002-2 © Tritech International Ltd.
- Page 32 See Section 5.3, “Serial Data Input” for a detailed description of the related settings and options. The Gemini Hub and COM Ports options can only be altered when the software is offline. 0742-SOM-00002-2 © Tritech International Ltd.
-
Page 33: Application Settings
Click the directory control (i.e. the box containing C:\GeminiData) in order to open the Browse for Folder dialogue. Use the navigation tree to select the desired directory and then press OK. The Cancel button closes the dialogue and does not change the logging directory. 0742-SOM-00002-2 © Tritech International Ltd. - Page 34 The user may specify a standard image file format which is used when saving a captured screenshot. Options provided include: BMP, GIF, JPG, and PNG. Video Format The user may specify a standard video file format which is used when saving a recorded video. Options provided include: AVI and WMV. 0742-SOM-00002-2 © Tritech International Ltd.
-
Page 35: Filter Settings
With the Movement control set at minimum, the movement filter retains almost all the background (and becomes almost indistinguishable from the Persistence filter). 0742-SOM-00002-2 © Tritech International Ltd. -
Page 36: Device Network Settings
Distance Marker as a horizontal line and the Set Point as a small circle in the Gemini data view. For both the Distance Marker and Set Point, the corresponding colour selector may be used to distinguish the markers from the head image. Click on each colour box to open a 0742-SOM-00002-2 © Tritech International Ltd. -
Page 37: Target Tracking
Tracking provides a mechanism of highlighting objects and following their Target movement over subsequent sonar frames. Once enabled, targets will be automatically determined and tracked when selected. There are two main methods of target tracking available within the Gemini software: 0742-SOM-00002-2 © Tritech International Ltd. - Page 38 Each right-click will attempt to find a target and track it separately. No position information is displayed when tracking multiple targets. If the user changes from Multiple to Single tracking, the target closest to the sonar will be used. 0742-SOM-00002-2 © Tritech International Ltd.
- Page 39 Detect + Track In order to track objects effectively, the various settings need to be optimised. Target Size This is the estimated size of target that is to be tracked. 0742-SOM-00002-2 © Tritech International Ltd.
- Page 40 The Tracked Targets information will now update with details of the primary target to be tracked. The primary target is denoted by a 0742-SOM-00002-2 © Tritech International Ltd.
-
Page 41: Serial Data Input
The Sonars tab is for displaying information and is the same display when no tabs are present (for a full description see Section 5.2.1, “System Data”). The Sensors tab is for displaying extra information from connected RS232 sensors. 0742-SOM-00002-2 © Tritech International Ltd. -
Page 42: Gemini Hub
The Hub Setup tab allows configuration of the serial ports on the rear of the Gemini Hub to allow RS232 data to pass through to the Gemini software from external sensors. Port The port letter, corresponding to the label on the back of the Gemini Hub. 0742-SOM-00002-2 © Tritech International Ltd. -
Page 43: Com Ports
Open the settings dialog for configuring the port baud rate, data bits, parity and flow control. Mode Can change between an ASCII or binary decode (ASCII is the default and binary is only used for the Simrad EM3000). 0742-SOM-00002-2 © Tritech International Ltd. - Page 44 The baud rate selection for the Port. Selectable between 9600 to 115200 Baud. Mode Can change between an ASCII or binary decode (ASCII is the default and binary is only used for the Simrad EM3000). 0742-SOM-00002-2 © Tritech International Ltd.
-
Page 45: Aux Power
In the Advanced screen, the Sonar tab contains details of all the Gemini Sonars detected by the software. Should an update be available, the affected sonar will have its firmware details highlighted with orange text - regardless of if the unit is Online or Offline. 0742-SOM-00002-2 © Tritech International Ltd. - Page 46 Update button will no longer be visible and when connected Online all the Sonar details will be in green text. If your Gemini Sonar fails to update correctly please contact Tritech International Ltd for assistance. 0742-SOM-00002-2 © Tritech International Ltd.
-
Page 47: Multiple Head Operation
Each text field is editable and allows the sonar scans to be moved around in relation to a central reference point. The default is as follows: Example Layout Changing the position values as follows: Will arrange the sonar images in a circle: 0742-SOM-00002-2 © Tritech International Ltd. - Page 48 In this case, sonar 1 is looking forward while 2 and 3 are looking aft. There is no overlap and each sonar is displaying a full 120° arc. Overlapping sonars is also possible and any images generated will be a combination of echoes from both heads: 0742-SOM-00002-2 © Tritech International Ltd.
-
Page 49: Offline Mode
The Gemini software stores all the settings in the file C:\GeminiData\Settings \Gemini.xml. A backup of this file can be kept as a record of all the Gemini settings. When contacting Tritech International Ltd Technical Support it may be necessary to supply a copy of this file. -
Page 50: Keyboard Shortcuts
A number of keyboard shortcuts are available for commonly used activities. Toggle Logging of data Ctrl F Capture the screen to file Increase gain Decrease gain Increase range Decrease range Decrease sonar swathe Increase sonar swathe 0742-SOM-00002-2 © Tritech International Ltd. -
Page 51: Seanet Pro Installation
The latest commercial release of software is always available from www.tritech.co.uk. Once loaded, the main menu of the CD will be shown on screen. Click on the Seanet Pro button and the following screen will display all the appropriate software packages for installation. 0742-SOM-00002-2 © Tritech International Ltd. - Page 52 The final check to see if the correct changes have been made to the Gemini Sonar is to run Seanet Setup from the desktop icon to display the Node table. If the change of the sonar’s IP address has been successful, the sonar should be listed in the node window. 0742-SOM-00002-2 © Tritech International Ltd.
- Page 53 Seanet Pro Installation Gemini 720ik Note In order to correctly run the Gemini head on a SCU the SCUv5, or later, is required. Contact Tritech International Ltd for more details of the SCUv5. 0742-SOM-00002-2 © Tritech International Ltd.
-
Page 54: Seanet Pro Operation
When the selected item in the ‘Selected Sonar’ drop- down list is changed, the details of that particular Gemini Sonar will be displayed here. These details include; unique Sonar ID, Firmware Versions, broadcasting Sonar IP Address and Subnet Mask. 0742-SOM-00002-2 © Tritech International Ltd. - Page 55 Gemini may be out of date. The firmware can be updated by Clicking on the Action column and selecting Program FPGA. Follow the onscreen instructions to complete the process. Do not interrupt power to the Gemini while updating the firmware. 0742-SOM-00002-2 © Tritech International Ltd.
- Page 56 Gemini Sonar. Whenever a Medium Noise or High Noise setting is selected, on initial startup of the Gemini, the VDSL communications will take several seconds to find it’s optimum rate. During this 0742-SOM-00002-2 © Tritech International Ltd.
-
Page 57: Gemini Sonar Application
This section shows only those specific to the Gemini Sonar Application. The Gemini Sonar display is very similar to the standard Sonar display used for Tritech International Ltd mechanical sonar heads such as SeaKing and SeaPrince. However, the Gemini Sonar has a sector width of up to 120°... - Page 58 Log-Log Setup drop down menu. 17. S ector Quick Select this can be used to reset the Sector Center and Sector Width back to the default settings by pressing either the middle or top red icon. 0742-SOM-00002-2 © Tritech International Ltd.
-
Page 59: Application Tools
Click on the symbol to deploy on the Marker panel and that marker symbol will be dropped at the Origin (0, 0) on the Sonar display. Then, pick up the Marker using the left mouse button and drag it to the position required. 0742-SOM-00002-2 © Tritech International Ltd. - Page 60 Rng Cross, Rings On, Rings, Grid On - Display Grid line options. Sector On, Sector – Display a Sector overlay with left and right angular limit adjustment (in degrees). Rotation – Rotational offset to correct Sonar heading – (Disabled for Gemini Sonar). 0742-SOM-00002-2 © Tritech International Ltd.
- Page 61 Use this option to select the source of the heading data. If using a sonar which contains an internal heading and compass device or if the compass is connected to the Aux port of the sonar select Internal/Aux Compass. If the compass device has been 0742-SOM-00002-2 © Tritech International Ltd.
- Page 62 The Compass Settings dialog allows configuration of the compass and pitch/roll sensor display on the main screen. The position can be selected only if Auto Positioning is first de-selected. Also colour and opacity can be controlled through this dialog. 0742-SOM-00002-2 © Tritech International Ltd.
- Page 63 720is unit. Note that the unit must have CHIRP capable firmware in order for this option to be selectable. • Off - This setting will disable the CHIRP function • On - This setting will enable the CHIRP function across all ranges 0742-SOM-00002-2 © Tritech International Ltd.
- Page 64 Move the Shape with X, Y position offset from display origin. Line Width Line width. Centre On Enable centre marker (+) for the shape. Digital Zoom The Digital Zoom will be selectable if Seanet Pro detects a Gemini 720is. 0742-SOM-00002-2 © Tritech International Ltd.
- Page 65 10% of the size of the pop up Zoom window. This control has a maximum value of 40% • Factor - This sets the oversampling rate used for the zoom area. This control has a maximum value of 4. 0742-SOM-00002-2 © Tritech International Ltd.
-
Page 66: Outputting Data Via Remv4
For the appropriate head, select the Channel to output the data on and, once configured, enable the Send box. Data will now be transmitted by REMV4. For more details on the operation of REMV4, please see its associated Product Manual: 0706-SOM-00004. 0742-SOM-00002-2 © Tritech International Ltd. -
Page 67: Maintenance
Do not deploy the Gemini without the cover being attached to the unit. It is recommended that Gemini units be returned to Tritech as part of a regular maintenance schedule. An annual return is highly recommended, but this can be lengthened, or shortened, by various factors: •... - Page 68 Maintenance Gemini 720ik • The presence of any galvanic action from dissimilar metals, or case voltages 0742-SOM-00002-2 © Tritech International Ltd.
-
Page 69: Troubleshooting
The software reports that no sonars are detected Ensure that the latest revision of Gemini software is running on your computer. Visit www.tritech.co.uk to download the latest version. Check all cabling to the sonar and verify that it is powered correctly with appropriate voltage at the sonar. - Page 70 This is often caused by bubbles forming on the metal faces at the front of the sonar, particularly if the sonar has been stationary for an extended period of time in a tank. Wiping the surface to remove bubbles should resolve the issue. 0742-SOM-00002-2 © Tritech International Ltd.
-
Page 71: Setting The Computer Ip Address In Windows® Xp
Scrolling the "This connection uses the following items" box will reveal an item titled "Internet Protocol (TCP/IP)". Click this item to select it, and then press the Properties button. The following dialog should open: 0742-SOM-00002-2 © Tritech International Ltd. - Page 72 Make a note of the settings as currently used by the computer; these will be needed to restore the computer to any existing network. Refer to the appropriate section of this manual for the correct IP address to use. The following screenshot shows the dialog after those changes have been made: 0742-SOM-00002-2 © Tritech International Ltd.
-
Page 73: Setting The Computer Ip Address In Windows® 7 Or Windows® 10
Under Network and Internet click on View network status and tasks. This will bring up the Network and Sharing Center which allows configuration of any networks on the computer. Click on Change adapter settings on the left-hand pane. 0742-SOM-00002-2 © Tritech International Ltd. - Page 74 Refer to appropriate section of this manual for the correct IP addresses to use. 0742-SOM-00002-2 © Tritech International Ltd.
-
Page 75: Setting The Gemini Device Ip Address In Gemini Software
IP address, and therefore will not show up on the status display. Once the IP address of the computer has been changed back to its original settings the Gemini should once again appear on the status display. 0742-SOM-00002-2 © Tritech International Ltd. -
Page 76: Setting The Gemini Head Ip Address In Seanet Pro
Sonar. This will take a few seconds. When the programming is finished the it may be necessary to reset the computer IP address to enable communication to resume with the Gemini (see the section Setting the Computer 0742-SOM-00002-2 © Tritech International Ltd. - Page 77 IP Address for details of how to do this). Once communication has been re-established the following screen shows the sonar is connected: Returning to Gemini LAN from the Setup menu should confirm that the changes have been made successfully. 0742-SOM-00002-2 © Tritech International Ltd.
-
Page 78: Gemini Software String Decode
Depth strings Name Description Format/Examples Digi Parascientific Digiquartz 000.0 (depth sensor) SonDepth Depth $SONDEP... Distance Marker strings Name Description Format/Examples TSS Altimeter 1 Marker Range Rxx.xx Ulvertech Bathy Marker Range 00000,xxxx 0742-SOM-00002-2 © Tritech International Ltd. - Page 79 Speed of Sound Speed of Sound 1500.0 Note With the exception of Simrad EM3000 (which is in binary format) all of the above strings are in ASCII format and use <CR> as the synchronisation character. 0742-SOM-00002-2 © Tritech International Ltd.
-
Page 80: Gemini Software String Encode
Sum of XOR on each character of the string expressed as a char written in hex. Terminator <CR><LF> Example Target located 3.18m from sonar at a 9.2651052° bearing to the right of the central point of the Sonar. $PTRITR1,04042017,113806,1,103,3.18,9.265105*28<CR><LF> 0742-SOM-00002-2 © Tritech International Ltd. -
Page 81: Glossary
Gigabyte = 1000MB Gemini Unless specified this can refer to any of the multibeam sonars in the Gemini range by Tritech International Ltd such as the Gemini Imager (720id), Narrow Beam Imager or Gemini Profiler (620pd). Gemini Hub A rack mountable device capable of driving 2 Gemini sonars and multiple serial sensors and outputting the data to a PC network. - Page 82 Power Supply Unit Random Access Memory Remote Access Terminal - the detachable front part of the Tritech Surface Control Unit (SCU) computer. Provides an alternative to using a keyboard and mouse. Run-length Encoding - a form of data compression in which sequences of data that have the same value are stored as a single datum point and count.
Need help?
Do you have a question about the Gemini 720ik and is the answer not in the manual?
Questions and answers