Table of Contents
Advertisement
Quick Links
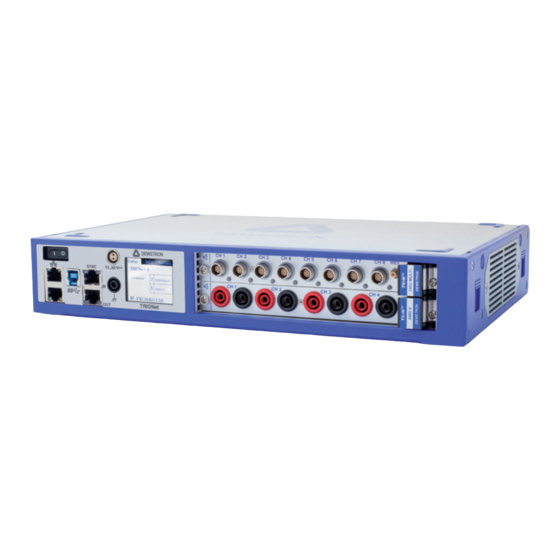
TRIONet
TECHNICAL REFERENCE MANUAL
WELCOME TO
THE WORLD OF
DEWETRON!
Congratulations on your new device! It
will supply you with accurate, complete
and reproducible measurement results
for your decision making.
ISO9001
Look forward to the easy handling and
the flexible and modular use of your
DEWETRON product and draw upon
more than 30 years of DEWETRON ex-
EN ISO 14001
pertise in measurement engineering.
THE MEASURABLE DIFFERENCE.
Advertisement
Table of Contents

Related Manuals for Dewetron TRIONet


Summary of Contents for Dewetron TRIONet
- Page 1 ISO9001 Look forward to the easy handling and the flexible and modular use of your DEWETRON product and draw upon more than 30 years of DEWETRON ex- EN ISO 14001 pertise in measurement engineering. THE MEASURABLE DIFFERENCE.
- Page 2 Copyright © DEWETRON GmbH This document contains information which is protected by copyright. All rights are reserved. Reproduction, adaptation, or translation without prior written permission is prohibited, except as allowed under the copyright laws. All trademarks and registered trademarks are acknowledged to be the property of their owners.
-
Page 3: Preface
The compact, distributable TRIONet accepts any two of the multi-channel TRION series plug-in modules and connects to any Windows computer via USB or Ethernet. Furthermore, TRIONet mainframes can be interconnected using Eth- ernet. Because of the Ethernet interface, TRIONet mainframes can even be placed up to 100 meters apart from each other. -
Page 4: Scope Of Delivery
Preface Scope of delivery 1 x TRIONet 1 x external AC power supply 1 x USB 3.0 cable (2 m, 6 ft) 1 x LAN cable (2 m, 6 ft) -
Page 5: Table Of Contents
TRION series modules overview ......17 Training ...............59 Analog modules ..........17 Digital modules ..........17 Troubleshooting ......60 Dedicated modules .......... 18 Touchscreen display ..........18 Certificate of conformity....62 Status tab ............18 TRIONet • Technical reference • Printing version 1.0.7 • October 15, 2021... - Page 6 TABLE OF CONTENTS Notes...
-
Page 7: General Information
Often intrusive IT software or network processes can interfere with the primary function of the DEWETRON system: to record data. Therefore we recommend strongly against the installation of IT/MIS software and running their process- es on any DEWETRON data acquisition system, and cannot guarantee the performance of our systems if they are so configured. -
Page 8: Printing History
General information PARTICULAR PURPOSE. DEWETRON shall not be liable for any direct, indirect, special, incidental, or consequential dam- ages, whether based on contract, tort, or any other legal theory, in connection with the furnishing of this document or the use of the information in this document. -
Page 9: Safety
` Handle the product with care. Shocks, hits and dropping it even from an already lower level may damage your system. For exact values refer to the enclosed specifications. TRIONet • Technical reference • Printing version 1.0.7 • October 15, 2021... -
Page 10: Electrical Safety Instructions
– Electrostatic fields etc. ` DO NOT use the system in rooms with flammable gases, fumes or dust or in adverse environmental conditions. ` Direct exposure of any DEWETRON product to strong sunlight or other heat radiation shall be prevented, as this... -
Page 11: Safety Notices During Operation
Indicates a hazardous situation that, if not avoided, could result in death or serious injury. CAUTION Indicates a hazardous situation that, if not avoided, could result in minor or moderate injury. TRIONet • Technical reference • Printing version 1.0.7 • October 15, 2021... -
Page 12: Notices
Safety Notices NOTICE This text indicates situations or operation errors which could result in property damage or data loss. INFORMATION This text indicates important information or operating instructions. Not observing these instructions could inhibit or impede you from successfully completing the tasks described in this documentation. Symbols Denotes a warning that alerts you to take precautions to avoid injury. -
Page 13: System Setup
USB 2.0; USB 3.0 Synchronization TRION-SYNC-Bus up to 100 m between nodes System bandwidth 90 MB/s with one connected TRIONet (up to 50 MB/s with more than one) Display Status display with touchscreen Cooling 2 temperature controlled ultra silent fans Isolated power supply –... -
Page 14: Dimensions
Dimensions (W x D x H) Approx. 320 x 205 x 55 mm (12.6 x 8 x 2.2 in.) Weight Typ. 1.9 kg (4.2 lbs) without modules Tab. 1: System specifications TRIONet 1) TRION3 modules are not supported. Dimensions* 320,4 *) Dimensions in mm (1 inch = 25.4 mm) -
Page 15: Connections And Ports
10. Release button for locking mechanism TRION-SYNC-BUS interface 11. Fans Chassis terminal INFORMATION The amount and location of the connectors might vary from system to system and depend on the sys- tem configuration. TRIONet • Technical reference • Printing version 1.0.7 • October 15, 2021... -
Page 16: Trion(3) Modules Compatibility
SyStem SetuP Element Description USB interface connectors The TRIONet is equipped with a USB 3.0 interface (type B) to connect to a laptop or PC. For details see USB 3.0 interface connector on page Power supply input con- Input range 11...32 VDC (external AC/DC power supply included). For... -
Page 17: Trion Series Modules Overview
48 highspeed TRION-DI-48 2 MS/s 500 nsec digital IN Basic IO card with TRION-BASE 2 MS/s 80 MHz simple IRIG sync IRIG and 2 counter Tab. 5: TRION digital modules TRIONet • Technical reference • Printing version 1.0.7 • October 15, 2021... -
Page 18: Dedicated Modules
STAR-slot for TRION modules refer to the TRION series modules technical reference manual. Touchscreen display The integrated touchscreen display of the TRIONet shows all relevant information straight on the device. To switch between the tabs, simply touch the display. The following information is shown on the display:... -
Page 19: Info Tab
Fig. 6: Info tab Net tab The 'Net' display tab shows the network settings of the TRIONet device itself and the client if connected. In this tab there is also the possibility of resetting the IP address of the TRIONet. For more information on how to change IP address and subnet mask see... -
Page 20: Reset Ip
` DHCP: Choose 'DHCP' if the TRIONet should be implemented in a proprietary, already existing LAN with a DHCP server up and running. The DHCP lookup may take a few minutes. If the DHCP lookup failed, the TRIONet will switch automatically to a fallback address called 'Link-Local IP address'. -
Page 21: Usb 3.0 Interface Connector
USB 3.0 interface connector The TRIONet is equipped with a USB 3.0 interface (type B) to connect to a laptop or PC. A 2 m (6 ft) USB 3.0 cable is included. The USB 3.0 interface meets the standard USB pin assignment. -
Page 22: Locking Mechanism And Release Button
The total length of the Ethernet cable must not exceed 100 m (328 ft) between two units. Locking mechanism and release button The TRIONet comes with a nifty locking mechanism if you want to stack your units. To stack two or more TRIONet units proceed as follows: 1. -
Page 23: Installing A Trion Module
In order to install a TRION module into a chassis proceed as follows: Take proper ESD precautions to avoid any damage to the unit. 2. Power off and unplug all connected cables including sensors from the TRIONet chassis and TRION series modules. 3. Identify a supported TRION peripheral slot. -
Page 24: Power Supply
SyStem SetuP Power supply The TRIONet is powered by an external AC/DC power supply which is included as standard accessory. 65 W AC/DC power supply Input – Rated input voltage 100...240 V (max. 90 ... 264 V – Input frequency 50...60 Hz... -
Page 25: Connecting Trionet To Laptop/Pc
Connecting TRIONet to laptop/PC To connect your TRIONet to a laptop or PC, you can either use USB 3.0 or Gigabit Ethernet. To do so, you have to install measurement software of your choice as well as all drivers for the TRIONet before connecting it to the laptop/PC. This reference manual describes on how to install and operate your device with OXYGEN. -
Page 26: Connect Trionet To Laptop/Pc Via Usb 3.0 Or Gigabit Ethernet
1. Connect the TRIONet to the included external AC/DC power supply. 2. Switch ON the device with the 'Power-on switch' located on the top left at the front panel. 3. After a short bootscreen animation, the status display will indicate the TRIONet is ready to go. Status... - Page 27 (assuming that it also haven't been assigned an address manually or automatically) to find out if 169.254.1.1 is free. If it is, then the TRIONet assigns that address to its network card. If that address is already in use by another device on the same network, then it tries the next IP 169.254.1.2 and so on, until it finds a free...
- Page 28 SyStem SetuP ZeroConf via USB3.0 If the TRIONet is connected via USB 3.0 cable (included in the kit) to the laptop/PC, WINDOWS will automatically de- tect a new hardware and install the corresponding USB 3.0 to Ethernet adapter driver (ASIX AX88179).
- Page 29 Fig. 11: Check ZeroConf status By selecting the TRIONet in the DEWETRON Explorer, it will now show a 'connected' symbol on the status display of the device. When deselecting the TRIONet in the DEWETRON Explorer, the 'connected' symbol will disappear from the status display of the unit.
- Page 30 To manually set up the Gigabit Ethernet connection of your host PC proceed as follows: 1. After the TRIONet has been connected via Gigabit Ethernet cable (included in the kit) to the laptop/PC, right click on the network icon at the bottom right of your taskbar and select 'Open Network and Sharing Center'.
- Page 31 WINDOWS 10 5. Check 'Use the following IP adress:' and use an IP address within the same range as the TRIONet (e.g. 192.168.0.151). The current IP address of the TRIONet is shown on the status display. Use the following subnet mask: 255.255.255.0.
- Page 32 Manually setting up USB 3.0 connection of host PC After the TRIONet has been connected via USB 3.0 cable (included in the kit) to the laptop/PC, WINDOWS will auto- matically detect a new hardware and install the corresponding USB 3.0 to Ethernet adapter driver (ASIX AX88179) when connected to the internet.
- Page 33 2 meters (<6 ft.). The total length of the cable must not exceed 2 m (6 ft.), otherwise the TRIONet will not connect to the laptop/PC. DEWETRON offers USB 3.0 cables for your TRIONet in perfect length.
- Page 34 4. Select 'Internet Protocol Version 4 (TCP/IPv4)' and click on 'Properties' afterwards. WINDOWS 7 WINDOWS 10 5. Check 'Use the following IP adress:' and use an IP address within the same range as the TRIONet (e.g. 192.168.0.151). The actual IP address of the TRIONet is shown on the status display.
-
Page 35: Setting Up Your Trionet With Dewetron Explorer (Static Ip, Dhcp, Node Name)
To set up the TRIONnet with the DEWETRON Explorer proceed as follows: 1. After connecting the TRIONet with your laptop/PC via desired interface, start the DEWETRON Explorer which has been installed with the TRION package, usually via 'Start' > 'All programs' > 'DEWETRON' > 'DEWETRON Explorer' or just type 'DEWETRON Explorer' in the search bar. - Page 36 SyStem SetuP The DEWETRON Explorer will list a 'Local System' (which is your laptop/PC) and the connected TRIONet. If the systems are not in the same IP address range, select the 'LocalSystem' and click on 'Net Settings' from the menu bar. The following screen will pop up:...
- Page 37 The DEWETRON Explorer will scan all Ethernet adapters and choose the corresponding adapter automatically. It is also possible but not recommended to manually select the adapter. 3. Now the TRIONet becomes active and by selecting the unit (may take a few seconds), the DEWETRON Explorer will show some information (name of chassis, installed TRION™ modules...).
- Page 38 SyStem SetuP 5. To change the IP address or the name of the TRIONet node just select and right click the unit in the DEWETRON Explorer. 6. Select 'Change Node IP' from the menu. 7. Choose 'static' and type in a new IP address and subnet mask and hit 'OK'.
- Page 39 8. To change the name of the Node select and right-click the system and choose ‘Rename Node’ from the menu. 9. Type in a new name for your system and hit ‘OK’. The name will also automatically update on the status display of the unit. TRIONet • Technical reference • Printing version 1.0.7 • October 15, 2021...
-
Page 40: Installation Of Oxygen Measurement Software
Installation of OXYGEN measurement software Install the OXYGEN measurement software as follows: 1. Start the OXYGEN installation by plugging in the DEWETRON installation media USB stick shipped with your TRI- ONet into your computer, and execute the “oxygen_x86_setup.exe” or “oxygen_x64_setup.exe” file on the USB drive, depending on your platform. - Page 41 SyStem SetuP 3. Select the destination location. 4. Select 'OXYGEN Desktop' as OXYGEN edition. 5. Select the start menu folder. TRIONet • Technical reference • Printing version 1.0.7 • October 15, 2021...
-
Page 42: Setting Up Trionet In Oxygen
Setting up TRIONet in OXYGEN Set up TRIONet in OXYGEN as follows: 1. After successfully connecting your TRIONet with the laptop/PC, run OXYGEN usually via 'Start' > 'All Programs' > 'DEWETRON' > 'OXYGEN' or just type 'OXYGEN' in the search bar and hit enter. - Page 43 7. Switch to 'Channel list' will display the TRIONet and installed modules. If there is no TRIONet shown in 'Channel list', the unit is not setup correctly or there is any other issue with the connection. Make sure you have precisely followed the instructions described in...
-
Page 44: Synchronization Of Multiple Trionet Units
TRION-SYNC-BUS The TRION-SYNC-BUS (SYNC IN, SYNC OUT) is used to synchronize two or more TRIONet units with up to 100 m dis- tance between each node. The 10 Mhz clock signal, along with acquisition control signals, is transmitted via the RJ-45 connection. -
Page 45: Connect Cpad2/3 Modules To Trionet
CPAD3 modules. No additional power supply is required. PC/laptop LAN/USB TRION-CAN module CAN + PS ≤10 CPAD modules CAN + PS CAN + PS Fig. 14: Connection laptop, 1x TRIONet, CPADs via TRION-CAN TRIONet • Technical reference • Printing version 1.0.7 • October 15, 2021... - Page 46 CAN + PS CAN + PS CAN + PS ≤10 CPAD modules CAN + PS ≤10 CPAD modules Fig. 15: Connection laptop, 2x TRIONet, CPADs via TRION-CAN LAN (max 100 m)/USB (max. 1.8 m) TRION-CAN module SYNC (max 100 m) CAN + PS ≤10 CPAD modules...
- Page 47 CPAD3 module directly. If more than one CPAD2/CPAD3 modules are used an additional power supply via a split cable is required. PC/laptop LAN/USB TRION-MULTI module max. 100 m max. 1.8 m CAN + PS Fig. 18: Connection laptop, 1x TRIONet, CPAD via TRION-MULTI TRIONet • Technical reference • Printing version 1.0.7 • October 15, 2021...
- Page 48 100 m max. 1.8 m CAN + PS Power supply CAN + PS CAN + PS Fig. 19: Connection laptop, 1x TRIONet, CPADs via TRION-MULTI SYNC (max. 100 m) TRION-MULTI module SYNC (max. 100 m) CAN + PS LAN/USB TRION-MULTI module max.
-
Page 49: Maintenance And Service
` USB drive (received from DEWETRON or Create USB drive for firmware upgrade) ` 10 minutes of time To perform a firmware upgrade proceed as follows: 1. Switch of the instrument. TRIONet • Technical reference • Printing version 1.0.7 • October 15, 2021... - Page 50 4. Plugin the USB drive in the lower, blue, USB3.0 port. The update will not start when plugged-in in the standard USB port. 5. Switch-on the instrument. The TRIONet will automatically detect the new firmware and install it from the USB drive. Note that the update process may take up to 5 minutes.
-
Page 51: Create Usb Drive For Firmware Upgrade
The firmware has now been upgraded. Create USB drive for firmware upgrade If you have not received a USB drive from DEWETRON with the latest firmware, follow the next steps on how to create a USB drive to upgrade the firmware of your TRIONet. - Page 52 maintenance and Service 3. Extract the 'trionet_create_stick_R2.x.x.zip' in the same folder. After extracting following files should be available: – trionet_create_stick_R2.x.x.zip – trionet_update_image_R2.x.x.img – win32DiskImager-x.x.x-install.exe – README.txt 4. Run Win32DiskImager-x.x.x-install.exe (if not already installed). The install wizard will guide you through the instal- lation process.
- Page 53 9. Hit 'Write' to start the progress and write the image file on the USB drive. 10. Check the target device and confirm overwrite by clicking 'Yes'. TRIONet • Technical reference • Printing version 1.0.7 • October 15, 2021...
-
Page 54: Updating Firmware Files On Existing Usb Drive
The creation of a USB drive for a firmware update of your TRIONet has now been successfully finished. Updating firmware files on existing USB drive The next steps will describe on how to update the firmware files on your DEWETRON or self created USB drive. Requirements... - Page 55 INFORMATION The firmware update will not work if the firmware files are copied on an empty USB drive only. Refer to Create USB drive for firmware upgrade on page 51 first. Your USB drive has now been successfully updated. TRIONet • Technical reference • Printing version 1.0.7 • October 15, 2021...
-
Page 56: Perform A Remote Update W/O A Usb Drive
Service Perform a remote update w/o a USB drive The next steps will describe on how to update the firmware files on your TRIONet without the needs of a USB drive (requires Firmware 5.0 or newer). Requirements ` TRIONet connected to your laptop/PC ` Firmware 5.0 or higher installed on your TRIONet... - Page 57 5. After clicking on 'Software Update' a browser window opens (depending on installed browser on your laptop/PC). This window shows the set IP address as well as the installed firmware on your TRIONet. Furthermore, there is also a link to the latest update image file if it has not been downloaded yet.
-
Page 58: Service And Repairs
Products arriving at our repair department without RMA require follow-up calls and investigation, which lead to a longer turnaround. Only the team of DEWETRON is allowed to perform any kinds of repairs to your system to assure a safe and proper operation in future. -
Page 59: Support
Service Support DEWETRON has a team of people ready to assist you if you have any questions or any technical difficulties regarding the system. For any support contact your local distributor first or DEWETRON directly. For Asia and Europe contact:... -
Page 60: Troubleshooting
` Check overall cable length. The cable length must not exceed 1.8 m (6 ft)! If you are using a USB 3.0 Type-C adapter, do not exceed overall cable length of 1.8 meters (6 ft) and check if the adapter works properly. Two TRIONet units are daisy-chained and implemented into an existing company network. Only one TRIONet is found. - Page 61 Two or more TRIONet units are connected to a laptop/PC and found in DEWETRON Explorer but unfortunately measuring in OXYGEN fails. ` Check if there has been a demo system created in your DEWETRON Explorer and remove it. OXYGEN cannot make any differences between virtually created demo systems and physically connected instruments. The connected TRIONet units are awaiting a clock signal from the virtually created demo system (which will not happen) and will not run in OXYGEN.
-
Page 62: Certificate Of Conformity
Certificate of conformity Manufacturer DEWETRON GmbH Address Parkring 4 8074 Grambach, Austria Tel.: +43 316 3070-0 Fax: +43 316 3070-90 Email: sales@dewetron.com http://www.dewetron.com TRIONet Name of product Kind of product Data acquisition front-end The product meets the regulations of the following EC-directives:... - Page 63 Notes TRIONet • Technical reference • Printing version 1.0.7 • October 15, 2021...
Need help?
Do you have a question about the TRIONet and is the answer not in the manual?
Questions and answers