Advertisement

Quick Links

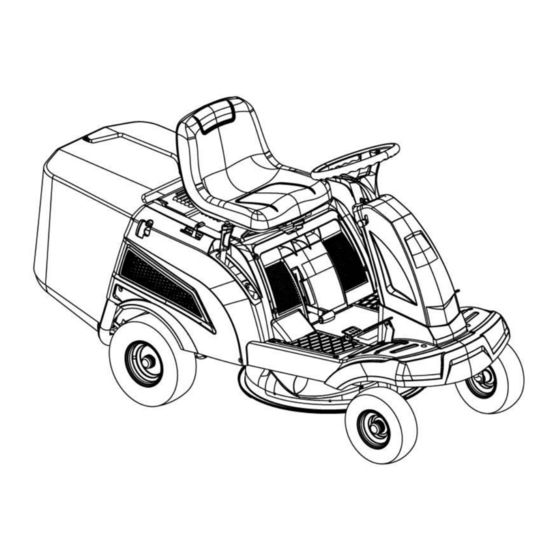
COBRA GARDEN TRACTOR
OWNER'S MANUAL
MODEL:
LT62MRL (TRM162-L224)
LT62HRL (TRM162H-L224)
WARNING!
When using the machine the safety rules must be followed. For your own safety and bystanders please read these instructions before
operating the machine. Please keep the instructions safe for later use.
Cobra Garden Machinery
Henton and Chattell Ltd., London Road, Nottingham NG2 3HW UK
www.cobragarden.co.uk
1

Advertisement

Table of Contents
loading
Need help?

Need help?

Do you have a question about the LT62MRL and is the answer not in the manual?

Questions and answers

Chris Stone
February 18, 2025

Can you charge battery with 12volt car charger

1 comments:
Mr. Anderson
February 18, 2025

The manual states that the charging voltage for the Cobra LT62MRL battery must not exceed 14.4V and the charging current must not exceed 5A. A 12-volt car charger may work if it meets these specifications. However, it is recommended to use a specifically suitable charger as mentioned in the manual.

This answer is automatically generated

Summary of Contents for Cobra LT62MRL

  • Page 1 COBRA GARDEN TRACTOR OWNER’S MANUAL MODEL: LT62MRL (TRM162-L224) LT62HRL (TRM162H-L224) WARNING! When using the machine the safety rules must be followed. For your own safety and bystanders please read these instructions before operating the machine. Please keep the instructions safe for later use.
  • Page 2 Modifications can be made to the machine without notice and without the obligation to update the manual, although the essential safety and function characteristics will remain unaltered. If in doubt, do not hesitate to contact your dealer. And now enjoy your Cobra garden tractor. AFTERSALES SERVICE This manual gives all the necessary instructions for using the machine and carrying out basic maintenance.
  • Page 3: Table Of Contents

    TABLE OF CONTENTS 1. SAFETY ..........................4 2. IDENTIFICATION OF THE MACHINE AND COMPONENTS ............8 3. UNPACKING AND ASSEMBLY ................... 10 4. CONTROLS AND INSTRUMENTS ..................11 5. CHECKS BEFORE USE INSTRUCTIONS ................17 6. OPERATING THE RIDE-ON MOWER ................. 19 7.
  • Page 4: Safety

    1. SAFETY 1.1 HOW TO READ THE MANUAL Some paragraphs in the manual containing important information regarding safety and operation are emphasised in the following ways. NOTE IMPORTANT These give details or further information on what has already been said, in the aim to prevent damage to the machine. Non-observance will result in the risk of injury to oneself or others Non-observance will result in the risk of serious injury or death to oneself or others Positions refer such as “front”, “back”, “left”...
  • Page 5 PREPARATION While mowing, always wear sturdy footwear and long trousers. Do not operate the equipment barefoot or wearing open sandals. Thoroughly inspect the area where the equipment is to be used and remove all objects which can be ejected from the machine, such as twigs, branches, stones, and other debris. DANGER! Petrol is highly flammable: –...
  • Page 6 – go into neutral and apply the parking brake; – stop the engine and remove the ignition key. 10) Disengage the blades, stop the engine and remove the ignition key: – before clearing blockages or unclogging the collector channel; – before cleaning, checking or servicing the machine; –...
  • Page 7 Warning: No step on the deck or discharge guard. Danger: Risk of overturning on steep slopes Warning: Do Not Step Do not use the machine on slopes with a gradient greater than 8 degrees (15%). Danger: Ejected Objects Always operate with the grass catcher or discharge guard in place Danger: Risk of Injury Keep bystanders away...
  • Page 8: Identification Of The Machine And Components

    2. IDENTIFICATION OF THE MACHINE AND COMPONENTS IMPORTANT The lawnmower must always be used with utmost caution. So that safety precautions and operating instructions are always readily on hand, labels have been affixed to the machine showing pictographs illustrating the main operating precautions. The labels, according to applicable safety standards, are considered an integral part of the machine, the user is therefore responsible for replacing them in the event they become detached or illegible.
  • Page 9 COMPONENT / PARTS DESCRIPTION 13 Lever for grass catcher 21 Cable starter handle 14 Throttle lever with choke 22 Rear wheels, driven 15 Ignition lock 23 Discharge channel 16 Locking lever for brake/clutch pedal 24 Bypass lever 17 Forwards pedal 25 Fill level sensor 18 Reverse pedal 26 Engine cover...
  • Page 10: Unpacking And Assembly

    3. UNPACKING AND ASSEMBLY For storage and transport purposes, some components of the machine are not installed in the factory and have to be assembled after unpacking. Follow the instructions below: The machine is supplied without engine oil or fuel. Before starting the engine, fill with oil and fuel following the instructions given in the engine manual.
  • Page 11: Controls And Instruments

    CONTROLS AND INSTRUMENTS...
  • Page 15 4.1 THROTTLE LEVER (Fig. 3A.) Adjusting the throttle will change the speed of the ride-on mower. This regulates the engine revs and speed. The positions are indicated on a label showing the following symbols: «CHOKE» cold starting «SLOW» for minimum engine speed «FAST»...
  • Page 16 4.4 MANUAL GEARBOX OPERATION [SELECT DRIVING SPEED] 4.4.1 Operating the manual transmission (Fig. 3, 5, 7) The manual gearbox transmission of the ride-on mower has four forwards gears and one reverse gear. The gears can be selected using a selector lever (Fig 3.B and Fig. 7.2) on the left of the operator's seat, according to the required driving speed.
  • Page 17: Checks Before Use Instructions

    CHECKS BEFORE USE INSTRUCTIONS STOP – Danger – Only operate the ride-on once fully assembled – follow the assembly instructions - Ensure the assembly has been completed, the oil level is correct and safety devices operate correctly before use. CHECKING THE MOWER CUTTING MECHANISM Wear heavy duty gloves and proceed with care.
  • Page 18 The ride-on should be parked on a firm and level ground and remove the ignition key. The tyre should be allowed to cool down for about an hour after use. Only measure the tyres when cool. Measure the tyre pressures carefully. The tyre pressures should be 1.0 –...
  • Page 19: Operating The Ride-On Mower

    5.6.3 Checking the seat contact switch (Fig. 16) The ride-on tractor has a contact switch for the seat (Fig. 16/1), this ensures that the engine cuts off when nobody is on the operator's seat when the mower cutting mechanism is switched on or when the parking brake is not locked. 1.
  • Page 20 6.3 Caution when pushing the ride-on mower (Fig. 03, 19) Danger when pushing on slopes! Caution: Do not push the ride-on on slopes. It is only safe to push the tractor on flat level areas. The tractor may run away on slopes.
  • Page 21 Adjust the driving speed before changing direction so as to maintain control of the ride-on mower at all times and to prevent it from tipping over. 6.5.1 Starting off and stopping with manual Transmission 1. Fully depress the brake/clutch pedal (Fig. 05/1) or the brake pedal (Fig. 06/1) and lock it with the locking lever (Fig. 05/2, 06/2).
  • Page 22 The maximum driving speed is for travelling between areas, it is not intended for mowing. Use 2/3 of the maximum possible driving speed whilst mowing. Normally, the cutting height is 4 - 5 cm. This corresponds to the 2nd or 3rd detent of the height adjustment (Fig. 03/C). Please mow with a higher cutting height if the grass is moist or wet.
  • Page 23 Enabling a higher speed when reverse mowing For reverse mowing at full speed, the reverse pedal can be enabled – even during reverse mowing: 1. During reverse mowing, push the enable button (Fig 21/4) on the right-hand side of the steering column cover downwards. 2.
  • Page 24: Cleaning The Ride-On Mower

    CLEANING THE RIDE-ON MOWER The ride-on mower must be cleaned regularly to ensure optimum function and a long service life. Clean the ride-on mower and the grass collector each time after use to remove dirt and grass debris. Do not use a high-pressure cleaner for cleaning. The water jet from a high-pressure cleaner or a garden hose can damage the electrical system and bearings.
  • Page 25: Maintenance

    DANGER OF CUTTING AND INJURY: When working on the cutters, pay attention to the sharp blades. Wear heavy duty gloves. - Replace parts with genuine parts from a Cobra dealer - Contact a service dealer for maintenance and servicing Maintenance schedule The following tasks may be carried out by the user independently.
  • Page 26 * Refer to the operating instructions of the engine manufacturer NOTE - It may be necessary to shorten the maintenance intervals compared to those stated in the table above in case of severe loading and at high temperatures. Lubricating plan Annual lubrication of key components is required.
  • Page 27 Checking the spark plug (Fig. 26, 27, 28) The spark plug must be checked according to the maintenance schedule and replaced if necessary. NOTE - For more detailed information, please refer to the engine instructions NOTE - Allow the engine to cool down before working on the engine. NOTE –...
  • Page 28: Transport

    The starter battery is always supplied from the factory pre-charged. Danger if the starter battery is not handled correctly! Follow the instructions below to avoid risks associated with the battery. - Do not store the starter battery in the immediate vicinity of naked flames, do not burn it or place it on heaters. Risk of explosion.
  • Page 29: Storage

    STORAGE Weather Protection The ride-on mower should be parked where it is protected against the effects of weather, especially moisture, rain and lengthy exposure to direct sunlight. Particularly the UV radiation contained in sunlight can cause plastic parts to fade, and damage them, in the event of long-term exposure.
  • Page 32: Technical Data

    TECHNICAL DATA Ride-on mower LT62MRL LT62HRL Item no. TRM162-L224 TRM162H-L224 Engine Name Loncin Loncin Type 1P75F 1P75F Fuel Type Petrol Engine starting Key Electric Start / Pull Cord Engine speed [rpm] 3,000 Engine output [kW] Displacement [cm Fuel tank capacity [litres] Ride-on mower Max.
  • Page 34: Warranty

    Please Register Your Tractor If your dealer did not collect registration information from you, please take a few minutes and register your purchase with Cobra. You can register by completing and mailing the registration card that should be in the box or by going online to: www.cobragarden.co.uk...
  • Page 35: Ec Declaration

    14 EC-DECLARATION OF CONFORMITY EC Declaration of Conformity We herewith declare, Cobra Garden Machinery Henton & Chattell Ltd, London Road, Nottingham NG2 3HW UK That the following machine complies with the appropriate basic safety and health requirements of the EC Directive based on its design and type, as brought into circulation by us.

This manual is also suitable for:

Lt62hrl

Table of Contents

Save PDF