Table of Contents
Advertisement
Advertisement
Table of Contents
Troubleshooting

Related Manuals for UROVO DT50S

Summary of Contents for UROVO DT50S
- Page 1 USER GUIDE DT50S User Guide...
- Page 2 Note: * This Guide introduced general functions of DT50S. Your PDA device may have different functions wherein or description. * There may be differences between the illustrations in this Guide and the actual product. And the actual product shall prevail.
- Page 3 Disclaimer All the user guides and specifications published by Urovo are correct. In the event of any wrong information, Urovo shall reserve the right to correct such errors but waive rights of liability and claim. Urovo shall not be liable for personal and property safety of users in the following cases: ...
-
Page 4: Table Of Contents
Table of Contents About the Guide ....................1 Chapter 1 Getting Started .................4 1.1 Unpacking .................... 4 1.2 Appearance ..................5 1.2.1 Front Side ..................5 1.2.2 Side ..................... 5 1.2.3 Back Side ..................6 1.3 Installation Guide ................. 6 1.3.1 Instruction of battery ..............6 1.3.2 Instruction of battery replacement .......... - Page 5 2.5.1 Screen Rotation Settings ............18 2.5.2 Sleep Settings ................18 2.6 Sound Settings ................... 19 2.7 Privacy Settings .................. 20 2.8 Date and Time Settings ...............22 2.9 Reset Settings ..................23 2.10 About Devices ...................24 2.11 Scan Settings ..................25 2.11.1 Floating action button .............
- Page 6 3.6.2 File management by media transfer protocol (MTP) ....53 3.6.3 Picture management by picture transfer protocol (PTP) .... 53 3.6.4 Charging mode ................. 54 3.6.5 Disconnection from PC .............. 55 Charter 4 Accessories ..................56 4.1 List of Standard Accessories ............... 56 4.2 List of Optional Accessories ..............
-
Page 7: About The Guide
About the Guide Introduction This Guide offers information on usage of DT50S mobile computer and its accessories. Note: The screens and windows described in this Guide are samples, which can differ from actual ones. Software version To determine the software version of the current device, please touch Settings -System-About Phone. - Page 8 Service information You can visit the official website (enurovo.com) of Urovo Technology Co., Ltd. (hereinafter referred to as Urovo) whenever possible to gain quick network support services: Click the search box and enter corresponding product model to query the machine's configuration information. Click maintenance query...
- Page 9 Model or product name Software type and version number: check the device “Settings- System-About Phone” Thanks for your cooperation! Provision of document feedback If you have any comment, question or advice on this Guide, please e-mail totech@urovo.com 或 service@urovo.com...
-
Page 10: Chapter 1 Getting Started
This chapter describes product information and instruction of device for the first time. 1.1 Unpacking 1 . Please carefully remove all the protective materials around DT50S and keep the device case for storing and transporting the device in the future 2. -
Page 11: Appearance
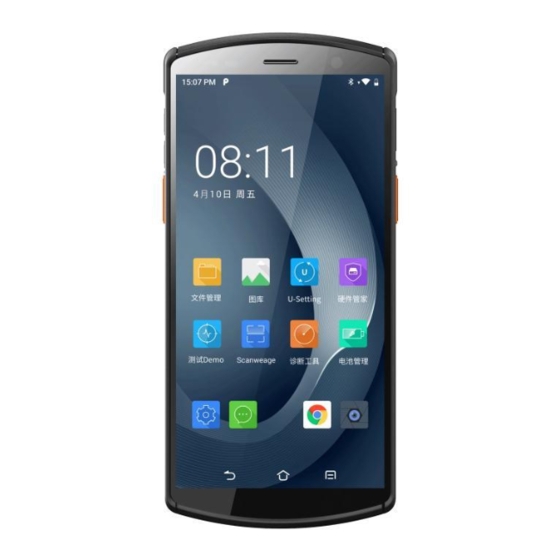
1.2 Appearance 1.2.1 Front Side Figure 1- 1 Front View 1.2.2 Side Figure 1- 2 Top View Figure 1- 3 Bottom View... -
Page 12: Back Side
Figure 1- 4 Left & Right-Side Views 1.2.3 Back Side Figure 1-5 Back View 1.3 Installation Guide 1.3.1 Instruction of battery While installing the battery, please note the direction of installing the battery. Load the front end of the battery in the device's battery slot... -
Page 13: Instruction Of Battery Replacement
and push the bottom of the battery into the device. Please do not push the battery into the device with force. The installed battery in the battery holder should be flat and secure. The installation method is as shown in Figure 6 . -
Page 14: Caution On Battery Charging
6. Push a new SIM/TF Card into the holder to replace the former one. A slight click will indicate that the installation is completed. Figure 1-7 DT50S Card Slot 1.4 Caution on Battery Charging 1. Please do not use or charge the device in any environment with too high or low temperature;... -
Page 15: Charging Method
4. Please do not idle the device for over 3 months; be sure to charge and discharge the battery not used for the moment once per 3 months, where the stored battery should be 60%~70% charged (i.e., 3.8V~3.9V); 5. The lithium battery should be stored somewhere cool, dry and ventilated. -
Page 16: Battery Optimization
1.6 Battery Optimization Please follow the tips below to save the battery power: Clear the background of all apps to enter the power-saving mode In Settings-Automatic On/Off, set DT50S to automatically power on/off. Reduce screen brightness. Turn off all the wireless connections not used for the moment. Touch the airplane mode. -
Page 17: Usage Of Touchscreen
1.7 Usage of Touchscreen Use the multi-touch-sensitive screen to operate the device. Light touch - light touch to: Select any screen option; Enter letters and signs in the screen keyboard; Press any screen button. Light touch press and hold - light touch, press and hold to: Create a home screen shortcut for a certain App;... -
Page 18: Chapter 2 Device Settings
Chapter 2 Device settings 2.1 Access device settings Method 1 Pull down the status bar to open the quick access panel, then tap the settings icon. Figure 2- 1 quick access panel Method 2 In the home screen, pull up the screen to enter the app center interface, then tap the settings icon. -
Page 19: Wlan
2.2 WLAN To enable the WLAN function, please operate as following: After the wireless function is enabled, DT50S will automatically display all the available wireless networks nearby in the wireless network list. To connect to a certain wireless network, please click the network's SSID in the list and tap CONNECT. - Page 20 Figure 2- 3 Wi-Fi Option Bar 3. Enter the password and tap "CONNECT"; Figure 2- 4 Wi-Fi Password and Settings Input Box Check Show password to display the hotspot password to check whether the password input is wrong;...
- Page 21 Check Advanced options for advanced settings, including agent and static IP settings. Figure 2- 5 Wi-Fi Static IP Settings Check whether connection is done: ‘ Connected ’ indicates that connection is done, Click the network to view the network details; Figure 2- 6 Wi-Fi Connected...
-
Page 22: Wwan
DT50S supports a wide range of 4G networks . If failed to connect to WWAN, please follow as below: 1. Check local network signal intensity 2. - Page 23 3. Tap Device name can change visible name to another; Figure 2- 7 Bluetooth settings 4. Tap the device to be connected and enter PIN code for verifying pairing or request for entering PIN code. Figure 2- 8 Bluetooth Pairing...
-
Page 24: Display
Note: rotation is not available for the home screen interface. 2.5.2 Sleep Settings User may make DT50S sleep if not using it for a moment. As DT50S is in the sleep status, user may directly press the power key to wake up the screen and unlock to back to the program interface. -
Page 25: Sound Settings
Figure 2- 9 Screen timeout 3. Select a sleep time 2.6 Sound Settings To adjust the volume of the device, please follow as below: 1. Press the volume key to regulate media volume settings. Slide up or down the volume icon to set the volume; 2. -
Page 26: Privacy Settings
Figure 2- 10 Media Volume Settings 3. Select Settings-Sound to open the sound settings interface for setting the media volume, call volume, ringer volume, alarm volume as well as ringtone, alarm tone, other notification tones, or vibration, etc. Figure 2- 11 Sound Settings 2.7 Privacy Settings To view and change the permissions for your application, please follow as bellow:... - Page 27 1. Open“Settings-Privacy-Permission manager”; Figure 2- 12 Privacy Setting page 2. Click the permissions you want to view or modify (take SMS permissions as an example); Figure 2- 13 Permission manager 3. You can view the applications that have been allowed or denied this permission and click the application you want to modify;...
-
Page 28: Date And Time Settings
4. You can modify whether the application allows SMS permission. Figure 2- 15 SMS permission 2.8 Date and Time Settings As DT50S is networked, the system will automatically update the time and date. Users need set the time zone only. If time is not updated,... -
Page 29: Reset Settings
please check whether the device is networked or whether the current WLAN supports the network time protocol (NTP). Where manual settings are needed, please take the following steps: 1. Open“Settings-System-Date & time”; 2. Disable Use network-provided time; 3. Modify time and back. Figure 2- 16 System Time Settings 2.9 Reset Settings Restore Device is a built-in restoration toolkit that enables users to... -
Page 30: About Devices
Erase All Data (factory reset) Figure 2- 17 Reset options 2.10 About Devices Open“Settings-About phone”, to view information of this Terminal Device. SIM status——view carrier, signal strength, IMEI and other information Device ID——display the device's unique identifier Model——view the device's model and SN IMEI——view IMEI1, IMEI2 and MEID information Android version——view the device's Android version IP address——display the device's IP address... -
Page 31: Scan Settings
Scanning engine may differ from each other in the settings interface. N6603 is taken as example for illustration herein. For more details, please contact Urovo's technical staff for instruction. 2.11.1 Floating action button Suspension button: Open the virtual key scanning tool on the desktop--USCAN, which is available for dragging at will and touching to simulate the key scanning function;... -
Page 32: Keystroke Output
scanning laser or supplementary image light will not go out after decoding. Instead, decoding will sustain; Manual mode-Trigger release or Time-out : manually trigger the scanning function. Press the scanning key and laser light or supplementary light will be shown.Release the key and the light will go out. - Page 33 Figure 2- 20 keystroke output Keyboard type – options include Auto text mode、Soft keyboard 、 Always Physical keyboard, Such options may cause a difference in scanning results. Please select with caution. Auto text mode: If a focus input box arises in any app interface in the foreground, it will directly show all the data, otherwise the device will output scanning results character by character through keyboard simulation;...
-
Page 34: Reader Params
Action key character – None、Carriage return 、Line feed 、 Tab, Add operational key characters behind scanning results through keyboard simulation. None: no operation Carriage return: add an enter behind scanning results through keyboard simulation; Line feed: add an OK operation behind scanning results through keyboard simulation;... - Page 35 Figure 2- 22 Chinese Code Type Beam timer – laser duration for failing in single scanning, range of 500-10000ms, 5000 ms by default; Linear code type security level – set the check level to lower the error rate. The higher the level is, the more accurate it will be but the slower decoding per time will be;...
- Page 36 Illum/Aimer Off: turn off illumination / aimer light; Aimer Only: turn on aim light only; Illum Only: turn on illumination only; Alternating: turn on illumination and aim light in alternation; Concurrent: turn on illumination and aim light at the same time; Figure 2- 24 Lights Configuration Exposure Mode: auto/on.
-
Page 37: Basic Data Formatting
2.11.6 Basic data formatting Upon access of bar codes, the system may be available for additional functions: Formatting, Prefix, Suffix, Formatting, Substitute, Delete Non-printing Control Character, App Identifier, or Code Id Type. Figure 2- 25 Basic data formatting 1. Tap Label Formatting and select the additional formatting type; Figure 2- 26 Append formatting settings 2. - Page 38 Figure 2- 27 Edit Suffix/prefix Select the default type from the drop-down list box or define any character as the prefix/suffix; Figure 2- 28 Edit Suffix/prefix 3. Replace: select the mode and modify the former character to be substituted and the substitute character and set the value of the substituted and that of substitute.
-
Page 39: Scanwedge Profiles
5. App Identifier: select the mode and add an app identifier to some bar codes, e.g., Code 128; 6. App Delimited Identifier: select the mode and set "()" as the app delimited identifier by default, which may be substituted by any other identifier;... - Page 40 2. New scan settings can be created and applications can be associated to this profile, as follows: (a)Click on the top right option and select "New profile"; (b)Name the new scan configuration; (c)Touch "Associated Apps”; (d)Touch "Associate more app"; (e) Select the app you want to associate with.
-
Page 41: Feature Settings
Figure 2- 31 New Scan Settings 2.13 Feature Settings The following setting switches are available in the system feature settings: Status bar pull down: the default is "on", if disabled, the status bar function cannot be modified. Virtual key: the default is "on", click on the virtual key at the bottom ... -
Page 42: Remap Key
Show scan suspension button: the default is "on", if you do not want to scan the key value of the button to be output in the application, select "Off". Automatic call recording: the default is "off", all call recordings of ... - Page 43 Figure 2- 32 Remap Key 2. Touch“Key Remap”; Figure 2- 33 Key Remap Page 3. Press the physical key for key remapping, the key value and name will be shown;...
- Page 44 Figure 2- 34 Key Remap Page Tap KeyCode, Start Application, Send Broadcast, after finish setting, tap Remap key; Figure 2- 35 Key Remap options 5. View the remapped key list in the Show key remapping list to manage remapped keys;...
- Page 45 Figure 2- 36 Show key remapping list a) Slide a certain option in the list to the left to reset the key to the default settings and clear the key's mapping value; Figure 2- 37 Key Remapping Deleting b) Touch the menu key or settings icon at the top right corner reset the value of each remapped key and restore the default value of each physical key.
- Page 46 Figure 2- 38 Remapped Key Resetting...
-
Page 47: Chapter 3 Application
Slide up or down to view more app icons and touch any app icon to be accessed to open the app. 3.2 App Profile System apps are set forth in the following table. For detailed operation of the software, please contact the technical staff of UROVO for guidance. - Page 48 Calendar-view and manage calendar events. Scanner-test the engine module of scanner, Images can be displayed in real time Scanner-test the engine module of scanner Settings-configure DT50S. Clock-set the alarm and timer Contacts-manage contact information.
- Page 49 U Stage-Allows for fast configuration synchronization of devices. After the first device is configured according to enterprise requirements, the other devices can be configured in a simple and fast manner. Files-list all the files downloaded from the device Photos-view or edit photos in the device and microSD Card Camera-take photos and record videos.
-
Page 50: Enterprise Launcher
Google Play-Allows users to browse, download and use applications published by Google Keep Notes-for easy creation of articles, pictures, voice notes, and timely uploading to the cloud for saving Play Store-Used to find the latest Android apps, games, movies and more RFID- Used to scan and identify RFID tags RfidWedge- Allows to modify the default settings for RFID catching and to create new scan settings to be applied to... - Page 51 The enterprise launcher can easily restrict the device to be used by one or more specified applications. It is like a local MDM (Mobile Device Management) and MAM (Mobile Application Management) with reduced functions and has partial Android permissions. User Interface The user interface is the launcher used by the end user of the device, and will display applications that are only available to the user.
- Page 52 Figure 3- 3 menu Administrator login Click the menu key in the upper right corner of the user interface to enter the administrator login interface. To enter the administrator interface, you need to confirm the opening of the enterprise launcher, the login password is blank by default when you log in for the first time, and you can modify the password in the administrator settings interface after logging in.
- Page 53 Administration interface The administrator interface displays all the apps on the device, and you can install, uninstall, and view app details. (1) Long press the application to pop up the selection bar: application details, uninstall. (2) Click the menu button in the upper right corner of the interface to select:administrator settings, device information, and exit enterprise mode.
-
Page 54: U Stage
Figure 3- 6 Administrator setting interface 3.4 U Stage U Stage provides enterprise IT administrators and agents with quick device configuration synchronization. After the first device is configured according to enterprise requirements, other devices can be configured synchronously in a simple way, thus making mass devices reach their working state simply and quickly, facilitating enterprise control, and reducing the errors of human configuration. - Page 55 Export After the standard configuration of the prototype is completed, export the configuration scheme. U Stage provides 3 transmission modes. 1) Upload to UMS If the device has been bound to the UMS, click to automatically upload the current configuration to the UMS - Configure Management page.
-
Page 56: Wifi Diagnosis
After clicking "Import", the scanner will light up (or use the physical scanner key); then scan the QR code generated in the previous step, and reboot after the devices execute the configuration to complete deployment. 3.5 WIFI Diagnosis Real-time WiFi analysis and troubleshooting tools can accurately locate the problem and solve the problem immediately. -
Page 57: Description Of Computer Connected Operation
Filter: Filter function, according to the manually selected conditions, to filter out only the WiFi that meets the conditions, so that you can find the WiFi you need. PING test: Test the connectivity of the current connected network, the packet loss rate and stability. - Page 58 Figure 3- 9 developer mode 3. Open “Settings-System-Advanced-Developer options” , Enable USB Debugging to enter the debugging mode; Figure 3- 10 USB debugging Insert one end of the device’s USB cable to the device and the other to the PC’s USB port to connect the device to the PC, then a USB enabling popup will be shown.
-
Page 59: File Management By Media Transfer Protocol (Mtp)
Android file transfer app to Mac (please refer to www.android.com/filetransfer). Figure 3- 11 File Transfer 3. At PC end, open My Computer to access DT50S device; 4. Open an internal storage folder or SD card folder; 5. Manager media files needed. -
Page 60: Charging Mode
2. Pull down the status bar to open the notification panel and select PTP in USB Preference to transfer photos to Windows; Figure 3- 12 PTP 3. At PC end, open My Computer to access DT50S device; 4. Open an SD card folder or internal storage folder; 5. Manage picture files needed. -
Page 61: Disconnection From Pc
USB cable in case of loss of data. 1. Find the external device identification in the task bar at the bottom right corner of PC; 2. Right click to select Unplug DT50S Device; 3. Carefully remove the USB cable. -
Page 62: Charter 4 Accessories
Charter 4 Accessories 4.1 List of Standard Accessories Figure 4- 1 Power adapter Figure 4- 2 Type-C USB cable Figure 4- 3 DT50S battery 4300mAh 4.2 List of Optional Accessories Single Charging Cradle: support charging one device and one battery;... - Page 63 Figure 4- 4 Single Charging Cradle 4-Slot Battery Charging Cradle: Support Charging 4 Batteries; LED Charging Status Indicator ; Charging Cradle Adapter Output: 12V/5A. Figure 4- 5 4-Slot Battery Charging Cradle 5-Slot Charging Cradle (5 terminals): Support Charging 5 devices ; ...
- Page 64 Support Charging 4 devices and 4 battery; LED Charging Status Indicator ; Charging Cradle Adapter Output: 12V/10A. Figure 4- 7 5-slot Charging Cradle (4 terminals, 4 batteries) Gun grip: Efficient scanning with trigger button; Comfortable grip. Figure 4- 8 Gun Grip UHF Gun Grip: ...
- Page 65 Figure 4- 9 UHF Gun Grip ID Card Module: Support card types: second-generation resident ID card, Hong Kong, Macao and Taiwan resident residence permit, foreigner permanent residence ID card; Included 1 PSAM holder. Figure 4- 10 ID Card Module 6000mAh Battery: ...
- Page 66 Figure 4- 11 6000mAh Battery Optical Fingerprint Module: 360 ° recognition; Dry/wet, deep/shallow fingerprints identification; FBI mobile ID FAP20 compliance certification from the FBI. Figure 4- 12 Optical Fingerprint Module Hand Strap: Convenient for Mobile operation and carrying Figure 4- 13 Hand Strap Screen Protector: ...
- Page 67 Figure 4- 14 Screen Protector Holster: Lightweight and convenient , easy to carry around; Nylon material, wear-resistant and durable Figure 4- 15 Holster Boot Case: Enhance the protection of device Figure 4- 16 Boot Case Two-tone Protective Shell: ...
- Page 68 Figure 4- 17 Two-tone Protective Shell...
-
Page 69: Chapter 5 Maintenance And Troubleshooting
To ensure that the device does not break down, please abide by the following instructions while using DT50S: Do not scratch the screen of DT50S. While using DT50S, please use a recognized touch pen or any other pen which is fit for touching with point made from plastics. -
Page 70: Troubleshooting
Not use for a while, the display will automatically turn off. Set the duration to DT50S is off DT50S is at inactive state be longer, such as 15 s, 30 s, 1 min, 2 min, 5 min, 10 min or 30 min... - Page 71 The bar code type is not code Set DT50S to accept the checked, or bar code scanned bar code type length is wrong Battery low Check the battery level Precautions: 1.
- Page 72 3. Please use this equipment under the specified temperature of the equipment, as too high or too low ambient temperature may cause equipment failure. 4. Do not disassemble the equipment or its accessories without permission. If the equipment or any of its parts do not work properly, please consult our after-sales service staff or send the equipment to the after-sales service network for inspection and repair.
Need help?
Do you have a question about the DT50S and is the answer not in the manual?
Questions and answers