
Related Manuals for avantor VWR 76289-386


Summary of Contents for avantor VWR 76289-386
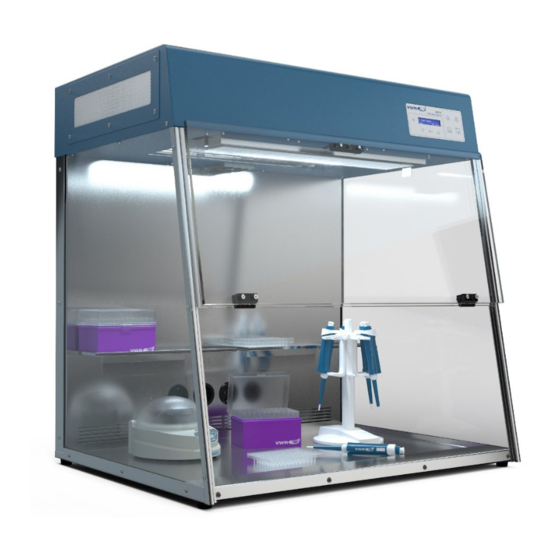
- Page 1 Instruction manual PCR Workstation HEPA ® US Plug: 76289-386 EU Plug: 732-3409 UK Plug: 732-3410 BE-FR Plug: 732-3901 Version 03 Issue 04/2023...
- Page 2 Legal address of Manufacturer Europe VWR International GmbH, Hilpertstraße 20a, 64295 Darmstadt, Germany +49 (0) 6151 3972 0 de.vwr.com UK Importer: VWR International Ltd Hunter Boulevard, Magna Park Lutterworth, Leicestershire, LE17 4XN uk.vwr.com United States VWR International LLC 100 Matsonford Rd Radnor, PA 19087 +1 800-932-5000 www.vwr.com...
-
Page 3: Table Of Contents
Table of contents Introduction ................................5 General warning ..............................5 Safety instructions ............................... 5 Delivery contents ..............................7 Unpacking ................................9 Assembling the PCR Workstation ........................9 Specifications ..............................14 VWR PCR Workstation ..........................14 Power supply ............................... 14 Connections ................................. 15 AC power inlet ............................ - Page 4 Compliance with local laws and regulations ..................... 32 16 Disposal Instruction ............................33 vwr.com I Instruction manual VWR PCR Workstation HEPA ®...
-
Page 5: Introduction
Introduction The VWR PCR Workstation is designed as an ideal environment for the manipulation of DNA and RNA, especially for the set-up of PCR assays. Contamination can lead to false or misleading results which costs time and money. The VWR PCR Workstation minimises the risk of contamination. It provides a 'separate room', e.g. - Page 6 Safety and protection of the user cannot be ensured if the PCR Workstation is used in any manner that is not specified in these instructions. Special notice must be taken of the following: Caution: Dangerous voltage Ensure that the voltage requirements of the PCR Workstation exactly match your local AC power supply.
-
Page 7: Delivery Contents
Delivery contents After receipt of the system, please check if the following items are included in the shipment: 1. Base (1x) 2. Rear panel (1x) 3. Side panel (2x) 4. Front panel (1x) 5. Shelf (2x) 6. Top assembly (1x) 7. - Page 8 8. Screw (31x) 9. Screwdriver (1x) 10. Main cable (1x) 11. Pre-filter (1x) 12. Carbon filter (1x) 13. HEPA filter (1x) 14. Filter holder (1x) vwr.com I Instruction manual VWR PCR Workstation HEPA ®...
-
Page 9: Unpacking
Unpacking Remove the instrument from its packaging and inspect it for signs of damage. If any are discovered, − inform your supplier immediately The instrument must be placed on a stable, level surface and positioned such that air can circulate −... - Page 10 Slide the connection assembly into the cavity of the back panel. Be careful not to damage the blue sensor cables. Warranty for this type of damage is excluded. Slot the back panel onto the base . The connecting link of the base must fit in the back panel .
- Page 11 Step 2 Back panel Remove the protective foil from the side panels. Insert the side panels into the guiding rails at Side panel the base and push up against the back panel within the guiding rails at both sides. Carefully screw the side panels ...
- Page 12 Step 5 Insert the UV tube back in place. Cover the service access of the top assembly Top assembly with the ventilation cover . Screw both parts together with 6 screws . Use the screw-driver . Turn the system around 180° and place it at the Ventilation cover ...
- Page 13 • Place the activated carbon filter with the greased sealing side on the HEPA filter. Pay attention to the correct alignment (air flow). Grease the now above seal generously with petroleum jelly. Insert the air filter holder prepared in this •...
-
Page 14: Specifications
Specifications VWR PCR Workstation Light sources integrated into the top assembly: 2x 25 W 254 nm UV light tubes – for effective surface decontamination • • 1x 8 W 254 nm UV light tube – for decontamination of air during work in UV Air Recirculator 1x 8 W 254 nm UV light tube –... -
Page 15: Connections
Connections AC power inlet AC power switch AC power inlet Fuse Before first use, ensure that the voltage requirements of the PCR Workstation exactly match your local AC power supply. Connect the PCR Workstation to the AC power supply only by the AC power cord delivered with your PCR Workstation. -
Page 16: Ac Power Outlets
AC power outlets 4x AC power outlet The 4 AC power outlets serve as power supplies for devices used inside the PCR chamber. PCR workstation version reference Plug Type Sockets type Voltage Grounded North American 76289-386 Type B (NEMA 5-15) Type B (NEMA 5-15) 120 V Europe... -
Page 17: Operating The Pcr Workstation
Operating the PCR Workstation Use of PCR equipment inside the workstation Shelves are provided for the placing of small tools for storage and decontamination. Power outlets allow use of shakers, rockers and other equipment for PCR experiments inside the PCR chamber. The equipment can be decontaminated between experiments. To operate equipment within the chamber, plug the equipment into the power plug. -
Page 18: Operating The Hepa/Uv System
Operating the HEPA/UV System Push the HEPA button to operate the HEPA/UV filter system. The airflow fan setting can be adjusted in four steps (0.3m/s, 0.5m/s (Factory Default), 0.8m/s, 1.2m/s) by pressing the or button in the start screen. The UV light starts first followed by the airflow fan, to avoid contaminations from inside of the top assembly. -
Page 19: Control Panel Description
Control panel description To scroll or increase selected value To scroll or decrease selected value Enables to select and change the displayed program settings. Several clicks to jump from value to value. Enables to open and close the software menu Switch white light on and off Switch UV light on and off It automatically activates the programme to decontaminate the workspace. -
Page 20: Select Day And Time
Select day and time Press from the home screen to change day and time. Pressing the or button will modify the selected value. Press to go to the next values: hours, minutes and safe. Software menu Press to open the software menu. Pressing the ... -
Page 21: Set Up Auto Decontamination Routine
9.10 Set up Auto Decontamination routine Select “Auto Decontamination” and click on to set up a daily decontamination routine. The following parameters can be selected Start time Weekdays Functions Select “Start time” and press . The first value starts flashing. Pressing the ... - Page 22 Select “Functions” and press . To select the Functions for the auto decontamination, click on the function buttons on the right panel. A blue light will flash if a function is selected. To save the selection press Note: During Auto-Decontamination all selected functions will be activated automatically, after reaching the selected time only the UV Light will be deactivated all other functions (HEPA,...
-
Page 23: Checking And Resetting The Hours Of Duty
9.11 Checking and resetting the hours of duty Select “Duty hours” and click on . The following parameters can be selected UV Surface UV Recirculator UV Supply Air HEPA Filter Carbon Filter Select one parameter and press on to see the time of duty. -
Page 24: Settings
9.12 Settings Select “Settings” and press on . The following parameters can be selected Brightness Contrast Language Time Format HEPA Default Factory Reset Select “Brightness” and press on progress bar starts flashing and indicates the brightness of the display. Press the or buttons to change the value. - Page 25 Press the or buttons to modify the selected format between 24h and 12h am/pm. Press to confirm and store the selected parameter. Press to go back to the Settings parameters. Select “HEPA Default” and press on progress bar starts flashing, indicates the default value of the air flow.
-
Page 26: Uv Tube Intensity
10 UV tube intensity 10.1 Measuring UV tube intensity As UV tubes age, intensity and germicidal destruction rate decreases. We recommend you change the UV tubes after 1000 – 1500 hours of operation (please refer to “Checking and resetting the hours of duty "). - Page 27 Microwatt Microwatt Bacteria Other organisms seconds/cm seconds/cm Bacillus anthracis 8700 YEASTS Saccharomyces S. enteritidis 7600 13200 ellipsoideus B. Megatherium sp. (veg.) 2500 Saccharomyces sp. 17600 B. Megatherium sp. 5200 Saccharomyces cerevisiae 13200 (spores) B. parathyphosus 6100 Brewer’s yeast 6600 B. subtilis 11000 Baker’s yeast 8800...
-
Page 28: Maintenance
11 Maintenance NOTE: Polycarbonate ages in UV light, therefore crazing is considered as a normal process. Crazing will occur with time. Reduce crazing by keeping exposure to UV to a minimum. Crazing may occur within the warranty period and is regarded as normal wear and not covered by the warranty. Polycarbonate panels can be replaced. -
Page 29: Replacing The Uv Air Recirculator Uv Tube
11.3 Replacing the UV Air Recirculator UV tube Locate and remove the six screws on the ventilation cover on the outer back panel of the workstation. Pull away the ventilation cover from the workstation. The tube has two prongs on each end that fit into a socket, then rotate into place. -
Page 30: Replacing The Hepa And Carbon Filter
11.6 Replacing the HEPA and Carbon filter Turn the unit power off and unplug the unit from the power outlet. Lift the front panel and locate the HEPA filter cassette. Unscrew the cassette to remove the HEPA and Carbon filter. Please follow instructions in section “6. -
Page 31: Ordering Information
12 Ordering Information Cat. No. EU Article Description Cat. No. US EU Plug: 732-3409 PCR Workstation UK Plug: 732-3410 VWR PCR Workstation HEPA 76289-386 (US) HEPA BE-FR Plug: 732-3901 76289-388 (US) VWRI732-3411 For HEPA/UV system of VWR PCR Pre-filter Workstation, 1 filter 76289-390 (US) VWRI732-3412 For HEPA/UV system of VWR PCR Carbon filter... -
Page 32: Warranty
14 Warranty VWR International warrants that this product will be free from defects in material and workmanship for a period of two (2) years from date of delivery. If a defect is present, VWR will, at its option and cost, repair, replace, or refund the purchase price of this product to the customer, provided it is returned during the warranty period. - Page 33 16 Disposal Instruction This equipment is marked with the crossed out wheeled bin symbol to indicate that this equipment must not be disposed of with unsorted waste. Instead it's your responsibility to correctly dispose of your equipment at lifecycle end by handing it over to an authorised facility for separate collection and recycling.
- Page 34 VWR International s. r. o. Barcelona Korea Veetee Business Park Tel.: +34 902 222 897 Avantor Performance Materials Korea Ltd Pražská 442 info.es@vwr.com 2F ACE Gwanggyo Tower I, Daehak 4ro 17 CZ - 281 67 Stříbrná Skalice Yeongtong-gu Suwon, Korea 16226 Tel.: +420 321 570 321...
Need help?
Do you have a question about the VWR 76289-386 and is the answer not in the manual?
Questions and answers