Gigaset 5040 Quick Start Guide
- Quick manual (15 pages) ,
- Quick manual (18 pages) ,
- Manual (58 pages)
Advertisement
- 1 Overview
- 2 Safety precautions
- 3 Preparing the telephone for use
- 4 Making calls
- 5 Using Name keys
-
6
Adjusting the telephone
- 6.1 Activating/deactivating the proximity sensor
- 6.2 Activating/deactivating automatic call pickup
- 6.3 Adjusting the ringer volume
- 6.4 Setting the ringer frequency
- 6.5 Setting the handset volume
- 6.6 Mute
- 6.7 Activating/deactivating the mute melody
- 6.8 Adjusting the loudspeaker volume
- 6.9 Activating/deactivating the telephone lock
- 6.10 Baby call (direct call) number setting
- 6.11 Activate/deactivate call duration display
- 6.12 Setting the pause time
- 6.13 Changing the dialling mode
- 6.14 Changing dialling modes during a call
- 7 Operation on a PABX
- 8 Using functions for additional services of public telephone systems
- 9 Appendix
- 10 Authorisation
- 11 Documents / Resources
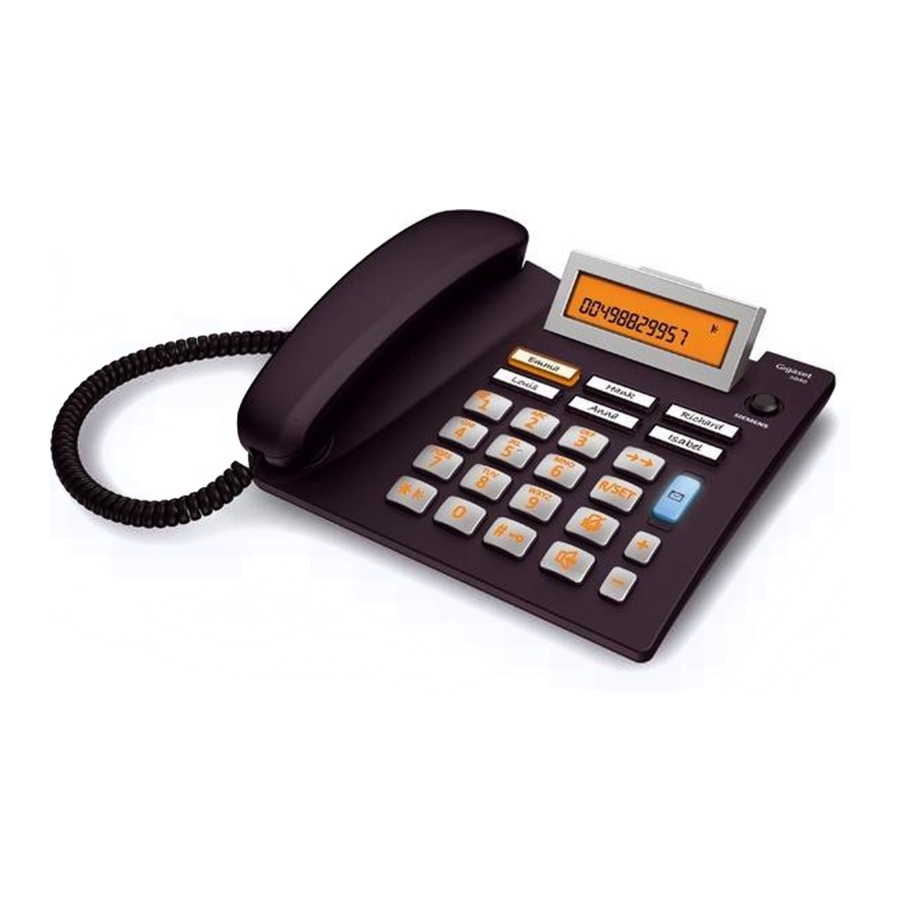
Overview

Keys
- Name keys
- Automatic call pick-up key*
- Star key / Proximity sensor key*
- Hash key / Telephone lock key*
- Recall key / Set key*
- Loudspeaker key (handsfree)
- Mute key
- Redial key
- Calls list key / Visual display of incoming calls
- Loud key / Up key
- Quiet key / Down key
* Keys can have two functions. Hold down key for at least 1 second to use the function marked with an asterisk. If activated successfully you will hear the positive confirmation tone. The corresponding symbol is shown in the display (see "Display symbols").
Display
To get the optimum viewing angle you can adjust the display to an angle of 0° - 60°.
Display symbols
 | |
| In setting mode | |
 | Telephone locked |
 | Baby Call (direct call) activated |
 | Microphone off |
 | Handsfree on |
 | Number indicated in calls list called more than once |
 | Power on |
 | On: Proximity sensor activated Flashing: Proximity sensor and automatic call pick-up activated |
 | Phone number |
 | Call duration |
 | Entry mark when setting (e.g. volume) |
 | Recall key pressed |
 | Pause |
 | Ready for use |
 | No memory content |
 | When trying to connect: telephone locked |
With tone dialling:
 | Star key  pressed pressed |
| - | Hash key  pressed pressed |
Keypad and display illumination
The whole keypad and the display light up
- when a call comes in,
- when you press a key,
- when you lift handset,
- when you approach the telephone and the proximity sensor is on.
Proximity sensor
The proximity sensor detects when you approach the telephone and lights up the keypad and display. A call is automatically answered by speaking handsfree.
Prerequisite
the caller is stored under a Name key and "Automatic call pick-up" is activated.
Note
An automatically answered call is ended like any other call in handsfree mode.
Important numbers under Name keys
For quick access to important numbers, you can save up to 6 numbers under Name keys and label them accordingly. The complete number must be stored (including area code).
Easy to recognise incoming and missed calls
The Gigaset 5040 also indicates visually when you receive a call:
- The Name key flashes if the caller is stored.
- The Calls list key flashes if the caller is not stored under a Name key.
- The calling number is shown in the display if Calling Line Identification (CLI) is possible.
You can also quickly access numbers which called in your absence:
- The Name key is lit up if the caller is stored.
- The Calls list key is lit up if the caller is not stored under a Name key. You can scroll through all missed calls.
Safety precautions
When installing, connecting and operating the telephone, always observe the following precautions:
- Only use the plugs and leads supplied.
- Only connect the connecting lead to the socket/jack provided for that purpose.
- Only connect approved accessories.
- Arrange the connecting lead where it will not cause accidents.
- Position the telephone on a non-slip surface.
- For your safety and protection, the telephone must not be used in bath or shower rooms (wet locations). The telephone is not splash proof.
- Never expose the telephone to sources of heat, direct sunlight or other electrical devices.
- Protect your telephone from moisture, dust, corrosive liquids and vapours.
- Never open up the telephone yourself.
- Do not touch the plug contact with pointed or metallic objects.
- Do not carry the telephone by the leads.
- If you give your Gigaset 5040 to someone else, make sure you also give them the user guide.
![]()
All electrical and electronic products should be disposed of separately from the municipal waste stream via designated collection facilities appointed by the government or the local authorities.
This crossed-out wheeled bin symbol on the product means the product is covered by the European Directive 2002/96/EC. The correct disposal and separate collection of your old appliance will help prevent potential negative consequences for the environment and human health. It is a precondition for reuse and recycling of used electrical and electronic equipment. For more detailed information about disposal of your old appliance, please contact your local council refuse centre or the original supplier of the product.
Preparing the telephone for use
Recommended installation of telephone
- Do not expose the telephone to direct sunlight or other sources of heat.
- Operate at temperatures between +5°C and +40°C.
- Maintain a distance of at least one metre between the telephone and radio equipment, e.g. wireless telephones, wireless pagers or TV sets. Otherwise, telephone communication could be impaired.
- Do not install the telephone in dusty areas as this can shorten the service life of the telephone.
- To clean, wipe with a moist or antistatic cloth only, never with a dry cloth (risk of electrostatic charging and discharge) or harsh cleaning agent.
- Furniture lacquer and polish can be damaged by contact with parts of the unit (e.g. device feet).
Connecting
Insert the short end of the coiled handset cord in the socket provided in the handset and the long end in the a socket marked with an  on the underside of the device. Plug the phone cord into the outlet on the wall Y and the other end into the socket marked
  on the underside of the device. Plug the mains adapter cable into the power supply socket on the underside of the device and plug the adapter itself into a mains socket.
Your telephone is now ready to use.

Apart from the Loudspeaker key, the display and keypad illumination will not work when the power supply is unplugged.
Setting the internal clock

Press the Set key for 2 seconds.
Initiate function.
The current set time is displayed in 24-hour o mode (default setting: 00:00).

Enter the time in hours <hh> and minutes <mm> (24-hour mode).

Hold down the Set key.
If successful you will hear a positive confirmation tone.
Making calls
Dialling a number

Lift handset, dial number.
or...

Dial number, press Loudspeaker key. After 2 seconds the number is dialled.
Lift the handset if you want to talk via the handset.
You can delete wrongly entered digits with  and then enter the correct digit. Picking up or replacing the handset while dialling interrupts the dialling process. Any digits after the 14th digit are moved from right to; left in the display. The last number Redial key
  can be used to insert pauses when dialling, starting from the 2nd digit.
Dial phone number via a Name key, see "Using Name keys".
Dial phone number from the calls list.
Activating/deactivating handsfree talking
With this telephone you can also make calls (handsfree mode) or settings without lifting the handset. The best distance from the microphone for speaking is about 50 cm.
When handsfree talking is active the Loudspeaker key flashes.
Activating during a call via the handset

With the Loudspeaker key pressed replace the handset.
Activating before dialling the number

Before dialling: hold down the Loudspeaker key until you can hear the dialling tone.
Deactivating handsfree talking

Lift the handset during the call.
or...

Press Loudspeaker key.
Ending a call in handsfree mode

Press the Loudspeaker key.
or...

Lift the handset and replace it.
Last number redial
The last 5 numbers dialled (up to 32 digits) are saved automatically. You can retrieve these numbers from the last number redial list and dial them again.
Redialling the last number dialled

Lift the handset and press the last number Redial key.
The last number dialled is redialled immediately.
Dialling from the last number redial list

Without lifting the handset: Press the last number Redial key.
The last number dialled is displayed. (You can leave the; last number redial list at any time by pressing .)

Using the Down/Up key, scroll through the list to the desired number.

Press Loudspeaker key.
After 2 seconds the number is dialled.

Lift the handset if you want to talk via the handset.
Using Name keys
You can store up to 6 phone numbers via Name keys and label the keys with the corresponding names.
You have to enter the complete number including the area code. This also applies to numbers within your own local telephone network.
Programming Name keys

Enter the phone number including area code.

Press and hold down your chosen Name key.
The number is saved.
You can enter up to 32 digits. The digits after the 14th position are moved from right to left in the display.
Labelling Name keys
To label the Name keys:
- Remove the transparent key cover by lifting it off the key.
- Take a strip from the pre-cut paper provided and label it with the desired name.
- Put the strip on the key and put the key cover back in place.

Dialling via a Name key

Press the Name key for the number you want to call. After 2 seconds the number is dialled.
The call will be handsfree.
or...

Lift the handset if you want to talk via the handset.
Answering a call via a Name key
A Name key flashes when a call comes in from the stored phone number.
Automatic call pick-up
Approach the telephone. The call is answered automatically in handsfree mode.
Prerequisite
Proximity sensor and automatic call pickup are activated and "Activating/deactivating automatic call pick-up".
Note
An automatically answered call is ended like any other call in handsfree mode.
If automatic call pick-up is not activated:

Press the Name key if the caller is stored and the Name key is flashing.
or...

Press the Loudspeaker key to talk handsfree.
or...

Lift the handset if you want to talk via the handset.
Returning a call via a Name key
A Name key is lit up if a call from the stored phone number came in.

Press the Name key twice. After 2 seconds the number is dialled.

Lift the handset if you want to talk via the handset.
or...

Press the Name key once. The light goes out without the call being returned.
Adjusting the telephone
Changed telephone settings must be completed by º holding down the Set key  to make them available permanently.
To cancel without saving, e.g. after an incorrect entry, simply replace the handset if it is off the hook or pick it up if it is on the hook. The original setting is then retained.
Activating/deactivating the proximity sensor
The proximity sensor recognises when someone approaches the telephone and automatically activates the display and key lighting.

Hold down the Proximity sensor key to activate/deactivate the function.
The display shows the  symbol when the proximity sensor is activated.
Activating/deactivating automatic call pickup
An incoming call from a number stored under one of the Name keys is automatically answered via the handsfree function when someone approaches the telephone.
Prerequisite
the proximity sensor is activated and the number is stored correctly (including area code) under the name key.
Note
An automatically answered call is ended like any other call in handsfree mode.

Hold down the Automatic call pick-up key to activate/deactivate the function.
When the automatic call pick-up function is activated, the symbol for the proximity sensor  flashes in the display.
Adjusting the ringer volume
The volume of the ringer can be set to one of 4 levels and can also be deactivated completely (default setting: level 4). If the ringtone is deactivated, you can only recognise incoming calls from the display and the flashing Calls list key.
To adjust when the telephone is idle:

Hold down the Set key. Initiate function.

Adjust the volume with the Loud/Quiet key.

Hold down the Set key.
To adjust while the telephone is ringing:
Press before lifting the handset.
The last value set is saved.
Setting the ringer frequency
The frequency (speed) of the ringer can be set to one of three levels (default setting: level 3).

Hold down the Set key. Initiate function.

Press one of the keys 1...3:
1: lowest frequency;
3: highest frequency.

Hold down the Set key.
Setting the ringtone
Ten different ringtones can be set for the ringer (default setting: ringtone 9).
To set when the telephone is idle:

Hold down the Set key. Initiate function.

Press one of the keys 0... 9.

Hold down the Set key.
To set while the telephone is ringing:

Press one of the keys 0... 9.
Setting the handset volume
The volume on the handset can be set to one of 3 levels and saved (default setting: level 1).
Lift the handset and press .
The last value set is saved.
Mute
You can deactivate the telephone's handset and microphone. Then the other party can no longer hear you.

During a call: Press the Mute key
Activate again: Press the key again.
Activating/deactivating the mute melody
You can activate and deactivate the mute melody for the mute (default setting: on).

Hold down the Set key. Initiate function. Press the Hash key.

0: deactivate; 1: activate.

Hold down the Set key.
Adjusting the loudspeaker volume
While in handsfree mode, you can set the volume to one of 7 levels and save it (default setting: 1).

Adjust the volume with the Loud/Quiet key.
Activating/deactivating the telephone lock
The telephone can be locked so that it cannot dial any phone numbers (with the exception of a baby call phone number if set). You can continue to receive incoming calls.

Hold down the Telephone lock key. Press it again to unlock the telephone.
When the telephone is locked, you will see the  symbol in the display.
Baby call (direct call) number setting
The Baby Call function only works when the telephone is locked. If a phone number is set for the Baby Call function it will be dialled when you lift the handset (or press the loudspeaker key) and then press any key (except holding down  ). The telephone does not allow other phone numbers to be dialled, but incoming calls can be received.

Hold down the Set key. Initiate function.

Enter direct call number (max. 32 digits).

Hold down the Set key.
When the Baby Call function is activated and the tele-ƒ { phone is locked, you will see the and symbols in the display.
Deactivating
Baby Call is deactivated when you deactivate the telephone lock.
Deleting a baby call phone number

Hold down the Set key. Initiate function.

Hold down the Set key.
Activate/deactivate call duration display
The telephone can display the approximate call duration in the display (up to 99 min. 59 sec., default setting: on). If the call duration display is activated, the time display begins 8 seconds after the last digit is dialled.

Hold down the Set key. Initiate function. Press the Hash key.

0: deactivate; 1: activate.

Hold down the Set key.
Setting the pause time
If necessary, the pause time of the Pause key  (pause function from second input position) can be changed to 1, 3 or 6 seconds (default setting: 3 seconds).

Hold down the Set key. Initiate function.

0: 1 sec.; 1: 3 sec.; 2: 6 sec..

Hold down the Set key.
Changing the dialling mode
You can choose between two dialling modes:

Hold down the Set key. Press the Hash key.

- Tone dialling.
- Pulse dialling without flash function.

Hold down the Set key.
The dialling mode is saved.
Changing dialling modes during a call
If your telephone is set to pulse dialling and you want to use functions that require tone dialling (e.g. remote access to an answering machine), you can change the dialling mode during a call.

With an established connection: press the Star key.

Enter digits for remote control.
The telephone is reset to the original dialling mode by hanging up the handset.
Operation on a PABX
Enter/delete an external line prefix
If you are using your telephone on a PABX, you may have to save one or more external line prefixes. A dialling pause is set automatically with the external line prefix. You can save up to three external line prefixes.

Hold down the Set key. Initiate function.
If no external line prefix has been set in a location, z appears in the display.
If several external line prefixes are saved, these are displayed next to one another; the current external line prefix to be edited flashes.
If necessary, use the  key to toggle between the external line prefixes displayed, to edit them as follows:
- To delete an external line prefix:
![]()
Hold down the Set key. - To enter an external line prefix:
![]()
Enter a one- to three-digit code. - Enter additional external line prefixes:
![]()
Press the Redial key, enter next external line prefix.
![]()
Hold down the Set key.


Recall key (on a PABX)
During an external call, you can make a recall or divert º the call. To do this, press the Recall key  . .
. .
The subsequent procedure depends on your PABX. By default, the Recall key is preset to a flash time (interruption time) of 90 ms for use of new features on public telephone systems. With a connection to a PABX, it may be necessary to change the flash time (e.g. 600 ms). For how to do this, please refer to the operating instructions for your PABX.
Setting the flash time for the Recall key

Hold down the Set key. Initiate function.

Enter desired flash code:
0: 90 ms (default setting);
1: 120 ms; 2: 270 ms;
3: 375 ms; 4: 600 ms.

Hold down the Set key.
Using functions for additional services of public telephone systems
If you want to use services that are to be triggered with the Recall key, make sure beforehand that the correct flash time is set for the key.
Recall key (in public telephone systems)
In public telephone systems, this key is required to use certain additional services.
The appropriate flash time for the specific country must be set before using the Recall key can be used:
- Belgium, Netherlands, Switzerland: 120 ms (access code 1)
- France, Luxembourg, Portugal, Germany, Greece: 270 ms (access code 2)
- other European countries: 90 ms (access code 0).
Using Calling Line Identification (CLI)
Under the following conditions, the phone numbers of incoming calls are
- shown on the display and
- automatically saved in a calls list:
- Both your network provider and the caller's network provider must offer CLI.
- Both you and the caller must have requested this service (if necessary) from your respective network providers.
If these conditions are met, but a caller has suppressed CLI before making the call, you will see ---P--- on the display instead of the phone number. If the number could not be identified for other (technical) reasons, you will see ---0--- or ---E--- on the display.
Up to 14 digits can be shown on the display. With longer numbers the last 14 digits are displayed.
Calls list
The calls list includes up to 50 entries. If the same subscriber calls more than once, a new entry is not created. Up to 99 repeated calls are displayed in the additional information.
Sequence of list entries
The most recent call is displayed in the first position (position number "01"). Older entries are moved downwards with each new incoming phone number until they are deleted from the list. In the calls list you can do the following:
- You can scroll through the phone numbers displayed,
- query additional information:
- date and time, if this is transferred from the telephone system, otherwise only the time according to the telephone's internal clock,
- frequency of an incoming phone number,
- delete entries,
- dial a displayed phone number directly.
Viewing caller histories and dialling phone numbers
If there are entries in the calls list which you have not yet seen, the Calls list key flashes.
You can retrieve the calls list, scroll through its entries, view additional information about a call and call back directly:

Press the Calls list key.
The phone number of the most recent call appears in the display. Its position number "01" is displayed to the left of the number. If the phone number is too long to be displayed completely, it will be displayed in multiple steps. (You can leave the calls list at any time by pressing  .)
.)

To scroll through the calls list:
Press the Down/Up key.
To view additional information:

Press the Hash key.
The date and time of the displayed entry is displayed with the number of calls (on the right).
Back to the calls list (calling number display):

Press the Hash key again.
Dial the phone number:

Press the Loudspeaker key.
After 2 seconds the number is dialled.
Lift the handset if you want to talk via the handset.
Deleting entries in the calls list
Delete all entries at the same time

Press the Calls list key.

Hold down the Set key, press the star key and hold down the Set key again.
The calls list is deleted and closed.
Delete individual entries

Press the Calls list key.

Scroll to the desired entry.

Hold down the Set key twice.
The entry is deleted.
Activating/deactivating display of the area code
You can set the telephone so that the area code is not displayed for incoming calls. This can be useful, for example, if you cannot see the last digits of a long phone number on the display.
You can deactivate the display for 2 area codes (up to 5 digits each).

Hold down the Set key. Initiate function.
If no number has been set in a storage location  appears in the display.
If both storage locations are in use, these are displayed side by side; the current storage location to be edited flashes.
If necessary, use the  key to toggle between the storage locations displayed to edit them as follows:
Delete a number:

Hold down the Set key.
Enter a number:

Enter a one to five digit number.
Enter another prefix:

Press the last number redial key, enter next prefix.

Hold down the Set key.
Appendix
Care
To clean, wipe with a moist or antistatic cloth only, never with a dry cloth (risk of electrostatic charging and discharge) or harsh cleaning agent.
If your telephone is not working properly
No signal tone:
The tone volume might be set to 0.
Lift handset, no dialling tone:
Is the connecting lead correctly plugged into the telephone and the telephone socket?
Dialling tone audible but telephone will not dial:
The connection is OK. Is the dialling mode set correctly.
PABX only: No connection or incorrect connection when dialling from memory (e.g. redial, speed dial):
Program external line prefix.
The other party cannot hear you:
Have you pressed the Mute key? Press the  key again. Is the plug from the handset cord inserted correctly?
Recall key does not work:
Set appropriate flash time.
The caller's phone number and the calls list are not displayed:
Is the adapter connected.
Can Calling Line Identification be used.
Contacts
If you should encounter any problems when operating the telephone connected to a communication system with analogue network access, please contact the network operator responsible or your dealer.
Authorisation
This device is intended for analogue phone lines in the UK and on the Irish network.
Country-specific requirements have been taken into consideration.
We, Gigaset Communications GmbH, declare that this device meets the essential requirements and other relevant regulations laid down in Directive 1999/5/EC.
A copy of the 1999/5/EC Declaration of Conformity is available at this Internet address:
Documents / Resources
References
Download manual
Here you can download full pdf version of manual, it may contain additional safety instructions, warranty information, FCC rules, etc.
Advertisement


Need help?
Do you have a question about the 5040 and is the answer not in the manual?
Questions and answers