Advertisement
Quick Links
Advertisement

Related Manuals for 3D AEROWORKS PR1 Pond Racer


Summary of Contents for 3D AEROWORKS PR1 Pond Racer
- Page 1 ASSEMBLY MANUAL AND USER GUIDE POND RACER 1200mm By 3D AEROWORKS...
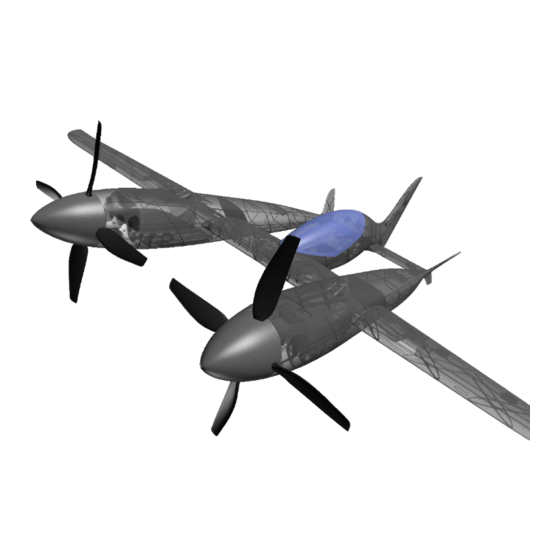
- Page 2 OVERVIEW: This replica of the Pond racer is designed for quick and easy construction and printed using regular PLA. Designed to suit the 3548 900kv motor this model has a significant amount of power and is happy to cruise around at 50% power on 3s. Utilizing 6 channels; Ailerons, Elevator, Flaps, Rudder,Throttle and Landing gear, this model is sure to turn some heads at the local flying field.
-
Page 3: General Specifications
HELP US CONTINUE TO PRODUCE QUALITY MODELS This model has taken many hours of hard work and testing in order to provide a nice flying aircraft. Please do not share it. Please show your appreciation by directing interested parties to the link below. https://cults3d.com/en/3d-model/various/pond-racer-1200mm GENERAL SPECIFICATIONS WINGSPAN:... - Page 5 Different coloured parts indicate sections which can be attached or separated from neighboring components with the use of m2 screws or magnets.
-
Page 6: Required Tools
REQUIRED TOOLS: KNIFE CA GLUE + HOT GLUE LIGHTER SCREW DRIVERS (PHILLIPS AND HEX) SANDPAPER (MEDIUM GRIT) FILE (flat) PLIERS DRILL AND BITS (1mm, 2mm) REQUIRED COMPONENTS: X2 3548 900kv X6 m1.5 linkage stopper X2 11x10 propeller M2 screws (6mm, 10mm, 14mm, 20mm) X2 40amp esc (for 3s operations) X8 M3 screws (25mm) (for landing gear) X2 2200mah 3s 50c LIPO OR SIMILAR... - Page 7 ASSEMBLY INSTRUCTIONS All faces which are to be glued to other parts need to be given a light sanding (scuff the surface) to assist with glue adhesion. Almost all components which are to be joined will have 3mm alignment pin holes printed into the mating faces of the parts.
- Page 8 CENTER FUSELAGE ASSEMBLY Glue Center fuselage sections 1-5 of the fuse together. Glue the sections of the vertical stabilizer together and then to the center fuselage section. Once glued, with a sharp knife, remove the false floor of the battery hatch. (see pic/ highlighted faces) Should look like this!
- Page 9 RUDDER AND TAIL WHEEL ASSEMBLY Glue the sections of the Rudder together and bend up a tailwheel axle to mount into the rudder. Mount the 20-25mm tail wheel and secure it in place with a m1.5 collar. Glue the tail wheel assembly into the Rudder using CA.(the fitment should be tight) Test fit nylon hinges into the Rudder and the Vertical stabilizer, then once happy with the fitment and rotation, glue the Rudder in place with CA.
-
Page 10: Horizontal Stabilizer Assembly
HORIZONTAL STABILIZER ASSEMBLY Glue the sections of the elevator together. NOTE- the elevator horn is on the top side when fitted to the horizontal stabilizer. Test fit the elevators to the horizontal stabilizer using the nylon hinges, then glue them in place. - Page 11 Test fit the horizontal stabilizer to the center fuselage section by securing it with an m2 x 10mm screw. Install the elevator and rudder servo. Use a 1.5mm push rod to connect the elevator and rudder to their respective servo’s through the printed bowden tubes in the fuselage.
- Page 12 CANOPY/BATTERY COVER ASSEMBLY Glue the respective sections of the canopy and battery bay covers together using CA. Glue the magnets into the canopy, battery bay covers, center fuselage and motor pod sections. MOTOR POD ASSEMBLY Glue sections 2-6 of the motor pod together using CA. Leave off section one until after installing the motor.
-
Page 13: Motor Installation
MOTOR INSTALLATION Install the motor using m2 or m3 screws. Check the fitment and spacing of fuse 1 to the spinner backplate and add washers as required. There should be a 1mm gap between the spinner backplate and the front of fuse 1. - Page 14 Install the gear leg into the retract. Install the retract into the gear bay using m3 x 25mm screws. Fit a connecting wire long enough that it will reach the center fuselage section and leave the wire in the motor pod battery bay. GEAR DOOR INSTALLATION Use a 1mm drill bit on the gear door control arm to ensure the tension spring will be able to be installed.
- Page 15 Attached a small length (5mm or less) of small extension spring to a length of braided line. This will be the tension wire which pulls the gear door closed when retracting the gear. Fit the other end of the braided line to an m2 x 8mm screw and install the screw into the gear bay.
- Page 16 CENTER WING ASSEMBLY Glue inner wing (1) sections of the center wings together. Cut an 180mm length of 10mm round carbon tube and insert it through the inner wing sections. Glue inner wing (2) sections to the center wing assembly. ASSEMBLED INNER WING SECTION...
- Page 17 Glue the sections of the inner flap together Test fit the inner flap to the inner wing section using the nylon pinned hinges. Check that the flap does not bind with the center fuselage section or the motor pod through its range of travel.
- Page 18 OUTER WING ASSEMBLY Glue the sections of the outer wing together using CA. Glue the sections of the ailerons together and fit the aileron to the outer wing section. Glue the aileron and outer flap to the wing using nylon hinges. Install the aileron servo to the servo mount plate and screw the mount plate to the outer wing section.
- Page 19 WIRING Wire up the esc’s so that there is a common positive and negative wire connecting the two. This will ensure the motors spin with the same rpm and power reducing the chances of adverse thrust. The wiring tunnel splits into two tunnels inside the center wing section. One forward and one aft.
- Page 20 Connect up the gear, ailerons, flaps, elevator and rudder to the receiver.
- Page 21 FINAL COMPONENT ASSEMBLY Slide the center wing onto the mounts for the center fuse Cut a 35mm length of 3mm skewer and install it into the side of the center fuselage and push it through into the center wing. Secure the center wing to the center fuselage using m2 x 12mm screws.
- Page 22 Secure the motor pods to center wing using m2 x 12mm screws...
- Page 23 Secure the horizontal stabilizer to center fuse and motor pod using m2 x8mm screws.
- Page 24 Insert an 8mm x 500mm round carbon tube through the motor pod and into the center fuselage section. Ensure that the flap torque tube and carbon spar line up as the outer wing is installed.
- Page 25 Secure the outer wing to the motor pod using m2 x 12mm screws. Fit the spinner back plate to the motor shaft. Install the propeller Secure the Spinner in place using m2 x 6mm screws. Be sure to tighten the screws diagonally so that the spinner spins straight.
-
Page 26: Maiden Flight
BALANCING AND CG Fit the batteries using Velcro as required and balance the aircraft on the CG marking points located 32mm aft of the leading edge at the wing root. Balance the model with the landing gear retracted! RANGE OF TRAVEL: MAIDEN FLIGHT: AEROBATIC FLIGHT: Elevator... - Page 27 PARTS LINKS: 3548 900kv https://hobbyking.com/en_us/propdrive-v2-3548-900kv-brushless-outrunner-motor.html?queryID= 0c6168bd15eaaf0dde6d5909e3f425eb&objectID=58899&indexName=hbk_live_products_analytic 11x10 propeller https://de.aliexpress.com/item/1005001718982171.html?spm=a2g0o.order_list.order_list_ main.116.54a65c5fFneeHb&gatewayAdapt=glo2deu 40amp esc (for 3s operations) https://de.aliexpress.com/item/1005004861859210.html?spm=a2g0o.order_list.order_list_ main.106.54a65c5fFneeHb&gatewayAdapt=glo2deu 2200mah 3s 50c LIPO OR SIMILAR (175g) https://www.ampow.com/products/ovonic-50c-2200mah-3s1p-deans-2pcs-lipo-battery?_p os=3&_sid=36799dfeb&_ss=r 9g servo https://hobbyking.com/en_us/turnigytm-tg9d-digital-micro-servo-1-8kg-0-09sec-9g.html?queryID= 5140502f0f9e21619bc511d4a45d6cf1&objectID=41779&indexName=hbk_live_products_analytics 2.5kg retracts 4mm pin https://de.aliexpress.com/item/32780245176.html?gatewayAdapt=glo2deu landing gear leg 120mm long https://de.aliexpress.com/item/4000908270111.html?spm=a2g0o.order_list.order_list_mai n.238.54a65c5fFneeHb&gatewayAdapt=glo2deu Hardened stainless steel rod 4mm (x2 50mm min)
- Page 28 1mm Piano wire https://de.aliexpress.com/item/4000342547852.html?spm=a2g0o.productlist.main.21.44cf 7aa2jfk10j&algo_pvid=17edd28d-76ed-44c7-a6ae-fa240a35227d&algo_exp_id=17edd28 d-76ed-44c7-a6ae-fa240a35227d-10&pdp_npi=3%40dis%21EUR%2112.79%2112.79%2 1%21%21%21%21%4021021d7b16814702034604233d06d0%2110000001408348415% 21sea%21DE%21118672630&curPageLogUid=cGmPYkUyBoll 1.5mm Piano wire (350mm min) https://de.aliexpress.com/item/32654012150.html?algo_pvid=8361ad95-f602-4965-9e1b- 5862b770f1fb&algo_exp_id=8361ad95-f602-4965-9e1b-5862b770f1fb-0&pdp_npi=3%40 dis%21EUR%219.99%219.99%21%21%21%21%21%40211bf31616814702830091640d 0754%2165399088922%21sea%21DE%21118672630&curPageLogUid=aMjHTxQjF8Ol 10mm X 10mm X 2mm Magnet (ROUND) https://de.aliexpress.com/item/1005001530832872.html?spm=a2g0o.productlist.main.39. 20c563d4d8xLqU&algo_pvid=ff8dd49a-ece5-4f55-9126-a55d6cbb6cdf&aem_p4p_detail= 202304140405307959858700496280003924452&algo_exp_id=ff8dd49a-ece5-4f55-9126 -a55d6cbb6cdf-19&pdp_npi=3%40dis%21EUR%213.41%212.59%21%21%21%21%21% 40211be3d216814703305047047d077e%2112000029553597407%21sea%21DE%21118 672630&curPageLogUid=bUSEgYd8m695&ad_pvid=2023041404053079598587004962 80003924452_4&ad_pvid=202304140405307959858700496280003924452_4 16x29mm nylon hinges (OPTIONAL) https://de.aliexpress.com/item/4000509445431.html?spm=a2g0o.productlist.main.1.2863 2f37zcual9&algo_pvid=8dde8809-9866-44f9-8cda-f52d1d9e7f8d&algo_exp_id=8dde8809 -9866-44f9-8cda-f52d1d9e7f8d-0&pdp_npi=3%40dis%21EUR%212.55%211.51%21%21 %21%21%21%40211bc2a016814703627224262d0757%2110000002484729194%21sea %21DE%21118672630&curPageLogUid=kya54TyjMRX5 m1.5 linkage stopper https://de.aliexpress.com/item/33022776233.html?spm=a2g0o.productlist.main.7.5ed750 47HiBvvT&algo_pvid=8fab5415-28b2-4c58-b445-c393d8674214&algo_exp_id=8fab5415-...
- Page 29 M2 screws (6mm, 10mm, 14mm, 20mm) https://de.aliexpress.com/item/1005004079348711.html?spm=a2g0o.productlist.main.5.7 e6516caFkwXPA&algo_pvid=bf6afd00-e2bd-45b1-ab9c-45e1079c8d8d&aem_p4p_detail =20230414040646115799707303840003927264&algo_exp_id=bf6afd00-e2bd-45b1-ab9 c-45e1079c8d8d-4&curPageLogUid=23PtbBxizTOm&ad_pvid=202304140406461157997 07303840003927264_1&ad_pvid=20230414040646115799707303840003927264_1 M3 screws (25mm) (for landing gear) https://de.aliexpress.com/item/4001083281057.html?spm=a2g0o.productlist.main.45.6b1 51a9chPdIkd&algo_pvid=6d31d3d5-1d97-4d37-b8e7-a27e8b7fd9cd&aem_p4p_detail=20 23041404080117278536978500050004022775&algo_exp_id=6d31d3d5-1d97-4d37-b8e 7-a27e8b7fd9cd-44&curPageLogUid=NdfFWIeGqJfy&ad_pvid=202304140408011727853 6978500050004022775_10&ad_pvid=2023041404080117278536978500050004022775_ 10mm round carbon tube (500mm) https://de.aliexpress.com/item/4000407024494.html?spm=a2g0o.productlist.main.29.682 d7ab5hiFi6H&algo_pvid=31948e8e-7091-42e7-bc62-a5e6b77f1ac0&aem_p4p_detail=20 230414040841970929659074950004024367&algo_exp_id=31948e8e-7091-42e7-bc62-a 5e6b77f1ac0-14&pdp_npi=3%40dis%21EUR%215.4%215.4%21%21%21%21%21%402 102176616814705215366974d0767%2110000001678731776%21sea%21DE%21118672 630&curPageLogUid=9ebqbBfCag8S&ad_pvid=202304140408419709296590749500040 24367_3&ad_pvid=20230414040841970929659074950004024367_3 3mm square carbon tube (65mm min) https://de.aliexpress.com/item/1005002475812331.html?spm=a2g0o.productlist.main.1.4 4aa45f1qAn4x6&algo_pvid=936ebbb3-d51b-4453-a004-60b66ebdd10e&algo_exp_id=93 6ebbb3-d51b-4453-a004-60b66ebdd10e-0&pdp_npi=3%40dis%21EUR%213.92%213.92...
- Page 30 25mm foam wheel (tail wheel) https://de.aliexpress.com/item/32649247647.html?spm=a2g0o.productlist.main.1.2f467f7 ceLcM4a&algo_pvid=a82ef8c7-48c9-4e5a-8491-50ada29c522f&algo_exp_id=a82ef8c7-4 8c9-4e5a-8491-50ada29c522f-0&pdp_npi=3%40dis%21EUR%2113.79%2113.79%21%2 1%21%21%21%40211bec8616814705890197999d077c%2112000019585409121%21se a%21DE%21118672630&curPageLogUid=cfVOta6A9NWW Braided fishing line (or similar) https://de.aliexpress.com/item/33018161006.html?spm=a2g0o.productlist.main.15.2fd97b e51GQWrY&algo_pvid=b8b2314c-462b-4cd1-b08e-5871caecc672&aem_p4p_detail=202 304140410046353375629606280003952210&algo_exp_id=b8b2314c-462b-4cd1-b08e-5 871caecc672-14&curPageLogUid=corn7LDB5O35&ad_pvid=2023041404100463533756 29606280003952210_3&ad_pvid=202304140410046353375629606280003952210_3 Small extension spring 0.3mm https://de.aliexpress.com/item/1005003240212391.html?spm=a2g0o.productlist.main.20. 20d14c4e37Mko7&algo_pvid=087e9fd3-aaba-4311-a095-8f6057197290&aem_p4p_detail =202304140411383140391802712440003955724&algo_exp_id=087e9fd3-aaba-4311-a0 95-8f6057197290-19&curPageLogUid=6UYTxFBcNKhl&ad_pvid=2023041404113831403 91802712440003955724_4&ad_pvid=202304140411383140391802712440003955724_4 Extension spring 1.2x30x8mm (for grass runways) https://de.aliexpress.com/item/1005003298102282.html?spm=a2g0o.order_list.order_list_main.56 .54a65c5fz0g38O&gatewayAdapt=glo2deu...
- Page 31 Thank you for supporting us! We hope you enjoy many hours flying your Pond racer. If you have any questions regarding the build process or set-up of your model, please contact us at: Aeroworks3d@outlook.com...
Need help?
Do you have a question about the PR1 Pond Racer and is the answer not in the manual?
Questions and answers