
Subscribe to Our Youtube Channel
Related Manuals for Girard Systems NOVA


Summary of Contents for Girard Systems NOVA
- Page 1 GIRARD SYSTEMS RV AWNING PRODUCTS NOVA Dual pitch, assette patio awning OWNERS MANUAL INSTALLATION, OPERATION, ADJUSTMENT AND REPAIR Rev. 010112 1361 Calle Avanzado, San Clemente, CA 92673 (949) 259-4000 Fax (949) 276-5500...
- Page 3 Girard Systems will not pay for expedited freight in any circumstance. All products are built to customer specifications therefore all returned goods must have prior authorization(RGA#).
- Page 4 This warranty implies no coverage of the arms, or any of the interior components or hardware. This warranty covers the painted surfaces for five(5) years. This only applies to Girard Systems factory “powder coated” finishes, black and white. This warranty does not include OEM/Aftermarket custom painting, or any finish modifications.
- Page 5 Girard Systems. Girard Systems does not warrant that the awning meets the requirements of any laws or regulations of any county, state, municipality or other jurisdiction. The purchaser assumes all risks and liability whatsoever resulting from the use thereof.
-
Page 6: Table Of Contents
Damage caused by wind and rain is not covered by warranty. All awnings must also be closed prior to moving the vehicle for any reason. As an extra safety precaution a visual check that the awning is fully closed is required. Damage caused by failure to comply with these instructions is not covered by warranty. - Page 7 D. Adjusting the Lead Rail……………………………………………………………………………..23 Troubleshooting Guide……………………………………………………………………………….24-25 Warranty Labor Time Guidelines……………………………………………………………………..26 Common Repair Procedures……………………………………………………………………………..27 Motor Replacement………………………………………………………………………………….. 27-29 Fabric Replacement………………………………………………………………………………….. 30-32 Replacement…………………………………………………………………………………… …32-34 Restringing the Crossbar……………………………………………………………………………35-36 Care and Maintenance Guide……………………………………………………………………………37 Technical Drawings NOVA Profile…………………………………………………………………………………………… …..38 NOVA Adjustments…………………………………………………………………………………… …39 NOVA Exploded View………………………………………………………………………………….40...
-
Page 8: Basic System Overview
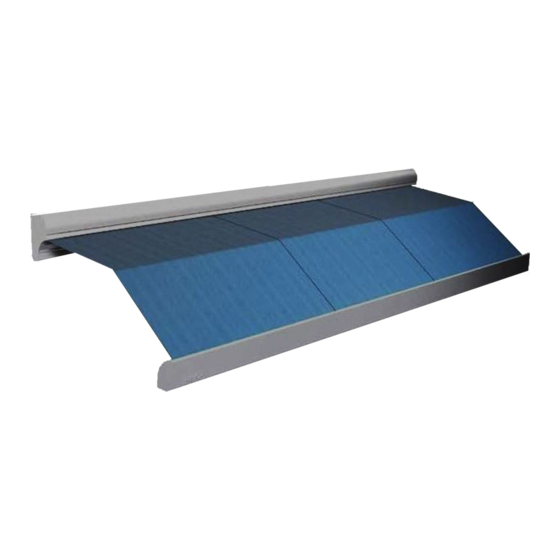
Basic System Overview The NOVA Awning is the newest edition to the Girard Systems product line. The design of the product was tailored to be specific to the requirements of an RV while also adding a new element of style and class for all applications. - Page 9 Your NOVA Awning consists of three main components: 1. Mechanical system – consisting of: • The enclosure (or cassette) protects the awning while closed. • The roller tube which is mounted within the cassette. • The top cover or fabric rolled onto the roller tube and connected to the lead rail that extends from the enclosure when the awning is opened.
-
Page 10: Important Reminders
Shore Power – if connected; Generator Power – if generator is running; Inverter Power – batteries must be charged for inverter operation. Your NOVA Awning is operated using a 110Volt AC motor. However, some Girard Systems awnings are equipped with 12Volt DC motors. NOTICE... -
Page 11: Installation Manual
INSTALLATION MANUAL Product description The NOVA dual pitch awning system provides protection from the sun at a touch of a button. The NOVA awning is built to your specifications with the highest quality materials available, your unit features: • A standard motor that operates with a wireless motor control, or a wireless motor that operates with an integrated motor control. - Page 12 • Caulking gun • (2) tubes silicone caulking • Drill bits: 1/8”, 3/8”, and 7/16” • Allen wrenches: 5mm and 4mm • Open-end wrenches: 10mm, 19mm • Keyhole saw WARNING ALL ELECTRICAL WORK MUST CONFORM TO APPLICABLE ELECTRICAL CODES AND STANDARDS. •...
- Page 13 A. To remove the brackets locate the slide lock that retains the bracket to the housing. (Figure. 1) B. Using a 5mm allen wrench loosen the set screws on the slide locks. C. Once the set screws have been loosened the slide locks should slide freely, clear the slide lock away from the bracket.
-
Page 14: Layout And Mounting The Brackets
A. ROOFMOUNT APPLICATION – NOTE: The clearance needed for roofmount application of the NOVA varies by manufacturer. NOTE: THE LEAD RAIL OF THE NOVA Awning WILL DROP IMMEDIATELY AFTER DEPLOYMENT. The shape of the roof, the depth of installation, type of roofmount bracket used and all other factors should be taken into consideration when installing this product.. - Page 15 Items such as slide rooms, etc. vary from one manufacturer another. Please consult Girard Systems if there are any questions regarding your insatallation. 1. The mounting brackets and hardware used for this application are...
- Page 16 2. Determine the location for the final installation position of the awning, including heighth to be installed. 3. Mounting brackets must be installed within two(2) inches of the ends of the awning. Once you have determined the location of the two end brackets snap a chalk line between the two points to ensure straightness of the installation.
- Page 17 ...
- Page 18 4. To find the location of the smaller center bracket please refer to chart on the previous page.. NOTE: The location of the center bracket must fall directly centered behind the center arms shoulder location. Failure to follow these instructions will void the warranty of this product.
-
Page 19: Mounting The Awning To The Brackets
10. Tighten bolts and then apply silicone caulking to the top edge and both sides of each bracket. 11. On the motor side of the awning drill a 7/16” hole for the awning motor cable to enter the RV near the electrical source. Position the hole 1”... - Page 20 position of the slide lock should be directly under the shoulder of the arm. 4. Once the final location of the slide locks has been achieved, tighten both set screws on each slide lock with a 5mm allen wrench. (FIGURE 4)
-
Page 21: Weather Stripping Installation (Sidewall Application)
D. WEATHERSTRIPPING INSTALLATION (SIDEWALL APPLICATION ONLY) 1. Trim weather stripping to the length of the awning and remove any overhang. 2. Make a small cut in the weather stripping to allow for the motor cord. 3. Apply generous beads of silicone where indicated in Figure 5. 4. -
Page 22: Anemometer (Hardware Installation)
(Figure 5) E. ANEMOMETER – (Hardware Installation Only) Place the anemometer on the roof of the vehicle. The unit can be mounted to a horizontal, vertical, or an inclined surface. The rotor of the anemometer must be pointing down. (Figure 6) Position anemometer as follows: A. -
Page 23: Motion Sensor
3. The anemometer operates remotely by sending a retract signal to the motor control system of the awning. 4. The anemometer must have 12VDC power at all times when the awnings are extended. The minimal power consumption will not affect the charge of the batteries in any appreciable way. -
Page 24: Testing And Adjustments
MOTION SENSOR (Battery) 1. The Motion Sensor will come from the factory pre-programmed and pre- installed. No additional installation is necessary. MOTION SENSOR (Hard wired) 1. The Motion Sensor will come from the factory pre-programmed and pre- installed. 2. A hole must be drilled for the power wire. Locate the wire at the back of the awning cassette and the nearest source of 12VDC power. -
Page 25: Adjusting Motor Limit Switches
FAILURE TO DO SO WILL CAUSE THE MOTOR TO RUN WHEN THE AWNING IS CLOSED. THIS CAN SUBSTANTIALLY REDUCE THE LIFE OF THE MOTOR. 1. The AC motors used in Girard Systems awnings are reversible. Any reference made to the motor limit switches in these instructions are based on the right-hand placement of the motor. -
Page 26: Adjusting Pitch And Arm
holes, turn the black key (or 4mm allen wrench) to make the necessary adjustments. Typically, the motors are labeled with a + or a -. (Figure 7) (Figure 8) 5. Approximately ¼ turn of the adjustment screws represents about 1” of awning movement. -
Page 27: Heighth
NOTE: This adjustment is usually required after an arm replacement. Also, when the elbow of the arm hits the bottom of the casing as the lead rail closes. Tools Required • 19mm (3/4”) open-end wrench • 10mm (3/8”) open-end wrench A. - Page 28 NOTE: Your NOVA Awning will have the pitch adjusted to its highest point. DO NOT TRY TO RAISE THE PITCH, this could result in damaging the awning. 1. Extend the awning about 18” 2. On the arm selected, loosen the two(2) nylon nuts on the upper side of the arm connection using a 19mm open-end wrench.
-
Page 29: Testing The Anemometer
(Figure 10) C. TESTING THE ANEMOMETER (Wind Sensor) 1. Partially extend the awning. 2. Manually employ the anemometer by blowing on the cups or by spinning them. may also press the UP button on the anemometer. 3. At this point the awning should retract; if not, check motor connection for proper polarity. -
Page 30: Troubleshooting Guide
(Figure 11) TROUBLESHOOTING GUIDE Girard Systems recommends that all adjustments be made by authorized service centers. The following guide is intended to help you become familiar with the awning in case of emergency. PROBLEM: The lead rail is binding on the side of the awning casing; i.e. the rail is offset from housing. - Page 31 Awnings Power Main Swtch, locate that switch and make sure it is in the ON position. The 110V AC motor supplied in your NOVA Awning is designed for intermittent use and may cut out temporarily if it has overheated. When this occurs you must allow the motor to cool so that the internal circuit breaker can reset.
-
Page 32: Warranty Labor Time Guidelines
There is no apparent binding of the awning components. SOLUTION: The NOVA Awning is equipped with a manual override motor which has manual limit settings. The IN limit may need to be adjusted to allow the box to be closed tighter. - Page 33 20% restocking fee. All replacement parts will be shipped by carrier via ground. • If you have any questions or concerns about any of the labor functions or the time allowed, please contact Girard Systems’ Warranty and Returns Department at (800)382-8442...
-
Page 34: Common Repair Procedures
COMMON REPAIR PROCEDURES MOTOR REPLACEMENT NOTE: Replacement procedures vary due to motor styles, placement, factory installation methods, and preferences of different vehicle manufacturers. These variations primarily effect how the motors are accessed, replacement operations are generally the same for any situation. A. - Page 35 cord is white with four wires. Notate the points that each of the motor wires connect to. Disconnect all four motor cord wires. 6. Fasten a long “pigtail” extension to the motor cord (string, rope, a small wire, etc. can be used). This will allow you to pull through the new motor wire. Exit the vehicle and pull the motor cord completely through the wall.
- Page 36 3. Make sure the awning roller tube is still seated and connected into the roller tube support bracket at the opposite end of the awning. 4. Rotate the motor and roller tube assembly until the motor-limit switches are accessible. They will be at an approximate 6 o’clock position, The manual overdrive mechanism must have proper downward clearance.
-
Page 37: Fabric Replacement
" (Figure 15) FABRIC REPLACEMENT IMPORTANT NOTE: THESE PROCEDURES REQUIRE THE USE OF A MANUAL CRANK. IF NO MANUAL CRANK IS AVAILABLE THE MOTOR LIMIT SWITCHES MUST BE USED TO CREATE THE SETTINGS. PLEASE REFER TO THE “ADJUSTING MOTOR LIMIT SWITCHES”. USE THE MOTOR SPARINGLY TO PREVENT OVERHEATING. - Page 38 available use the motor limit switches to adjust the OUT limit until the C-shaped channel is accessible 2. Remove all four(3) fabric set screws. There are two(2) on the lead rail and there is one(1) on the roller tube on the opposite side that the motor is located on.
- Page 39 removed. This function is the safest and most easily achieved with four people. Carefully slide the new fabric into the lead rail and roller tube simultaneously. Two people can pull the fabric through the channels while two others support the excess fabric and feed the fabric into the lead rail and roller tube.
-
Page 40: Arm Replacement
1/8’ of gap.) Please refer to the “ADJUSTING MOTOR LIMIT SWITCHES” section of this manual. IMPORTANT NOTE: THE HIGH-TORQUE MOTOR SUPPLID WITH THE NOVA Awning IS DESIGNED TO RUN FOR ONLY FOUR(4) MINUTES PER HOUR. THE MOTOR HAS A BUILT-IN CIRCUIT BREAKER WHICH IS DESIGNED TO ACTIVATE IF THE MOTOR OVERHEATS. - Page 41 " (Figure 18) 1. Support the lead rail and carefully open the awning a few feet. If the elbow is open tie a large rag around it to protect the fabric from the elbow. 2. CAUTION: THERE WILL BE A VERY LOUD NOISE WHEN THE CABLES ARE CUT.
- Page 42 8. If the arm you are replacing has a fixed bolt: Insert the arm into the shoulder, ensure that the fixed bolt on the arm goes through the pitch adjustment assembly, the spacer bushing, and the washer. (These are the components inside of the shoulder) Insert the previously removed bolt and nut.
-
Page 43: Restringing The Crossbar
RESTRINGING THE CROSSBAR This procedure is necessary in the event that the cord inside of the crossbar breaks for any reason. 1. Remove the screws located in the elbow that attach the pins to the arms, set aside for later use. Remove the crossbar. 2. - Page 44 9. Locate the mark that was made for the left arm in step 6. Thread the cord thru the left sides’ end cap pulley leaving that mark on the side that is furthest from you. Make a square knot as close as possible to the location of the mark. Take a pin and place the knot in the right hand location with the slot facing away from you.
-
Page 45: Care And Maintenance Guide
CARE AND MAINTENANCE GUIDE AWNING FABRICS 100% Acrylic Fabric Care Guidelines • Use only mild soap (no harsh chemicals or detergent) • Use only cold to lukewarm water (not hot water) • Air dry only (to prevent shrinkage and damage) STAIN SOLUTIONS •... -
Page 46: Technical Drawings
5. Use sweeping motions to clean the awning. 6. Allow soap to soak in and capture dirt. 7. Rinse thoroughly to remove all residues. AIR DRY ONLY! Pressing, steaming, or machine drying will shrink awning fabric TECHNICAL DRAWINGS NOVA Automatic Lateral Arm Awning Systems... - Page 48 ...
Need help?
Do you have a question about the NOVA and is the answer not in the manual?
Questions and answers