Table of Contents
Advertisement
Advertisement
Table of Contents
Troubleshooting

Related Manuals for ViewSonic VPC190


Summary of Contents for ViewSonic VPC190
- Page 1 ® ViewSonic VPC190 All-in-One PC Model No. : VS13111...
-
Page 2: Table Of Contents
Inserting the card ...14 Removing the card ...14 Using the Optical Disc Drive ...15 Inserting a Disc ...15 Removing a Disc ...15 Chapter 4 BIOS Setup Utility ...16 When to Use the BIOS Setup Utility ...17 Starting BIOS Setup ...17 ViewSonic VPC190... - Page 3 Exit Menu ...28 Chapter 5 System Recovery ...29 When to Use System Recovery ...30 Running ViewSonic Recovery Manager ...30 Use ViewSonic Recovery DVD Disc ...32 Chapter 6 Troubleshooting ...33 Chapter 7 Other Information ...37 Customer Support ...37 Limited Warranty ...38...
-
Page 4: Compliance Information
If the batteries, accumulators and button cells included with this equipment, display the chemical symbol Hg, Cd, or Pb, then it means that the battery has a heavy metal content of more than 0.0005% Mercury or more than, 0.002% Cadmium, or more than 0.004% Lead. ViewSonic VPC190... - Page 5 30 min of inactivity for the computer. Move the mouse or click any button on the keyboard to wake the computer from Sleep mode. ViewSonic VPC190 ® requirements of less than 15 min of...
-
Page 6: Important Safety Instructions
15. Risk of explosion if battery is replaced by an incorrect type. Dispose of used batteries according to the instructions. ViewSonic VPC190... -
Page 7: Declaration Of Rohs Compliance
4. Lead as an allotting element in steel containing up to 0.35% lead by weight, aluminium containing up to 0.4% lead by weight and as a cooper alloy containing up to 4% lead by weight. ViewSonic VPC190 Proposed Maximum Concentration 0.1% 0.1%... -
Page 8: Copyright Information
® is a registered trademark of the U.S. Environmental Protection Agency NERGY (EPA). As an E ® partner, ViewSonic Corporation has determined that this prod- NERGY ® uct meets the E NERGY Disclaimer: ViewSonic Corporation shall not be liable for technical or editorial errors ®... -
Page 9: For Your Records
To meet your future needs, and to receive any additional product information as it becomes available, please register your product on the Internet at: www.viewsonic.com. The ViewSonic Wizard CD-ROM also provides an opportunity for you to print the registration form, which you may mail or fax to ViewSonic. Product Name: Model Number:... -
Page 10: Specifications
Built-in Drive Slot in 8X DVD SuperMulti slim type Wireless LAN 802.11 b/g/n Power Supply 19V DC; 65W power adapter 18.1 x 14.7 x 7.2 inches(WxHxD) Dimension 460 x 374 x 182 mm(WxHxD) Weight 16.5 lb (7.5 kg) ViewSonic VPC190 Description... -
Page 11: Chapter 1 Getting Started
Chapter 1 Getting Started Chapter 1 Getting Started ViewSonic VPC190 Congratulations on your purchase of the ViewSonic VPC 190 All-In-One PC! The VPC 190 All-In-One PC is engineered for powerful computing performance. Unlike conventional computers, this All-in-One PC is portable and can be easily moved anytime, anywhere. -
Page 12: Package Contents
Check the contents of your package. It should contain: All-in-One-PC Power Adapter Driver User Guide Disk NOTE Your keyboard and mouse may vary depending on specific country configuration. ViewSonic VPC190 Stand Power Cord System Recovery Quick Guide User Guide Disk USB Keyboard... -
Page 13: Features
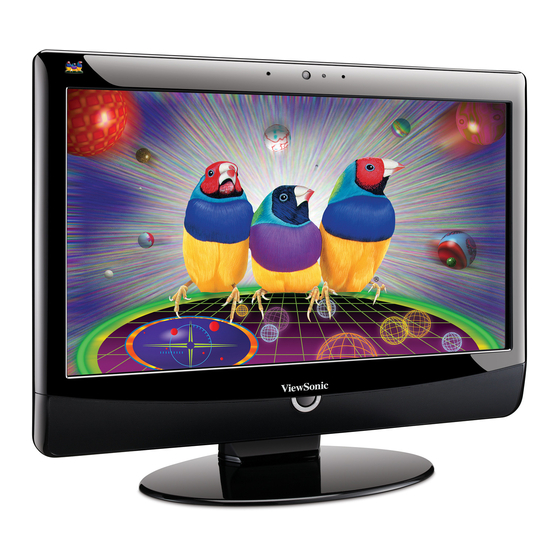
The 48cm/19” (18.5” viewable) LCD display supports an optimal resolution of 1366x768. Mountable For more flexibility options, use a standard VESA mount to attach this All-in-One PC on the wall. Low power consumption This All-in-One PC consumes a maximum of 65 watts of power with active PFC. ViewSonic VPC190... -
Page 14: System Overview
Microphone LCD display Power button LCD Light Adjustment Stereo speakers Stand ViewSonic VPC190 Description Use for taking pictures, recording videos, and video conferencing. Use for chatting and other interactive applications. Provides visual output on a 1366 x 768 resolution display. -
Page 15: Getting Started
Slot RJ-45 LAN jack USB port NOTE VESA mounts are not included in the package and are sold separately. ViewSonic VPC190 Description Used for air convection to prevent the All-in-One from overheating. Do not cover the cooling vent. Mount the All-in-One PC on the wall using VESA mounts. - Page 16 4 in 1 Card Reader USB ports External microphone jack Headphone jack Power jack inlet Optical disk drive ViewSonic VPC190 Description Use to read SD (SD 2.0 included), MMC, MS, and MS Pro cards. Connect USB devices such as a mouse, keyboard, printer, scanner, and other peripherals.
-
Page 17: Chapter 2 Installation
Chapter 2 Installation Chapter 2 Installation ViewSonic VPC190 This chapter will guide you in installing necessary and additional components to maximize the system performance of your All-in-One PC. The following topics are covered: • Attaching the Stand • Tilting the Screen •... -
Page 18: Attaching The Stand
1. Lay the All-in-One PC on flat and stable surface. Use a soft cloth to protect the display screen. 2. Remove the 3 screws located on the bottom of the stand(A) 3. Pull the stand off (B) ViewSonic VPC190... -
Page 19: Connecting Usb Devices
Simply plug the USB cable of the device to the USB port of the All-in-One PC. Connecting a USB Keyboard Plug the keyboard’s USB cable into the USB port of the All-in-One PC. ViewSonic VPC190... -
Page 20: Connecting A Usb Mouse
2. Connect the power cord to the power adapter. 3. Plug the power cord into an electrical outlet. NOTE When disconnecting the power, always unplug the power cord from the electrical outlet first. Use the cord’s head to unplug, never pull the cable. ViewSonic VPC190... -
Page 21: Connecting Audio Components
LED indicators. Activity/Link LED Color Activity/Link Green Green Speed LED Yellow ViewSonic VPC190 LED Status LAN link is not established. On (Steady) LAN link is established. The All-in-One PC is communicating On (Flashing) with other computers on the network. 10 Mbit/sec data rate is selected. -
Page 22: Chapter 3 Operating
Chapter 3 Operating Chapter 3 Operating ViewSonic VPC190 This chapter describes some of the basic All-in-One PC operations. The following topics are covered: • Using the Power Button • Using the Card Reader • Using the Optical Disc Drive • Using the Keyboard... -
Page 23: Using The Power Button
Before removing a memory card, use the configuration utility on the taskbar to stop the memory card operation. Failure to do so may result in data loss. 1. Push the card gently to eject it. 2. Pull the card out from the port. ViewSonic VPC190... -
Page 24: Using The Optical Disc Drive
2. Right click on the disc drive, then select Eject to eject the disc. 3. Gently pull out the disc from the disc tray. WARNING Do not remove the disc while the computer is still reading or playing it. ViewSonic VPC190... -
Page 25: Chapter 4 Bios Setup Utility
Chapter 4 BIOS Setup Utility Chapter 4 BIOS Setup Utility ViewSonic VPC190 BIOS Setup Utility is a program for configuring the BIOS (Basic Input/Output System) settings of the computer. BIOS is a layer of software called firmware that translates instructions from other layers of software into instructions that the computer hardware can understand. -
Page 26: When To Use The Bios Setup Utility
• The settings you select in your operating system might override similar settings in the Setup. To run BIOS Setup, follow the steps below: 1. Turn on the All-in-One PC. 2. When the ViewSonic keyboard. NOTE If Windows operating system starts up before you press the Delete button and you still wish to enter the BIOS Setup, restart the All-in-One PC then follow the same procedures above. -
Page 27: Menu
General Help You can access help from any menu. Press [F1] to view the general help window. It lists the appropriate keys to use to browse and configure BIOS settings. ViewSonic VPC190 Function Move cursor to next/previous page Go to Sub Menu... -
Page 28: Main Menu
Press [Tab] or [Shift Tab] to go to the next / previous field, then use + or - keys to adjust the values. Advanced Menu WARNING If you are not familiar with these settings, it is recommended to use the default configuration for the Advanced Menu options. Setting the wrong values may cause the system to malfunction. ViewSonic VPC190... -
Page 29: Cpu Configuration
For example, you can run multimedia applications or play the latest games and still perform a virus scan in the background. • You can have faster Internet applications. • It is compatible with 32-bit applications and also ready for the future 64-bit technology. ViewSonic VPC190... -
Page 30: Ide Configuration
Select Primary IDE Master and press [Enter] to launch the SATA Primary IDE Mas- ter settings screen. WARNING If you are not familiar with these configurations, it is recommended to allow BIOS to auto detect the devices. Do not manually change these settings to ensure system performance. ViewSonic VPC190... -
Page 31: Usb Configuration
BIOS Setup Utility USB Configuration The USB Configuration sub-menu allows you to configure the USB Configuration and USB Mass Storage Device settings. Select USB Mass Storage Device Configuration and press [Enter] to launch the USB Mass Storage Device Configuration screen. ViewSonic VPC190... -
Page 32: Chipset Configuration
BIOS Setup Utility Power Configuration The Power Configuration sub-menu allows you to configure the mode to restore on AC power loss. Chipset Configuration Chipset Configuration sub-menu allows you to enable or disable PXE booting. ViewSonic VPC190... -
Page 33: Hardware Health Configuration
This sub-menu displays the hardware condition of your All-in-One PC. Boot Menu The Boot menu lets you configure settings and the boot sequence to follow when the system boots up. NOTE The available sub-menu options may vary depending on the installed devices on your All-in-One PC. ViewSonic VPC190... -
Page 34: Boot Settings Configuration
This will decrease the time needed to boot the system. • Quiet Boot: When disabled, the normal POST (Power On Self Test) messages are displayed when the system boots up. When enabled, ViewSonic logo is dis- played instead. • Bootup Num-Lock: Turn the “Power-on state for Numlock” on or off. -
Page 35: Security Menu
BIOS Setup Utility Boot Menu ® When the ViewSonic logo appears, quickly press the F11 button on the keyboard, Then you will enter Boot Menu. It allow you select the boot device. Security Menu The Security menu displays the security settings and lets you set up and change the supervisor or user password. -
Page 36: User Password
NOTE Once you have set the Supervisor Password, you cannot start your computer with- out entering the password. Be sure not to forget the password. Write down your password and keep it safe and private from other people. ViewSonic VPC190... -
Page 37: Exit Menu
Select this option to load fail safe default values. To perform an option, do the following: 1. Select an item. 2. Press [Enter]. A confirmation message appears. 3. Select Ok to proceed or Cancel to cancel the operation. ViewSonic VPC190... -
Page 38: Chapter 5 System Recovery
This function is useful in the event of a system failure or when you forget system passwords. This chapter covers the following topics: • When to Use System Recovery • Running ViewSonic Recovery Manager • Use ViewSonic Recovery DVD Disc... -
Page 39: When To Use System Recovery
Your All-in-One PC uses ViewSonic Recovery Manager for system recovery func- tions. To run ViewSonic Recovery Manager, follow the steps below: 1. Turn on the All-in-One PC. The system boots up and the ViewSonic logo appears. 2. When the screen displays F3..., quickly press the F3 button on the keyboard. -
Page 40: System Recovery
7. After the system has been restored, the following window appears. 8. Click OK to restart your All-in-One PC. 9. After restarting, Windows Setup Wizard appears to help you configure basic settings. 10. Follow the on screen instructions to complete setup and start using your All-in- One PC. ViewSonic VPC190... -
Page 41: Use Viewsonic Recovery Dvd Disc
Use ViewSonic Recovery DVD Disc [Caution] ViewSonic Recovery DVD Disc will destroy all of data in hard disk. 1. Turn on the All-in-One PC. The system boots up and the ViewSonic logo appear. 2. Insert ViewSonic Recovery DVD Disc into DVD-ROM. -
Page 42: Chapter 6 Troubleshooting
Chapter 6 Troubleshooting Chapter 6 Troubleshooting ViewSonic VPC190 This chapter lists some common problems that you may encounter when using your All-in-One PC and describes solutions on how to solve them. -
Page 43: Troubleshooting
• If the CD-ROM requires software, make sure the software is installed according to the program’s instructions. • Moisture condensation may have occurred. Leave the computer for at least 1 hour while the computer is turned on. • Clean the CD-ROM. • Check the speaker volume. ViewSonic VPC190... -
Page 44: My Speakers Have No Sound
Internet access. • The wireless LAN data transfer speed is affected by distance and obstructions between devices and access points. To maximize the data transfer speed, please choose any access point you may be using closer to All-in-One PC. ViewSonic VPC190... -
Page 45: My Microphone Does Not Work
If the ShutDown command does not work properly, follow these steps: •Restart the computer by pressing Ctrl+Alt+Delete. •Press the power switch to turn off the power. •Unplug the All-in-One PC from the power adapter. ViewSonic VPC190... -
Page 46: Chapter 7 Other Information
Renta y Datos, 29 SUR 721, COL. LA PAZ, 72160 PUEBLA, PUE. Tel: 01.222.891.55.77 CON 10 LINEAS Electroser, Av Reforma No. 403Gx39 y 41, 97000 Mérida, Yucatán. Tel: 01.999.925.19.16 Other places please refer to http://www.viewsonic.com/la/soporte/index.htm#Mexico Latin America (Peru) www.viewsonic.com/la/ Macau www.hk.viewsonic.com... -
Page 47: Limited Warranty
ViewSonic VPC products are warranted for (1) year from the first consumer purchase for parts and labor. User is responsible for the back up of any data before returning the unit for service. ViewSonic is not responsible for any data lost. -
Page 48: Other Information
Exclusion of damages: ViewSonic's liability is limited to the cost of repair or replacement of the product. ViewSonic shall not be liable for: 1. Damage to other property caused by any defects in the product, damages based upon inconve-...
Need help?
Do you have a question about the VPC190 and is the answer not in the manual?
Questions and answers