
Subscribe to Our Youtube Channel
Related Manuals for Siemens LE66MAC00


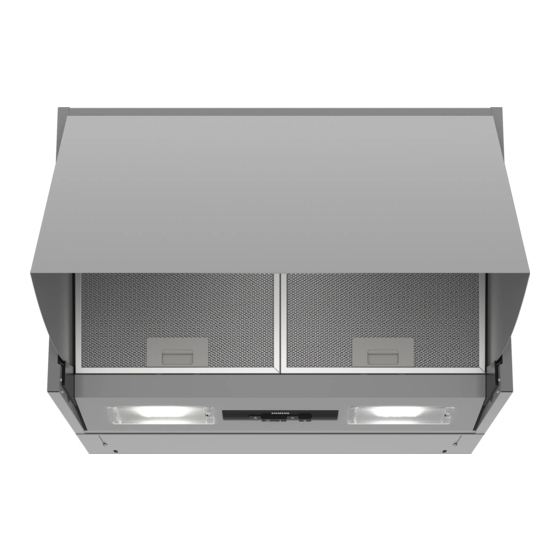
Summary of Contents for Siemens LE66MAC00
- Page 1 LE63MAC00, LE63MAC00B, LE66MAC00, LE66MAC00B Extractor hood EN User manual and installation instructions Register your appliance on My Siemens and discover exclusive services and offers. Siemens Home Appliances...
-
Page 2: Table Of Contents
en Safety Table of contents Do not use the appliance: ¡ With an external timer. INFORMATION FOR USE 1.3 Restriction on user group Safety .............. 2 This appliance may be used by children aged 8 or over and by people who have reduced Avoiding material damage........ 4 physical, sensory or mental abilities or inad- Environmental protection and saving en-... -
Page 3: Safety
Safety en WARNING ‒ Risk of poisoning! WARNING ‒ Risk of fire! Risk of poisoning from flue gases being Fatty deposits in the grease filters may catch drawn back in. Room-air-dependent heat-pro- fire. ducing appliances (e.g. gas, oil, wood or coal- ▶ Never operate the appliance without a operated heaters, continuous flow heaters or grease filter. -
Page 4: Avoiding Material Damage
en Avoiding material damage WARNING ‒ Risk of injury! WARNING ‒ Risk of explosion! Components inside the appliance may have Highly caustic alkaline or highly acidic clean- sharp edges. ing agents in conjunction with aluminium parts in the interior of the appliance may cause ex- ▶... -
Page 5: Operating Modes
Operating modes en 3.2 Saving energy Switch off the lighting if it is no longer required. ¡ When the lighting is switched off, it does not con- If you follow these instructions, your appliance will use sume any energy. less power. Clean or replace the filters at regular intervals. Adjust the fan speed to the amount of steam pro- ¡... -
Page 6: Accessories
Accessories vary from one appliance to another. When Accessories Order number purchasing accessories, always quote the exact product number (E no.) of your appliance. -
Page 7: Cleaning And Servicing
Cleaning and servicing en Clean stainless steel surfaces in the direction of Use special grease solvent for stubborn dirt. You ‒ the finish using a sponge cloth and hot soapy can obtain grease solvents from after-sales service water. or the online shop. Clean painted surfaces using a damp sponge Use a brush to clean the grease filters. -
Page 8: Troubleshooting
en Troubleshooting Rotate the old odour filters and remove them Fitting odour filters ▶ from the holder . Push the new odour filters onto the holder and ro- tate . Install the grease filters. → "Fitting grease filters", Page 7 9 Troubleshooting You can rectify minor faults on your appliance yourself. -
Page 9: Disposal
Disposal en Loosen and remove the bulb cover . Refit the bulb cover. Unscrew the bulb and replace it with a bulb of the Insert the mains plug and switch on the fuse again. same type. 10 Disposal 10.1 Disposing of old appliance This appliance is labelled in accord- ance with European Directive Valuable raw materials can be reused by recycling. - Page 10 en Installation instructions 12.1 Scope of delivery 150 mm After unpacking all parts, check for any damage in transit and completeness of the delivery. 12.2 Appliance dimensions You will find the dimensions of the appliance here 120 mm 12.3 Safety clearances Comply with the safety clearances for the appliance.
-
Page 11: Installation Instructions
Installation instructions en Risk of poisoning from flue gases being 12.4 Secure installation drawn back in. Follow these safety instructions when in- ▶ If an extractor hood with an open-flued heat stalling the appliance. production source is installed, the power WARNING ‒ Risk of poisoning! supply for the extractor hood must be Risk of poisoning from flue gases being provided with a suitable safety switch. - Page 12 en Installation instructions The appliance may fall down if it has not been ¡ The surfaces of the appliance are sensitive. Avoid damaging them during installation. properly fastened in place. ▶ All fastening components must be fixed 12.6 Information on the installation situation firmly and securely in place.
- Page 13 Installation instructions en Flat ducts Use flat ducts with an inner cross-section that corres- ponds to the diameter of the round pipes: ¡ Diameter of 150 mm corresponds to ap- prox. 177 cm². ¡ Diameter of 120 mm corresponds to ap- prox. 113 cm². ¡ Use sealing strips for different pipe diameters. ¡...
- Page 14 en Installation instructions Insert the motor with the opening towards the wall . Preparing the air extraction through the top of Screw the motor in place. the appliance Secure the backflow flaps to the air-pipe connector. Secure the facing on the top of the appliance. Install the exhaust pipe on the air-pipe connector on the top of the appliance.
- Page 15 Installation instructions en Install the odour filter. Attach the drill template to the unit. Drill the holes. Checking the units Place the drill template on the back of the cover Check whether the fitted unit is level and has suffi- cladding. cient load-bearing capacity.
- Page 16 en Installation instructions Screw on the angle bracket. Secure the appliance to the unit. Secure the cover to the bottom of the appliance. Installing the appliance WARNING ‒ Risk of injury! Components inside the appliance may have sharp edges. Wear protective gloves. ▶ Remove the protective film from the rear.
- Page 17 Installation instructions en Seal the joints. Connecting to the power supply Insert the mains plug into the protective contact socket. If a fixed connection is required, follow the instruc- tions in the section → "Instructions for the electrical connection", Page 12. Removing the appliance Disconnect the appliance from the power supply.
- Page 20 EN Manufactured by BSH Hausgeräte GmbH under the trademark licence of Siemens AG Valid within Great Britain: Imported to Great Britain by BSH Home Appliances Ltd. Grand Union House Old Wolverton Road Wolverton, Milton Keynes MK12 5PT United Kingdom BSH Hausgeräte GmbH Carl-Wery-Straße 34...
Need help?
Do you have a question about the LE66MAC00 and is the answer not in the manual?
Questions and answers