Table of Contents
Advertisement
Available languages
Available languages
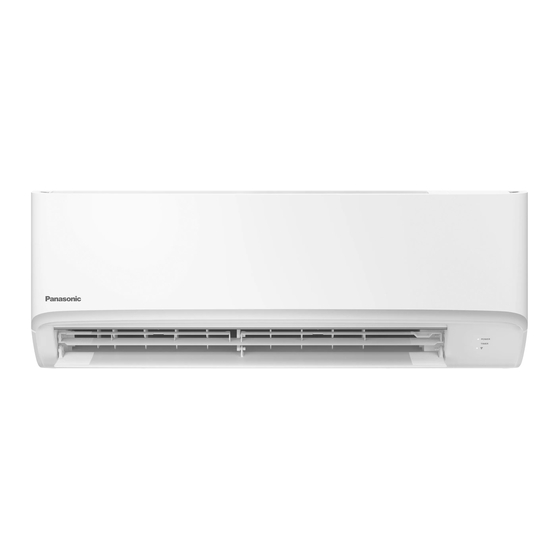
Air conditioner
Installation Instruction
(Simplifi ed Version)
QR code for
Web Manual
https://eu.datanavi.ac.smartcloud.panasonic.com/documents/index.htm?model=TZ20ZKE
•
Please scan the above matrix two-dimensional (2D) barcode and read thoroughly for the detailed instruction.
Panasonic will not be responsible for any accident or damage due to improper installation in anyway not described in the detailed manuals. Malfunction caused by incorrect
installation is also not covered by product warranty.
SAFETY PRECAUTIONS
•
Read the following "SAFETY PRECAUTIONS" carefully before installation.
•
This installation manual must be used together with another installation manual incorporated in applicable outdoor unit as complete full set of instructions.
•
Confi rm the type of gas used before installation.
•
Electrical work must be installed by a licensed electrician. Be sure to use the correct rating of the power plug and main circuit for the model to be installed.
•
The caution items stated here must be followed because these important contents are related to safety. The meaning of each indication used is as below. Incorrect installation due
to ignoring of the instruction will cause harm or damage, and the seriousness is classifi ed by the following indications.
WARNING
This indication shows the possibility of causing death or serious injury.
CAUTION
This indication shows the possibility of causing injury or damage to properties only.
The items to be followed are classifi ed by the symbols:
Symbol with white background denotes item that is PROHIBITED.
Symbol with dark background denotes item that must be carried out.
•
Carry out test running to confi rm that no abnormality occurs after the installation. Then, explain to user the operation, care and maintenance as stated in instructions. Please
remind the customer to keep the operating instructions for future reference.
Do not use means to accelerate the defrosting process or to clean, other than those recommended by the manufacturer. Any unfi t method or using incompatible material may cause product
damage, burst and serious injury.
Do not install outdoor unit near handrail of veranda. When installing air-conditioner unit on veranda of a high rise building, child may climb up to outdoor unit and cross over the handrail
causing an accident.
Do not use unspecifi ed cord, modifi ed cord, joint cord or extension cord for power supply cord. Do not share the single outlet with other electrical appliances. Poor contact, poor insulation or
over current will cause electrical shock or fi re.
Do not tie up the power supply cord into a bundle by band. Abnormal temperature rise on power supply cord may happen.
Do not insert your fi ngers or other objects into the unit, high speed rotating fan may cause injury.
Do not sit or step on the unit, you may fall down accidentally.
Keep plastic bag (packaging material) away from small children, it may cling to nose and mouth and prevent breathing.
When installing or relocating air conditioner, do not let any substance other than the specifi ed refrigerant, eg. air etc mix into refrigeration cycle (piping). Mixing of air etc. will cause abnormal
high pressure in refrigeration cycle and result in explosion, injury etc.
Do not pierce or burn as the appliance is pressurized. Do not expose the appliance to heat, fl ame, sparks, or other sources of ignition.
Else, it may explode and cause injury or death.
Do not add or replace refrigerant other than specifi ed type. It may cause product damage, burst and injury etc.
•
For R32/R410A model, use piping, fl are nut and tools which is specifi ed for R32/R410A refrigerant. Using of existing (R22) piping, fl are nut and tools may cause abnormally high
pressure in the refrigerant cycle (piping), and possibly result in explosion and injury.
For R32 and R410A, the same fl are nut on the outdoor unit side and pipe can be used.
•
Since the working pressure for R32/R410A is higher than that of refrigerant R22 model, replacing conventional piping and fl are nuts on the outdoor unit side are recommended.
•
If reuse piping is unavoidable, refer to instruction "IN CASE OF REUSING EXISTING REFRIGERANT PIPING"
•
Thickness of copper pipes used with R32/R410A must be more than 0.8 mm. Never use copper pipes thinner than 0.8 mm.
•
It is desirable that the amount of residual oil less than 40 mg/10 m.
Engage authorized dealer or specialist for installation. If installation done by the user is incorrect, it will cause water leakage, electrical shock or fi re.
For refrigeration system work, install according to this installation instructions strictly. If installation is defective, it will cause water leakage, electrical shock or fi re.
Use the attached accessories parts and specifi ed parts for installation. Otherwise, it will cause the set to fall, water leakage, fi re or electrical shock.
Install at a strong and fi rm location which is able to withstand weight of the set. If the strength is not enough or installation is not properly done, the set will drop and cause injury.
For electrical work, follow the national regulation, legislation and this installation instructions. An independent circuit and single outlet must be used. If electrical circuit capacity is not enough
or defect found in the electrical work, it will cause electrical shock or fi re.
Do not use joint cable for indoor / outdoor connection cable. Use the specifi ed indoor/outdoor connection cable, refer to instruction CONNECT THE CABLE TO THE INDOOR UNIT and connect
tightly for indoor/outdoor connection. Clamp the cable so that no external force will have impact on the terminal. If connection or fi xing is not perfect, it will cause heat up or fi re at the connection.
Wire routing must be properly arranged so that control board cover is fi xed properly. If control board cover is not fi xed perfectly, it will cause fi re or electrical shock.
This equipment is strongly recommended to be installed with Earth Leakage Circuit Breaker (ELCB) or Residual Current Device (RCD), with sensitivity of 30 mA at 0.1 sec or less.
Otherwise, it may cause electrical shock and fi re in case of equipment breakdown or insulation breakdown.
During installation, install the refrigerant piping properly before running the compressor. Operation of compressor without fi xing refrigeration piping and valves at opened position will cause
suck-in of air, abnormal high pressure in refrigeration cycle and result in explosion, injury etc.
During pump down operation, stop the compressor before removing the refrigeration piping. Removal of refrigeration piping while compressor is operating and valves are opened will cause
suck-in of air, abnormal high pressure in refrigeration cycle and result in explosion, injury etc.
Tighten the fl are nut with torque wrench according to specifi ed method. If the fl are nut is over-tightened, after a long period, the fl are may break and cause refrigerant gas leakage.
After completion of installation, confi rm there is no leakage of refrigerant gas. It may generate toxic gas when the refrigerant contacts with fi re.
Ventilate if there is refrigerant gas leakage during operation. It may cause toxic gas when the refrigerant contacts with fi re.
Be aware that refrigerants may not contain an odour.
This equipment must be properly earthed. Earth line must not be connected to gas pipe, water pipe, earth of lightning rod and telephone.
Otherwise, it may cause electrical shock in case of equipment breakdown or insulation breakdown.
Do not install the unit in a place where leakage of fl ammable gas may occur. In case gas leaks and accumulates at surrounding of the unit, it may cause fi re.
Prevent liquid or vapor from entering sumps or sewers since vapor is heavier than air and may form suffocating atmospheres.
Do not release refrigerant during piping work for installation, re-installation and during repairing refrigeration parts. Take care of the liquid refrigerant, it may cause frostbite.
Do not install this appliance in a laundry room or other location where water may drip from the ceiling, etc.
Do not touch the sharp aluminium fi n, sharp parts may cause injury.
Carry out drainage piping as mentioned in installation instructions. If drainage is not perfect, water may enter the room and damage the furniture.
Select an installation location which is easy for maintenance.
Incorrect installation, service or repair of this air conditioner may increase the risk of rupture and this may result in loss damage or injury and/or property.
Power supply connection to the room air conditioner.
Use power supply cord 3 x 1.5 mm² (3/4 ~ 1.75HP), 3 x 2.5 mm² (2.0HP) type designation 60245 IEC 57 or heavier cord.
Connect the power supply cord of the air conditioner to the mains using one of the following method.
Power supply point should be in easily accessible place for power disconnection in case of emergency.
In some countries, permanent connection of this air conditioner to the power supply is prohibited.
1) Power supply connection to the receptacle using power plug.
Use an approved 15/16 A (3/4 ~ 1.75HP), 16 A (2.0HP) power plug with earth pin for the connection to the socket.
2) Power supply connection to a circuit breaker for the permanent connection.
Use an approved 16 A (3/4 ~ 2.0HP) circuit breaker for the permanent connection. It must be a double pole switch with a minimum 3.0 mm contact gap.
Installation work.
It may need two people to carry out the installation work.
Keep any required ventilation openings clear of obstruction.
PRECAUTION FOR USING R32 REFRIGERANT
•
Pay careful attention to the following precaution points and the installation work procedures.
When connecting fl are at indoor side, make sure that the fl are connection is used only once, if torqued up and released, the fl are must be remade. Once the fl are connection was
torqued up correctly and leak test was made, thoroughly clean and dry the surface to remove oil, dirt and grease by following instructions of silicone sealant. Apply neutral cure
(Alkoxy type) & ammonia-free silicone sealant that is non-corrosive to copper & brass to the external of the fl ared connection to prevent the ingress of moisture on both the gas &
liquid sides. (Moisture may cause freezing and premature failure of the connection)
The appliance shall be stored, installed and operated in a well ventilated room with indoor fl oor area larger than A
ignition source. Keep away from open fl ames, any operating gas appliances or any operating electric heater. Else, it may explode and cause injury or death.
Refer to "PRECAUTION FOR USING R32 REFRIGERANT" in outdoor unit installation manual for other precautions that need to pay attention to.
Piping size
Applicable piping kit
Gas
Liquid
CZ-3F5, 7BP
9.52 mm (3/8")
6.35 mm (1/4")
CZ-4F5, 7, 10BP
12.7 mm (1/2")
6.35 mm (1/4")
CZ-52F5, 7, 10BP
15.88 mm (5/8")
6.35 mm (1/4")
•
Pipe Size Reducer (CZ-MA1PA) for Outdoor Multi Connection CS-TZ42***,
CS-TZ50***, CS-RZ50***
•
Please refer to "CONNECT THE PIPING" section
SELECT THE BEST LOCATION
INDOOR UNIT
Do not install the unit in excessive oil fume area such as kitchen, workshop and
etc.
There should not be any heat source or steam near the unit.
There should not be any obstacles blocking the air circulation.
A place where air circulation in the room is good.
A place where drainage can be easily done.
A place where noise prevention is taken into consideration.
Do not install the unit near the door way.
Ensure the spaces indicated by arrows from the wall, ceiling, fence or other
obstacles.
Indoor unit of this air conditioner shall be installed in a height of at least 1.8 m.
Table A
Capacity W
Max. Refrigerant
Model
Indoor A min (m²)
(HP)
Charge ( )
TZ20***
3/4HP
0.60
Not applicable (*)
TZ25***, RZ25***
1.0HP
0.69
Not applicable (*)
TZ35***, RZ35***
1.5HP
0.75
Not applicable (*)
TZ42***
1.75HP
0.87
Not applicable (*)
TZ50***, RZ50***
2.0HP
1.22
Not applicable (*)
A
= ( m
min
(*) Systems with total refrigerant charge, m
, lower than
c
A
= Required minimum room area, in m²
min
1.84
are not subjected to any room area requirements.
m
= Refrigerant charge in appliance, in
c
* Table "A" only applicable for single split connection.
LFL = Lower fl ammability limit (0.307
* In case of connection to outdoor multi inverter,
h
= Installation height of the appliance (1.8 m for wall mounted)
0
refer to installation manual at outdoor unit.
SF = Safety factor with a value of 0.75
** The required minimum room area, A
the safety factor margin formula below :
MODEL NO. :-
CS-TZ20, TZ25, TZ35, TZ42, TZ50ZKE Series
CS-RZ25, RZ35, RZ50ZKE Series
Required tools for Installation Works
1
Phillips screw driver
2
Level gauge
3
Electric drill, hole core drill (ø70 mm)
4
Hexagonal wrench (4 mm)
5
Spanner
6
Pipe cutter
7
Reamer
8
Knife
9
Gas leak detector
10 Measuring tape
11 Thermometer
WARNING
CAUTION
(m²) [refer Table A] and without any continuously operating
min
Indoor/Outdoor Unit Installation Diagram
( * )
50 mm
or more
(Left and right are identical)
Insulation of piping connections
•
Carry out insulation after
checking for gas leaks and
secure with vinyl tape.
Vinyl tape
Attaching the remote control holder to the wall
Remote control holder fi xing screws
Remote control
Remote control holder
•
This illustration is for
( * ) If holder at the rear of chassis need
explanation purposes only.
to be used to prop up the unit, this
The indoor unit will actually
distance shall be 65 mm or more.
face a different way.
** not less than safety
/ (2.5 x (LFL)
(5/4)
x h
))
2
A
= m
c
factor margin
0
min
The higher value shall be taken when determining
the room area.
/m³)
, shall also be governed by
min
1
INSTALL THE INDOOR UNIT
12 Megameter
For indoor unit installation, please scan the matrix two-dimensional (2D) barcode and refer to the detailed manuals.
13 Multimeter
14 Torque wrench
18 N•m (1.8 kgf•m)
42 N•m (4.3 kgf•m)
2
55 N•m (5.6 kgf•m)
65 N•m (6.6 kgf•m)
CONNECT THE CABLE TO THE INDOOR UNIT
100 N•m (10.2 kgf•m)
15 Vacuum pump
16 Gauge manifold
The power supply cord, indoor and outdoor unit connection cable can be connected without removing the front grille.
1
Install the indoor unit on the installing holder that mounted on
the wall.
2
Open the front panel and grille door by loosening the screw.
3
Cable connection to the power supply through Isolating Devices
(Disconnecting means).
•
Connect the approved polychloroprene sheathed power
supply cord 3 x 1.5 mm² (3/4 ~ 1.75HP) or 3 x 2.5 mm²
(2.0HP), type designation 60245 IEC 57 or heavier cord to
the terminal board, and connect the other end of the cable to
Isolating Devices (Disconnecting means).
•
Do not use joint power supply cord. Replace the wire if the
existing wire (from concealed wiring, or otherwise) is too short.
•
In unavoidable case, joining of power supply cord between
isolating devices and terminal board of air conditioner shall
be done socket and plug rated 15/16 A (3/4 ~ 1.75HP) or
16 A (2.0HP). Wiring work to both socket and plug must follow
to national wiring standard.
Terminals on the outdoor unit
Colour of wires (connection cable)
Terminals on the indoor unit
(Power supply cord)
Terminals on the isolating devices
(Disconnecting means)
Recommended
length (mm)
30
S1
1
a
b
c
Earth Wire
longer than
others AC
wires for
safety reason
Holder
4
Left escapement
Power supply
cord
Isolating Devices
8 Secure fi rmly the power supply cord and connecting cable onto
the control board with the holder.
Do not overtighten holder screw, as this may damage the holder.
9 Close grille door by tighten with screw and close the front panel.
•
Isolating Devices (Disconnecting means) should have
minimum 3.0 mm contact gap.
•
Ensure the colour of wires of outdoor unit and the terminal
Nos. are the same to the indoor's respectively.
Note:
•
Earth wire shall be Yellow/Green (Y/G) in colour and
longer than other AC wires as shown in the fi gure for the
electrical safety in case of the slipping out of the cord
from the anchorage.
3
CONNECT THE PIPING
Connecting The Piping to Indoor
For connection joint of all models
Please make flare after inserting flare nut (locate at
joint portion of tube assembly) onto the copper pipe.
(In case of using long piping)
Connect the piping
•
Align the center of piping and suffi ciently tighten
the fl are nut with fi ngers.
•
Further tighten the fl are nut with torque wrench in
specifi ed torque as stated in the table.
Spanner or
Wrench
Connecting The Piping to Outdoor
Decide piping length and then cut by using pipe cutter.
Remove burrs from cut edge.
Make fl are after inserting the fl are nut (locate at valve) onto the copper pipe.
Align center of piping to valve and then tighten with torque wrench to the
specifi ed torque as stated in the table.
Connecting The Piping to Outdoor Multi
Decide piping length and then cut by using pipe cutter. Remove burrs from cut edge.
Make flare after inserting the flare nut (locate at valve) onto the copper pipe. Align center
of piping to valve and then tighten with torque wrench to the specified torque as stated
in the table.
*
For Gas side piping please refer table and diagram below
Outdoor Multi Combination Model
R32 Model
Installation parts you
CS-TZ20***,
CU-2Z35***,
should purchase ( )
CS-TZ25***,
CU-2Z41***,
CS-TZ35***,
CU-2Z50***,
It is advisable to avoid more
CS-RZ25***,
CU-3Z52***,
than 2 blockage directions.
CS-RZ35***,
CU-3Z68***,
For better ventilation &
CU-4Z68***,
multiple-outdoor installation,
CU-4Z80***,
please consult authorized
CU-5Z90***,
dealer/specialist.
CU-2TZ41***,
Installation plate
CU-2TZ50***,
Bushing-Sleeve ( )
CU-3TZ52***
Sleeve ( )
CS-TZ42***,
CU-2Z50***,
CS-TZ50***,
CU-3Z52***,
Putty ( )
CS-RZ50***,
CU-3Z68***,
(Gum Type Sealer)
CU-4Z68***,
CU-4Z80***,
Bend the pipe as
CU-5Z90***,
closely on the wall as
CU-2TZ50***,
possible, but be careful
CU-3TZ52***
that it doesn't break.
Power supply cord ( )
Cutting and Flaring The Piping
Vinyl tape (wide) ( )
1. Please cut using pipe cutter and then remove the burrs.
• Apply after carrying
2. Remove the burrs by using reamer. If burrs is not removed, gas leakage may be caused. Turn the piping
out a drainage test.
end down to avoid the metal powder entering the pipe.
• To carry out the
drainage test,
3. Please make flare after inserting the flare nut onto the copper pipes.
remove the air fi lters
and pour water into
the heat exchanger.
Saddle ( )
Point down
1. To cut
2. To remove burrs
/ ( SF x LFL x h
)
c
0
INDOOR UNIT
4
Bind all the power supply cord lead
wire with tape and route the power
supply cord via the left side escapement.
5
Connection cable between indoor
unit and outdoor unit shall be approved
polychloroprene sheathed 4 x 1.5 mm²
(3/4 ~ 1.75HP) or 4 x 2.5 mm² (2.0HP)
fl exible cord, type designation 60245 IEC
57 or heavier cord.
6
Bind all the indoor and outdoor
Connection cable with tape and route
the connection cable via the right side
escapement.
7
Remove the tapes and connect the
power supply cord and connection cable
between indoor unit and outdoor unit
according to the diagram below.
S1 2
3
1
2
L
1
N
S1 2
3
OR
L
1
N
S1 2
*
Connection for multi
inverter model (Outdoor
(L) (N)
power supply)
g
a
c
e
b
d
f
30
60
45
40
35
55
Terminal Board
S1
Flip the
panel down
d
e
g
f
Panel
Earth
Wire
1
longer
than
Panel
others
AC wires
for safety
reason
Holder
Right escapement
6
Indoor & outdoor
connection cable
Flip the panel down
until 'click' sound before
Outdoor Unit
connect indoor and outdoor
connection cable
Additional Precautions For R32 Models when connecting by fl aring at indoor side
Ensure to do the re-fl aring of pipes before connecting to units to avoid leaking.
Seal suffi ciently the fl are nut (both gas and liquid sides) with neutral cure (Alkoxy type) & ammonia-free
silicone sealant and insulation material to avoid the gas leak caused by freezing.
Neutral cure (Alkoxy type) & ammonia-free silicone sealant is only to be applied after pressure testing
and cleaning up by following instructions of sealant, only to the outside of the connection. The aim is to
Torque wrench
prevent moisture from entering the connection joint and possible occurrence of freezing. Curing sealant
will take some time. Make sure sealant will not peel off when wrapping the insulation.
Pipe size (refer
to diagram)
Auxiliary pipe
(male side)
Auxiliary pipe
(male side)
(CZ-MA1PA)
Pipe
Handle
Reamer
Bar
Bar
Yoke
Core
Red arrow mark
Clamp handle
3. To fl are
Tape
Power
supply
cord
Tape
Connection cable
WARNING
3
Recommended
This equipment
length (mm)
must be properly
3
refer table below
earthed.
WIRE STRIPPING, CONNECTING REQUIREMENT
Wire stripping
Indoor/outdoor
connection
terminal board
No loose
5 mm or more
strand when
inserted
(gap between wires)
Conductor not
Conductor
Conductor
fully inserted
over inserted
fully inserted
PROHIBITED
PROHIBITED
ACCEPT
RISK OF FIRE
JOINING OF WIRES
MAY CAUSE
WARNING
OVERHEATING AND
FIRE.
Do not joint wires.
OR
OR
OR
Use complete wire without joining.
Use approved socket and plug with earth pin.
Wire connection in this area must follow to national wiring rules.
Do not connect power supply to indoor
and outdoor unit at the same time.
Risk of fi re if wrong connection of power
supply.
CAUTION
Apply neutral cure
(Alkoxy type) and ammonia-free
silicone sealant along the
circumference
Do not overtighten, overtightening may cause gas leakage.
Piping size
Torque
6.35 mm (1/4")
[18 N•m (1.8
f•m)]
9.52 mm (3/8")
[42 N•m (4.3
f•m)]
12.7 mm (1/2")
[55 N•m (5.6
f•m)]
15.88 mm (5/8")
[65 N•m (6.6
f•m)]
19.05 mm (3/4")
[100 N•m (10.2
f•m)]
Liquid side
Hall Union
Flare Nut
Auxiliary pipe
Connection pipe
(male side)
(female side)
Gas side
Hall Union
Flare Nut
Connection pipe
(female side)
Hall Union
Flare Nut
Connection pipe
(female side)
Pipe size reducer (CZ-MA1PA)
Improper fl aring
Inclined Surface
Cracked Uneven
0 – 0.5 mm
damaged
thickness
When properly fl ared, the internal surface of the
fl are will evenly shine and be of even thickness.
Copper pipe
Since the fl are part comes into contact with the
connections, carefully check the fl are fi nish.
ENGLISH
ACXF60-47630
PRINTED IN MALAYSIA
Advertisement
Table of Contents

Related Manuals for Panasonic CS-TZ20ZKE Series


Summary of Contents for Panasonic CS-TZ20ZKE Series
- Page 1 Install the indoor unit on the installing holder that mounted on Bind all the power supply cord lead Panasonic will not be responsible for any accident or damage due to improper installation in anyway not described in the detailed manuals. Malfunction caused by incorrect the wall.
-
Page 2: Unidad Interior
Conecte todos los cables de suministro Panasonic no se hará responsable de ningún accidente o daño debido a una instalación incorrecta en ningún modo descrita en los manuales detallados. Los fallos eléctrico de conexión con cinta y dirija el cable la pared. -
Page 3: Installazione Dell'unità Interna
Legare tutti i fi li del cavo di alimentazione Panasonic non è responsabile di eventuali incidenti o danni dovuti a un’installazione impropria eseguita diversamente da quanto descritto nei manuali. Eventuali Aprire il pannello anteriore e lo sportellino della griglia allentando con con un nastro adesivo e far passare il malfunzionamenti causati da un’installazione non corretta non sono coperti dalla garanzia del prodotto. -
Page 4: Installatie Van De Binnenunit
Plaats de binnenunit op de aan de wand gemonteerde houder. Bind alle stroomdraden van de Panasonic is niet verantwoordelijk voor elk ongeval of schade door een onjuiste installatie op elke manier die niet in de gedetailleerde handleidingen is beschreven. Storingen voedingskabel samen met tape en leid de Open het voorpaneel en het rooster door de schroef los te draaien. -
Page 5: Instalar A Unidade Interior
Instalar e unidade interior no suporte de instalação montado na Una todos os cabos de alimentação A Panasonic não será responsável por qualquer acidente ou danos resultantes de uma instalação incorreta que não seja descrita de maneira alguma nos manuais parede. -
Page 6: Вътрешна Част
Монтирайте вътрешния агрегат върху монтажната стойка, Вържете всички проводници на Panasonic не носи отговорност за злополука или повреда в резултат на неправилен монтаж по никакъв начин, който не е описан в подробните ръководства. монтирана на стената. захранващия кабел с лента и навийте... -
Page 7: Unité Intérieure
Installez l’unité intérieure sur le support d’installation monté sur le mur. Reliez tous les fi ls conducteurs du cordon Panasonic ne pourra être tenu responsable de tout accident ou dommage dû à une installation incorrecte d’une manière non décrite dans les manuels détaillés. Les d’alimentation électrique avec du ruban adhésif Ouvrez le panneau avant et la porte de la grille en desserrant la vis. -
Page 8: Installation Des Innengeräts
Bitte scannen Sie den obenstehenden, zweidimensionalen (2D) Barcode und lesen Sie aufmerksam die detaillierten Anweisungen. Installieren Sie das Innengerät an der an der Wand angebrachten Umwickeln Sie alle Leiter des Panasonic haftet nicht für Unfälle oder Schäden, die von einer unsachgemäßen, nicht in den detaillierten Anleitungen vorgesehenen Installation herrühren. Stromversorgungskabels mit Klebeband und Haltevorrichtung. -
Page 9: Unutarnja Jedinica
Ugradite unutarnju jedinicu na ugrađeni držač koji je montiran Omotajte cijelu glavnu žicu kabela za Tvrtka Panasonic ne odgovara za bilo koju nezgodu ili štetu koja nastane zbog neispravne ugradnje na bilo koji način koji nije naveden u priručnicima s pojedinostima. Osim na zid. - Page 10 İç mekan ünitesini, duvara monte edilmiş olan montaj tutucusu Güç kaynağı kablosunun tüm giriş Panasonic, ayrıntılı kılavuzlarda anlatıldığının dışında uygun olmayan kurulum nedeniule oluşan herhangi bir kaza veya hasardan sorumlu olmayacaktır. Aynı zamanda, üzerine kurun. ve çıkışlarını bantla bağlayın ve güç...
-
Page 11: Εσωτερική Μονάδα
Εγκαταστήστε την εσωτερική μονάδα στη βάσης στήριξης που είναι Δέστε όλα τα αγώγιμα καλώδια παροχής ρεύματος Η Panasonic δεν φέρει καμία ευθύνη για τυχόν ατύχημα ή ζημιά που οφείλεται σε ακατάλληλη εγκατάσταση με οποιονδήποτε τρόπο που δεν περιγράφεται στα λεπτομερή εγχειρίδια. στερεωμένη στον τοίχο. -
Page 12: Vnitřní Jednotka
Nainstalujte vnitřní jednotku na instalační držák, který je Omotejte všechny přívodní vodiče Společnost Panasonic nenese odpovědnost za žádnou nehodu nebo poškození způsobené nesprávnou instalací, jakkoli není popsáno v podrobných návodech. Na závadu namontován na stěně. napájecího kabelu páskou a veďte způsobenou nesprávnou instalací... -
Page 13: Jednostka Wewnętrzna
Należy zeskanować powyższy dwuwymiarowy (2D) kod kreskowy i dokładnie przeczytać szczegółową instrukcję. Zainstaluj jednostkę wewnętrzną na uchwycie montażowym, który Zwiąż taśmą wszystkie żyły przewodu kabla Firma Panasonic nie ponosi odpowiedzialności za jakiekolwiek wypadki ani uszkodzenia spowodowane niewłaściwą instalacją w jakikolwiek sposób nieopisaną w zamontowano na ścianie. zasilającego i poprowadź przewód zasilający szczegółowych instrukcjach. -
Page 14: Beltéri Egység
Szerelje fel a beltéri egységet a falra szerelt beszerelési tartóra. Kösse össze a tápkábel összes vezetékét A Panasonic nem vállal felelősséget a nem megfelelő, a részletes kézikönyvekben leírt telepítéstől bármilyen módon eltérő telepítésből eredő balesetekért vagy károkért. A Nyissa ki az elülső panelt és a rács ajtaját a csavar ragasztószalaggal, és vezesse át a tápkábelt a... -
Page 15: Vnútorná Jednotka
Vnútornú jednotku nainštalujte na inštalačný držiak, ktorý sa Všetky prívodné vodiče napájacieho Spoločnosť Panasonic nenesie zodpovednosť za nehodu alebo poškodenie spôsobené nesprávnou inštaláciou, ktorá nie je popísaná v podrobnom návode. Na nefunkčnosť montuje na stenu. kábla zviažte páskou a napájací kábel spôsobenú... -
Page 16: Notranja Enota
Notranjo enoto vgradite na vgradno držalo, ki je pritrjeno Vse vodnike napajalnega kabla Podjetje Panasonic ne prevzema nikakršne odgovornosti za nesreče ali škodo, do katerih pride zaradi napačne vgradnje ali neupoštevanja podrobnih navodil. Garancija ne na steno. povežite s trakom in napeljite napajalni krije okvar zaradi napačne vgradnje. -
Page 17: Unitatea Interioară
Se instalează unitatea interioară pe suportul de instalare montat Se leagă cu bandă toate fi rele cablului de Panasonic nu răspunde pentru niciun accident și nicio avarie produsă ca urmare a instalării incorecte în vreo manieră nemenționată în manualele cu instrucțiuni detaliate. pe perete.
Need help?
Do you have a question about the CS-TZ20ZKE Series and is the answer not in the manual?
Questions and answers