
Related Manuals for Axor Starck 240 1-Jet 12672 1 Series


Summary of Contents for Axor Starck 240 1-Jet 12672 1 Series
- Page 1 EN Installation / User Instructions / Warranty AXOR Starck 240 1-Jet 12672XX1 FR Instructions de montage / Mode d'emploi / Garantie 12673XX1 ES Instrucciones de montaje / Manejo / Garantía I N S T A L L A T I O N...
-
Page 2: Technical Information
E N G L I S H T EC HN IC A L I N F ORMAT IO N Water pressure Recommended 15 - 75 PSI (0.1 - 0.5 MPa) Maximum 145 PSI (1 MPa) Hot water temp. Recommended 120°-140° F (48° - 60° C)* * Please know and follow all applicable local plumbing Maximum 158°F (70°... - Page 3 F R A N A I S D ON N É E S T EC HN I Q UES Pression d’eau recommandée 15 - 75 PSI (0.1 - 0.5 MPa) maximum 145 PSI (1 MPa) Température d'eau chaude recommandée 120°-140°...
-
Page 4: Datos Tecnicos
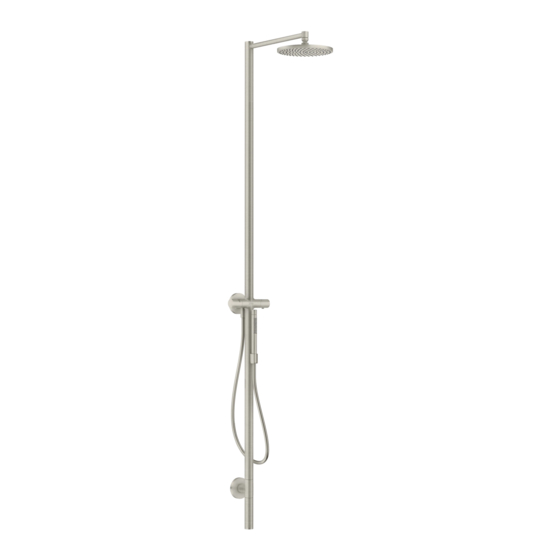
E S P A Ñ O L DATOS TEC N ICO S Presión en servicio recomendada 15 - 75 PSI (0.1 - 0.5 MPa) max. 145 PSI (1 MPa) Temperatura del agua caliente recomendada 120°-140° F (48° - 60° C)* * Debe conocer y cumplir todos los códigos locales apli- max. - Page 5 AXOR Starck 240 1 jet 12672XX1 12673XX1 24" (609 mm) 19¼" (490 mm) Ø9¼" (236 mm) Ø1½" 15¾" (38 mm) (400 mm) 4⅜" (110 mm) ⅝" (15 mm) 5¹⁄₁₆" (128 mm) 8" (203 mm) 3½" (90 mm) TOOLS R EQUIRED / OUTILS RE QUIS / HERRA MIE NTA S ÚTILE S...
- Page 6 I N S T A L L A T I O N / I N S T A L L A T I O N / I N S T A L A C I Ó N TO REDUCE THE RISK OF SCALD INJURY AND PROPERTY DAMAGE, TURN THE WATER OFF AT THE MAIN.
- Page 7 Lightly lubricate the o-rings on the sleeves using white plumbers grease. Install the sleeves and the seat. Tighten the screws using a 3 mm Allen wrench. Lubrifiez légèrement les joints toriques sur les gaines en utilisant de la graisse de plomberie blanche. Installez les gaines et la pièce d’appui.
- Page 8 Install the mounting plate seal and the mounting plate. Tighten the screws using a 4 mm Allen wrench. Installez le joint d’étanchéité de plaque de montage et la plaque de montage. Serrez les vis à l’aide d’une clé hexagonale de 4 mm. Instale el sello de la placa de montaje y la placa de 4 mm montaje.
- Page 9 Remove the shower column. Retirez la colonne de douche. Quite la columna de ducha. Place the top mounting piece against the wall at the marked location. Mark the positions of the screw holes. Placez la pièce de montage supérieure contre le mur à l’emplacement marqué.
- Page 10 Drill the screw holes using a ¼" (6 mm) bit. " ( 6 2 ⅝ Percez les trous de vissage à l’aide d’une mèche de 6 mm (¼ po). Perfore los orificios para tornillos con una broca de ¼” (6 mm). Install the anchors.
- Page 11 Lightly lubricate the o-ring on the top mounting plate using white plumbers grease. Push the shower column into place. Connect the shower column to the mounting plate by rotat- ing the escutcheon clockwise. Lubrifiez légèrement le joint torique sur la plaque de montage supérieure en utilisant de la graisse de plomberie blanche.
- Page 12 Lightly lubricate the o-ring on the top of the shower column. Install the riser. 3 ft-lb 4 Nm Lubrifiez légèrement le joint torique situé en haut de la colonne de douche. Installez la colonne montante. Lubrique ligeramente el retén anular de la columna de ducha.
- Page 13 Install the showerhead with the filter and the washer. Tighten the showerhead using a 17 mm wrench. Tighten the safety screw using a 2 mm Allen wrench. Installez la pomme de douche avec le filtre et la rondelle. Serrez la pomme de douche à l’aide d’une clé de 17 mm. Serrez la vis de sûreté...
- Page 14 Turn the water on at the main. Turn the water on to the handshower. Ouvrez l’eau à la valve principale. Ouvrez l’eau de la douchette. Abra el agua en la entrada del suministro. Abra el agua de la ducha de mano. Turn the thermostatic mixer handle to the full hot position.
- Page 15 J U S T I F Y T H E H A N D L E / R É G L E Z L A P O I G N É E / A J U S T E L A M A N I J A SW 3 mm SW 3 mm click!
- Page 16 S E T THE H I GH T E M PER ATU R E L I M IT STO P / R ÉGL AGE D E L A B UTÉ E LIM ITE D’E AU C HAUD E / AJ UST E E L TO PE D E L ÍM I TE DE ALTA TE MPERATURA If the maximum high temperature is Si la température maximale de l’eau Si la temperatura máxima de salida...
- Page 17 R E P L A C E M E N T P A R T S / P I È C E S D É T A C H É E S / R E P U E S T O S AXOR Starck 240 1 jet...
- Page 18 U S E R I N S T R U C T I O N S / I N S T R U C T I O N S D E S E R V I C E / M A N E J O ouvert ouvert abierto...
- Page 20 C L E A N I N G / N E T T O Y A G E / L I M P I E Z A scale remover détartrant commercial desincrustante comercial...
- Page 21 > 1 min scale remover détartrant commercial desincrustante comercial SW 5 mm SW 5 mm 1.5 ft-lb 2 Nm...
- Page 22 C L E A N I N G / N E T T O Y A G E / L I M P I E Z A scale remover détartrant commercial desincrustante comercial > 1 min.
- Page 23 C HEC K VA LVE M A I N T EN AN CE / EN TR ETIE N D E LE S CL APETS ANTI-RE TOUR/ M AN TE N I M I E N TO D E L AS VÁ LVU L A S ANTIR R ETORN OS...
-
Page 24: Troubleshooting
M A I N T E N A N C E ⁄ Should the volume of water decrease over time, When reassembling after maintenance, set the inspect and clean the filters on the showerhead(s) high temperature limit stop and justify the handle If the problem persists, inspect and clean the filters (see page 16). - Page 25 E N T R E T I E N ⁄ Si le débit d’eau devait décroître avec le temps, Lors du réassemblage après l’entretien, réglez la commencez par inspecter et nettoyer la ou les butée de limite de rotation avant de réinstaller la pomme(s) de douche.
- Page 26 M A N T E N I M I E N T O ⁄ Si el volumen del agua disminuye con el tiempo, Al rearmar después de realizar el mantenimiento, primero inspeccione y limpie el cabezal de configure el tope límite rotacional antes de rein- ducha.
- Page 27 C L E A N I N G R E C O M M E N D A T I O N F O R H A N S G R O H E P R O D U C T S Modern bathroom faucets, kitchen faucets and shower products are made from different materials to comply with the needs of the market with regard to design and functionality.
- Page 28 I MP O RTA N T ⁄ Les residus de produits pour le corps comme les savons liquides, shampooings, gels de douche, teintures pour cheveux, parfums, apres-rasage et vernis a ongles peuvent causer des deteriorations. Rincez le produit avec de l’eau propre après chaque utilisation.
-
Page 29: What We Will Do
Hansgrohe, Inc. (ii) a limited warranty on our hansgrohe and AXOR branded products. any hansgrohe or AXOR product sold for display purposes or (iii) hans- ® ® grohe or AXOR products purchased from unauthorized sellers. - Page 30 PRODUCT INSTRUCTIONS AND QUESTIONS OR REPAIR, INCLUDING THE USE OF ABRASIVE OR CAUSTIC CLEANING AGENTS OR “NO-RINSE” CLEANING PRODUCTS. Upon purchase or prior to installation, please carefully inspect your prod- NOTICE TO RESIDENTS OF THE STATE OF NEW JERSEY: uct for any damage or visible defect. Prior to installing, always carefully The provisions of this warranty, including its limitations, are intended to study the enclosed instructions on the proper installation and the care apply to the fullest extent permitted by the laws of the State of New...
- Page 32 AXOR ⁄ Hansgrohe, Inc. 1490 Bluegrass Lakes Parkway Alpharetta, GA 30004 Tel. 800-334-0455 Fax 770-889-1783 axor-design.com...
Need help?
Do you have a question about the Starck 240 1-Jet 12672 1 Series and is the answer not in the manual?
Questions and answers