Table of Contents
Troubleshooting

Related Manuals for GORMAN-RUPP PUMPS GMS1 1/2


Summary of Contents for GORMAN-RUPP PUMPS GMS1 1/2
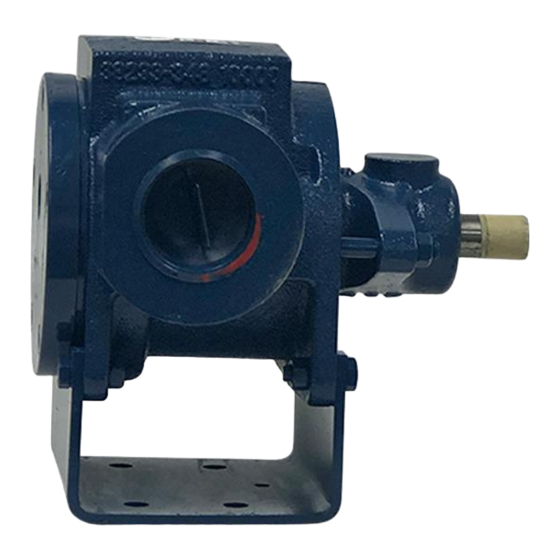
- Page 1 OM-07468-05 September 1, 2022 INSTALLATION, OPERATION, AND MAINTENANCE MANUAL ROTARY GEAR PUMP MODELS GMS SERIES PUMPS GMS1 1/2GH3-B /S2 GORMAN‐RUPP PUMPS www.grpumps.com 2022 Gorman‐Rupp Pumps Printed in U.S.A.
- Page 2 Register your new Gorman‐Rupp pump online at www.grpumps.com Valid serial number and e‐mail address required. RECORD YOUR PUMP MODEL AND SERIAL NUMBER Please record your pump model and serial number in the spaces provided below. Your Gorman‐Rupp distributor needs this information when you require parts or service. Pump Model: Serial Number:...
-
Page 3: Table Of Contents
TABLE OF CONTENTS INTRODUCTION ........... PAGE I - 1 SAFETY - SECTION A . - Page 4 TABLE OF CONTENTS (continued) PUMP MAINTENANCE AND REPAIR - SECTION E ....PAGE E - 1 PARTS KEY: Typical GMS D, G, J And N Pump Models .
-
Page 5: Introduction
GMS SERIES OM-04386 INTRODUCTION Thank You for purchasing a Gorman‐Rupp Rotary WARRANTY INFORMATION Gear Pump. This manual is designed to help you achieve the best performance and longest life from The warranty provided with your pump is part of your Gorman‐Rupp Rotary Gear pump. Read this Gorman‐Rupp's support program for customers manual carefully to learn how to safely install, op... - Page 6 OM-04386 GMS SERIES RECORDING MODEL AND SERIAL NUMBERS Please record the pump model and serial number in the spaces provided below. Your Gorman‐Rupp distributor needs this information when you require parts or service. Pump Model: Serial Number: PAGE I-2 INTRODUCTION...
-
Page 7: Safety - Section A
GMS SERIES OM-07468-05 SAFETY - SECTION A This information is specific to Gorman‐Rupp GMS covered in this manual could lead to de Series Rotary Gear Pumps. It applies throughout struction of equipment, injury, or death. this manual and any manual or literature ac companying the pump. - Page 8 OM-07468-05 GMS SERIES valves are installed with their adjusting 3. Refer to the instructions in this ends toward the suction port. If bi‐rota manual before restarting tional operation is required, a pressure pump. relief device must be provided for both directions of flow.
-
Page 9: Installation - Section B
GHC SERIES OM-07468-05 INSTALLATION - SECTION B Review all SAFETY information in Section A. Typical Pump Model GHS 1 1/2 Design Port Hydraulic Construction Pumps and related equipment must be in Style Size Size Code stalled and operated according to all na tional, local and industry standards. -
Page 10: Preinstallation Inspection
OM-07468-05 GMS SERIES Table B‐1. Theoretical Displacement If the pump will not be immediately installed, follow these procedures or damage to the pump will oc cur. Theoretical Displacement Hydraulic Per Revolution a. Do not flush the pump. Ensure that the port Size plugs shipped with the pump remain in place Gallons... -
Page 11: Pump Installation
GHC SERIES OM-07468-05 To flush the pump, use an approved solvent com Install the pump and motor on a base before patible with the liquid being pumped. Make cer mounting the base on a foundation. tain that the solvent will not attack pump com Mount the base on a foundation that will provide ponents, particularly seals and gaskets. -
Page 12: Strainers
OM-07468-05 GMS SERIES bows and fittings used in the lines increase friction When handling very hot or cold liquids, install a losses; minimize their use. Reducers used in suc pressure relief valve in any part of the system that tion lines should be the eccentric type installed can be valved off or isolated;... -
Page 13: V-Belt Drives
GHC SERIES OM-07468-05 The coupling is in alignment when the hub ends When using V‐belt drives, the power source and are the same distance apart at all points (see Fig the pump must be parallel. Use a straightedge ure B‐2). along the sides of the pulleys to ensure that they are properly aligned (see Figure B‐4). -
Page 14: Tension Measurement
OM-07468-05 GMS SERIES Ideal v‐belt tension is the lowest tension at which of 64 inches would require a deflection of 1 inch at the belt will not slip under peak load conditions. Do the force shown on the Tables for your particular not over‐tension v‐belts. -
Page 15: Electrical Connections
GHC SERIES OM-07468-05 Table B‐2. Sheave Diameter (In.) Table B‐3. Sheave Diameter (Mm.) Deflection Force (Lbs.) Deflection Force (Kg.) Belt Deflection Force Belt Deflection Force Uncogged Cogged Uncogged Cogged Hy‐T Belts & Torque‐Flex Hy‐T Belts & Torque‐Flex Uncogged & Machined Uncogged &... - Page 16 OM-07468-05 GMS SERIES alified electrician to make all electrical sphere. Install, connect, and operate connections. the motor in accordance with The Na tional Electrical Code and all local codes. If there is a conflict between the instructions in the manual accompany ing the unit and The National Electrical Code or the applicable local code, The Do not install and operate a non‐explo...
-
Page 17: Operation - Section C
GMS SERIES OM-07468-05 OPERATION - SECTION C Review all SAFETY information in Section A. Open all valves in the suction and discharge lines, and close all drain valves. Follow the instructions on all tags, labels and Consult the drive manufacturer's operating manu decals attached to the pump. -
Page 18: Operation
OM-07468-05 GMS SERIES erating against closed valves could bring the liquid galling, seizing, damage to the seal or ex to a boil, build pressure, and cause the pump to cessive wear of rotating parts. rupture or explode. If overheating occurs, stop the Review the previous steps outlined in PRE‐OP... -
Page 19: Pressure Relief Valve Adjustment
GMS SERIES OM-07468-05 Packing pumps must leak slightly to cool and lu Complete By‐pass Pressure bricate the shaft and to allow the shaft to turn freely. Complete by‐pass pressure is the maximum pres Wait until the pump has run long enough to reach sure the pump will see when all the pumped fluid is its normal operating temperature to adjust the being by‐passed through the pressure relief valve. -
Page 20: Troubleshooting - Section D
GMS SERIES OM-07468-05 TROUBLESHOOTING - SECTION D Review all SAFETY information in Section A. Before attempting to open or service the pump: 1. Familiarize yourself with this manual. 2. Allow the pump to completely cool if overheated. 3. Check the temperature before open ing any covers, plates, or plugs. -
Page 21: Troubleshooting Chart
OM-07468-05 GMS SERIES TROUBLESHOOTING CHART TROUBLE POSSIBLE CAUSE PROBABLE REMEDY PUMP FAILS Air leak in suction line; end of suction Check and correct as required. line not submerged; foot valve blocked TO PRIME OR or jammed; insufficient liquid in sump or LOSES PRIME tank. - Page 22 GMS SERIES OM-07468-05 TROUBLESHOOTING CHART (Cont.) TROUBLE POSSIBLE CAUSE PROBABLE REMEDY PUMP REQUIRES Pump and/or drive mounting not Tighten mounting hardware; realign TOO MUCH secure; drive misaligned. drive. POWER (Cont.) Power source undersized. Check power requirements for applica tion; resize as required. Lubrication required.
-
Page 23: Preventive Maintenance
OM-07468-05 GMS SERIES tion at 250 hours will give insight into the wear rate PREVENTIVE MAINTENANCE for your particular application. Subsequent inspec tions should be performed at regular intervals of Since pump applications are seldom identical, and 2000 hours. Critical applications should be in pump wear is directly affected by such things as spected more frequently. - Page 24 GMS SERIES OM-07468 MAINTENANCE AND REPAIR - SECTION E MAINTENANCE AND REPAIR OF THE WEARING PARTS OF THE PUMP WILL MAINTAIN PEAK OPERATING PERFORMANCE. Pump Model Your pump model number and serial number are shown on the Parts List, furnished as a separate document with this manual.
- Page 25 OM-07468 GMS SERIES 01AB 46166-314 NOTE: Refer to Seal Appendix, Section F for details of the seal assembly and related components. Figure E-1. GMS1 1/2GH3-B /S2 Pump Model PAGE E-2 MAINTENANCE AND REPAIR...
-
Page 26: Parts Key
GMS SERIES OM-07468 PARTS KEY FOR FIGURE E‐1 Note: Item numbers cross reference to specific part numbers on the separate Parts List. ITEM PART NAME ITEM PART NAME HEAD KIT HOUSING KIT -HEAD ASSEMBLY -HOUSING 01AA -HEAD -FLANGED SHAFT BUSHING 01AB -IDLER PIN -GLAND... -
Page 27: Pump Disassembly
OM-07468 GMS SERIES PUMP DISASSEMBLY AND and/or maintenance personnel to en sure that applications and/or mainte REASSEMBLY nance procedures not addressed in this manual are performed only after estab Review all SAFETY information in Section A. lishing that neither personal safety nor pump integrity are compromised by Follow the instructions on all tags, labels and such applications or procedures. -
Page 28: Preparing For Disassembly
GMS SERIES OM-07468 In the instructions which follow the FRONT is the Head/Idler Kit (01/02) head assembly end of the pump and the REAR is Disengage the hardware (B) and separate the the drive (or backhead) end of the pump. head jacket (if so equipped) and/or head assembly (01A) from the housing (04A). -
Page 29: Rotor/Shaft Removal (03)
OM-07468 GMS SERIES with your pump to identify the seal, refer to Seal Ap parts have sharp edges which will grow pendix, Section F for removal of the seal and re sharper with use. lated components, then proceed as follows with pump disassembly. -
Page 30: Housing Assembly (04)
GMS SERIES OM-07468 Housing Assembly (04) 0.010 inch below the surface of the crescent. Clean and inspect the housing (04A) with a cloth Lightly oil the I.D. of the idler (02A), and use an ar soaked in fresh cleaning solvent. Replace the bor (or hydraulic) press to install the idler bushing housing if badly worn or damaged. -
Page 31: Relief Valve Disassembly
OM-07468 GMS SERIES NOTE 2500 SSU 250,000 SSU Feeler Gauge 225_F 300_F The end clearance is established without the head Reading (107_C) (149_C) gasket set (01B) in place. (1) 0.015 (2) 0.015 0.000-0.002 (1) 0.006 (2) 0.015 0.003-0.006 (2) 0.015 (1) 0.006 Slide the head assembly into the housing assem... -
Page 32: Relief Valve Reassembly
GMS SERIES OM-07468 or 10AF). The spring guide (10AH) is an O‐ring fit in If the warning plate (10AB) must be replaced, re the bonnet. Remove and discard the O‐rings. move the drive screws (BM), and remove the plate. PARTS KEY 10AA VALVE BODY 10AB WARNING PLATE 10AD POPPET... -
Page 33: Relief Valve (10) Installation
OM-07468 GMS SERIES Refer to the separate Parts List accompanying your pump, and determine the specific hydraulic size (D, G, J, etc.). PUMP SINGLE CRACKING DIMENSION DOUBLE CRACKING DIMENSION HYDRAULIC SPRING PRESSURE “A” (INCHES) SPRING PRESSURE “A” (INCHES) SIZE OPTION CODE (PSI) (Fig. -
Page 34: Seal Appendix - Section Fpage
GMS SERIES OM-07468 SEAL APPENDIX - SECTION F PARTS KEY 03A ROTOR/SHAFT ASSY 04A HOUSING 04B FLG SHAFT BUSHING 04N MECH SEAL GLAND 04R SHAFT SNAP RING MECH SEAL ASSY 05P GASKET STUD SHAFT KEY ASSEMBLED VIEW 16708-4 Figure F‐1. Standard Friction Drive And Optional 60A And 61J Mechanical Seals SEAL APPENDIX PAGE F - 1... - Page 35 OM-07468 GMS SERIES Seal Removal gency, carefully wash all metallic parts in fresh cleaning solvent and allow to dry thoroughly. (Figures E‐1 and F‐1) Separate the pump and driver and remove the shaft key (N). Seal components must be kept clean. Remove the nuts (D) and slide the gland (04N) and Handle seal parts with extreme caution to stationary seal components off the shaft as a unit.
- Page 36 GMS SERIES OM-07468 SEAL APPENDIX - SECTION F PARTS KEY 03A ROTOR/SHAFT ASSY 04A HOUSING 04B FLG SHAFT BUSHING 04N LIP SEAL GLAND LIP SEAL 05P GASKET 06F OIL HOLE COVER STUD SHAFT KEY ASSEMBLED VIEW 16708-6 Figure F‐2. Optional 65A Lip Seal SEAL APPENDIX PAGE F - 3...
- Page 37 OM-07468 GMS SERIES Seal Removal Clean the seal cavity and shaft with a cloth soaked in fresh cleaning solvent. (Figures E‐1 and F‐2) Separate the pump and driver and remove the shaft key (N). Most cleaning solvents are toxic and There are no provisions for draining oil from the flammable.
-
Page 38: Positive Drive (Option 60D) Seal
GMS SERIES OM-07468 SEAL APPENDIX - SECTION F PARTS KEY 03A ROTOR/SHAFT ASSY 04A HOUSING 04B FLG SHAFT BUSHING 04N MECH SEAL GLAND 04R SHAFT SNAP RING MECH SEAL ASSY 05P GASKET STUD SHAFT KEY ASSEMBLED VIEW 16708-5 Figure F‐3. Positive Drive (Option 60D) Seal SEAL APPENDIX PAGE F - 5... - Page 39 OM-07468 GMS SERIES Seal Removal gerprints on the faces can shorten seal life. If necessary to clean the faces, use a clean (Figures E‐1 and F‐3) cloth and wipe in a circular pattern. Remove the nuts (D) and slide the gland (04N) and Inspect the seal components for wear, scoring, stationary seal components off the shaft as a unit.
-
Page 40: Standard Packing Seal (Option 65)
GMS SERIES OM-07468 SEAL APPENDIX - SECTION F PARTS KEY 03A ROTOR/SHAFT ASSY 04A HOUSING 04B FLG SHAFT BUSHING GLAND PACKING KIT STUD SHAFT KEY ASSEMBLED VIEW 16708-7 Figure F‐4. Standard Packing Seal (Option 65) SEAL APPENDIX PAGE F - 7... - Page 41 OM-07468 GMS SERIES Seal Removal (Figures E‐1 and F‐4) Separate the pump and driver and remove the shaft key (N). Remove the nuts (D) and slide the gland (04N) and packing rings (05) off the shaft as a unit. Remove the gasket (05P).
- Page 42 GMS SERIES OM-07468 Some channel‐type packing with a lead core may Remove the dowel from the gland bore. Carefully require a slight gap between packing rings to allow slide the assembled gland and packing rings onto for expansion. Consult the packing manufacturer's the shaft until the packing rings seat against the installation instructions and follow the recommen...
-
Page 43: O-Ring Appendix - Section G
GMS SERIES OM-07468 O‐RING APPENDIX - SECTION G O‐ring Part Numbers are based on the hydraulic (every pump does not necessarily use each O‐ring size of the pump, which is included in the pump identified). O‐ring part numbers begin with a 5‐digit model number. - Page 44 GMS SERIES OM-07468 JACKETED HEAD and BACKHEAD - APPENDIX H "D, G, J, N & R" JACKETED NOTES: 1. MAX PRESSURE OF 150 PSI (10.3 BAR). 2. MAX TEMP OF 500 F (260 C). IN (STEAM) BACKHEAD JACKET "R" SIZE ONLY OUT (HOT OIL) IN (STEAM) OUT (HOT OIL)
- Page 45 For Warranty Information, Please Visit www.grpumps.com/warranty or call: U.S.: 419-755-1280 Canada: 519-631-2870 International: +1-419-755-1352 GORMAN‐RUPP PUMPS...
Need help?
Do you have a question about the GMS1 1/2 and is the answer not in the manual?
Questions and answers