Table of Contents
Advertisement
Available languages
Available languages
Quick Links
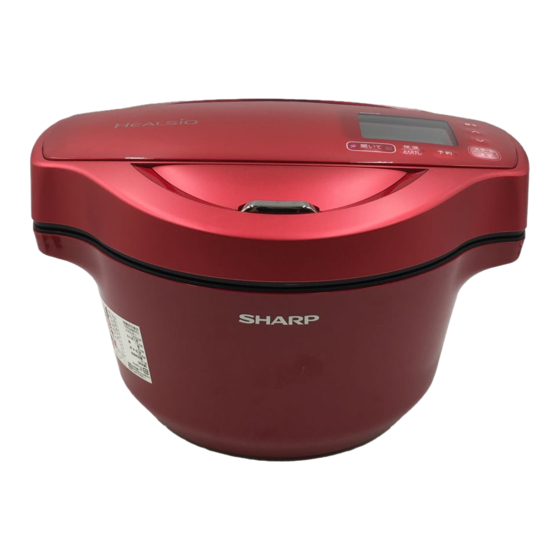
KN-H24XA
สารบั ญ
คํ า แนะนํ า ด ้านความปลอดภั ย ที � สํ า คั ญ .....................th-1
สิ � งที � เครื � องสามารถทํ า ได ้.......................................th-2
คํ า แนะนํ า สํ า หร ับการใช ้งาน....................................th-3
ชื � อชิ � นส่ ว นและอุ ป กรณ์ ต ่ า งๆ....................................th-5
แผงควบคุ ม /หน้ า จอ.............................................th-7
ก่ อ นการใช ้งาน......................................................th-8
การปรุ ง อาหารอั ต โนมั ต ิ / การปรุ ง อาหารด ้วยตั ว เอง... th-9
เคล็ ด ลั บ การปรุ ง อาหารด ้วยตั ว เอง........................th-13
ทํ า ให ้ร ้อน............................................................th-14
การอุ ่ น ...............................................................th-14
Contents
Important Safety Instructions... ... ... ... ...en-1
What this appliance can do... ... ... ... ... ...en-2
Instructions for use..............................en-3
Names of parts and accessories... ... ... ...en-5
Control panel/Display...........................en-7
Before operating.................................en-8
Automatic/Manual cooking... ... ... ... ... ...en-9
Tips for manual cooking.....................en-13
Reheat..........................................en-14
Keep warm....................................en-14
โลโก ้ Healsio และ HEALSIO เป ็ นเคร ื � องหมายการค ้าของบร ิ ษ ั ท ชาร ์ป คอร ์ปอเรช ั � น
The Healsio logo and HEALSIO are trademarks of Sharp Corporation
หน ้ า
Page
เครื � องใช้ไฟฟ ้ าในคร ัว
ส ํ า หร ับใช ้ภายในบ ้ า น
คู ่ ม ื อ การใช้ ง าน
Electric Cookware
Operation Manual
การตั � งเวลา.........................................................th-15
การร ักษาและการทํ า ความสะอาด... ... ... ... ... ... ... ...th-16
หม้อช ั � นใน.........................................................th-16
•
ฝาปิ ด ด ้านใน......................................................th-17
•
ฝาปิ ด ช่ อ งระบายไอนํ � า.......................................th-18
•
อุ ป กรณ์ ส ํ า หร ับคนอาหาร.................................th-19
•
ผลิ ต ภั ณ ฑ ์/แผงควบคุ ม /เซ็ น เซอร ์อุ ณ หภู ม ิ /
•
แผ่ น ความร ้อน/สายไฟ.......................................th-19
การแก ้ปั ญ หา......................................................th-20
ข ้อกํ า หนดเฉพาะ................................................th-22
Timer.............................................en-15
Care and Cleaning... ... ... ... ... ... ... ... ...en-16
Inner pot.......................................en-16
•
Inner lid..........................................en-17
•
Steam vent cover... ... ... ... ... ... ... ... ...en-18
•
Stirring unit....................................en-19
•
•
Trouble shooting..............................en-20
Speci cations.................................en-22
Household Use
Advertisement
Table of Contents

Related Manuals for Sharp HEALSIO KN-H24XA


Summary of Contents for Sharp HEALSIO KN-H24XA
-
Page 1: Table Of Contents
Operation Manual โลโก ้ Healsio และ HEALSIO เป ็ นเคร ื � องหมายการค ้าของบร ิ ษ ั ท ชาร ์ป คอร ์ปอเรช ั � น The Healsio logo and HEALSIO are trademarks of Sharp Corporation สารบั ญ หน ้ า... - Page 2 คํ า แนะนํ า ด้ า นความปลอดภั ย ที � ส ํ า ค ั ญ คํ า แนะนํ า ด ้านความปลอดภั ย ที � สํ า คั ญ : โปรดอ่ า นด ้วยความรอบคอบเพื � อใช ้สํ า หร ับการอ ้างอิ ง ในอนาคต 1.
- Page 3 คํ า เตื อ นอื � นๆ 1. ตรวจสอบชิ � นส่ ว นและอุ ป กรณ์ ท ั � งหมดก่ อ นการใช ้งานคร ั � งแรก โปรดตรวจสอบให ้แน่ ใ จว่ า ได ้นํ า แผ่ น ป้ องกั น ซึ � งอยู ่ ใ ต ้หม้ อ ช ั � นในออก ก่...
- Page 4 คํ า แนะนํ า สํ า หร ับการใช้ ง าน ตํ า แหน่ ง ที � ตั � งของเครื � อง วางเครื � องบนพื � นราบซึ � งพื � นผิ ว แข็ ง แรงพอที � จะรองร ับนํ � าหนั ก ที � เพิ � มขึ � นของอุ ป กรณ์ ท ี � ใช้ ป รุ ง อาหาร ●...
- Page 5 การใช ้ ง านหม ้ อ ช ั � นในและฝาป ิ ดได ้ ย าวนาน ถึ ง แม้ ว ่ า ทั � งหม้ อ ช ั � นในและฝาปิ ดจะทํ า จากสแตนเลสสตี ล แต่ แ ร่ ธ าตุ ท ี � อยู ่ ใ นนํ � า อาจทํ...
- Page 6 ชื � อชิ � นส่ ว นและอุ ป กรณ์ ต ่ า งๆ การเช ื � อมต ่ อ เข ้ า ก ับสายไฟ ■ผลิ ต ภัณฑ ์ ❷ ปล ั � กไฟ เสี ย บปลั � กไฟ เข ้ากั บ เต ้าเสี ย บ ❶...
- Page 7 ด ้ า นบน (ฝาป ิ ด ) ช ่ อ งระบายไอน ํ � า อย ่ า วางม ื อ หร ื อ น ํ า ใบหน ้ า เข ้าไปใกล ้ขณะท ี � เคร ื � องก ํ า ล ั ง ปร ุ ง อาหาร แผงควบค...
- Page 8 แผงควบคุ ม /หน้ า จอ ■แผงควบคุ ม หน ้ า จอ การปรุ ง อาหาร 7 ประเภท สามารถเลื อ กทํ า งานด ้วยระบบอั ต โนมั ต ิ หรื อ กํ า หนดด ้วยตั ว เองในการใช ้งานแต่ ล ะประเภท โปรดดู ท ี � เมนู แ ละเลื อ กหมายเลขรายการที � ต ้องการ ป...
- Page 9 ก่ อ นการใช้ ง าน ■การตั � งนาฬ ิ ก า เครื � องนี � ใช ้ระบบเวลา 24 ช ั � วโมง นาฬ ิ ก าจะทํ า งานด ้วยแบตเตอรี � ภายในเครื � องเมื � อไม่ ไ ด ้เชื � อมต่ อ ปลั � กไฟกั บ เต ้าเสี ย บ ตรวจสอบให...
- Page 10 การปรุ ง อาหารอั ต โนมั ต ิ / การปรุ ง อาหารด้ ว ยตั ว เอง ① หมายเลขรายการ, เวลาปรุ ง อาหาร และการขยายเวลา หมายเลขรายการ (หมายเลขรายการ) ● ประเภท รายการ หมายเลขรายการประกอบด ้วยหมายเลขประเภท และรายการ ให ้เล ื อ กประเภทก ่ อ นแล ้วจ ึ ง เล ื อ กรายการ (อั...
- Page 11 ก ่ อ นเร ิ � มปร ุ ง อาหาร โปรดด ู เ มน ู แ ละเคล ็ ด ล ั บ การปร ุ ง อาหารด ้วยต ั ว เองท ี � หน ้ า th-13 การปรุ ง อาหารด้ ว ยตัวเอง ติ...
- Page 12 การปรุ ง อาหารอั ต โนมั ต ิ / การปรุ ง อาหารด้ ว ยตั ว เอง ② ใส ่ ส ่ ว นผสมลงในหม ้อช ั � นใน จากน ั � นใส ่ ห ม ้อช ั � นใน (หมายเลขรายการ) ประเภท รายการ เข...
- Page 13 ก ่ อ นเร ิ � มปร ุ ง อาหาร โปรดด ู เ มน ู ท ี � แนบไปและเคล ็ ด ล ั บ การปร ุ ง อาหารด ้วยตนเองท ี � หน ้ า th-13 ❹ ❹ ② ① ① เล...
- Page 14 เคล ็ ด ล ับการปร ุ ง อาหารด ้ ว ยต ัวเอง ใช ้การปร ุ ง อาหารด ้วยต ั ว เองเม ื � อไม ่ ม ี ร ายการอาหารท ี � คล ้ายก ั น ในการปร ุ ง อาหารอ ั ต โนม ั ต ิ [1] แกง/แกงจ...
- Page 15 ท ํ า ให ้ ร ้อน เคร ื � องใช ้น ี � สามารถท ํ า ให ้อาหารซ ึ � งปร ุ ง เสร ็ จ แล ้วร ้อนอ ี ก คร ั � งโดยอ ั ต โนม ั ต ิ กด...
- Page 16 การตั � งเวลา เครื � องนี � สามารถปรุ ง อาหารร ้อนให ้เสร็ จ สิ � นตามเวลาที � ต ั � งไว ้ล่ ว งหน้ า (มากที � สุ ด 12 ช ั � วโมง) การตั � งเวลานี � สามารถใช ้ได ้สํ า หร ับรายการ AUTO ซึ � งปุ่ ม TIMER จะมี ไ ฟสว่ า งขึ � นระหว่ า งการตั � งค่ า หมายเลขรายการ ตั...
- Page 17 การร ักษาและการทํ า ความสะอาด สิ � งส ํ า ค ั ญ - ท ํ า ความสะอาดท ั น ท ี เ ม ื � อเคร ื � องสกปรก! ก ่ อ นการท ํ า ความสะอาดให ้ป ิ ด เคร ื � อง ถอดปล ั � ก และด ึ ง ขาปล ั � กออกจากผล ิ ต ภ ั ณ ฑ ์ ตรวจสอบให...
- Page 18 การร ักษาและการทํ า ความสะอาด ต่ อ ฝาปิ ดด้ า นใน ท ํ า ความสะอาดหล ั ง การใช ้งานท ุ ก คร ั � ง ● ล ้างด ้วยสบ ู ่ อ ่ อ นๆ หร ื อ น ํ � ายาล ้างจานด ้วยฟองน ํ � านิ � ม ●...
- Page 19 ฝาปิ ดช่ อ งระบายไอนํ � า หลั ง จากทํ า ความสะอาดแล้ ว ทํ า ให้ ฝ าแห้ ง ก่ อ นติ ด เข้ า กั บ ส่ ว นอื � น ทํ า ความสะอาดหลั ง การใช ้งานทุ ก คร ั � ง ●...
- Page 20 การร ักษาและการทํ า ความสะอาด ต่ อ อ ุ ป กรณ ์ ส ํ า หร ับคนอาหาร เช ็ ด อ ุ ป กรณ ์ ใ ห ้แห ้งหล ั ง จากท ํ า ความสะอาด ท ํ า ความสะอาดหล ั ง การใช ้งานท ุ ก คร ั � ง และปฏ...
- Page 21 การแก้ ป ั ญ หา ปั ญ หาเหล่ า นี � สามารถพบได ้ทั � วไปและไม่ ใ ช่ ส ั ญ ญาณว่ า เครื � องทํ า งานผิ ด ปกติ ปั ญ หา คํ า ตอบ เครื � องมี เ สี ย ง ค...
- Page 22 การแก้ ป ั ญ หา ปั ญ หา คํ า ตอบ ไอนํ � าระเหย ต ิ ด ต ั � งฝาป ิ ด ด ้านในและฝาป ิ ด ช ่ อ งระบายไอน ํ � า (และอ ุ ป กรณ ์ ส ํ า หร ับคนอาหาร) เร ี ย บร ้อยด ี ห ร ื อ ไม ่ ? ●...
- Page 23 ปั ญ หา คํ า ตอบ อาจม ี ก ล ิ � นพลาสต ิ ก หลงเหล ื อ ในคร ั � งแรกแรก แต ่ ก ล ิ � นจะค ่ อ ยๆ จางหล ั ง จากใช ้คร ั � งต ่ อ ไป ม...
-
Page 24: Important Safety Instructions
11. Do not operate any appliance with a damaged cord or plug or after the appliance malfunctions, or has been damaged in any manner. Contact a SERVICE CENTER APPROVED BY SHARP. 12. Never adjust, repair or modify the appliance by yourself. -
Page 25: What This Appliance Can Do
Other warnings 1. Before the rst use, check all parts and accessories. The protective sheet under the inner pot is not necessary. Be sure to remove it before use. Then wash each part. Refer to Water washable parts. See page en-5-6. 2. -
Page 26: Instructions For Use
INSTRUCTIONS FOR USE The placement of the appliance Place the appliance on a flat, level surface strong enough to support it’s weight plus the ● heaviest item likely to be cooked. (Risk of the appliance falling and causing injuries or burns) *Maximum weight is approx. - Page 27 Do not leave metallic items such as iron or aluminum in the pot. Rust from such items may ● stick in the pot, causing itself to rust as well. Do not scratch the surface with sharp objects. ● See page en-16 for Cleaning tips if something becomes stuck on the pot, or discoloration (iridescent or white patches) or rust develops.
-
Page 28: Names Of Parts And Accessories
NAMES OF PARTS AND ACCESSORIES ■Main unit Connecting the power cord ❷ Power plug Insert the power plug in the outlet. ❶ Inlet plug Power cord Insert in the socket on the main unit Washable parts Steam vent cover (page en-18) ※... - Page 29 Top side (lid) Steam vent Do not place hands or face near the appliance during cooking Control panel/Display (page en-7) Handle When carrying, please hold both sides with the lid closed. Open button Press to open. The appliance has a lock function during cooking or when the Timer cooking is set.
-
Page 30: Control Panel/Display
CONTROL PANEL/DISPLAY ■Control panel Display 7 cooking categories It is possible to choose automatic or manual cooking from each category. See the Menu book and select the menu number. MENU / ENTER buttons Use when selecting the menu, cooking time and other settings. Pressing the ... -
Page 31: Before Operating
BEFORE OPERATING ■CLOCK SETTING This appliance has a 24 hour clock. The clock works by the internal battery when the power plug is disconnected from an outlet. Make sure the displayed time is correct when setting the timer. [The display when working by the internal battery] * Suppose you want to set the present time of day 10:00. -
Page 32: Automatic/Manual Cooking
AUTOMATIC/MANUAL COOKING ① MENU NUMBER, COOKING TIME and EXTENSION Menu number (Menu number) ● Category Menu The menu number consists of a category and a menu. Choose the category, and then select the menu. Categories [1] and [2] have two options of stir or no-stir. [1-1] 、... - Page 33 See the Menu book attached and Tips for Manual Cooking on page en-13 before cooking. MANUAL COOKING Attach the stirring unit before cooking for menu number [1-1] and [2-1]. ● Use the stirring unit and steam plate depending on the menu. ●...
- Page 34 AUTOMATIC/MANUAL COOKING ② (Menu number) Put ingredients in the inner pot. Place the inner pot Category Menu in the main unit and close the lid. Use accessories depending on the menu. ・ Stirring unit Attach the unit with the stirring wings closed. ・...
- Page 35 See the Menu book attached and Tips for Manual Cooking on page en-13 before cooking. ❹ ❹ ② ① ① Select the menu [18]. Select the fermentation temperature [45°C]. ② Con rm the temperature [45°C]. The heating time [0 MIN] will ash. ❺...
-
Page 36: Tips For Manual Cooking
TIPS FOR MANUAL COOKING Use manual cooking when no similar dish is available in automatic cooking. [1] CURRY/SOUP, [2] SIMMER Choose STIR or no stir according to the menu item. ● STIR : Quickly heats up to Do not heat the following items with boiling point, and after that Ingredients that are soft and easily fall apart ( sh, tofu etc.) ●... -
Page 37: Keep Warm
REHEAT The appliance can reheat food. Press once : Reheat with no stir. Press twice : Reheat with STIR (Attach the stirring unit) * Suppose you want to reheat 4 servings (approx. 800g) of stew that has been stored in a refrigerator. -
Page 38: Timer
TIMER The appliance can complete cooking at a preset time (in maximum 12hours) The Timer cooking can be used for the AUTO menus which the TIMER button lamp ashes during setting the menu number. There are two memory banks for the Timer cooking. Press once :... -
Page 39: Care And Cleaning
CARE AND CLEANING Key Point - Clean immediately if it is dirty! Before cleaning, turn the appliance off. Unplug and then remove the inlet plug from the main unit. Make sure the cavity including the temperature sensor and thermo plate, each parts and accessories are completely cool. -
Page 40: Inner Lid
CARE AND CLEANING continued Inner lid Clean after every use. ● Wash with mild soap or detergent solution using a soft sponge. ● Gasket Rinse and dry thoroughly. Do not remove the gaskets (the rubber-like part) ● Cleaning tips Removing the unit ❶... -
Page 41: Steam Vent Cover
Steam vent cover Carefully dry the lid before attaching it after Clean after every use. ● cleaning. Be careful especially with the gasket Wash with mild soap or detergent ● in the middle. Small amount of water may cause solution using a soft sponge. rust. -
Page 42: Stirring Unit
CARE AND CLEANING continued Stirring unit Dry the unit carefully after cleaning, Clean after every use. ● and assemble it in reverse order as Wash with mild soap or detergent solution ● it is removed. using a soft sponge. Rinse and dry thoroughly. Remove the stirring unit when cooking a dish which does not require it - this makes cleaning it easy. -
Page 43: Trouble Shooting
TROUBLE SHOOTING The following problems are common and are not signs that the appliance is malfunctioning. Problem Answer The appliance You may hear the following sounds during the cooking. It is common. ● -The sound that the appliance controls the heating. makes sounds during operation. - Page 44 TROUBLE SHOOTING Problem Answer Steam is coming out Are the inner lid and steam vent cover (and stirring unit) attached properly? ● from places other than See page en-17-19. the steam vent. Is the inner pot or inner lid deformed? ●...
-
Page 45: Speci Cations
● fell into the inner pot. If you still require service, disconnect the plug from the outlet and CONTACT YOUR NEAREST SERVICE CENTER APPROVED BY SHARP. ■ERROR MODE If ERROR message is displayed, follow the below instructions. The errors with [U] and [E] will sound audible signals. - Page 46 NOTE...
- Page 48 TINSTA001KRRZ-T71 PRINTED IN CHINA...
Need help?
Do you have a question about the HEALSIO KN-H24XA and is the answer not in the manual?
Questions and answers