Advertisement
Quick Links
Advertisement

Subscribe to Our Youtube Channel
Related Manuals for Fontana Forni PIERO


Summary of Contents for Fontana Forni PIERO
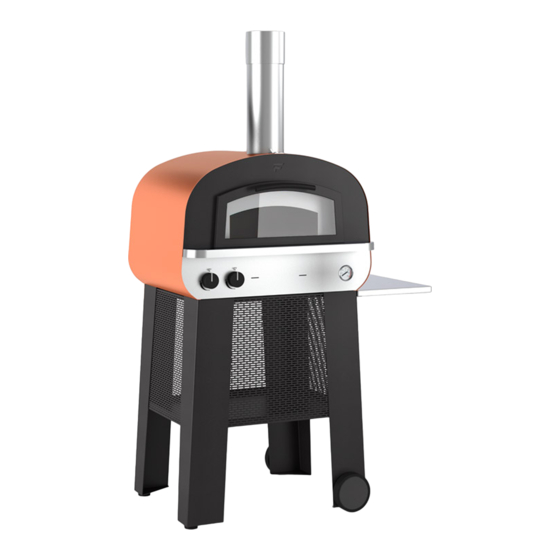
- Page 1 REV 1.0 1/6/20 USER MANUAL PIERO OVEN USER MANUAL USER MANUAL Pag. 1 | 62...
- Page 2 REV 1.0 1/6/20 USER MANUAL PIERO OVEN PLEASE NOTE BELOW THE MODEL, SERIAL NUMBER AND DATE OF PURCHASE FOR FUTURE REFERENCE: model* : …………………………………………………………………………………. serial number* : ………………………………………………………………... purchase date : ………………………………………………………………….. *The identification plate is visible at the rear of the oven.
- Page 3 REV 1.0 1/6/20 USER MANUAL PIERO OVEN Dear customer we want to thank you for choosing our products. This manual will allow you to install and use your oven safely and in the best possible way. We recommend that you read the following manual carefully before turning it on for the first time.
-
Page 4: Installation
REV 1.0 1/6/20 USER MANUAL PIERO OVEN Use is prohibited in closed areas, campers or boats. • If, when not in use, it is stored indoors or in closed rooms, it is compulsory to disconnect the gas cylinder, which must be stored outdoors and safely in accordance with local regulations. - Page 5 REV 1.0 1/6/20 USER MANUAL PIERO OVEN the rear. If the legs are not installed, the unit should only be placed on a non-combustible surface. 5 cm non-combustible surfaces 50 cm from combustible surfaces 5 cm APPLIANCE 50 cm • Do not place it under a cover or shelter that might be flammable.
- Page 6 REV 1.0 1/6/20 USER MANUAL PIERO OVEN upright position. If positioned horizontally, the cylinder may allow the combustible liquid to reach the pipes, causing damage and the risk of explosion. • Always place the cylinder in an accessible location to facilitate turning it on and off in case of emergency.
- Page 7 REV 1.0 1/6/20 USER MANUAL PIERO OVEN This device must be equipped with a pressure regulator in accordance with local/national standards and/or regulations with a nominal pressure output of: CATEGORY I3+(28-30/37) Propane 37 mbar. Butane 28-30 mbar. CATEGORY I3B/P(30) Propane/Butane 30 mbar...
- Page 8 REV 1.0 1/6/20 USER MANUAL PIERO OVEN protect it with a suitable cover to ensure ventilation and to prevent condensation. Note: if there are long periods of non-use, clean the oven immediately afterwards (as soon as it has cooled down) because deposits of fatty residues and/or acidic food could affect and stain the steel parts, making it difficult to clean them after a long time.
- Page 9 REV 1.0 1/6/20 USER MANUAL PIERO OVEN The maximum capacity of the appliance is around a8000 Kcal/h which is equivalent to about 10 kW/h 30Mbar pressure and PROPANE gas max. hourly consumption PROPANE 1.0 Kg/h Pag. 9 | 62...
- Page 10 REV 1.0 1/6/20 USER MANUAL PIERO OVEN TYPE OF OVEN: FREE STANDING OR TROLLEY VERSION Free standing models must always be placed on a fireproof surface while trolley models can be transported and positioned according to safety instructions and distances from flammable materials as seen in the previous chapters.
- Page 11 REV 1.0 1/6/20 USER MANUAL PIERO OVEN In the free-standing version there are non-slip rubber feet at the base of the oven that can be adjusted in height for optimal levelling and good ventilation in the lower part of the oven itself. Removing these...
- Page 12 REV 1.0 1/6/20 USER MANUAL PIERO OVEN If the oven is placed on a furniture unit, make sure that it is strong enough to support its weight. Always leave one side open if the gas cylinder is placed inside the furniture unit or ensure adequate air intakes to prevent gas accumulation that could result in fire or explosion.
-
Page 13: Cylinder Connection
REV 1.0 1/6/20 USER MANUAL PIERO OVEN In the trolley versions, the lower support surface can also be used for placing the cylinder. This ensures stability when the oven is moved and repositioned in addition to ensuring the vertical position for proper use. - Page 14 REV 1.0 1/6/20 USER MANUAL PIERO OVEN (~1.5mt) that must be connected to the pressure regulator. If it is necessary to change the gas pipe because of safety reasons or due to wear and tear, follow the instructions below. Gently pull the knobs until they detach from the valve block.
- Page 15 REV 1.0 1/6/20 USER MANUAL PIERO OVEN Locate the 4 screws indicated in the arrows, 2 under the knobs and 2 under the shelf. Unscrew and save for reassembly. Pag. 15 | 62...
- Page 16 REV 1.0 1/6/20 USER MANUAL PIERO OVEN At this point the cover is supported only by the side magnets. Pull slightly to detach it. Pay attention to the capillary tube of the thermometer that is inside the structure, make sure not to crush or bend it.
- Page 17 REV 1.0 1/6/20 USER MANUAL PIERO OVEN Detail of lower passage for gas pipe The cylinder must always be fitted with a pressure regulator* calibrated for the type of gas used (G30_28/30mbar, G31_30/37mbar). Avoid twisting, bending or crushing the pipe. If there are visible signs of wear or the date of use stamped on the pipe has expired, replace it immediately.
- Page 18 REV 1.0 1/6/20 USER MANUAL PIERO OVEN Pag. 18 | 62...
- Page 19 REV 1.0 1/6/20 USER MANUAL PIERO OVEN Once the connections have been made, check the system for leaks. Before proceeding, you must make sure that you have tightened the various fittings in case of maintenance or parts replacement. The check should be carried out outdoors away from naked flames.
- Page 20 REV 1.0 1/6/20 USER MANUAL PIERO OVEN DANGER OF FIRE OR EXPLOSION. As for the final part of the system (between the ramp and the burner) this must be checked by a technician (see next pages). The entire circuit is factory tested and guaranteed against leakage, while the connection to the cylinder is the responsibility of the end customer.
- Page 21 REV 1.0 1/6/20 USER MANUAL PIERO OVEN 1-Removing burners Remove the refractory tops and the ash collecting duct to gain access to the burners at the bottom of the oven. Unscrew and release the burner support brackets Pag. 21 | 62...
- Page 22 REV 1.0 1/6/20 USER MANUAL PIERO OVEN Remove burners from supports to free them and access injectors Pag. 22 | 62...
- Page 23 REV 1.0 1/6/20 USER MANUAL PIERO OVEN After gaining access to the injectors (see above) proceed by applying the soapy solution to all the connections mentioned to check for any leaks (following diagrams). Pag. 23 | 62...
- Page 24 REV 1.0 1/6/20 USER MANUAL PIERO OVEN Flex tube connection to burner door and tube connection on gas ramp (front access) Valve flex tube connection (access from bottom) The correct procedure for the test is: - open the valve on the gas cylinder so that the circuit is under pressure (always with pressure regulator fitted).
- Page 25 REV 1.0 1/6/20 USER MANUAL PIERO OVEN the connection between the ramp and the pipe holder, if it is OK then continue. - reassemble the knobs on the valve rods Test one circuit at a time as follows Before starting, make sure you have removed the battery from the...
- Page 26 REV 1.0 1/6/20 USER MANUAL PIERO OVEN Press firmly and close the hole of injector B with a finger while simultaneously pressing and turning the corresponding valve B1 to the MAX flame position Pag. 26 | 62...
- Page 27 REV 1.0 1/6/20 USER MANUAL PIERO OVEN Press and hold the valve and check the soapy connections for leaks. Repeat the operation with the second circuit N.B. While performing the above, the knobs must always be kept pressed to bypass the safety device that would otherwise interrupt the flow in the absence of flame.
- Page 28 REV 1.0 1/6/20 USER MANUAL PIERO OVEN avoiding it coming into contact with the base of the oven, because when the oven is running it can reach high temperatures with the risk of damaging the rubber pipe if in direct contact.
- Page 29 REV 1.0 1/6/20 USER MANUAL PIERO OVEN If, on the other hand, the support surface cannot be prepared with a hole for its passage, the oven is in any case equipped with lateral provisions for the passage of the gas pipe. Important, do not pass the...
- Page 30 REV 1.0 1/6/20 USER MANUAL PIERO OVEN If the oven is placed on a closed surface, set the feet at the maximum possible height to ensure that there is as much air flow as possible into the lower part so as to facilitate both combustion and general cooling of the control area.
- Page 31 REV 1.0 1/6/20 USER MANUAL PIERO OVEN INITIAL GAS IGNITION. After testing for leaks and placing the oven on a stable surface we can proceed with the ignition. Open the tap on the gas bottle equipped with pressure regulator. Always keep the oven door open during the ignition phases. Turn a knob to MAX and simultaneously hold it down to activate the spark generator.
- Page 32 REV 1.0 1/6/20 USER MANUAL PIERO OVEN Pag. 32 | 62...
-
Page 33: Minimum Setting
REV 1.0 1/6/20 USER MANUAL PIERO OVEN Repeat the procedure with the second burner. Once both burners are lit, you can adjust the power by turning the knobs between the MAX and MIN flame positions. If for any reason the ignition is not successful, wait a few minutes before retrying to allow any gas accumulated inside the oven to disperse. - Page 34 REV 1.0 1/6/20 USER MANUAL PIERO OVEN The adjustment must be made on one burner at a time. Proceed as normal with ignition of a burner. Once the thermocouple has been activated, which allows the flame to remain lit, release the knob and turn it to the MIN flame position.
- Page 35 REV 1.0 1/6/20 USER MANUAL PIERO OVEN With a screwdriver adjust to a flame level of your choice. Once the adjustment has been decided, put the knob back on the axle and repeat the operation on the other valve. It is advisable to adjust both the burners to equal minimum levels in order to avoid non- homogeneous temperatures during minimum use.
- Page 36 REV 1.0 1/6/20 USER MANUAL PIERO OVEN The section dedicated to the exhaust of combusted gases is always open to allow them to escape into the exhaust flue. The front section is equipped with an adjustment valve that can be opened or closed (max~80%).
- Page 37 REV 1.0 1/6/20 USER MANUAL PIERO OVEN Pag. 37 | 62...
- Page 38 REV 1.0 1/6/20 USER MANUAL PIERO OVEN After the initial start-up and pre-heating phases, if you want to reach the operating temperature quickly, just keep the door in place and the register valve closed. Viewed from the front, the knob with the "F" logo remains with the vertical letter.
- Page 39 REV 1.0 1/6/20 USER MANUAL PIERO OVEN food. The closed valve register is also useful when maintaining temperatures, saving fuel because we can work with the burners at minimum (see minimum regulation section) while maintaining a controlled dispersion of heat in the exhaust flue. For any reason, if we...
- Page 40 REV 1.0 1/6/20 USER MANUAL PIERO OVEN Once the cooking is finished, turn it off properly by first closing the supply valve on the gas cylinder. Wait a few seconds until the flame extinguishes itself due to lack of gas. At this point turn off the taps. This procedure is used to empty the entire gas circuit and avoid fires or gas accidents inside the oven.
- Page 41 1/6/20 USER MANUAL PIERO OVEN The Piero model can also be used as a direct wood-burning oven like old traditional ovens. In this case it is recommended not to connect the gas cylinder to the oven as an accidental leakage could create a dangerous gas accumulation with the risk of explosion or fire.
- Page 42 REV 1.0 1/6/20 USER MANUAL PIERO OVEN Open register (above) Closed register (below) Pag. 42 | 62...
- Page 43 REV 1.0 1/6/20 USER MANUAL PIERO OVEN Once the flame has extinguished or the desired temperature has been reached, it is possible to maintain the flame for longer by closing the smoke register so as to limit its dispersion in the exhaust flue.
- Page 44 REV 1.0 1/6/20 USER MANUAL PIERO OVEN the plates. To prevent these residues from falling directly underneath the gas combustion chamber, a fixed perimeter collection system and a removable central duct are provided. Section with top view of the cooking chamber and possible ash drop points (the entire perimeter and the central area).
- Page 45 REV 1.0 1/6/20 USER MANUAL PIERO OVEN Proceed with vacuuming the surface of the refractory plates then, taking care not to break them, lift them and remove them from the oven by storing them temporarily in a safe place. As mentioned before,...
- Page 46 REV 1.0 1/6/20 USER MANUAL PIERO OVEN The central duct can be removed to facilitate access to the gas combustion chamber. Vacuum and keep the burner holes free of obstruction. Pag. 46 | 62...
- Page 47 REV 1.0 1/6/20 USER MANUAL PIERO OVEN NOTES: Pag. 47 | 62...
-
Page 48: Parts Replacement
REV 1.0 1/6/20 USER MANUAL PIERO OVEN PARTS REPLACEMENT: Some parts can be replaced by the customer/user following the instructions on the following pages while some components require the intervention of a specialized technician. The parts that can be replaced independently are:... - Page 49 REV 1.0 1/6/20 USER MANUAL PIERO OVEN Remove the refractory tops and the ash collecting duct to gain access to the burners at the bottom of the oven. Unscrew and release the burner support brackets Pag. 49 | 62...
- Page 50 REV 1.0 1/6/20 USER MANUAL PIERO OVEN Remove the burners from the supports to release them Pag. 50 | 62...
- Page 51 REV 1.0 1/6/20 USER MANUAL PIERO OVEN Unhook the bracket from the old burner and insert it on the new one taking care to insert it in the correct direction. Put the replaced burner back in place taking care not to damage the spark plug and the thermocouple fixed on the burner holder block.
- Page 52 REV 1.0 1/6/20 USER MANUAL PIERO OVEN Interlocking slots on the burner holder Profiles to be inserted in the burner holder interlocking slots Pag. 52 | 62...
- Page 53 REV 1.0 1/6/20 USER MANUAL PIERO OVEN SPARK PLUG: As for the replacement of batteries, ignitor or thermometer, the control box must be accessed by removing the front panel. Gently pull the knobs until they detach from the valve block.
- Page 54 REV 1.0 1/6/20 USER MANUAL PIERO OVEN Locate the 4 screws indicated by the arrows, 2 under the knobs and 2 under the shelf. Unscrew and save for reassembly. At this point the cover is supported only by the side magnets, pull slightly to detach it.
- Page 55 REV 1.0 1/6/20 USER MANUAL PIERO OVEN Faston connection on the spark generator Metal locking clip. Pag. 55 | 62...
- Page 56 REV 1.0 1/6/20 USER MANUAL PIERO OVEN Replace the spark plug by reconnecting it to the spark generator and replacing the locking clip which not only blocks the spark plug but also ensures the correct distance from the burner for proper use. Before restarting the oven, check the function of the replaced part and make sure that it is able to ignite the spark on the burner.
- Page 57 REV 1.0 1/6/20 USER MANUAL PIERO OVEN SPARK GENERATOR AND BATTERY: After removing the front cover (see previous page) you can find the spark generator in the central part of the control box. To replace the battery, unscrew the cap on the right side, remove the AAA battery and insert a new one.
- Page 58 REV 1.0 1/6/20 USER MANUAL PIERO OVEN If the generator has to be replaced, also unscrew the locking ring in order to remove the device. Gently unplug the wiring so as not to damage the terminals, taking care to reconnect them properly to the new generator.
- Page 59 REV 1.0 1/6/20 USER MANUAL PIERO OVEN THERMOMETER: follow the procedure until the front cover is removed. This is to access the place where the thermometer is attached. Before removing the thermometer from the cover, it is necessary to remove the capillary bulb located inside the cooking chamber in the right corner next to the door opening.
- Page 60 REV 1.0 1/6/20 USER MANUAL PIERO OVEN Underneath the plate, in the corner, there is a hole for the capillary bulb to pass through. Pag. 60 | 62...
- Page 61 REV 1.0 1/6/20 USER MANUAL PIERO OVEN Unscrew the 2 screws and remove the fixing cage that holds the thermometer body attached to the front cover. At this point remove the thermometer and replace it taking care not to bend or crush the capillary tube in order not to compromise its operation.
- Page 62 REV 1.0 1/6/20 USER MANUAL PIERO OVEN NOTES: Pag. 62 | 62...
Need help?
Do you have a question about the PIERO and is the answer not in the manual?
Questions and answers