Advertisement
Quick Links
EWS INSTALLATION & OPERATION GUIDE
Installation should be carried out by a competent person with previous plumbing experience.
All installations should comply with local bylaws.
bar
bar
psi
psi
4
5
Before starting, shut off the water supply to the location where the unit is to be installed. Clear the location of any
hazards, ie electrical.
1. Using the housing bracket, mark out the location for affixing the system, ensuring a minimum 1½" clearance at the
base for bowl removal (required for filter cartridge replacement).
2. Remove the bowls to make installation easier.
3. Affix to the mounting surface.
NOTE: Screws supplied are not suitable for all mounting surfaces. Use details in Table 1 to work out the correct fixing
option.
4. Refit bowls onto the housing heads and hand tighten (1st depth filter, 2nd media cartridge). Use the spanner to
tighten bowl, follow the arrow moulded on spanner handle.
5. Turn the water back on and depress the blue pressure release valve to purge any air.
6. Check for leaks around system.
7. Run the system until the filters have been flushed thoroughly (approx. 5 litres).
8. Check for leaks before leaving the system in operation. Use the spanner to tighten bowl (if required).
Please note : Systems left unused for extended periods of time should be fully flushed to drain before using.
1
2
bar
psi
3
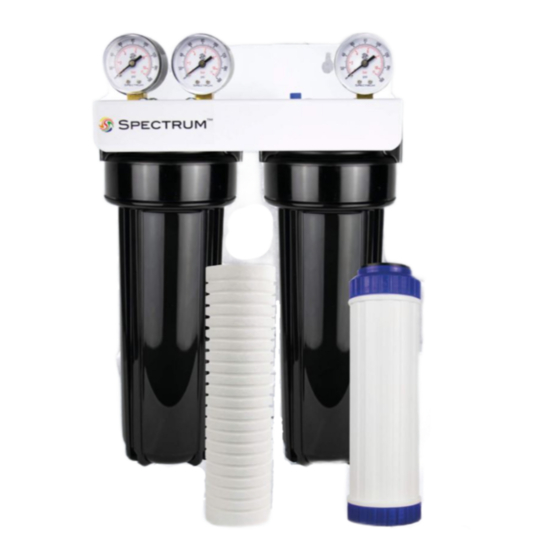
Equipment Supplied
Housing System
1.
2.
3.
4.
5.
Accessories
6.
7.
8.
6
9.
Note: Systems include connecting nipples
7
8
SPECTRUM EWS Installation & Replacement Cartridge Instructions1120v1
Spectrum
Pressure gauges
Pressure Release Valve (PRV)
Housing bracket
OSP Cartridge Kit (installed)
EFH-PK plastic housing
1 x Housing spanner
1 x Screw kit
1 x SPECTRUM brand label
1 x Cartridge replacement label
9
Advertisement

Related Manuals for Spectrum EWS Series


Summary of Contents for Spectrum EWS Series
- Page 1 8. Check for leaks before leaving the system in operation. Use the spanner to tighten bowl (if required). Please note : Systems left unused for extended periods of time should be fully flushed to drain before using. SPECTRUM EWS Installation & Replacement Cartridge Instructions1120v1...
- Page 2 Weights are approximate and are based on use with water and appropriate sized cartridge. Please note : Systems left unused for extended periods of time should be fully flushed to drain before using. SPECTRUM EWS Installation & Replacement Cartridge Instructions1120v1...
Need help?
Do you have a question about the EWS Series and is the answer not in the manual?
Questions and answers