
Subscribe to Our Youtube Channel
Related Manuals for Alcatel-Lucent Enterprise OmniSwitch 2x60


Summary of Contents for Alcatel-Lucent Enterprise OmniSwitch 2x60
- Page 1 Part No. 060718-00, Rev. A July 2021 OmniSwitch 2x60 Hardware Users Guide www.al-enterprise.com...
- Page 2 This user guide documents OmniSwitch 2x60 hardware, including chassis and associated components. The specifications described in this guide are subject to change without notice. Service & Support Contact Information North America: 800-995-2696 Latin America: 877-919-9526 EMEA: +800 00200100 (Toll Free) or +1(650)385-2193 Asia Pacific: +65 6240 8484 Web: businessportal.al-enterprise.com...
-
Page 3: Table Of Contents
About This Guide ......................vii Supported Platforms ......................vii Related Documentation ....................vii Chapter 1 OmniSwitch 2x60 ....................... 1-1 OmniSwitch 2x60 Availability Features .................1-4 Hot-Swapping ......................1-4 Hardware Monitoring ....................1-4 Chapter 2 Getting Started ......................2-1 Installing the Hardware ....................2-1 Items Required ......................2-1 Site Preparation ......................2-1... - Page 4 Contents Chapter 3 Chassis and Power Supplies ..................3-1 OmniSwitch 2x60 Chassis Details ..................3-2 OS2260-10 .......................3-2 OS2260-10 Front Panel ..................3-2 OS2260-10 Rear Panel ..................3-2 OS2260-10 Chassis Specifications ..............3-3 OS2260-P10 ......................3-4 OS2260-P10 Front Panel ...................3-4 OS2260-P10 Rear Panel ..................3-4 OS2260-P10 Chassis Specifications ..............3-5 OS2x60-24 .......................3-6...
- Page 5 Standards Compliance ....................A-5 FCC Class A, Part 15 ....................A-7 Canada Class A Statement ..................A-7 JATE ........................A-7 CISPR22 Class A warning ..................A-7 Korea Emissions Statement ..................A-8 VCCI ........................A-8 OmniSwitch 2x60 Hardware Users Guide July 2021...
- Page 6 Advertencia sobre una apropiada conexión a tierra ........A-14 Leer “información importante de seguridad” ..........A-14 Advertencia de acceso restringido ..............A-14 Advertencia de pulsera antiestática ..............A-14 Clase de seguridad ..................A-14 Advertencia de fuentes de poder ..............A-14 OmniSwitch 2x60 Hardware Users Guide July 2021...
-
Page 7: About This Guide
About This Guide This OmniSwitch 2x60 Hardware Users Guide describes OmniSwitch 2x60 switch components and basic switch hardware procedures. Supported Platforms The information in this guide applies only to OmniSwitch 2260 and OmniSwitch 2360 switches. Related Documentation The following are the titles and descriptions of all the user manuals: OmniSwitch 2x60 Hardware Users Guide •... - Page 8 OmniSwitch 2x60 Hardware Users Guide July 2021...
-
Page 9: Chapter 1 Omniswitch 2X60
1 OmniSwitch 2x60 Refer to the information below for OmniSwitch 2x60 models and components. Model Number Description OS2260-10 Fixed-configuration chassis in a 1U form factor with: 8 x RJ45 non-PoE ports • 4 x SFP (1G) ports • Internal power supply •... - Page 10 48 x RJ45 PoE (802.3at) ports • 4 x SFP (1G) ports • 2 x SFP (1G) Uplink or SFP+ (10G) VFL ports • Internal power supply • 1 Fan • “OS2x60-P48” on page 3-14 page 1-2 OmniSwitch 2x60 Hardware Users Guide July 2021...
- Page 11 2 x SFP (1G) ports • 2 x SFP+ (1G/10G) ports • 2 x SFP (1G) Uplink or SFP+ (10G) VFL ports • Internal power supply • 2 Fans • “OS2x60-P48X” on page 3-16 OmniSwitch 2x60 Hardware Users Guide July 2021 page 1-3...
-
Page 12: Omniswitch 2X60 Availability Features
The user enters “show” commands that output information to the console. The show commands for all the features are described in detail in the CLI Reference Guide. page 1-4 OmniSwitch 2x60 Hardware Users Guide July 2021... -
Page 13: Chapter 2 Getting Started
The installation site must maintain a supported temperature and humidity range as given in the • specifications table for the chassis. See “OmniSwitch 2x60 Chassis Details” on page 3-2. Be sure to allow adequate room for proper air ventilation at the front, back, and sides of the switch. -
Page 14: Unpacking And Installing The Switch
Unpack your chassis as close as possible to the location where it will be installed. Items Included Your OmniSwitch may include the following items: OmniSwitch chassis with power supplies, per order • Transceivers, per order • Blank cover panel • Rack mount brackets • page 2-2 OmniSwitch 2x60 Hardware Users Guide July 2021... -
Page 15: Weight Considerations
Rubber table-mounting feet • Attachment screws • Assorted instructional cards, anti-static bags and additional packaging • Weight Considerations Weights vary depending on model type. Please refer to the chassis specifications table. OmniSwitch 2x60 Hardware Users Guide July 2021 page 2-3... -
Page 16: Airflow Considerations
Note. Clearance is not required at the top and bottom of the chassis. Mounting the Switch For information on mounting the switches, refer to the Chapter 3, “Chassis and Power Supplies.” page 2-4 OmniSwitch 2x60 Hardware Users Guide July 2021... -
Page 17: Connections And Cabling
The console port provides a serial connection to the switch is required when logging into the switch for the first time. By default, this connector provides a DCE console connection. Serial Connection Default Settings baud rate 115200 parity none data bits (word size) stop bits OmniSwitch 2x60 Hardware Users Guide July 2021 page 2-5... -
Page 18: Booting The Switch
Once the switch has completely booted and you have accessed your computer’s terminal emulation software via the console port, you are ready to log in to the switch’s Command Line Interface (CLI) and configure basic information. Continue to “Your First Login Session” on page 2-7. page 2-6 OmniSwitch 2x60 Hardware Users Guide July 2021... -
Page 19: Your First Login Session
You can also unlock session types on a one-by-one basis. For example, to unlock Telnet sessions only, enter the following command: -> aaa authentication telnet local To unlock WebView (HTTP) sessions only, enter the following command: OmniSwitch 2x60 Hardware Users Guide July 2021 page 2-7... -
Page 20: Changing The Login Password
An administrative contact is the person or department in charge of the switch. If a contact is specified, users can easily find the appropriate network administrator if they have questions or comments about the switch. page 2-8 OmniSwitch 2x60 Hardware Users Guide July 2021... -
Page 21: Specifying A System Name
To view your current changes, enter show system at the CLI prompt. Saving Your Changes Once you have configured this basic switch information, save your changes by entering write memory at the CLI command prompt. OmniSwitch 2x60 Hardware Users Guide July 2021 page 2-9... - Page 22 Your First Login Session Getting Started page 2-10 OmniSwitch 2x60 Hardware Users Guide July 2021...
-
Page 23: Chassis And Power Supplies
3-12 OS2x60-P48, page 3-14. OS2x60-P48X, page 3-16. Switch mounting information, page 3-19. • Temperature management, page 3-28. • Monitoring the chassis components via the Command Line Interface (CLI), page 3-28 • OmniSwitch 2x60 Hardware Users Guide July 2021 page 3-1... -
Page 24: Omniswitch 2X60 Chassis Details
CLASS 1 M LASER CAUTION. CAUTION - CLASS 1 M LASER RADIATION WHEN OPEN. DO NOT VIEW DIRECTLY WITH OPTICAL INSTRUMENTS OS2260-10 Rear Panel Item Description Chassis Grounding Lug Power Supply Connector (30W Internal AC Power Supply) page 3-2 OmniSwitch 2x60 Hardware Users Guide July 2021... -
Page 25: Os2260-10 Chassis Specifications
*Note On Chassis Versus Ambient Temperatures. Chassis temperature refers to the sensor reading of the internal switch temperature (threshold or danger). Ambient temperature refers to the approximate room temperature. The ambient temperature will typically be lower than the chassis temperature. OmniSwitch 2x60 Hardware Users Guide July 2021 page 3-3... -
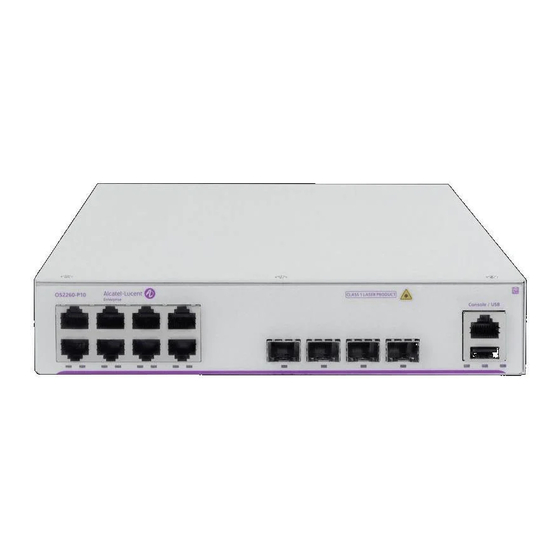
Page 26: Os2260-P10
CLASS 1 M LASER CAUTION. CAUTION - CLASS 1 M LASER RADIATION WHEN OPEN. DO NOT VIEW DIRECTLY WITH OPTICAL INSTRUMENTS OS2260-P10 Rear Panel Item Description Chassis Grounding Lug Power Supply Connector (120W Internal AC Power Supply) page 3-4 OmniSwitch 2x60 Hardware Users Guide July 2021... -
Page 27: Os2260-P10 Chassis Specifications
*Note On Chassis Versus Ambient Temperatures. Chassis temperature refers to the sensor reading of the internal switch temperature (threshold or danger). Ambient temperature refers to the approximate room temperature. The ambient temperature will typically be lower than the chassis temperature. OmniSwitch 2x60 Hardware Users Guide July 2021 page 3-5... -
Page 28: Os2X60-24 Front Panel
CLASS 1 M LASER CAUTION. CAUTION - CLASS 1 M LASER RADIATION WHEN OPEN. DO NOT VIEW DIRECTLY WITH OPTICAL INSTRUMENTS OS2x60-24 Rear Panel Item Description Chassis Grounding Lug Power Supply Connector (65W Internal AC Power Supply) page 3-6 OmniSwitch 2x60 Hardware Users Guide July 2021... -
Page 29: Os2X60-24 Chassis Specifications
*Note On Chassis Versus Ambient Temperatures. Chassis temperature refers to the sensor reading of the internal switch temperature (threshold or danger). Ambient temperature refers to the approximate room temperature. The ambient temperature will typically be lower than the chassis temperature. OmniSwitch 2x60 Hardware Users Guide July 2021 page 3-7... -
Page 30: Os2X60-P24
CLASS 1 M LASER CAUTION. CAUTION - CLASS 1 M LASER RADIATION WHEN OPEN. DO NOT VIEW DIRECTLY WITH OPTICAL INSTRUMENTS OS2x60-P24 Rear Panel Item Description Chassis Grounding Lug Power Supply Connector (260W Internal AC Power Supply) page 3-8 OmniSwitch 2x60 Hardware Users Guide July 2021... -
Page 31: Os2X60-P24 Chassis Specifications
*Note On Chassis Versus Ambient Temperatures. Chassis temperature refers to the sensor reading of the internal switch temperature (threshold or danger). Ambient temperature refers to the approximate room temperature. The ambient temperature will typically be lower than the chassis temperature. OmniSwitch 2x60 Hardware Users Guide July 2021 page 3-9... -
Page 32: Os2X60-P24X
CLASS 1 M LASER CAUTION. CAUTION - CLASS 1 M LASER RADIATION WHEN OPEN. DO NOT VIEW DIRECTLY WITH OPTICAL INSTRUMENTS OS2x60-P24X Rear Panel Item Description Chassis Grounding Lug Power Supply Connector (550W Internal AC Power Supply) page 3-10 OmniSwitch 2x60 Hardware Users Guide July 2021... -
Page 33: Os2X60-P24X Chassis Specifications
*Note On Chassis Versus Ambient Temperatures. Chassis temperature refers to the sensor reading of the internal switch temperature (threshold or danger). Ambient temperature refers to the approximate room temperature. The ambient temperature will typically be lower than the chassis temperature. OmniSwitch 2x60 Hardware Users Guide July 2021 page 3-11... -
Page 34: Os2X60-48 Front Panel
CLASS 1 M LASER CAUTION. CAUTION - CLASS 1 M LASER RADIATION WHEN OPEN. DO NOT VIEW DIRECTLY WITH OPTICAL INSTRUMENTS OS2x60-48 Rear Panel Item Description Power Supply Connector (65W Internal AC Power Supply) Chassis Grounding Lug page 3-12 OmniSwitch 2x60 Hardware Users Guide July 2021... -
Page 35: Os2X60-48 Chassis Specifications
*Note On Chassis Versus Ambient Temperatures. Chassis temperature refers to the sensor reading of the internal switch temperature (threshold or danger). Ambient temperature refers to the approximate room temperature. The ambient temperature will typically be lower than the chassis temperature. OmniSwitch 2x60 Hardware Users Guide July 2021 page 3-13... -
Page 36: Os2X60-P48
CLASS 1 M LASER CAUTION. CAUTION - CLASS 1 M LASER RADIATION WHEN OPEN. DO NOT VIEW DIRECTLY WITH OPTICAL INSTRUMENTS OS2x60-P48 Rear Panel Item Description Power Supply Connector (550W Internal AC Power Supply) Chassis Grounding Lug page 3-14 OmniSwitch 2x60 Hardware Users Guide July 2021... -
Page 37: Os2X60-P48 Chassis Specifications
*Note On Chassis Versus Ambient Temperatures. Chassis temperature refers to the sensor reading of the internal switch temperature (threshold or danger). Ambient temperature refers to the approximate room temperature. The ambient temperature will typically be lower than the chassis temperature. OmniSwitch 2x60 Hardware Users Guide July 2021 page 3-15... -
Page 38: Os2X60-P48X
CLASS 1 M LASER CAUTION. CAUTION - CLASS 1 M LASER RADIATION WHEN OPEN. DO NOT VIEW DIRECTLY WITH OPTICAL INSTRUMENTS OS2x60-P48X Rear Panel Item Description Chassis Grounding Lug Power Supply Connector (950W Internal AC Power Supply) page 3-16 OmniSwitch 2x60 Hardware Users Guide July 2021... -
Page 39: Os2X60-P48X Chassis Specifications
*Note On Chassis Versus Ambient Temperatures. Chassis temperature refers to the sensor reading of the internal switch temperature (threshold or danger). Ambient temperature refers to the approximate room temperature. The ambient temperature will typically be lower than the chassis temperature. OmniSwitch 2x60 Hardware Users Guide July 2021 page 3-17... -
Page 40: Chassis Status Leds
Valid port link (PoE). Blinking Amber Valid port link with activity (PoE). SFP Port LEDs Solid / Blinking Green Uplink port / with activity. Solid / Blinking Amber VFL port / with activity. page 3-18 OmniSwitch 2x60 Hardware Users Guide July 2021... -
Page 41: Mounting The Switch
Reliable Earthing. Reliable earthing of rack-mounted equipment should be maintained. Particular attention should be given to supply connections other than direct connections to the branch (e.g., use of power strips). OmniSwitch 2x60 Hardware Users Guide July 2021 page 3-19... -
Page 42: Airflow Recommendations
Sides. 2 inches minimum at left and right sides. Front. 6 inches minimum at front of chassis. Chassis Top View Note. Clearance is not required at the top and bottom of the chassis. page 3-20 OmniSwitch 2x60 Hardware Users Guide July 2021... -
Page 43: Rack-Mounting
The chassis has rack-mount flanges that support standard 19-inch rack mount installations. • Alcatel-Lucent Enterprise does not provide rack-mount screws. Use the screws supplied by the • rack vendor. - Page 44 Clip in “In” (engaged) position “CLICK” Secure the flange to the chassis using the attachment screw(s). Repeat steps 1 through 4 for the flange on the opposite side of the chassis. page 3-22 OmniSwitch 2x60 Hardware Users Guide July 2021...
-
Page 45: Installing The Chassis In The Rack
Once the holes are aligned, the second person should insert a screw through the bottom hole on each flange. Tighten both screws until they are secure. Install the remaining screws in the top hole of each flange. Be sure that all screws are securely tightened. OmniSwitch 2x60 Hardware Users Guide July 2021 page 3-23... -
Page 46: Standalone (Non-Rack Mounted) Installations
Place the switch on the tabletop “right side up.” Note. Never attempt to operate a switch while it is placed on its top or side. Connect network and management cables as needed. page 3-24 OmniSwitch 2x60 Hardware Users Guide July 2021... -
Page 47: Rack-Mounting 1/2 Width Switches
• If you are installing the switch on a relay rack, be sure to install and secure the rack per the rack • manufacturer’s specifications. OmniSwitch 2x60 Hardware Users Guide July 2021 page 3-25... -
Page 48: Installing Available Rack Mounting Kits
Tighten both screws until they are secure Follow the recommended clearance requirements for the model type being mounted. Rack-mounting Single Chassis page 3-26 OmniSwitch 2x60 Hardware Users Guide July 2021... -
Page 49: Grounding The Chassis
Use this connector to supplement the ground provided by the AC power cord. To do so, install a Panduit Grounding Lug (type LCD8-10A-L) using 8AWG copper conductors to the paint-free area. Refer to the rear chassis views on page 3-2 for location details. OmniSwitch 2x60 Hardware Users Guide July 2021 page 3-27... -
Page 50: Monitoring Chassis Components
1/Slot1 15-93 UNDER THRESHOLD 2/CMMA 15-85 UNDER THRESHOLD 2/Slot1 15-85 UNDER THRESHOLD For more information about this command, see the “Chassis Management and Monitoring Commands” chapter in the CLI Reference Guide. page 3-28 OmniSwitch 2x60 Hardware Users Guide July 2021... -
Page 51: Temperature Errors
The Danger threshold is factory-set and cannot be configured by the user. Addressing danger threshold temperature conditions may include: Checking for a chassis airflow obstruction • Checking the ambient room temperature • OmniSwitch 2x60 Hardware Users Guide July 2021 page 3-29... - Page 52 Monitoring Chassis Temperature Chassis and Power Supplies page 3-30 OmniSwitch 2x60 Hardware Users Guide July 2021...
-
Page 53: Managing Power Over Ethernet (Poe)
Important. It’s recommended that PoE-enabled switches with attached IP telephones should have opera- tional power supply redundancy at all times for 911 emergency requirements. In addition, both the switch and the power supply should be plugged into an Uninterruptible Power Source (UPS). OmniSwitch 2x60 Hardware Users Guide July 2021 page 4-1... -
Page 54: In This Chapter
Viewing Power Status on page 4-4 • Configuring Power over Ethernet Parameters on page 4-4 • Understanding Priority Disconnect on page 4-10 • Monitoring Power over Ethernet via the CLI on page 4-13 • page 4-2 OmniSwitch 2x60 Hardware Users Guide July 2021... -
Page 55: Power Over Ethernet Specifications
“Power over Ethernet Budget”. entire slot Power priority level for lanpower priority a port Capacitor detection lanpower capacitor-detec- Disabled method tion Priority disconnect sta- lanpower slot priority-dis- Enabled connect OmniSwitch 2x60 Hardware Users Guide July 2021 page 4-3... -
Page 56: Power Over Ethernet Budget
Viewing Power Supply Status To view the type and status for installed power supplies, use the show powersupply command: -> show powersupply Total Chassis/PS Power Type Status Location -----------+---------+--------+--------+----------- Internal Total page 4-4 OmniSwitch 2x60 Hardware Users Guide July 2021... -
Page 57: Viewing Poe Status
Once powered, if the device uses less than the maximum, the remaining power will be made available for other devices. Power at Port Standard Class Type Pairs (Watts) IEEE 802.3af 15.4 15.4 802.3at OmniSwitch 2x60 Hardware Users Guide July 2021 page 4-5... -
Page 58: Poe Operational Status
LLDP-based PoE devices will not function as expected until the switch has completed the boot-up • process and the switch is in a state to respond to LLDP requests. page 4-6 OmniSwitch 2x60 Hardware Users Guide July 2021... -
Page 59: Configuring The Total Power Available To A Port
3, slot 1 to 400 watts. This value is now the maximum amount of power the slot can use to power all attached devices (until the value is modified by the user). OmniSwitch 2x60 Hardware Users Guide July 2021... -
Page 60: Setting Port Priority Levels
Guard Band functionality is implemented when the switch has to provide power to a newly connected PD. This functionality is more relevant on switches that have a lower amount of total PoE power available for the switch but a higher default maximum PoE power available to some ports. page 4-8 OmniSwitch 2x60 Hardware Users Guide July 2021... - Page 61 PDs in the case of the power budget being reduced, such as the removal of a power supply. Please refer to the “Understanding Priority Disconnect” on page 4-10 for additional details. OmniSwitch 2x60 Hardware Users Guide July 2021 page 4-9...
-
Page 62: Understanding Priority Disconnect
For example: -> lanpower slot 2/1 priority-disconnect disable Enabling Priority Disconnect To enable priority disconnect, use the lanpower slot priority-disconnect command. For example: -> lanpower slot 2/1 priority-disconnect enable page 4-10 OmniSwitch 2x60 Hardware Users Guide July 2021... -
Page 63: Priority Disconnect Is Enabled; Same Priority Level On All Pd
When a PD is being connected to a port with a lower priority level than all other in the slot, the incoming PD will be denied power, regardless of its physical port number. Devices connected to other higher-prior- ity will continue operating without interruption. OmniSwitch 2x60 Hardware Users Guide July 2021 page 4-11... -
Page 64: Priority Disconnect Is Disabled
When priority disconnect is disabled, power will be denied to any incoming PD, regardless of its port priority status (i.e., low, high, and critical) or physical port number (i.e., 1–24). page 4-12 OmniSwitch 2x60 Hardware Users Guide July 2021... -
Page 65: Monitoring Power Over Ethernet Via Cli
Undefined 30000 Undefined 30000 Undefined 30000 Undefined Slot 3 Max Watts 150 1 Power Supplies Available Note. For detailed information on show lanpower command output, refer to the CLI Reference Guide. OmniSwitch 2x60 Hardware Users Guide July 2021 page 4-13... - Page 66 Monitoring Power over Ethernet via CLI Managing Power over Ethernet (PoE) page 4-14 OmniSwitch 2x60 Hardware Users Guide July 2021...
-
Page 67: Appendix A Regulatory Compliance And Safety Information
Switzerland and therefore marked with the following symbol: Treatment applied at end of life of the product in these countries shall comply with the applicable national laws implementing directive 2002/96/EC on waste electrical and electronic equipment (WEEE). OmniSwitch 2x60 Hardware Users Guide July 2021 page A-1... -
Page 68: China Rohs: Hazardous Substance Table
China RoHS: Hazardous Substance Table Regulatory Compliance and Safety Information China RoHS: Hazardous Substance Table page A-2 OmniSwitch 2x60 Hardware Users Guide July 2021... -
Page 69: Taiwan Rohs: Hazardous Substance Table
Regulatory Compliance and Safety Information Taiwan RoHS: Hazardous Substance Table Taiwan RoHS: Hazardous Substance Table OmniSwitch 2x60 Hardware Users Guide July 2021 page A-3... -
Page 70: California Proposition 65 Warning
State of California to cause cancer and birth defects or other reproductive harm. For more information go to www.P65Warnings.ca.gov. Products are packaged using one or more of the following packaging materials: Corrugated Cardboard Corrugated Fiberboard Low-Density Polyethylene page A-4 OmniSwitch 2x60 Hardware Users Guide July 2021... -
Page 71: Standards Compliance
BSMI, Taiwan (Contact for availability) • KCC, Korea (Contact for availability) • In compliance with UL/EN/IEC 62368-1: This equipment is not suitable for use in locations where children are likely to be present. OmniSwitch 2x60 Hardware Users Guide July 2021 page A-5... - Page 72 • IEC 60068-2-13 • IEC 60068-2-40 • IEC 60068-2-41 • IEC 6068-2-6 • IEC 60068-2-64 • IEC 60068-2-27 • GR-63-CORE • MIL-STD-810F Method 516.5 IV • MIL-STD-810F Method 516.5 C • page A-6 OmniSwitch 2x60 Hardware Users Guide July 2021...
-
Page 73: Fcc Class A, Part 15
CISPR22 Class A warning This is a Class A product. In a domestic environment, this product may cause radio interference. Under such circumstances, the user may be requested to take appropriate countermeasures. OmniSwitch 2x60 Hardware Users Guide July 2021 page A-7... -
Page 74: Korea Emissions Statement
Class 1M Laser Warning CLASS 1M LASER RADIATION WHEN OPEN. DO NOT VIEW DIRECTLY WITH OPTICAL INSTRUMENTS. Network Cable Installation Warning Never install exposed network cables outdoors. Install network cables per manufacturer requirements. page A-8 OmniSwitch 2x60 Hardware Users Guide July 2021... -
Page 75: Translated Safety Warnings
Deutsch: Dieses Gerät soll nur von Personal installiert oder gewartet werden, welches in elektrischen und mechanischen Grundlagen ausgebildet ist. Español: Estos equipos deben ser instalados y atendidos exclusivamente por personal adecuadamente formado y capacitado en técnicas eléctricas y mecánicas. OmniSwitch 2x60 Hardware Users Guide July 2021 page A-9... -
Page 76: Invisible Laser Radiation Warning
Netzverbindungen getrennt sind bevor das Gerät gewartet oder bewegt wird. Español: Antes de empezar a trabajar con un sistema, asegurese que el interruptor está cerrado y el cable eléctrico desconectado. page A-10 OmniSwitch 2x60 Hardware Users Guide July 2021... -
Page 77: Proper Earthing Requirement Warning
Erde angeschlossen werden. Español: Para EMC/EMI, cada fuente de alimentación de CC/CC requiere que el cable de tierra esté conectado desde cada fuente de alimentación de CC/CC a la conexión a tierra común. OmniSwitch 2x60 Hardware Users Guide July 2021 page A-11... -
Page 78: Read Important Safety Information Warning
Español: Debido a las descargas electrostáticas (ESD) puede dañar los componentes del interruptor, debe seguir los procedimientos adecuados para eliminar la EDS de su persona y sus alrededores antes de manipular los componentes del interruptor. page A-12 OmniSwitch 2x60 Hardware Users Guide July 2021... -
Page 79: Instrucciones De Seguridad En Español
Su interruptor esta equipado por fuentes de alimentación múltiples. Para reducir el riesgo de choque eléctrico, asegúrese desconectar todas las conexiones de alimentación antes de mantener o de mover la unidad. OmniSwitch 2x60 Hardware Users Guide July 2021 page A-13... -
Page 80: Advertencia Sobre Una Apropiada Conexión A Tierra
Las unidades OmniSwitch pueden estar equipadas con tres cordones para fuente de poder. Para reducir el riesgo de un choque electrico, desconecte todos los cordones de fuente de poder antes de dar servicio a la unidad. page A-14 OmniSwitch 2x60 Hardware Users Guide July 2021...
Need help?
Do you have a question about the OmniSwitch 2x60 and is the answer not in the manual?
Questions and answers