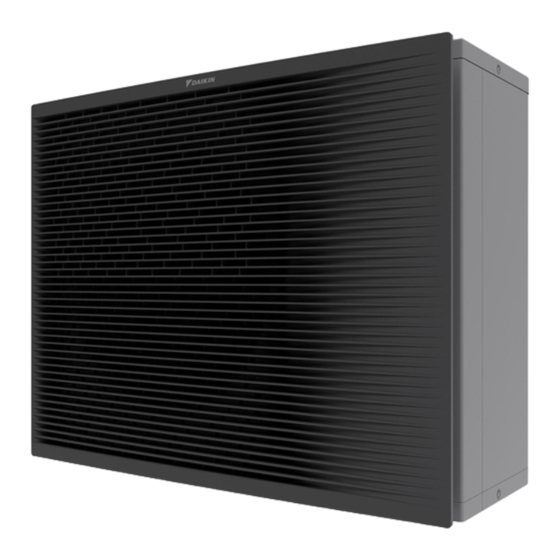
Daikin Altherma ERRA08E V3 Series Installation Manual
Hide thumbs
Also See for Altherma ERRA08E V3 Series:
- Installer's reference manual (348 pages) ,
- Installer's reference manual (324 pages) ,
- Installer's reference manual (308 pages)
Table of Contents
Advertisement
Quick Links
Advertisement
Table of Contents

Subscribe to Our Youtube Channel
Summary of Contents for Daikin Altherma ERRA08E V3 Series
- Page 1 Installation manual Daikin Altherma 3 R MT https://daikintechnicaldatahub.eu ERRA08E▲V3▼ ERRA10E▲V3▼ ERRA12E▲V3▼ ERRA08E▲W1▼ ERRA10E▲W1▼ ERRA12E▲W1▼ Installation manual English ▲= 1, 2, 3, …, 9, A, B, C, …, Z Daikin Altherma 3 R MT ▼= , , 1, 2, 3, …, 9...
-
Page 3: Table Of Contents
In case of V3 models ..........11 6.4.2 In case of W1 models ..........12 ▪ The full set of latest technical data is available on the Daikin To reposition the air thermistor on the outdoor unit....13 Business Portal (authentication required). -
Page 4: Specific Installer Safety Instructions
WARNING legislation. Make sure installation, servicing, maintenance and repair WARNING comply with instructions from Daikin and with applicable legislation and are executed ONLY by authorised persons. ALWAYS use multicore cable for power supply cables. Mounting the outdoor unit (see "4.2 Mounting the outdoor WARNING unit" [ 4 6]) -
Page 5: About The Box
The outdoor unit is designed for outdoor installation only, and for the following ambient temperatures: Cooling mode 10~43°C Heating mode –25~25°C O-ring for drain socket Drain socket Thermistor fixture (for installations in areas with low ambient temperatures) Compressor cover piece ERRA08~12E Installation manual Daikin Altherma 3 R MT 4P708481-1 – 2023.02... -
Page 6: Mounting The Outdoor Unit
(mm) Make sure not to cover the drain hole in the bottom plate of the unit. 4.2.3 To provide drainage Make sure that condensation water can be evacuated properly. Installation manual ERRA08~12E Daikin Altherma 3 R MT 4P708481-1 – 2023.02... -
Page 7: To Open The Outdoor Unit
DANGER: RISK OF BURNING/SCALDING The transportation stay protects the unit during transport. During installation it must be removed. 1 Open the service cover. ERRA08~12E Installation manual Daikin Altherma 3 R MT 4P708481-1 – 2023.02... -
Page 8: To Attach The Compressor Cover Piece
(4x) of the transportation stay to fix it (see "4.4 To remove the ▪ Connect the gas pipe (b) to the gas stop valve. stay" [ 4 7]). transportation 4 Do the following: Installation manual ERRA08~12E Daikin Altherma 3 R MT 4P708481-1 – 2023.02... -
Page 9: Checking The Refrigerant Piping
Do NOT exceed the unit's maximum working pressure (see "PS High" on the unit name plate). amount If the total liquid Then… piping length is… ≤10 m Do NOT add additional refrigerant. ERRA08~12E Installation manual Daikin Altherma 3 R MT 4P708481-1 – 2023.02... -
Page 10: To Charge Additional Refrigerant
32 A, C curve 16 A or 20 A, C curve Electrical installation Earth leakage circuit breaker / 30 mA – MUST comply with national residual current device wiring regulation DANGER: RISK OF ELECTROCUTION Installation manual ERRA08~12E Daikin Altherma 3 R MT 4P708481-1 – 2023.02... -
Page 11: Guidelines When Connecting The Electrical Wiring
In case of V3 models 1 Power supply cable: ▪ Route the cable through the frame. ▪ Connect the wires to the terminal block. ▪ Fix the cable with a cable tie. ERRA08~12E Installation manual Daikin Altherma 3 R MT 4P708481-1 – 2023.02... -
Page 12: In Case Of W1 Models
▪ Route the cable through the frame. ▪ Connect the wires to the terminal block. ▪ Fix the cable with a cable tie. Wires: 3N+GND Maximum running current: Refer to name plate on unit. — Installation manual ERRA08~12E Daikin Altherma 3 R MT 4P708481-1 – 2023.02... -
Page 13: To Reposition The Air Thermistor On The Outdoor Unit
Required accessory (delivered with the unit): tightening torque does NOT exceed 4.1 N•m. Thermistor fixture. 1 If necessary, close the side cover. 7× Click 8× 2 Close the service cover. ERRA08~12E Installation manual Daikin Altherma 3 R MT 4P708481-1 – 2023.02... -
Page 14: To Install The Discharge Grille
1 Remove the upper part of the discharge grille. vibrations. 4 Align and attach the left side. 5 Align and attach the middle part. 6 Align and attach the right side. Installation manual ERRA08~12E Daikin Altherma 3 R MT 4P708481-1 – 2023.02... -
Page 15: Starting Up The Outdoor Unit
3 Rotate the lower part of the discharge grille. 4 Align the ball stud and hook on the grille with their counterparts on the unit. 5 Insert the hook. 6 Insert the ball stud. ERRA08~12E Installation manual Daikin Altherma 3 R MT 4P708481-1 – 2023.02... -
Page 16: Technical Data
9 Technical data Technical data A subset of the latest technical data is available on the regional Daikin website (publicly accessible). The full set of latest technical data is available on the Daikin Business Portal (authentication required). Piping diagram: Outdoor unit... -
Page 17: Wiring Diagram: Outdoor Unit
C1~C7 (A1P) Capacitor Field fuse (field supply) DS1 (A1P) DIP switch F1U~F4U (A2P) Fuse (T 6.3 A / 250 V) Field fuse (field supply) F6U (A1P) Fuse (T 5.0 A / 250 V) ERRA08~12E Installation manual Daikin Altherma 3 R MT 4P708481-1 – 2023.02... - Page 18 Electronic expansion valve (injection) Solenoid valve (4‑way valve) Solenoid valve (low pressure bypass) Solenoid valve (hot gas bypass) Solenoid valve (liquid injection) Z1C~Z11C Noise filter (ferrite core) Z1F~Z6F (A1P, A2P) Noise filter Installation manual ERRA08~12E Daikin Altherma 3 R MT 4P708481-1 – 2023.02...
- Page 20 4P708481-1 0000000Q 4P708481-1 2023.02 Verantwortung für Energie und Umwelt...


Need help?
Do you have a question about the Altherma ERRA08E V3 Series and is the answer not in the manual?
Questions and answers