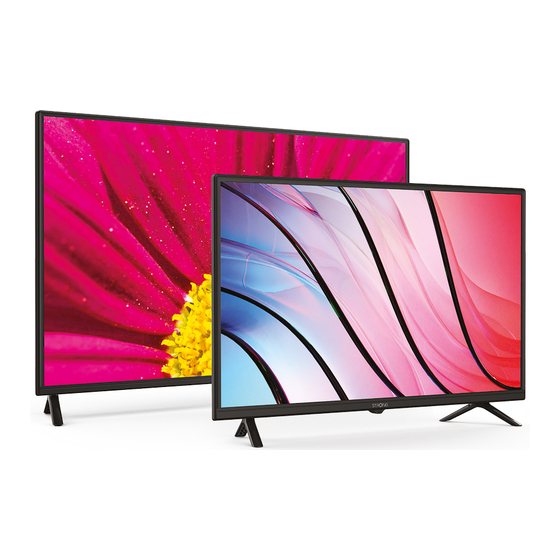
Strong SRT32HF2003 User Manual

Hd tv 32'' (80cm) / fhd 40” (100 cm)

Advertisement

Quick Links

HD TV 32'' (80CM) / FHD 40" (100 CM)
SRT32HF2003 / SRT40FF2003
User Manual
Gebruiksaanwijzing
Bedienungsanleitung
Instrukcja obsługi
Manuel utilisateur
Manual do Utilizador
Manual del Usuario
Manual de Utilizare
Инструкции за употреба
Uputsvo za upotrebu
Uživatelská příručka
Používateľská príručka
Korisnički priručnik
Navodila za uporabo
Használati útmutató
Посібник користувача
Manuale utente
Руководство пользователя
www.strong.tv

Advertisement

Table of Contents
loading

Summary of Contents for Strong SRT32HF2003

  • Page 1 HD TV 32'' (80CM) / FHD 40” (100 CM) SRT32HF2003 / SRT40FF2003 User Manual Gebruiksaanwijzing Bedienungsanleitung Instrukcja obsługi Manuel utilisateur Manual do Utilizador Manual del Usuario Manual de Utilizare Инструкции за употреба Uputsvo za upotrebu Uživatelská příručka Používateľská príručka Korisnički priručnik Navodila za uporabo Használati útmutató...
  • Page 2 0850 15 05 50 +34 91 119 61 76 +386 1 828 08 58 support_fr@strong.tv support_ua@strong.tv +385 1 344 57 66 +380 (44) 238 61 50 Supplied by STRONG Austria Represented by STRONG Ges.m.b.H. Teinfaltstraße 8/4. Stock 1010 Vienna, Austria Email: support_at@strong.tv www.strong.tv...
  • Page 3 Hereby, STRONG declares that the device SRT 32HF2003, SRT 40FF2003 is in compliance with Directive 2014/53/EU. The full text of the EU declaration of conformity is available at the following internet address: https://www.strong.tv/en/doc Subject to alterations. In consequence of continuous research and development technical specifications, design and appearance of products may change.
  • Page 4: Table Of Contents

    To obtain the best performance and safety, please read this manual carefully. Please keep this manual for future reference. TABLE OF CONTENTS 1.0 INSTRUCTION 1.1 SAFETY INSTRUCTIONS 1.2 STORAGE 1.3 ACCESSORIES 1.4 EQUIPMENT SET-UP 2.0 INSTALLATION 2.1 DEFAULT PIN CODE: 0000 2.2 FRONT PANEL/UNDERSIDE 2.3 REAR PANEL 2.4 REMOTE CONTROL...
  • Page 5 5.2.4 DTV MANUAL TUNING (IN DVB-T MODE ONLY) 5.2.5 ATV MANUAL TUNING (IN DVB-C MODE ONLY) 5.2.6 CHANNEL EXTRA SETTINGS 5.3 PICTURE MENU 5.3.1 CONTRAST/BRIGHTNESS/COLOUR 5.3.2 COLOUR TEMPERATURE 5.3.3 NOISE REDUCTION 5.4 SOUND MENU 5.5 TIMER MENU 5.6 LOCK 5.7 OPTION MENU 5.7.1 HDMI CEC 6.0 MEDIA 6.1 USB MENU...
  • Page 6: Instruction

    1.0 INSTRUCTION 1.1 SAFETY INSTRUCTIONS Read all of the instructions before operating the set. Keep these instructions well for later use. „ Only use attachments/accessories specified or provided by the manufacturer (such as the exclusive supply adapter, battery etc.). „ Please refer to the information on the exterior back enclosure for electrical and safety information before installing or operating the apparatus.
  • Page 7: Accessories

    1.3 ACCESSORIES „ 1x installation instructions „ 1x safety instructions/warranty cards „ 1x remote control „ 2x AAA batteries 1.4 EQUIPMENT SET-UP Fig. 1 Install the display on a solid horizontal surface such as a table or desk. For ventilation, leave a space of at least 10 cm free all around the set.
  • Page 8: Installation 2.1 Default Pin Code: 0000

    2.0 INSTALLATION 2.1 DEFAULT PIN CODE: 0000 2.2 FRONT PANEL/UNDERSIDE Fig. 2 NOTE: The graphics are for representation only. 1. Power indicator /remote sensor 2. Speakers 3. Buttons: Input source, Menu, V-/V+, CH-/CH+, Standby/ON. 2.3 REAR PANEL NOTE: The graphics are for representation only. Fig. 3 32”...
  • Page 9 DIGITAL ANT2 ANT1 COMMON INTERFACE SATELLITE AUDIO OUT HDMI1(ARC/CEC) USB1 500mA) 13/18V 13/18V 400mA 400mA 7 8 9 10 40” 1. HDMI 3 (CEC) Connect HDMI input signal from a signal source such as DVD, Blu-ray player or game console. 2.
  • Page 10: Remote Control

    2.4 REMOTE CONTROL Fig. 4 1. q Press to turn the TV on or standby. 2. ! Press to mute or restore the volume. 3. 0 ~ 9 Choose channel directly. Press to access the TV sources. 5. INFO Display information about the current source. 6.
  • Page 11: Installing The Batteries

    „ Do not place the remote control under direct sunlight which will cause deformation of the unit by heat. „ When the remote sensor is under direct sunlight or strong lighting, the remote control will not work. If so, please change the lighting or TV's position, or operate the remote control closer to the remote sensor.
  • Page 12: Air > Dvb-T/T2 I Nstallation

    Next step is depending of your choice in Tuner setup. 3.1 AIR > DVB-T/T2 I NSTALLATION Directly when you select Air and press button. Auto channel searching for channels is started. Just wait until all channels are found. Now you can enjoy digital Tv. If no channels are found, check antenna connection, or check if arial is correct adjusted to transmission tower.
  • Page 13: Electronic Programme Guide (Epg)

    confirm with ENTER button to start auto searching of channels. Just wait until all channels are found. Now you can enjoy digital Tv. If no channels are found, check antenna connection, or check if correct values of network are entered. Start from beginning the installation trough menu/ option/ Installation Guide.
  • Page 14: Channel Extra Settings

    5.2.6 CHANNEL EXTRA SETTINGS Logical Channel Numbering LCN This function sort channels automatically to logic order in DVB-T modus if broadcaster support this function. Press ENTER to select On or Off. Dynamic Rescan This function can search changes or for new channels automatically. Press ENTER to select On or Off. NOTE: if set to On, your channel list sorting can be changed if new channels are found.
  • Page 15: Timer Menu

    AD Switch Turn on the Audio description, you can activate the setting of AD volume. When turn on the audio description, a narrator will describe what is happening on the screen for blind or visually impaired viewers. (Only if available in DTV mode.) Audio Delay If the audio not is in lib-sync can here you adjust the delay of audio.
  • Page 16: Hdmi Cec

    1. Some USB storage devices may not be compatible to operate smoothly with this TV. 2. Back up all of the data in the USB storage device in case data is lost due to an unexpected accident. STRONG does not assume any liability for the losses by misuse or malfunction.
  • Page 17: Play Music

    From time to time you can check if there is an improved software version available. This can be viewed and downloaded from our website www.strong.tv. Search the model number on our website's service support section. If there is an improved software version you can download the file and copy it to the root of a USB device.
  • Page 18: Troubleshooting

    Additionally, we strongly recommend reading the detailed troubleshooting of your TV set in the full user manual available on our website www.strong.tv. If your TV set does not work properly after checking the general and detailed troubleshooting, please contact your dealer, the local Service Hotline, or send an email to our support via www.strong.tv. DO NOT try to open or disassemble your TV set.
  • Page 19: Specifications

    European low power regulations and help you to save energy. NOTE: If the problem persists after these solutions, please contact your local support centre or send a support mail via our website www.strong.tv. 8.0 SPECIFICATIONS Audio Audio Output: 32”: 5W...

This manual is also suitable for:

Srt40ff2003

Table of Contents