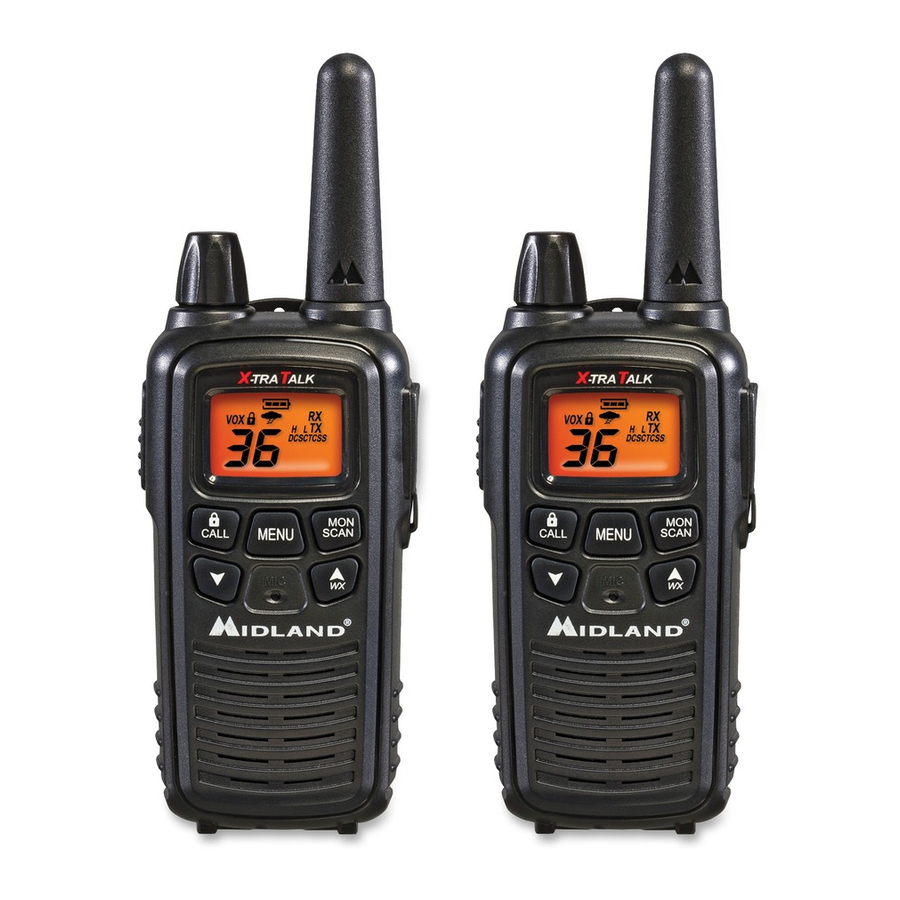
Midland X-TRA TALK LXT600, LXT630, LXT650 Series Manual
- Owner's manual (2 pages) ,
- User manual
Advertisement
- 1 Features
- 2 IMPORTANT NOTICE
- 3 LCD DISPLAY
- 4 CONTROLS
- 5 BATTERY INSTALLATION
- 6 BATTERY LEVEL INDICATOR
-
7
OPERATING YOUR RADIO
- 7.1 POWER ON/OFF AND VOLUME
- 7.2 TRANSMITTING AND RECEIVING A CALL
- 7.3 ABOUT RANGE
- 7.4 LXT600/630/650 SERIES QUICK REFERENCE CHART
- 7.5 MONITOR
- 7.6 SCAN
- 7.7 CALL ALERT
- 7.8 KEYPAD LOCK
- 7.9 CHANNEL SELECTION (FRS BAND)
- 7.10 SETTING PRIVACY CODES
- 7.11 TRANSMIT (TX) POWER LEVEL SELECTION
- 7.12 VOX
- 7.13 ROGER BEEP (end of transmission) TONE
- 7.14 CALL ALERT SELECTION
- 7.15 SILENT OPERATION
- 7.16 NOAA WEATHER RADIO/SCAN
- 7.17 NOAA WEATHER ALERT
- 7.18 EXTERNAL SPEAKER/MICROPHONE JACK
- 8 TROUBLESHOOTING GUIDE
- 9 USE AND CARE
- 10 SPECIFICATIONS
- 11 Documents / Resources
Features
- 36 FRS Channels
- 121 Privacy Codes (38 CTCSS / 83 DCS)
- VOX
- Selectable Call Alert
- NOAA Weather Scan
- NOAA Weather Radio
- NOAA Weather Alert
- Scan Function
- Monitor Function
- Roger Beep Tone
- Silent Operation
- Key Pad Lock
- Power High / Low Settings
- Speaker / Microphone Jacks
- Battery Meter / Battery Low Indicator
This device complies with Part 15 of the FCC Rules. Operation is subject to the following two conditions: (1) this device does not cause harmful interference, and (2) this radio must accept any interference that may cause undesired operation.
To maintain compliance with FCC's RF exposure guidelines, for body-worn operation, this radio has been tested and meets the FCC RF exposure guidelines when used with Midland Radio Corp. accessories supplied or designated for this product. Use of other accessories may not ensure compliance with FCC RF exposure guidelines.
IMPORTANT NOTICE
Exposure To Radio Frequency Energy
Your Midland radio is designed to comply with the following national and international standards and guidelines regarding exposure of human beings to radio frequency electromagnetic energy:
- United States Federal Communications Commission, Code of Federal Regulations: 47 CFR part 2 sub-part J
- American National Standards Institute (ANSI)/Institute of Electrical & Electronic Engineers (IEEE) C95. 1-1992
- Institute of Electrical and Electronic Engineers (IEEE) C95. 1-1999 Edition
- National Council on Radiation Protection and Measurements (NCRP) ofthe United States, Report 86, 1986
- International Commission on Non-lonizing Radiation Protection (ICNIRP) 1998
To control your exposure and ensure compliance with the general population or uncontrolled environment exposure limits, transmit no more than 50% of the time. The radio generates measurable RF energy exposure only when transmitting.
Body-Worn Operation
If you wear the radio on your body when transmitting always use Midlandsupplied or approved belt clip, holster, case, or body harness for this product. Use of any accessories not supplied or approved by Midland may exceed FCC/Health Canada RF exposure guidelines. If you do not use any accessories supplied or approved by Midland, ensure the radio and its antenna are at least 1 inch (2.5cm) from your body when ransmitting.

Changes or modifications to this unit not expressly approved by MIDLAND RADIO CORP. could void your right to operate this unit. Your radio is set up to transmit a regulated signal on an assigned frequency. It is against the law to alter or adjust the settings inside the COMMUNICATOR to exceed those limitations. Any adjustment to your radio must be made by qualified technicians.
LCD DISPLAY

- KEY LOCK ICON – Indicates KEY LOCK mode is on.
- VOX ICON – Indicates when VOX mode is active.
- NOAA WEATHER (WX) BAND ICON – Indicates when the radio is in Weather Band mode.
- CHANNEL NUMBER – Changes from 1~36 on FRS band (1~10 on WX band).
- PRIVACY CODE – Indicates Privacy Code selected by user (oF~38/oF~83). It can only be set in Ch 1~22.
- BATTERY METER – Indicates the battery level.
- RECEIVE (RX) ICON – Indicates radio is receiving a transmission.
- TRANSMIT (TX) ICON – Indicates radio is transmitting a signal.
- TRANSMIT POWER LEVEL ICON – Indicates TX Power setting (H/L).
- PRIVACY CODE ICON – Indicates Privacy Code setting (CTCSS/DCS).
CONTROLS

- POWER/VOLUME KNOB – Turn clockwise to turn the power on and increase the volume level. Turn counter-clockwise to decrease the volume level and turn the power off.
- PTT Button – Press and hold to transmit voice communication.
- CALL/LOCK Button – Press to send a CALL ALERT signal. Press and hold to turn KEY LOCK on/off.
- MIC – Built-in microphone.
- SPEAKER – Built-in speaker.
- ANTENNA
- EXTERNAL SPEAKER/MIC/CHG JACK
- MENU Button – Press momentarily to access Menu mode.
- MONITOR/SCAN Button – Press to enter SCAN mode. Press and hold to enter MONITOR mode.
- UP/WX SCAN
![]() and DOWN
and DOWN ![]() Buttons – Make adjustments in MENU mode. Press and hold the UP button for 5 seconds to activate the NOAA Weather Scan function.
Buttons – Make adjustments in MENU mode. Press and hold the UP button for 5 seconds to activate the NOAA Weather Scan function.
 and DOWN
  Buttons – Make adjustments in MENU
 BATTERY INSTALLATION
Your radio operates with either a NiMH battery pack or optional 3 AAA alkaline batteries. The belt clip should be removed (see below) to ease installation or removal of the batteries.
To install the batteries:
- With the back of the radio facing you, remove the belt clip (seediagram below) for easy access, then remove the Battery Cover by pressing down on the top center and sliding it down from the radio.
- Insert 3 AAA batteries observing the polarity as shown. Installingthe batteries incorrectly will prevent the unit from operating or may damage the unit.
- Return the Battery Cover by sliding it up on the radio. Replace thebelt clip, making sure it locks into place.

INSTALLING THE BELT CLIP
To install the BELT CLIP, slide the clip down into the slot on the back of the radio until the BELT CLIP LATCH clicks. To remove the BELT CLIP, press the LOCK TAB down, then gently pull the belt clip up toward the top of the radio.
CHARGING THE BATTERY PACK
Your radio is equipped for using a rechargeable NiMH battery pack which can be recharged by inserting the AC adapter into the desktop charger (as described below). Initial charge time is 24 hours. Charge time is about 12 hours thereafter. For maximum battery life, we recommend charging the battery pack when the low battery icon comes on. Remove the radios from the charger when the charge time expires.
To charge using a Desktop Charger:
- Place the rechargeable battery packs in the radios.
- Connect the AC adapter into an AC wall outlet.
- Insert the AC adapter plug (or DC Cigarette Lighter adapter ifcharging in vehicle) into the desktop charger jack.
- Place the units into the desktop charger slot and note that the LEDindicator with RED color will light up, indicating charging function. In order to ensure that the battery pack is fully charged, it is recommended that the battery pack be charged for at least 12 hours with the radio turned OFF.

- Only use the Midland NiMH battery pack and AC adapter.
- Do not attempt to charge alkaline batteries or any batteriesor battery packs other than the one indicated in the manual. This may cause leakage and damage to the radio.
- For long term storage of the radio, turn the radio OFF andremove the batteries from the radio.
BATTERY LEVEL INDICATOR
Your radio has a BATTERY LEVEL METER  that shows the battery power level. The greater the number of bars visible, the stronger the battery level. When the battery level is low, the Battery Shell
  icon will flash in the display indicating your batteries should be replaced or recharged if using a rechargeable battery pack.
OPERATING YOUR RADIO
POWER ON/OFF AND VOLUME
Rotate the POWER/VOLUME knob clockwise to turn the radio on and increase the volume level. Rotate the control counter-clockwise to reduce the volume level and to turn the radio off. During Power On, the radio will beep 2 times with different tones, the LCD will display all icons for 1 second and the LCD display will indicate the last channel selected.
TRANSMITTING AND RECEIVING A CALL
To communicate, all radios in your group must be set to the same channel and/or Privacy Code.
- For maximum clarity, hold the radio 2 to 3 inches from yourmouth.
- Press and hold the PTT button and speak in a normal voice into the microphone. The TX icon will appear continuously on the LCD display while transmitting.
- To receive a call, release the PTT button. The RX icon will appear on the display when your radio is receiving a transmision.
ABOUT RANGE
Your LXT Series radios are designed to give you maximum range under optimum conditions.

Maximum Range / Little to No Sight Obstruction

Medium Range / Partial Obstruction to Line of Sight

Short Range / Major Obstruction to Line of Sight
Optimum Conditions are:
- Over water
- Open rural areas without obstructions
- Flat areas where you can see the other person
To ensure you get maximum range:
- Be sure to use fresh or fully charged batteries - low batteries will cause low power conditions.
- Be sure to set your radio to use Hi power.
LXT600/630/650 SERIES QUICK REFERENCE CHART

MONITOR
Pressing and holding the MONITOR button for 3 seconds will let you hear noise so you can adjust the volume level of the radio when not receiving a signal. This could also be used to check any activity on your current channel before transmitting.
Press and hold the MONITOR button for 3 seconds again to get out of MONITOR mode.
SCAN
Your radio can scan all 36 channels for activity. To enter, quickly press the SCAN button. Repeat the same procedure to exit. Your radio will rapidly scan each of the 36 channels and stop on any active channel for 4 seconds before resuming scan.
When you press the PTT button to transmit on an active channel, the scanning function will stop and remain on the active channel. To resume scanning, quickly press the SCAN button.
CALL ALERT
Your radio can transmit a call alert for a fixed length of time. To send a call alert, press the CALL button. The TX icon will appear while transmitting a call alert and a tone can be heard on the speaker for confirmation.
KEYPAD LOCK
To avoid accidentally changing the radio setting, press the LOCK button for 4 seconds. The KEY LOCK icon will appear on the display. PTT and CALL will still be active. Repeat the same procedure to unlock the keypad.
CHANNEL SELECTION (FRS BAND)
Press the MENU button once, and then the  buttons to select one of the 36 FRS channels. To confirm the selection, press the PTT button or press the MENU button again to move to the next feature setting.
SETTING PRIVACY CODES
Your radio has 121 Privacy Codes available to use in channels 1~22. The selected Privacy Code may be different for each channel. To select a Privacy Code for the current channel press the MENU button twice, and then thebuttons to select one of the 38 CTCSS Privacy Codes. Press the MENU button again and then the buttons to select one of the 83 DCS Privacy Codes. The Privacy Code icon on the display will indicate whether you set your Privacy Code in CTCSS or DCS mode. To confirm the selection, press the PTT button or press the MENU button again to move to the next feature setting.
Note : If you select a CTCSS Privacy Code, any pre-selected DCS Privacy Code will be cancelled and vice-versa.
Selecting a Privacy Code of "oF" will disable the Privacy feature. To communicate between two radios, all radios in your group must be set to the same channel and/or Privacy Code selections. The Privacy Code can only be set in channels 1~22.
TRANSMIT (TX) POWER LEVEL SELECTION
Your radio has 2 power level settings. To select the power level on channels 1~7 and 15~36, press the MENU button until a "Pr" icon will appear blinking on the display. Then press the buttons to select TRANSMIT POWER LEVEL icon (H: Hi/L: Lo). To confirm, press the PTT button or press the MENU button again to move to the next feature setting. When the PTT button is pressed during Lo Battery Level condition, the TX Power will automatically switch from Hi(H) to Lo(L) level.
Note: You cannot adjust the power setting on channels 8~14. They are set to Lo power per FCC regulations.
VOX
Your radio has 3 VOX level settings: (oF/1/2/3).
To set VOX, press the MENU button until the display shows "VOX" blinking while on the right of the CHANNEL NUMBER display, an "oF" icon appears. Select "1","2" or "3" by pressing the s\t buttons and push the PTT key, or press the MENU button again to move to the next feature setting.
VOX will be more sensitive on the "1" setting than on the "3" setting.
To turn VOX off, press the MENU button until the display shows "VOX" blinking while on the right of the CHANNEL NUMBER display, a "1","2" or "3" icon appears. Select "oF" by pressing thebuttons and push the PTT key, or press the MENU button again to move to the next feature setting.
ROGER BEEP (end of transmission) TONE
When the PTT button is released, the radio will beep to confirm to other users that your transmission has finished.
To turn the ROGER BEEP tone on, press the MENU button until the display shows a "rb" icon while on the right of the "rb" display, an "oF" icon appears. Select "on" by pressing the buttons and push the PTT key, or press the MENU button to move to the next feature setting.
To turn the ROGER BEEP tone off, press the MENU button until the display shows a "rb" icon while on the right of the "rb" display, an "on" icon appears. Select "oF" by pressing the buttons and push the PTT key, or press the MENU button to move to the next feature setting.
CALL ALERT SELECTION
Your radio has 5 selectable CALL ALERTS.
To select, press the MENU button until a "CA" icon appears and to the right of the "CA" icon the current CALL ALERT setting is displayed. Then press the buttons to make the CALL ALERT selections - the radio will emit a corresponding tone for each selection. To confirm, press the PTT button or press the MENU button to move to the next feature setting.
SILENT OPERATION
Your radio has a SILENT OPERATION mode. In this mode, all "beeps" and "tones" are disabled.
To turn the SILENT OPERATION mode on, press the MENU button until the display shows a "bP" icon while on the right of the "bP" display, an "on" icon appears. Select "oF" by pressing the buttons and push the PTT key or MENU button.
To turn the SILENT OPERATION mode off, press the MENU button until the display shows a "bP" icon while on the right of the "bP" display, an "oF" icon appears. Select "on" by pressing the buttons and push the PTT key or MENU button.
NOAA WEATHER RADIO/SCAN
Your radio has a NOAA WEATHER RADIO function, to enable the user to receive weather reports from designated NOAA stations.
Your radio also has a NOAA WEATHER SCAN function to enable the user to scan all 10 channels of the NOAA WEATHER RADIO. To turn the NOAA WEATHER SCAN on, press and hold the UP/WX  button for 5 seconds while in FRS mode. The radio will go to WX Band mode and start scanning all 10 channels and stop on any active channel. When the channel becomes inactive for 10 seconds the radio will resume scanning.
To stop the NOAA WEATHER (WX) SCAN and set the channel manually on the WX Band, press the MENU button during NOAA WEATHER (WX) SCAN. The radio will stop scanning and the display will show the current WX Band channel setting and the WX Band icon. While on WX Band mode press the buttons to select one of the 10 NOAA WEATHER (WX) BAND channels. To confirm, press the PTT button or press the MENU button to move to the next feature setting.
To turn the NOAA WEATHER RADIO off, press the PTT button. The current FRS radio setting will be displayed and the WX BAND icon will go off.
NOAA WEATHER ALERT
Your radio has a NOAA WEATHER ALERT function, to enable you to automatically receive weather alerts from designated NOAA stations.
The NOAA WEATHER (WX) ALERT is automatically on during NOAA WEATHER SCAN mode.
To turn the NOAA WEATHER (WX) ALERT on during normal NOAA
WEATHER RADIO mode, press the MENU button twice while in NOAA WEATHER SCAN mode. The display shows "AL," while on the right an "oF" icon appears blinking. Select "on" by pressing the buttons.
To confirm, press the PTT button or press MENU. The radio will return to WX BAND and the WX BAND icon will continue blinking. If the radio receives a WX ALERT signal from a designated NOAA station while on FRS Radio mode, the radio will beep for 10 seconds while an "AL" and "In" icon appear on the display, after which it will automatically go to WX BAND.
If any button is pressed during beeping while on FRS Radio mode, the radio will automatically go to WX BAND.
To turn the NOAA WEATHER (WX) ALERT off, press the MENU button twice while in WX Band. The display shows "AL," while on the right an "on" icon appears blinking. Select "oF" by pressing the buttons. To confirm, press the PTT button or press MENU.
Note: The WX Alert is automatically ON during WX SCAN mode.
EXTERNAL SPEAKER/MICROPHONE JACK
Your radio can be used with an optional external speaker/microphone or headset, freeing your hands for other tasks. To use an optional speaker/ microphone or headset:
- Insert the plug(s) into the SPK/MIC jacks.
- Place the earbud into your ear, and adjust the mic into your desired position.
![]()

Note: You can charge a rechargeable NiMH battery pack thru the CHG Jack with the LXADP Adaptor (sold seperatly).
TROUBLESHOOTING GUIDE
| PROBLEM | SOLUTION |
| No Power |
|
| Cannot Receive Messages |
|
| Radio is not responding to button presses |
|
| Display is dim |
|
| Charger not functioning |
|
USE AND CARE
- Use a soft damp cloth to clean the radio.
- Do not use alcohol or cleaning solutions to clean the radio.
- Do not immerse the radio in water.
- Dry the radio with a dry lint-free cloth should it get wet.
- Turn off the radio and remove the batteries during long-termstorage.
If you have a problem which you believe requires service, please call first and speak with a service technician at 816-241-8500. Many problems can be remedied over the phone without returning the unit for service.
SPECIFICATIONS
Channels: 36 FRS Channels +121 Privacy Codes 10 NOAA Weather (WX) Band Channels
Operating Frequency: UHF 462.5500 ~ 467.7125 MHz
Power Source: 3 AAA Alkaline or 3.6V Rechargeable NiMH battery pack
FRS FREQUENCY CHART (MHz)
")
* Channels 8~14 are low-power FRS channels
NOAA WEATHER (WX) RADIO FREQUENCY CHART (MHz)
 RADIO FREQUENCY CHART (MHz)")
* Channel 8,9 and 10 are designated Canadian Marine Frequencies
PRIVACY CODES FREQUENCY CHART (Hz)
")
Note: Privacy codes can be programmed for use on Channels 1~22 only
DCS PRIVACY CODE CHART

Note: Privacy codes can be programmed for use on Channels 1~22 only

Documents / Resources
References
Download manual
Here you can download full pdf version of manual, it may contain additional safety instructions, warranty information, FCC rules, etc.
Download Midland X-TRA TALK LXT600, LXT630, LXT650 Series Manual
Advertisement


Need help?
Do you have a question about the X-TRA TALK LXT600 Series and is the answer not in the manual?
Questions and answers