Cateye Strada Slim CC-RD310W - Cyclocomputer Manual
- Quick start manual (19 pages) ,
- User manual (12 pages) ,
- User manual (12 pages)
Advertisement
- 1 INRODUCTION
- 2 Wireless Sensor
- 3 Preparing the computer
- 4 How to install the unit on your bicycle
- 5 Operating the computer [Measuring screen]
- 6 Changing the computer settings [Menu screen]
- 7 In use
- 8 Troubleshooting
- 9 Standard accessories
- 10 Optional accessories
- 11 Specification
- 12 Limited warranty
- 13 Documents / Resources
INRODUCTION
This model comes with a sensor inspired by modern road bikes. It may not be used for bikes with a large space between the front fork and spoke.
Before using the computer, please thoroughly read this manual and keep it for future reference.
Please visit our website, where detailed instructions with movies are available and the instruction manual can be downloaded.

- Do not concentrate on the computer while riding. Ride safely!
- Install the magnet, sensor, and bracket securely. Check these periodically.
- If a child swallows a battery, consult a doctor immediately.
- Do not leave the computer in direct sunlight for a long period of time.
- Do not disassemble the computer.
- Do not drop the computer to avoid malfunction or damage.
- When you press the MODE button with the computer installed to the bracket, press around the dot section on the surface of the computer. Pressing strongly the other section may result in malfunction or damage.
- When cleaning the computer, bracket and sensor, do not use thinners, benzene, or alcohol.
- Risk of explosion if battery is replaced by an incorrect type. Dispose of used batteries according to local regulations.
- LCD screen may be distorted when viewed through polarized sunglass lenses.
Wireless Sensor
The sensor was designed to receive signals within a maximum range of 60 cm, to reduce chance of interference.
When adjusting the wireless sensor, note the following:
- Signals cannot be received if the distance between the sensor and the computer is too large.
- The receiving distance may be shortened due to low temperature and exhausted batteries.
- Signals can be received only when the back of the computer is facing the sensor.
Interference may occur, resulting in incorrect data, if the computer is:
- Near a TV, PC, radio, motor, or in a car or train.
- Close to a railroad crossing, railway tracks, TV stations and/or radar base.
- Using with other wireless devices, or some particular battery lights.
This device complies with Part 15 of the FCC Rules. Operation is subject to the following two conditions:
- This device may not cause harmful interference, and
- this device must accept any interference received, including interference that may cause undesired operation.
Modifications
The FCC requires the user to be notified that any changes or modifications made to this device that are not expressly approved by CatEye Co., Ltd. May void the user 's authority to operate the equipment.
Hereby, CATEYE Co., Ltd., declares that this CC-RD310W is in compliance with the essential requirements and other relevant provisions of Directive 1999/5/EC.
Preparing the computer
Perform the All Clear operation, when you use the unit for the fi rst time or restore the unit to the condition checked at the factory.

- Clear all data (initialization)
Press the AC button on the back of the computer.
![]()
- Select the speed units
Select "km/h" or "mph"
![]()
- Enter the tire circumference
Enter the front wheel tire circumference of your bicycle in mm.
* Refer to the "Tire circumference reference table" as a guide.
![]()
- Set the clock
Pressing and holding the MODE button switches the display to "Displayed time", "Hour", and "Minute" in order.
![]()


Tire circumference There are the following ways to determine the tire circumference.
- Measure the tire circumference (L) Measure the distance when the tire turns right round with your weight applied, while adjusting the tire pressure appropriately.
![]()
-
Refer to the tire circumference reference table
* Generally, the tire size or ETRTO is indicated on the side of the tire.

| ETRTO | Tire size | L (mm) |
| 47-203 | 12x1.75 | 935 |
| 54-203 | 12x1.95 | 940 |
| 40-254 | 14x1.50 | 1020 |
| 47-254 | 14x1.75 | 1055 |
| 40-305 | 16x1.50 | 1185 |
| 47-305 | 16x1.75 | 1195 |
| 54-305 | 16x2.00 | 1245 |
| 28-349 | 16x1-1/8 | 1290 |
| 37-349 | 16x1-3/8 | 1300 |
| 32-369 | 17x1-1/4(369) | 1340 |
| 40-355 | 18x1.50 | 1340 |
| 47-355 | 18x1.75 | 1350 |
| 32-406 | 20x1.25 | 1450 |
| 35-406 | 20x1.35 | 1460 |
| 40-406 | 20x1.50 | 1490 |
| 47-406 | 20x1.75 | 1515 |
| 50-406 | 20x1.95 | 1565 |
| 28-451 | 20x1-1/8 | 1545 |
| 37-451 | 20x1-3/8 | 1615 |
| 37-501 | 22x1-3/8 | 1770 |
| 40-501 | 22x1-1/2 | 1785 |
| 47-507 | 24x1.75 | 1890 |
| 50-507 | 24x2.00 | 1925 |
| 54-507 | 24x2.125 | 1965 |
| 25-520 | 24x1(520) 24x3/4 Tubular | 1753 1785 |
| 28-540 | 24x1-1/8 | 1795 |
| 32-540 | 24x1-1/4 | 1905 |
| 25-559 | 26x1(559) | 1913 |
| 32-559 | 26x1.25 | 1950 |
| 37-559 | 26x1.40 | 2005 |
| 40-559 | 26x1.50 | 2010 |
| 47-559 | 26x1.75 | 2023 |
| 50-559 | 26x1.95 | 2050 |
| 54-559 | 26x2.10 | 2068 |
| 57-559 | 26x2.125 | 2070 |
| 58-559 | 26x2.35 | 2083 |
| 75-559 | 26x2.35 | 2170 |
| 28-590 | 26x1-1/8 | 1970 |
| 37-590 | 26x1-3/8 | 2068 |
| 37-584 | 26x1-1/2 650C Tubular 26x7/8 | 2100 1920 |
| 20-571 | 650x20C | 1938 |
| 23-571 | 650x23C | 1944 |
| 25-571 | 650x25C 26x1(571) | 1952 |
| 40-590 | 650x38A | 2125 |
| 40-584 | 650x38A | 2105 |
| 25-630 | 27x1(630) | 2145 |
| 28-630 | 27x1-1/8 | 2155 |
| 32-630 | 27x1-1/4 | 2161 |
| 37-630 | 27x1-3/8 | 2169 |
| 40-584 | 27.5x1.50 | 2079 |
| 50-584 | 27.5x1.95 | 2090 |
| 54-584 | 27.5x2.1 | 2148 |
| 57-584 | 27.5x2.25 | 2182 |
| 18-622 | 700x18C | 2070 |
| 19-622 | 700x19C | 2080 |
| 20-622 | 700x20C | 2086 |
| 23-622 | 700x23C | 2096 |
| 25-622 | 700x25C | 2105 |
| 28-622 | 700x28C | 2136 |
| 30-622 | 700x30C | 2146 |
| 32-622 | 700x32C 700C Tubular | 2155 2130 |
| 35-622 | 700x35C | 2168 |
| 38-622 | 700x38C | 2180 |
| 40-622 | 700x40C | 2200 |
| 42-622 | 700x42C | 2224 |
| 44-622 | 700x44C | 2235 |
| 45-622 | 700x45C | 2242 |
| 47-622 | 700x47C | 2268 |
| 54-622 | 29x2.1 | 2288 |
| 56-622 | 29x2.2 | 2298 |
| 60-622 | 29x2.3 | 2326 |
How to install the unit on your bicycle
Refer to the Quick Start Manual, where you can learn how to install the unit in detail using a movie.
http://www.cateye.com/products/detail/CC-RD310W/manual/

Accessories

Attach the bracket to the stem or handlebar

1-1 When mounting the bracket to the stem

1-2 When mounting the bracket to the handlebar

Install the sensor and magnet in a position where the following conditions are satisfied.
-
The distance from the computer to the sensor is within the transmission data length, and the back of the computer faces downward.
![]()
-
The magnet passes through the sensor zone of the speed sensor.
![]()
-
The clearance between the sensor surface and the magnet is within 5 mm.
![]()


Check the mounting position of the sensor and magnet
Get an estimate of the mounting position where the clearance between the magnet surface and sensor zone is 5 mm or less, by sliding up and down the sensor and magnet before mounting.

- Install the sensor

- Install the magnet
![]()
- Remove/Install the computer
![]()


Positioning and testing
Adjust the sensor magnet so that the conditions of A, B, C are satisfi ed, and then check the operation by turning the front wheel slowly.
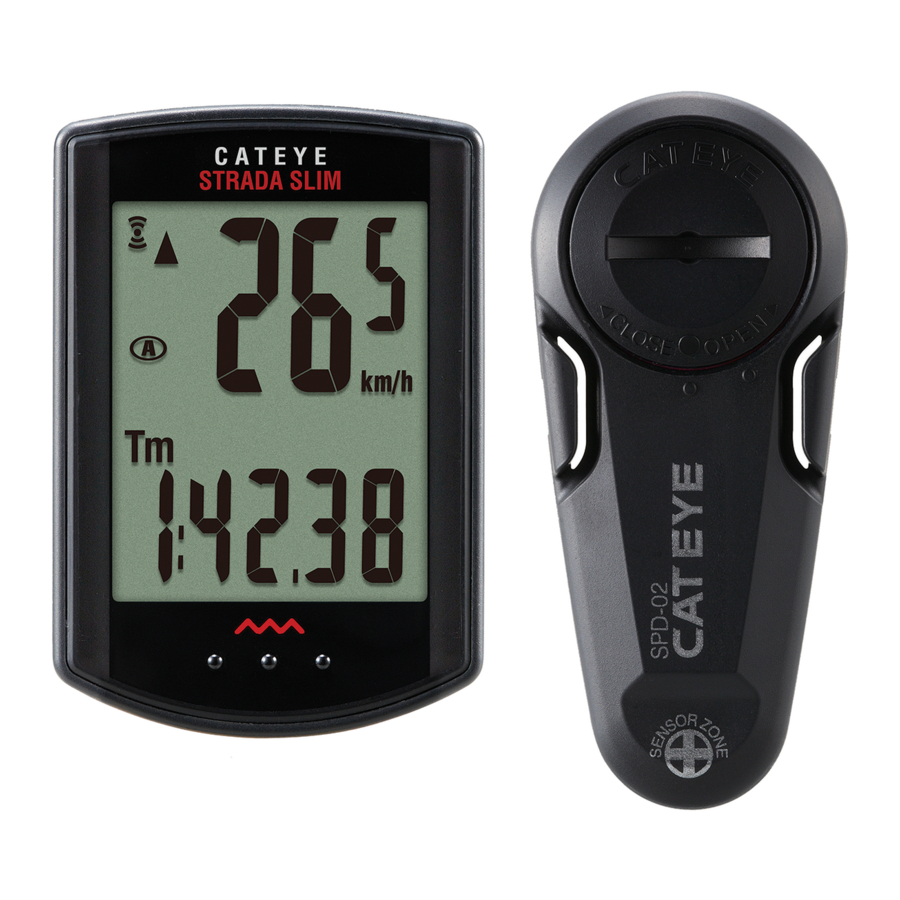
Operating the computer [Measuring screen]

- Pace arrow
Indicates whether the current speed is faster (![]() ) or slower (
) or slower (![]() ) than the average speed.
) than the average speed. -
Sensor signal icon
Flashes in synch with a sensor signal. -
Current speed
0.0 (4.0) – 105.9 km/h [0.0 (3.0) – 65.9 mph]


MODE operation when the computer is mounted on the bracket
When the computer is mounted on the bracket, once you press the dot section on the unit, the MODE button is pressed.

Switching computer function
Pressing the MODE button switches the selected data at the bottom in the order shown in the following figure.


Pressing MENU on the measurement screen changes to the menu screen. Various settings can be changed on the menu screen.
→To "Changing the computer settings [Menu screen]"
* The average speed displays. E instead of the measurement value, when Tm exceeds about 27 hours or Dst exceeds 999.99 km. Reset the data.
Starting / Stopping measurement
The unit automatically measures according to the movement of your bicycle.
The speed unit (km/h or mph) fl ashes during measurement.

Resetting data
With the data other than Dst2 displayed, pressing and holding the MODE button returns the measurement data to 0.
With Dst2 displayed, pressing and holding the MODE button returns only Dst2 to 0.
The total distance (Odo) cannot be reset.

Power-saving function
If the computer has not received a signal for 10 minutes, power-saving screen will activate and only the clock will be displayed.
When you press MODE, or the computer receives a sensor signal, the measuring screen reappears.

If another 60 minutes of inactivity elapses in the powersaving screen, only the speed unit is displayed on the screen. With such a screen, pressing the MODE button returns to the measurement screen.
Changing the computer settings [Menu screen]
Overview of the menu screen
Pressing MENU on the measurement screen changes to the menu screen. Various settings can be changed on the menu screen.

Switching the circumference A/B
From "Selecting the measurement unit"

Setting the tire circumference
To "Setting the clock"

Setting the clock
From "Setting the tire circumference"

Setting the function
To "Entering the total distance"
You can skip the selected data to be displayed. Once you select "Off" for a particular selected data, it will be skipped in the measurement screen.

* The elapsed time (Tm) cannot be skipped. * Even the hidden selected mode is measured, and the measurement result will be refl ected when it is displayed again.
Entering the total distance
From "Setting the function"
Enter the total distance. (No decimal number can be entered.)
* Once you enter any value to the total distance, you can start from the value you entered. Use this function when you renew your unit and/or replace the battery.

Selecting the measurement unit
To "Switching the circumference A/B"
The speed unit (km/h or mph) can be selected.

In use
Maintenance
To clean the computer or accessories, use diluted neutral detergent on a soft cloth, and wipe it off with a dry cloth.
Replacing the battery
Computer
When the display becomes dim, replace the battery. Install a new lithium battery (CR1616) with the (+) side faced upward.

- Press the top edge of waterproof Press the top edge of waterproof inner cap to remove it. inner cap to remove it.
- After replacing the computer bat- After replacing the computer battery, follow the procedure described tery, follow the procedure described in "Preparing the computer" in "Preparing the computer"
- Noting the total distance before replacing the battery allows you to start from the total distance you enter manually after replacing it.
Speed sensor
When the speed is not displayed even after adjusting correctly, replace the battery. Insert new lithium batteries (CR2032) with the (+) sign upward, and close the battery cover fi rmly.
- After replacement, check the positions of the sensor and magnet.
![]()

Troubleshooting
The sensor signal icon does not fl ash.
(the speed is not displayed)
- Check that the clearance between the sensor and magnet is not too large. (Clearance: within 5 mm)
- Check that the magnet passes through the sensor zone correctly.
- Adjust the positions of the magnet and sensor.
- Is the computer installed at the correct angle?
- Back of computer must face toward the sensor.
- Check that the distance between the computer and sensor is correct. (Distance: within 20 to 60 cm)
- Install the sensor within the specifi ed range.
- Is the computer or sensor battery weak?
- In winter, battery performance diminishes.
If the computer reacts only when it is close to the sensor, weak batteries may cause it. - Replace with new batteries according to the procedure specifi ed in the section "Replacing the battery".
Nothing is displayed by pressing the button.
Replace the computer battery according to the procedure specifi ed in the section "Replacing the battery".
Incorrect data appear.
Clear all according to the procedure described in "Preparing the computer".
All measured data are deleted.
Standard accessories

Optional accessories

Specification
| Battery Battery life | Computer | Lithium battery (CR1616) x 1 Approx. 1 year (If the computer is used for 1 hour/ day; the battery life will vary depending on the conditions of use.) |
| Speed sensor | Lithium battery (CR2032) x 1 Distance reaches about 10000 km (6250 mile) |
- This is the average figure of being used under 20°C temperature and the distance between the computer and the sensor is 60 cm.
- The factory-loaded battery life might be shorter than the above-mentioned specification.
| Controller | 4 bit, 1-chip microcomputer (Crystal controlled oscillator) | |
| Display | Liquid crystal display | |
| Sensor | No contact magnetic sensor | |
| Transmission distance | Between 20 and 60 cm | |
| Tire circumference range | 0100 mm - 3999 mm (Initial value: A = 2096 mm, B = 2096 mm) | |
| Working temperature | 0°F - 104°F (0°C - 40°C) (This product will not display appropriately when exceeding the Working Temperature range. Slow response or black LCD at lower or higher temperature may happen respectively.) | |
| Dimensions/ weight | Computer | 1-55/64" x 1-17/64" x 1/2" (47 x 32 x 12.5 mm) / 0.43 oz (12 g) |
| Speed sensor | 2-43/64" x 1-3/16" x 21/64" (67.7 x 30 x 8.1 mm) / 0.48 oz (13.5 g) | |
- The specifications and design are subject to change without notice.
Limited warranty
2-Years Computer/Sensor only
(Accessories and Battery Consumption excluded)
CatEye cycle computers are warranted to be free of defects from materials and workmanship for a period of two years from original purchase. If the product fails to work due to normal use, CatEye will repair or replace the defect at no charge. Service must be performed by CatEye or an authorized retailer. To return the product, pack it carefully and enclose the warranty certificate (proof of purchase) with instruction for repair. Please write or type your name and address clearly on the warranty certificate. Insurance, handling and transportation charges to CatEye shall be borne by person desiring service. For UK and REPUBLIC OF IRELAND consumers, please return to the place of purchase. This does not affect your statutory rights.
Please register your CatEye product on the website.
http://www.cateye.com/en/support/regist/
2-8-25, Kuwazu, Higashi Sumiyoshi-ku, Osaka 546-0041 Japan
Attn: CATEYE Customer Service Section
Phone: (06)6719-6863
Fax: (06)6719-6033
E-mail: support@cateye.co.jp
URL: http://www.cateye.com
[For US Customers]
CATEYE AMERICA, INC.
2825 Wilderness Place Suite 1200, Boulder CO 80301-5494 USA
Phone: 303.443.4595
Toll Free: 800.5.CATEYE
Fax: 303.473.0006
E-mail: service@cateye.com


Documents / Resources
References
Download manual
Here you can download full pdf version of manual, it may contain additional safety instructions, warranty information, FCC rules, etc.
Download Cateye Strada Slim CC-RD310W - Cyclocomputer Manual
Advertisement


Need help?
Do you have a question about the Strada Slim CC-RD310W and is the answer not in the manual?
Questions and answers