Advertisement
- 1 Features
- 2 Parts
- 3 Wireless Remote
- 4 Mounting and Adjusting the Kali50
- 5 To use NP-style Batteries
- 6 Removing Batteries
- 7 Using AC Power
- 8 Power OFF Kali50
- 9 The LCD Display
- 10 Adjusting Brightness and Temperature
- 11 Using the Barn doors
- 12 Setting the Group on the Kali50
- 13 Setting the Wireless Channel on the Kali50
- 14 Using the Remote Control
- 15 Install Batteries on Remote control
- 16 Power ON/OFF the Remote control
- 17 Adjusting Brightness on Remote control
- 18 Adjusting Color Temperature on Remote control
- 19 Remote ON/OFF Kali50 on Remote control
- 20 Setting the Group on the Remote Control
- 21 Setting the Wireless Channel on the Remote Control
- 22 Tech Specs
- 23 What's included
- 24 Documents / Resources
Features
The Phottix Kali50 Video LED is a compact and powerful light source for still and video photography. It uses the latest in Flicker-free LED technology, making it more efficient and durable.

The Kali50 features:
- 50W of power
- Long-life, Low-Heat LEDs
- Durable one-piece aviation-spec Aluminum shell
- Battery / AC Power Modes
- Adjustable brightness and color temperature
- 2.4G Wireless remote control
Please note:
- Do not shine the LED directly at people's eyes at short distances. This can cause shortterm vision issues. Use at distances of at least 1m from subject – or use a re ector/di user to soften the light.
- Do not place the LED close to alcohol or ammable objects.
- Do not place liquids on or near the LED. The product is not water, splash or dust resistant.
- Use a soft cloth and neutral cleaner to clean the LED light.
- Do not use strong cleaning agents or solvents such as thinner gasoline or alcohol to clean the LED light.
- Do not store the LED at temperatures of +40C as high temperatures may damage the product components.
- Do not use the LED in outdoors in direct sunlight for an extended period of time to prevent the product from overheating and possible damage.
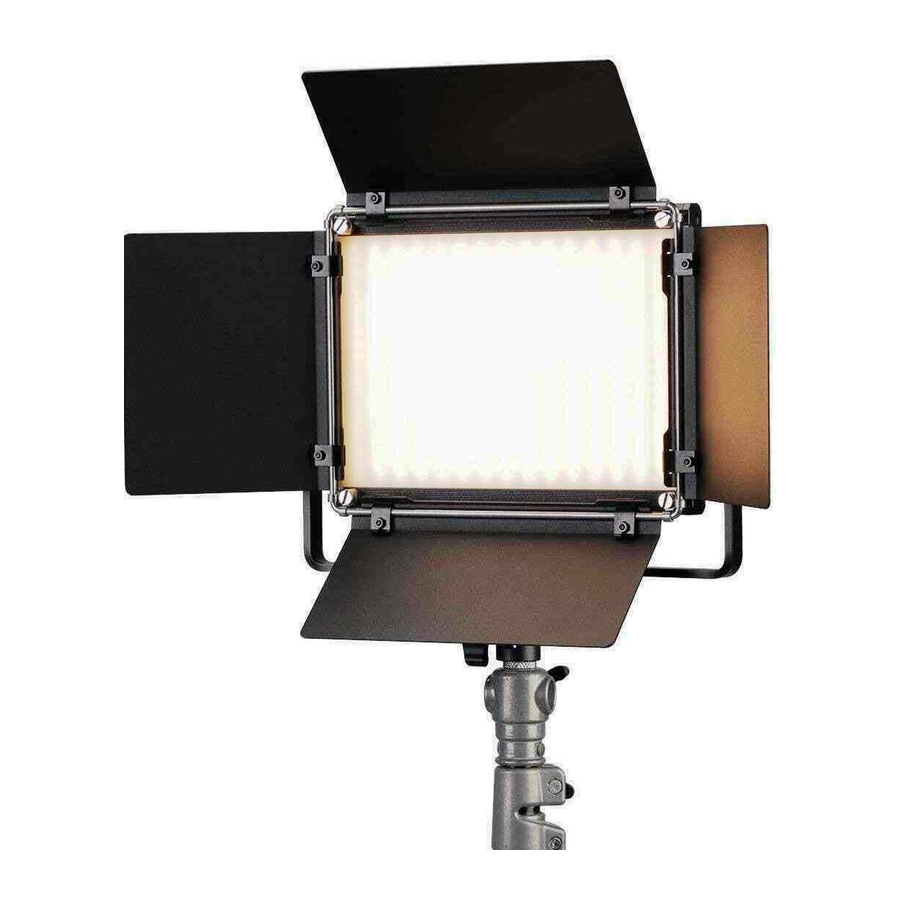
Parts

- Battery Ports
- Locking Nuts
- LCD Display
- Brightness Button
- Color Temperature Button
- Channel / Group Button (CH/Grp)
- Adjustment Dial
- AC Adapter Port
- Power / Battery / AC modes Switch
- Battery Release Button
Wireless Remote

- LCD
- Channel / Group button (CH/Grp)
- ON/OFF button
- + / - Adjustment Buttons
- Set Button
Mounting and Adjusting the Kali50
- Use the Mounting Bracket to mount the Kali50 to a Light Stand or other mount. Ensure the Mounting Bracket Locking Nut is securely fastened.
- Loosen and tighten the Locking Nuts on the Mounting Bracket to adjust the Kali50 angle.
To use NP-style Batteries
- Align the battery with the Battery Port
- Push the battery until locked into position.
- Move the Power / Battery / AC Modes Switch to the Battery position.
Please Note:
The Kali50 will operate with 2 pcs NP-F750 or NP-F960 batteries being used only.
Removing Batteries
Push the battery release button and remove battery from the Kali50's battery chamber.
Using AC Power
- Connect the AC Adapter to the AC Adapter Port on the Kali50
- Plug the other end of the AC Adapter into mains power.
- Move the Power / Battery / AC Modes Switch to the AC position.
Power OFF Kali50
Move the Power / Battery / AC Modes Switch to the Center position.
The LCD Display
On the Kali50 LCD Display
- Brightness displayed from 01-100%.
- Color Temperature is displayed from 3200K-5600K.
- Channel (CH) from 01-40
- Group A/B/C
- The estimated remaining battery power is indicated by the battery icon.
Adjusting Brightness and Temperature
- Press the Brightness button and turn the Adjustment Dial to adjust output from 01–100%.
- Press the Color temperature button and turn the Adjustment Dial to adjust color temperature from 3200K-5600K.
Using the Barn doors
The Barn doors included with the Kali50 are very useful in control and shaping light.
Setting the Group on the Kali50
- Press the Channel Button (CH/Grp) on Kali50.
- Use the Adjustment Dial to set the group between A/B/C.
Setting the Wireless Channel on the Kali50
- Press the Channel Button (CH/Grp) twice on Kali50.
- Use the Adjustment Dial to set the Channel from 01-40.
Please note:
The Channel and Group on the Remote and Kali50 needs to be the same for the remote to control the Kali50.
Using the Remote Control
The Phottix Kali50 comes with wireless remote control. Using this remote, Kali50 can be controlled from up to 50m away.
Install Batteries on Remote control
- Slide out back side cover.
- Insert 2pcs AAA batteries.
Power ON/OFF the Remote control
Hold 1sec ON/OFF button on Remote Control to power ON/OFF the Remote Control.
Adjusting Brightness on Remote control
Press the + / - buttons to direct adjust output from 01–100%.
Adjusting Color Temperature on Remote control
- Press the Set button
- Press the + / - buttons to adjust color temperature from 3200K-5600K.
- Press the ON/OFF button to confirm and exit.
Remote ON/OFF Kali50 on Remote control
- Press ON/OFF button on Remote Control to remote ON/OFF the Kali50.
- LCD will display OFF on both Kali50 and remote control when remote Kali50 to OFF.
Setting the Group on the Remote Control
- Press the CH/Grp Button to enter group setting.
- Using the + / - buttons to select the group between A/B/C
- Press the ON/OFF button to confirm and exit.
Setting the Wireless Channel on the Remote Control
- Press the CH/Grp Button twice to enter channel setting.
- Set the Channel from 01-40 using the + / - buttons
- Press the ON/OFF button to confirm and exit.
Tech Specs
Kali50
| Color temperature: | 3200K - 5600K |
| Brightness range: | 01% - 100% |
| Max. brightness / illuminance: | 1800Lux @ 1m |
| Max. Power: | 50W |
| Color rendering index: | CRI 96+/TLCI 98+ |
| Input power AC/DC adaptor operation voltage: | 100-240VAC |
| Battery operation: | NP-F750 or NP-F960 battery x2 |
| LED quantity: | 300pcs Cool + 300pcs Warm |
| Dimension: | 274mm x 64mm x 259mm |
| Weight: | 1180g (not include battery) |
Remote Control
| Remote Control: | 40 channels 2.4G wireless remote control |
| Remote Control Range: | <50m |
| Battery operation: | AAA x 2 |
What's included
- Kali50 LED Panel
- Remote control
- AC Adapter
- EU plug
- US plug
- UK plug
- SAA plug
Phottix.com


Documents / ResourcesDownload manual
Here you can download full pdf version of manual, it may contain additional safety instructions, warranty information, FCC rules, etc.
Advertisement


Need help?
Do you have a question about the Kali50 and is the answer not in the manual?
Questions and answers