Microsoft Surface Go 2 Manual
- Replacement manual (17 pages) ,
- Replacement manual (16 pages) ,
- User manual (100 pages)
Advertisement
Device Identity Information
Surface Go 2 Models
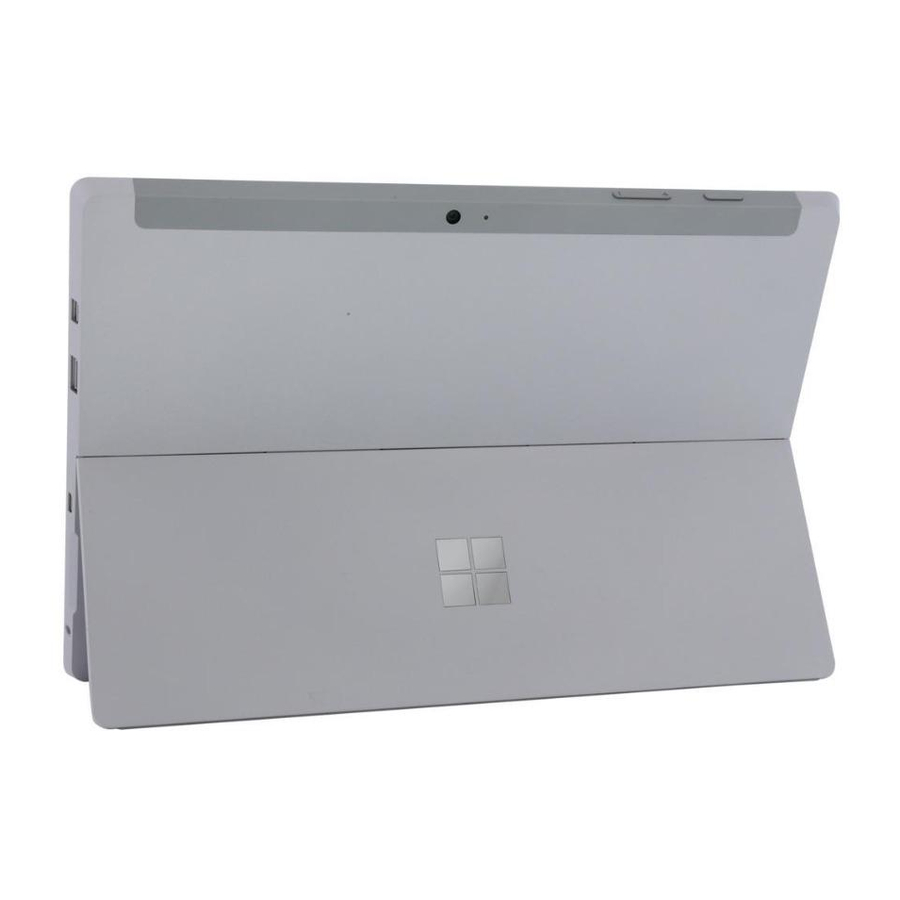
The serial number and model for Surface Go 2 are located under the kickstand. The model number is also noted on the kickstand's underside.

Glossary of Terms
The following terms are used throughout this manual:
- SDT – Surface Diagnostic Toolkit
- ESD – Electro-Static Discharge
- IBC – Tablet Back Cover
- TDM – Touch Display Module is the complete screen with all layers.
- FRU – Field Replaceable Units are sub-system components such as the Kickstand.
General Information, Precautions, Warnings
 This symbol identifies important safety and health information in this manual.
Service Tools and Jigs
Standard Service Tools:
- Anti-static wrist strap (1 MOhm resistance)
- Soft Electro-Static Discharge (ESD) safe mat
- 3IP (Torx-Plus) driver
- Microfiber cloth
The tools identified on this list can be purchased from many different commercial sources, including but not limited to Amazon.com; iFixit; Chemdex, and other vendors.
General Safety Precautions
Always observe the following, general safety precautions:
- Opening and/or repairing any device can present electric shock, device damage, fire, and/or personal injury risks and other hazards. Exercise caution when undertaking these activities as described in this manual. Only qualified IT technicians to whom Microsoft has provided this manual should attempt to remove the rSSD. Only Microsoft-authorized service providers should undertake repair activities.
- Always select and use the appropriate AC power supply for a device. We recommend you use genuine Microsoft power supply units and AC power cords. A genuine Microsoft power supply unit is provided with every device.
- Use only AC power provided by a standard (mains) wall outlet. Do not use non-standard power sources, such as generators or inverters, even if the voltage and frequency appear acceptable.
- Improper use of device batteries may result in fire or explosion. Only open the enclosure on a device as outlined in this manual. Do not heat, puncture, mutilate, or dispose of devices or their batteries in fire. Do not leave or charge devices in direct sunlight or exposed to other extreme sources of heat for an extended period of time. Doing so may cause damage or melt the batteries.
For additional product safety information, including information about
- Hearing conservation
- Heat related concerns
- Choking hazard/small parts
- Interference with medical devices
- Broken glass
- Photosensitive seizures
- Musculoskeletal disorders
See aka.ms/surface-safety or the Surface app. To open the Surface app, select the Start button, enter Surface into the search box, then select the Surface app.
Repair-Specific Precautions and Warnings
- Prior to opening device, ensure device is powered off and disconnected from a power supply.
- We recommend wearing protective eyewear as a safety precaution when disassembling/re-assembling a device.
- Before opening device, always check that an anti-static wrist strap is worn and work area is properly grounded to ensure electrostatic discharge (ESD) safe environment
- Check to make sure that general guidelines and ESD compliance steps are followed prior to starting activities. Refer to Prior to Device Disassembly section for details.
- As you remove each subassembly from the device, place the subassembly (and all accompanying screws) away from the work area to prevent damage to the device and to the subassembly.
Safety Policies/Procedures
Microsoft's field product safety program team is referred to as the Rapid Response Team (RRT). All device issues that may be safety related should be managed per the following instructions.
As a quick guide, any Microsoft Surface device that visually exhibits any of the following symptoms shall be immediately removed from the replacement process and delivered to your Variance Manager or IT Support Professional for notification to Microsoft RRT:
- Any burned or melted components, traces or plastic parts on the outside of the device, or which otherwise exhibits heat damage, including charring seen in charging and other ports;
- Any burned or melted components, traces or plastic parts on the inside of the device, or which otherwise exhibits heat damage.
- Any accessories exhibiting melting or heat damage that are included with the Microsoft device, such as power supplies, keyboards, mice, cables, charging connectors, etc.
- Any devices that exhibit a case that has separated apart or opened for reasons other than customer abuse (e.g., impact damage from dropping, evidence of tampering, separation caused by a malfunctioning battery).
- Any other finding that may constitute a safety hazard to the user, such as sharp edges on plastics.
The Variance Manager or IT Support Professional must send an email to RRT with pictures showing the damage within 24 hours of device receipt. Refer to the ASP Guidebook for the RRT email address. Your email should include:
- The model and serial number of the affected Microsoft Surface device and/or accessory(ies).
- The Service Request (SR) Number that the device was received under (Note as N/A if no SR exists).
- A brief description of the damage found.
- Clear photographs depicting the symptoms observed.
The Variance Manager or IT Support Specialist must await instructions from Microsoft Product Safety RRT for the affected unit before continuing with activities or returning the device to the end user.
Illustrated Device Diagram

Illustrated Device Diagram - Reference Descriptions
| Item # | SKU | Description | Model # | Segment |
| 1 (multiple options) | 1RD-00001 | Srfc Go 2 kickstand a WW Hdwr Platinum FRU Exchange NFR | 1901 | WIFI Consumer |
| 1RD-00002 | Srfc Go 2 kickstand b WW Hdwr Platinum FRU Exchange NFR | 1926 | WIFI Commercial | |
| 1RD-00003 | Srfc Go 2 kickstand c WW Hdwr Platinum FRU Exchange NFR | 1927 | LTE (all) |
Service Diagnostics/Troubleshooting Overview
- For general Surface support, visit www.support.microsoft.com
- To troubleshoot device feature/function problems or learn more about Surface Go 2 visit www.aka.ms/SurfaceGoHelp
- If you'd like to learn more about Windows, visit www.aka.ms/WindowsHelp
- To learn more about the accessibility features of the Surface Go 2, go to the online user guide at www.aka.ms/Windows-Accessibility
Software Tools
- How To: Update Surface device firmware and OS
- How To: Surface Tools Video
- Download: Surface drivers and firmware
- Download: Surface Diagnostic Toolkit (SDT)
- Download: Surface Data Eraser
- Download: Surface Imaging Tools
Troubleshooting Approach
The following approach should be considered when troubleshooting Surface devices:
- Update device to latest OS/FW versions using the SDT tool.
![]()
Device updates are required as a prerequisite to all hardware replacement. - Verify any suspected hardware failures by setting the device in a known OS/FW version state and running SDT to verify fault:
- Run SDT and verify if condition persists – Refer to Software Tools section for details on SDT
- If problem is not resolved, then re-image SSD.
- If re-mage fails replace device per established procedures.
- Run SDT and verify if condition persists – Refer to Software Tools section for details on SDT
Component Removal and Replacement Procedures
Prior to Device Disassembly:
- Before attempting any removal or replacement, always ensure device is powered off and disconnected from a power supply.
- Always ensure that the work surface is covered with an ESD-safe, soft, non-marring material.
- Work surfaces should be cleaned regularly to ensure debris/abrasive particles are not present.
- Check to make sure that general guidelines and ESD compliance steps are followed prior to opening device.
Kickstand Replacement Process
Preliminary Requirements

Be sure to follow all special (bolded) notes of caution within each process section.
Required Tools and Components
- Tools:
- 3IP (Torx-Plus) driver
- Soft ESD safe mat
- Microfiber cloth
- Components:
- New Kickstand FRU
(FRU includes new 3IP screws)
- New Kickstand FRU
Prerequisite Steps:
- Power off device - Ensure device is powered off and disconnected from a power supply.
- General Safety - Check to make sure that general guidelines and ESD compliance steps are followed prior to opening device. Refer to Prior to Device Disassembly section for details.
- Verify device model number – Ensure the model number on the new kickstand FRU matches the model number on the backside of the device.
Procedure – Removal (Kickstand)
- Place device screen-down on soft ESD safe mat. Ensure mat is clear of any abrasive material that may scratch the Touch Display Module (TDM) glass.
- Extend the kickstand to approximately 90°
 - Step 1")
 - Step 1")
- Remove hinge screws – Using the 3IP (Torx-Plus) driver, loosen all four hinge screws by 2-3 rotations. With the screws loose, use your finger to hold the back of the kickstand behind each hinge while fully removing the two hinge screws. Ensure screws do not fall into the hinge opening.
 - Step 2")
- Lay Kickstand Down - Lay the kickstand flat against the IBC. Be careful not to jostle the kickstand in this position as it may cause abrasions on the IBC.
 - Step 3")
- Angle hinges Down - Using your thumb or index finger, push both hinges down from 90° to approximately 30°. This will require a great deal of force. If necessary, place the microfiber cloth between your finger and the hinge for comfort. Be careful not to push the hinge all the way into the bucket as it will be difficult to pull back out.
 - Step 4")
- Remove Kickstand - Using the palm of your hand, firmly hold the device down from the center of the IBC. Simultaneously, grip the kickstand off-center between your thumb and index finger and firmly pull. Pull with a moderate amount of force until the foam inserts slide out of the device. If the kickstand is stuck, ensure it is not caught on the hinges.
 - Step 5")
 - Step 2")
 - Step 3")
 - Step 4")
 - Step 5")
Procedure – Installation (Kickstand)
Use caution when handling new kickstand assembly to avoid cosmetic damage of the kickstand and the device. The Surface Go 2 kickstands are not compatible with the original Surface Go.
- Insert Foam Tabs - With the hinges still at ~30° start to slide the new kickstand's foam tabs into the slots on the back of the IBC. Foam should slide in with minimal force—do not crumple the foam by using excess force.
![]()
Do not use any tool or sharp object to assist inserting the tabs into the slots. Only the tabs should be inserted. Doing so could damage to internal components.
 - Step 1")
- Lay Kickstand Down - Lay the kickstand flat against the IBC. Be careful not to jostle the kickstand in this position as it may cause abrasions on the IBC.
 - Step 2")
- Angle hinges Up - Using your thumb or index finger, push both hinges up from 30° to approximately 90°. This will require a great deal of force. If necessary, place the microfiber cloth between your finger and the hinge for comfort.
 - Step 3")
- Install hinge screws - Flip the kickstand up to approximately 90° such that the threaded holes of the kickstand align with the mounting holes of the hinge. Install the hinge screws in the order shown below with the 3IP (Torx-Plus) driver. Ensure screws do not fall into the hinge opening. Use your finger to hold the back of the kickstand behind the hinge while installing the screws until they are fully seated. Verify the kickstand is properly aligned and seated in the hinges, then tighten the screws an additional ~quarter turn (~90°).
 - Step 4")
 - Step 5")
- Final inspection Kickstand installation - Fold the kickstand down and peel off protective plastic from the kickstand and logo if present. Verify the side edges of the kickstand are aligned with the midframe walls and that there are no obvious steps/gaps between the kickstand and the IBC. Wipe the device thoroughly (including under the kickstand) with the microfiber cloth to remove all fingerprints.

 - Step 1")
 - Step 2")
 - Step 3")
 - Step 4")
 - Step 5")
Environmental Compliance Requirements
All waste materials, including waste electrical and electronic equipment (WEEE) and batteries, must be managed according to applicable laws and regulations and Microsoft standards and requirements, including H09117. In case of questions, please contact AskECT@microsoft.com
©2020 Microsoft.
Disclaimer of Warranties and Limitation of Damages
All information, content, materials, and products made available in or in conjunction with this Manual are provided by Microsoft on "as-is" and "as available" basis, unless otherwise specified by Microsoft in writing. Microsoft makes no representations or warranties of any kind, express or implied, as to the information, content, materials and products included or otherwise made available to you or accompanying this Manual unless specified in writing. You expressly agree that your use of the information, content, materials, and product in or accompanying this Manual is at your sole risk.
To the fullest extent permissible by law, Microsoft disclaims all warranties, express or implied, including but not limited to implied warranties of merchantability and fitness for a particular purpose. To the fullest extent permissible by law, Microsoft shall not be liable for damages of any kind arising from the use of information, content, materials, or product made available in or in conjunction with this Manual, including but not limited to direct, indirect, incidental, consequential, and/or punitive damages unless otherwise specified in writing.
Notice
Microsoft and its suppliers may have patents, patent applications, trademarks, copyrights, trade secrets and/or other intellectual property rights covering subject matter in this document. Microsoft's furnishing of this document to recipient does not grant or imply any license to any patents, trademarks, copyrights, trade secrets or other intellectual property rights, and recipient's permitted use of any such intellectual property rights, if any, is solely governed by the Agreements.
This document and the information it contains are subject to change without notice. You can find the latest information on Surface device servicing and repair at https://aka.ms/surfaceservicing. Always consult the most up-todate information available before performing device servicing or repair.
© 2020 Microsoft Corporation. All rights reserved.
Document Part Number: M1154224-001

Documents / Resources
References
Amazon.com. Spend less. Smile more.
![aka.ms]() Product safety warnings and instructions - Microsoft Support
Product safety warnings and instructions - Microsoft Support![www.support.microsoft.com]() Microsoft Support
Microsoft Support![www.aka.ms]() Surface Go help & learning
Surface Go help & learning![www.aka.ms]() Windows help & learning
Windows help & learning![www.aka.ms]() Discover Windows accessibility features - Microsoft Support
Discover Windows accessibility features - Microsoft SupportTop support solutions for Surface devices in the enterprise - Surface | Microsoft Learn
Download manual
Here you can download full pdf version of manual, it may contain additional safety instructions, warranty information, FCC rules, etc.
Advertisement


Need help?
Do you have a question about the Surface Go 2 and is the answer not in the manual?
Questions and answers