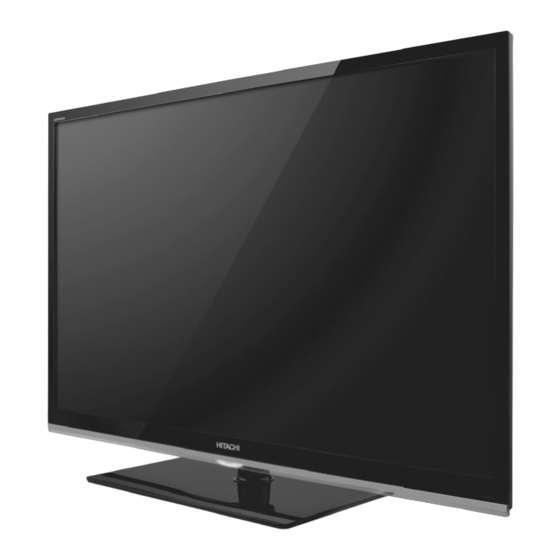
Hitachi LE55W806 Owner's Manual

Hitachi LE55W806 Owner's Manual

Ultrathin led lcd hdtv, 55”/48” class 54.64”/47.61” diagonal

Advertisement

Quick Links

Models
LE55W806
55" Class (54.64" Diagonal)
LE48W806
48" Class (47.61" Diagonal)
Thank you for purchasing this Hitachi product. Please read these instructions carefully.
For additional assistance please call 1-888-333-1899(U.S.A. or Puerto Rico), or 01-800-700-4321(Mexico) or visit our
website at www.hitachi.us/tv.
Record the model number and serial number of your LCD Television for future reference.
MODEL NUMBER
FIRST TIME USE ....................................................................................................... 10-12
TV OPERATION ........................................................................................................ 13-19
TROUBLESHOOTING ...................................................................................................36-37
SPECIFICATIONS .......................................................................................................... 38
LIMITED WARRANTY ............................................................................................... 39-40
APPENDIXES................................................................................................................. 43
ES-G122201
Owner's Guide
Keep this owner's guide for future reference.
This information is located on the back of the television.

TABLE OF CONTENTS

INSTRUCTIONS ....................................................................... 2-6
TO OTHER EQUIPMENT .............................................................. 20-22
..................................................................................................23-35
Image may differ from actual product.
SERIAL NUMBER
.............................................................
Simulated image.
7

Advertisement

Table of Contents
loading

Summary of Contents for Hitachi LE55W806

  • Page 1: Table Of Contents

    Owner’s Guide Simulated image. Image may differ from actual product. Thank you for purchasing this Hitachi product. Please read these instructions carefully. For additional assistance please call 1-888-333-1899(U.S.A. or Puerto Rico), or 01-800-700-4321(Mexico) or visit our website at www.hitachi.us/tv. Keep this owner's guide for future reference.
  • Page 2: Important Safety Instructions

    TO PREVENT ELECTRIC SHOCK, THIS APPLIANCE MUST BE CONNECTED TO AN OUTLET WITH A PROTECTIVE EARTHING CONNECTION. This TV has an Auto Shut Off feature that will automatically turn off the TV if there is no video signal detected within 15minutes. Additionally this TV has LED backlighting which has greater energy saving benefits versus conventional CCFL type TV.
  • Page 4 This apparatus shall be connected to a mains socket outlet with a protective earthing connection. This product contains lead. Dispose of this product in accordance with applicable environmental laws .For product recycling and disposal information,contact your local government agency or www.eRecycle.org (in California),the Electronic Industries Alliance at www.eiae.org(in the US) or the Electronic Product Stewardship Canada at www.epsc.ca (In Canada).For more information,call "1-888-333-1899."...
  • Page 6: Safety Precautions

    If the unit is to be mounted on a cabinet smaller than length of the unit, it could result in an unstable location and the unit may tumble over, creating a risk of personal, possibly fatal injury. Also, this would damage the product seriously. Accordingly, Hitachi accepts no responsibility or liability for any injuries or property damage resulting from the improper installation.
  • Page 7: Installing The Tabletop Stand

    Installing the Tabletop Stand 1. Use the four screws(GB/T 818-2000 M5x12) which are 2. Use the two screws(GB/T818-2000 M4X12) which are in t h e accessories bag to attach the base plate. in t h e accessories bag to attach the cover plate. 3.
  • Page 8: Features

    Unique space saving design combines a 55"/ 48" LCD color TV with the 6 features noted below and more! in accordance with FCC rules. Manufactured under license from Real Sound Lab. SIA. CONEQ is a trademark of Real Sound Lab, SIA. CONEQ delivers clear, rich sound using proprietary professional equalizing technology.
  • Page 9: Contents

    View the Shared Files on TV Digital Media Player Enjoy Video Files Enjoy Music Files Browse the Pictures Other Information Troubleshooting Specifications Limited Warranty End User License Agreement for HITACHI DTV Software End User License Agreement for Open Source Sofrware Appendixes...
  • Page 10: First Time Use

    3D emitter Power indicator Illuminates white when the TV is in on mode. Selects input source to TV and used like remote control's ENTER key when choosing an item in OSD menus. Adjusts TV volume and used as Cursor Left and Right keys to navigate OSD menus. Selects a TV channel and used as Cursor Up and Down keys to navigate OSD menus.
  • Page 11: Remote Control

    16. MUTE Button – To turn off the sound, press this button once. The LCD TV will be silenced and the mute icon will appear on the screen. The muting feature can be released by pressing the MUTE button again or by pressing either of the VOL(VOLUME)   button.
  • Page 12: Antenna Connections

    Antenna connections If you are using an indoor or outdoor antenna, follow the instructions below that correspond to your antenna system. If you are using a Cable TV service, see Cable TV connections. Combination VHF/UHF Antenna (Single 75 ohm cable) Antenna Jack 75 ohm...
  • Page 13: Tv Operation

    Starting setup Adjust the volume level by pressing VOL . The will assist you to specify the Air/Cable setting and program volume level will be indicated on the screen by a volume bar. your channels automatically. Set the Source option to the appropriate position. IMPORTANT: Make sure that the antenna or cable TV system connection is made.
  • Page 14: Using The Channels Menu

    Audio Language Lock Setting Reset ▲ ▲ Select Move Exit Select Move Exit ▼ ▼ MENU MENU ENTER ENTER ENTER EXIT ENTER EXIT EXIT EXIT /Standard/Movie/Pro-Day/Pro-night/Game/Custom. Auto Scan Status: Scanning... Cable Analog Channels: 7 Digital Channels: 0 Set to the "warmness" or "coolness" of the white areaa for picture.
  • Page 15 If a viewer notices any of these or any other symptoms of When the Auto Movie is set to Auto, your Hitachi LCD TV will activate discomfort while using the TV to view 3D visual images, the affected...
  • Page 16: Using The Audio Menu

    White Balance: Use this function to adjust the dark end (Cut off) and bright end (Drive) of the White background. Blue Only Mode: This function removes the red and green signal from the video signal and displays the blue signal only. This lets you accurately adjust the color and tint settings.
  • Page 17: Using The Parental Controls Menu

    Move Return ▼ HDMI CEC: Set to On and this feature will enable the HDMI-CEC signal bus to allow your Hitachi LCD TV to Password discover and communicate automatically with other compatible HDMI-interfaced Audio/Video device. The CEC signal bus makes global controls possible, based on “plug & play”...
  • Page 18 U.S.Movie Rating: Follow Step B Region 5: I Block Unrated TV: Rating Enable U.S. TV Rating U.S. Movie Rating Canadian Ratings(Eng) Canadian Ratings(Frn) Region 5 Block Unrated TV Move Return ▲ ▼ ENTER Air/Cable HDMI3 HDMI4 ▲ Move Return ▼...
  • Page 21 To connect a HDMI or a DVI device to the unit The HDMI/DVI input receives digital audio and uncompressed video from a HDMI device or uncompressed digital video from a DVI device. When you connect to a DVI device with a HDMI-to-DVI adapter cable, it transfers only video signal. Separate analog audio cables are required.
  • Page 22 Searching for Signal...
  • Page 23: Network Settings

    Network Settings Network Connection You can set up your TV so that it can access the Internet through your local area network (LAN) with an Ethernet or wireless connection. 1 Connecting to a Wired Network You can attach your TV to your LAN by using matchable cable in thr ee ways: You can attach your TV to your LAN by connecting the LAN port on the back of your TV to an exter nal modem using a Cat 5 cable.
  • Page 24 Network Settings 2 Network Setup (Auto) 3 Network Setup (Manual) Manual Use the Network Setup when connecting your TV to Use the Automatic Network Setup when connecting the TV a network that requires a Static IP address. to a network that supports DHCP. To set up your TV’s cable Ethernet connection automatically, follow these steps: Getting the Network Connection Values To get the network connection values on most windows...
  • Page 25: Connecting To A Wireless Network

    Network Settings Connecting to a Wireless Network Wireless IP Router Wireless LAN Adapter built-in TV Hitachi's built-in Wireless LAN Hitachi router router router router modem/router it may not be compatible with the TV. Caution: This wireless appliance complies with FCC radiation limits set forth for an uncontrolled environment.
  • Page 26: Wireless Setting

    7R FKRRVH D QHWZRUN SUHVV > @ EXWWRQV WR KLJKOLJKW WKH desired network and press [ENTER] button to confirm. Wireless Setting SSID Security Signal hitachi WPA/WPA2-PSK BBY-TP WPA/WPA2-PSK pad test WPA-PSK QMC2 WPA/WPA2-PSK...
  • Page 27: Home Network Settings

    Network Settings Home Network Settings 9. Press [Menu] button to exit IP Address and press the [ button to select the next option to enter the numbers. 10.When you are done, press the Menu button to return to the Computer, TV and other digital devices can be connected via previous menu.
  • Page 28: Setting To Share Files

    Network Settings 3. “Add To Library” will pop up on the screen. Click “Add”. Select check box for “Share my media” . 3. An equipment icon will appear in the white, box area if the DLNA Settings have been set correctly. Select the equipment icon and then click “Allow”.
  • Page 29: Internet-Based Services

    MENU EXIT 2. VUDU and other internet-based services are provided by the applicable service providers, and not by Hitachi, and such ENTER services, may change or be discontinued at any time and may be subject to restrictions imposed by your internet...
  • Page 30: Vudu Hd Movies

    Network Settings VUDU HD Movies Tool Bar Chapters 0:00:57 1:29:19 1 Brief introduction VUDU is an on-demand service that offers high-definition movies. 1. Chapters To enjoy these movies, please register and log in to your Select Chapters, press the [ENTER] button to select, VUDU account.
  • Page 31: Vudu Apps

    Network Settings Website instructions VUDU Apps Brief introduction TV screen may be diferrence with above picture. VUDU Apps - The applications platform for connected TVs VUDU HD Movies home page 1.VUDU Apps provides customers with access to a wide range of Internet services and applications including streaming video, music on demand, photo browsing, social networking and more.
  • Page 32: Netflix

    Network Settings 6 Press [RETURN] button to return the upper menu, or press [EXIT] button to close the menu. Website instructions My favorites: The user's favorite Apps Most popular: The most popular Apps in VUDU Netflix Movies home page Newest: The newest Apps in VUDU Browse by genre: Browse Apps by genre Show Ticker: Show the Apps at the bottom of screen while watching TV...
  • Page 33: View The Shared Files On Tv

    7. Select time to play 1) Press the [ ] button to select the position you want Please note that Hitachi will not assume any responsibility to set. for any lost data and cannot guarantee perfect compatibility 2) Press 0~9 to set the time and press the [ / / with all mass storage devices.
  • Page 34: Enjoy Music Files

    Network Settings Enjoy Music Files 1. Press [Red] button to switch to All or Music. 2. Press [ / / ] button to select the music you want to view. You can press [ASPECT] button to change the aspect ratio( Normal , Full Screen , Original Size ) while Digital...
  • Page 35: Browse The Pictures

    Network Settings Browse the Pictures Option Set Fast Speed 1. Press [Red] button to switch to All or Picture. None Effect 2. Press the [▲/▼/ ] button to select the picture you Background Music want to view. Enter 3. Press the [ENTER] to browse the picture. 4.
  • Page 37 network Home network Home network and select the USB input...
  • Page 38: Specifications

    MODEL NAME LE48W806 LE55W806 135W 115W 21.5kg (47.4 Ibs) 25kg (55.1 Ibs) 1105 43.5 1265 49.8 29.0 32.0 11.2 13.0 120.9cm (48’’class/ 47.61’’diagonal) 138.8cm (55’’class/ 54.64’’ diagonal) USB: USB 2.0×2 LAN: 10BASE-T/100BASE-TX ×1 /Quick Start Guide Stand Cover /2 pairs of 3D Active glasses Stand Screw: GB/T 818-2000 M4×12...

This manual is also suitable for:

Le48w806

Table of Contents