Advertisement
Quick Links
Advertisement

Summary of Contents for WASAGUN SZ001
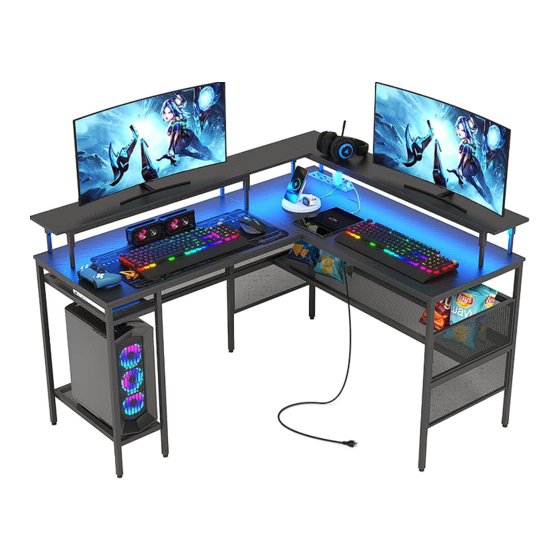
- Page 1 COMPUTER DESK SZ001 BRAND:WASAGUN...
- Page 2 MANUFACTURERS:DONGGUAN HANGXING HOUSEWARE CO.,LTD ADD.:BUILDING 5, NO. 6 HESHI ROAD, QIAOTOU, DONGGUAN CITY, GUANGDONG CONTACT:CARL TEL:+1 (838) 910-8241 E-MAIL: INFO@WASAGUN.COM...
- Page 3 Please check all parts below under a good condition before you install the Computer Desk. Ø6X30mm M6X16mm M3X10mm M6X23mm M6X28mm M6X12mm Led low voltage light bar fixing dlip M6X40mm M6X35mm...
- Page 4 Please check all parts below under a good condition before you install the Computer Desk. M6 black plastlc hole plug...
- Page 5 Please check all parts below under a good condition before you install the Computer Desk.
- Page 6 Please check all parts below under a good condition before you install the Computer Desk.
- Page 7 Please check all parts below under a good condition before you install the Computer Desk.
- Page 8 Please check all parts below under a good condition before you install the Computer Desk.
- Page 9 (L-shaped structure) (L-shaped structure) ① ④ Ⓕ Ⓕ Ⓕ ④ Ⓕ It does not distinguish between front and back and can be installed according to your needs. Ⓕ x4pc...
- Page 10 (L-shaped structure) ③ Ⓕ Ⓕ Ⓕ Ⓕ ③ Ⓕ ② Ⓕ x4pc...
- Page 11 (L-shaped structure) Please note that this unit is mounted inwards. ⑥ Ⓖ ⑤ Ⓖ Ⓖ Ⓖ Ⓖ x4pc...
- Page 12 (L-shaped structure) ⑩ Ⓓ ⑧ ⑨ Ⓓ ⑦ Ⓓ x8pc...
- Page 13 (L-shaped structure) Ⓖ Ⓖ ⑫ ⑪ Ⓖ Ⓖ Ⓖ ⑪ Ⓖ x4pc...
- Page 14 (L-shaped structure) × √ Ⓓ Ⓓ ⑬ Ⓓ Ⓓ Ⓓ Ⓓ Tips: If some hole don't match so that some Ⓓ x6pc screws cannot be installed, you could loosen the other screws also on this board slightly,and then those screws could be installed.
- Page 15 (L-shaped structure) Ⓐ Ⓐ Ⓐ Ⓐ Ⓐ Ⓐ Ⓐ Ⓐ Ⓐ x8pc...
- Page 16 (L-shaped structure) ⑭ ⑮ Ⓕ Ⓕ Ⓕ Ⓕ Ⓕ Ⓕ Ⓕ Ⓕ Ⓕ Ⓕ Ⓕ Ⓕ x11pc...
- Page 17 (L-shaped structure) Ⓒ Ⓒ ⑯ ㉗ ⑯ ⑯ ⑯ Ⓗ Ⓔ ⑯ ⑯ Ⓗ ⑯ Ⓔ ⑯ Ⓗ Ⓔ Ⓗ Ⓔ Ⓒ x2pc Ⓗ x4pc Ⓔ x4pc...
- Page 18 (L-shaped structure) Ⓔ Ⓔ Ⓔ Ⓔ Ⓔ The end with the screw hole further away from the edge is Ⓔ connected to the “⑱". Ⓔ Ⓔ Ⓔ Ⓔ x9pc...
- Page 19 (L-shaped structure) Ⓑ Ⓑ Ⓑ ㉔ Ⓑ ㉓ Ⓑ x4pc...
- Page 20 (L-shaped structure) ㉔ ㉕ ㉓ Ⓔ Ⓔ Ⓔ Ⓔ Ⓔ Ⓔ Ⓔ Ⓔ Ⓔ Ⓔ x10pc...
- Page 21 (L-shaped structure) Ⓒ Ⓘ Ⓒ Ⓘ Ⓒ Ⓘ Ⓒ Ⓘ Ⓒ Ⓘ Ⓒ Ⓘ Ⓒ Ⓒ x8pc Ⓘ Ⓒ Ⓘ x8pc Ⓘ...
- Page 22 (L-shaped structure) Ⓔ Ⓔ x1pc...
- Page 23 (L-shaped structure)...
- Page 24 (L-shaped structure) Ⓓ Ⓓ Ⓓ Ⓓ Ⓓ Ⓓ Ⓓ x8pc...
- Page 25 (L-shaped structure) L-shaped structure assembly completed...
- Page 26 (linear structure) ① ④ Ⓕ Ⓕ Ⓕ ④ Ⓕ It does not distinguish between front and back and can be installed according to your needs. Ⓕ x4pc...
- Page 27 (linear structure) Ⓕ Ⓕ Ⓕ ③ Ⓕ ② Ⓕ x4pc...
- Page 28 (linear structure) Please note that this unit is mounted inwards. ⑥ Ⓖ ⑤ Ⓖ Ⓖ Ⓖ Ⓖ x4pc...
- Page 29 (linear structure) ⑩ Ⓓ ⑧ ⑨ Ⓓ ⑦ Ⓓ x8pc...
- Page 30 (linear structure) Ⓖ Ⓖ ⑫ ⑪ Ⓖ Ⓖ Ⓖ ⑪ Ⓖ x4pc...
- Page 31 (linear structure) × √ Tips: If some hole don't match so that some screws cannot be installed, you could Ⓓ x6pc loosen the other screws also on this board slightly,and then those screws could be installed.
- Page 32 (linear structure) Ⓐ Ⓐ Ⓐ Ⓐ Ⓐ Ⓐ Ⓐ Ⓐ Ⓐ x8pc...
- Page 33 (linear structure) ⑭ ⑮ Ⓕ Ⓕ Ⓕ Ⓕ Ⓕ Ⓕ Ⓕ Ⓕ Ⓕ Ⓕ Ⓕ Ⓕ x11pc...
- Page 34 (linear structure) ⑯ ⑯ ㉗ Ⓗ ⑯ Ⓔ Ⓗ Ⓗ Ⓔ Ⓔ ⑯ ⑯ Ⓗ Ⓔ Ⓒ x2pc Ⓗ x4pc Ⓔ x4pc...
- Page 35 (linear structure) Ⓔ Ⓔ Ⓔ Ⓔ Ⓔ Ⓔ Ⓔ Ⓔ Ⓔ x8pc...
- Page 36 (linear structure) ㉕ ㉒ Ⓔ Ⓔ ㉑ Ⓔ ㉓ Ⓔ ⑲ Ⓔ Ⓔ Ⓔ x8pc Ⓔ Ⓔ...
- Page 37 (linear structure) Ⓒ x7pc Ⓘ x7pc...
- Page 38 (linear structure) ㉓ ㉕ Ⓙ Ⓙ Swivel for easy Ⓙ x2pc access to the hole.
- Page 39 (linear structure)...
- Page 40 (linear structure) Ⓓ Ⓓ Ⓓ Ⓓ Ⓓ Ⓓ Ⓓ x8pc...
- Page 41 (linear structure) Linear structure assembly completed.
- Page 42 Any help or questions during use, please contact us via website www.wasagun. com, send email to info@wasagun.com, we will service you within 24 hours. We suggest to provide a warranty card, a photo or a video if there’ s broken spare part or not working machine so that we can be much more clear about your problems and offer you the best solution.


Need help?
Do you have a question about the SZ001 and is the answer not in the manual?
Questions and answers