Helios MiniVent M1/120 N/C Installation And Operating Instructions Manual
Mini fan with codabel overrun timer and interval operation
Hide thumbs
Also See for MiniVent M1/120 N/C:
- Installation and operating instructions for (40 pages)
Advertisement
Available languages
Available languages
Quick Links
HELIOS VENTILATOREN
MONTAGE- UND BETRIEBSVORSCHRIFT
INSTALLATION AND OPERATING INSTRUCTIONS
NOTICE DE MONTAGE ET D'UTILISATION
Kleinlüfter - Mini fan - Mini ventilateur
Helios MiniVent
M1/100/120 N / C
- mit codierbarem Nachlauf- und Intervallbetrieb
- with codabel overrun timer and interval operation
- avec minuterie programmable et temporisation
DE
EN
FR
Advertisement
Chapters

Subscribe to Our Youtube Channel
Related Manuals for Helios MiniVent M1/120 N/C


Summary of Contents for Helios MiniVent M1/120 N/C
- Page 1 HELIOS VENTILATOREN MONTAGE- UND BETRIEBSVORSCHRIFT INSTALLATION AND OPERATING INSTRUCTIONS NOTICE DE MONTAGE ET D’UTILISATION Kleinlüfter - Mini fan - Mini ventilateur Helios MiniVent M1/100/120 N / C - mit codierbarem Nachlauf- und Intervallbetrieb - with codabel overrun timer and interval operation...
-
Page 2: Table Of Contents
DEUTSCH Inhaltsverzeichnis KAPITEL 1. ALLGEMEINE HINWEISE ........... . . Seite 1 Wichtige Informationen . -
Page 3: Wichtige Informationen
Montage- und Betriebsvorschrift MiniVent M1/100/120 N / C Wichtige Informationen KAPITEL 1 Zur Sicherstellung einer einwandfreien Funktion und zur eigenen Sicherheit sind alle nachstehenden Vorschriften genau durchzulesen und zu beachten. ALLGEMEINE HIN- Dieses Dokument ist Teil des Produktes und als solches zugänglich und dauerhaft aufzubewahren um einen WEISE sicheren Betrieb des Ventilators zu gewährleisten. -
Page 4: Garantieansprüche - Haftungsausschluss
Garantieansprüche – Haftungsausschluss Alle Ausführungen dieser Dokumentation müssen beachtet werden, sonst entfällt die Gewährleistung. Gleiches gilt für Haftungsansprüche an Helios. Der Gebrauch von Zubehörteilen, die nicht von Helios empfohlen oder angeboten werden, ist nicht statthaft. Eventuell auftretende Schäden unterliegen nicht der Gewährleistung. -
Page 5: Leistungsdaten
Montage- und Betriebsvorschrift MiniVent M1/100/120 N / C Leistungsdaten Das Gerätetypenschild gibt über die verbindlichen elektrischen Werte Aufschluss; diese müssen mit dem ört- lichen Versorgungsnetz abgestimmt sein. Die Ventilatorleistungen wurden auf einem Prüfstand entsprechend DIN EN ISO 5801 ermittelt. 1.10 Geräuschangaben Die Geräuschangaben, die sich auf Abstände beziehen gelten für Freifeldbedingungen. -
Page 6: Zubehör
Montage- und Betriebsvorschrift MiniVent M1/100/120 N / C Zubehör WES 100 Wandeinbauset Best.Nr. 0717 WES 120 Wandeinbauset Best.Nr. 0486 MF 100 Montageflansch Best.Nr. 6188 TWH 100 Teleskop-Wandhülse Best.Nr. 6352 TWH 120 Teleskop-Wandhülse Best.Nr. 6353 Montageblende Best.Nr. 0281 Produktlebensdauer Dieses Gerät ist auf eine Produktlebensdauer von mindestens 40.000 h, bei S1-Betrieb mit maximaler Leistung in maximal zulässiger Umgebungstemperatur ausgelegt. -
Page 7: Funktionsbeschreibung M1/100/120 N / C
Montage- und Betriebsvorschrift MiniVent M1/100/120 N / C Funktionsbeschreibung M1/100/120 N / C KAPITEL 4 Mit integrierter, Intervall-Steuerung, die einen automatischen Ventilatorbetrieb in vorgegebenen zeitlichen Abständen ermöglicht. Der Ventilator kann mit einem externen Schalter (evtl. mit Licht gekoppelt) mit ca. 45 FUNKTION sec. -
Page 8: Reinigung
Montage- und Betriebsvorschrift MiniVent M1/100/120 N / C Reinigung KAPITEL 5 – m Es sind die in Kapitel 1.2 aufgeführten Sicherheitshinweise zu beachten! Vor Beginn der Reinigung ist sicherzustellen, dass der Ventilator allpolig vom Netz getrennt und gegen REINIGUNG/ Wiedereinschalten gesichert wurde! DEMONTAGE –... -
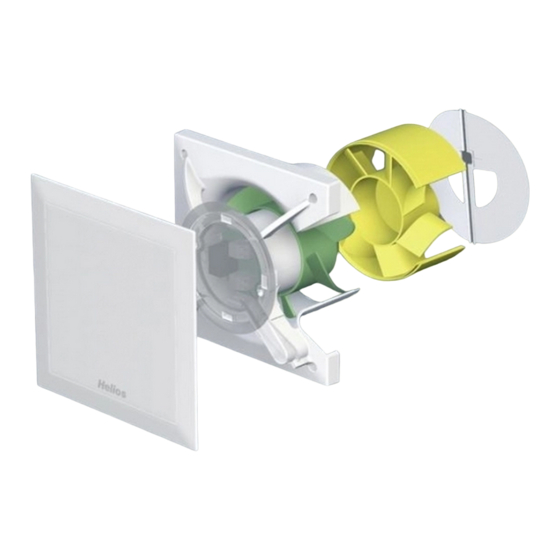
Page 9: Lieferumfang / Konstruktiver Aufbau
Montage- und Betriebsvorschrift MiniVent M1/100/120 N / C KAPITEL 6 Lieferumfang / Konstruktiver Aufbau Entnehmen Sie die Liefereinheit erst unmittelbar vor dem Einbau aus dem Karton, um mögliche Beschädi- INSTALLATION gungen und Verschmutzungen beim Transport sowie auf der Baustelle zu vermeiden. MiniVent M1/100/120 N / C Abb.5 ò... - Page 10 Montage- und Betriebsvorschrift MiniVent M1/100/120 N / C – Das Anschlusskabel ist so zu verwahren, dass bei Wasserbeaufschlagung kein Wasser entlang des Kabels eindringen kann. Das Kabel darf nicht über scharfe Kanten geführt werden! Abb.7 Abb.6 Empfohlener Kabelführung unter dem Gehäuse. Ka- Kabelaustritt bellänge aus der Wand mindestens beliebig...
-
Page 11: Elektrischer Anschluss
Montage- und Betriebsvorschrift MiniVent M1/100/120 N / C 4. Montageflansch MF 100 (Zubehör) Bei beengten Platzverhältnissen in Decken, in dünnen Wänden sowie in engen Schächten. MF 100 winkelgerecht an die Wand oder die Decke dübeln (beliebige Anzahl übereinander möglich). Anschließend Ventilator mittels beigefüg- ten Schrauben an MF 100 befestigen (Abb. -
Page 12: Einbau
Montage- und Betriebsvorschrift MiniVent M1/100/120 N / C – Alle Teile, insbesondere Schrauben, auf festen Sitz überprüfen. Schrauben dabei nicht lösen! WARNUNG – Beim Probelauf den Ventilator auf Vibrationen und Geräusche prüfen – Stromaufnahme mit Leistungsschildangabe vergleichen Abb.12 Abb.13 ò ù... -
Page 13: Betrieb
Montage- und Betriebsvorschrift MiniVent M1/100/120 N / C Betrieb m Es sind die in Kapitel 1.2 aufgeführten Sicherheitshinweise zu beachten! WARNUNG Zur Gewährleistung der einwandfreien Funktion des Ventilators, ist regelmäßig Folgendes zu prüfen: – Auftreten von Staub- oder Schmutzablagerungen im Gehäuse bzw. am Motor und Laufrad –... - Page 14 Montage- und Betriebsvorschrift MiniVent M1/100/120 N / C – Typen M1/100 N / C Stellung A - Auslieferzustand Kl. 1 = 75 m³/h, Aktivierung mit Zeitfunktion Kl. 2 = 90 m³/h, Aktivierung manuell Stellung B Kl. 1 = 90 m³/h, Aktivierung mit Zeitfunktion Kl.
-
Page 15: Schaltplanübersicht Für M1/100/120 N /C
Montage- und Betriebsvorschrift MiniVent M1/100/120 N / C Schaltplanübersicht für M1/100/120 N /C SCHALTPLAN- ÜBERSICHT M1/100 N / C M1/... N, ... NC, Prinzip SS-931 Anschluss Kunde Internes Funktionsprinzip / Jumperstellung SS-931 M1/120 N / C M1/... N SS-917 M1/... NC Zeit-Eingang Manueller-Eingang a) Zeitfunktion... -
Page 16: Instandhaltung Und Wartung
Montage- und Betriebsvorschrift MiniVent M1/100/120 N / C SS-920,1 M1/... NC ab Platinen Ver. 006 SS-920.1 Einstellung der DIP-Schalter DIP-Schalter Switch / Commutateur 0 sec 45 sec Einschaltverzögerung Delayed start Démarrage temporisé 90 sec 120 sec Nachlauf / 6 min Einschaltzeit 10 min Run on time /... -
Page 17: Störungsursachen
Ventilator startet nicht Anschluss nach Schaltplan überprüfen – Laufrad blockiert Blockade lösen, reinigen, ggf. Laufrad ersetzen – Motor blockiert Helios Kundendienst kontaktieren Sicherung löst aus – Windungsschluss im Motor Helios Kundendienst kontaktieren – Zuleitung bzw. Anschluss Teile erneuern, ggf. Motor ersetzen beschädigt... - Page 18 Montage- und Betriebsvorschrift MiniVent M1/100/120 N / C Notizen:...
- Page 19 Montage- und Betriebsvorschrift MiniVent M1/100/120 N / C Notizen:...
- Page 20 ENGLISH Table of contents CHAPTER 1. GENERAL INFORMATION ............Page 1 Important information .
-
Page 21: Chapter 1. General Information
Installation and Operation Instructions MiniVent M1/100/120 N / C Important information CHAPTER 1 In order to ensure complete and effective operation and for your own safety, all of the following instructions should be read carefully and observed. GENERAL INFORMATION This document should be regarded as part of the product and as such should be kept accessible and durable to ensure the safe operation of the fan. -
Page 22: Warranty Claims - Exclusion Of Liability
All versions of this documentation must be observed, otherwise the warranty shall cease to apply. The same applies to liability claims against Helios. The use of accessory parts, which are not recommended or offered by Helios, is not permitted. Any possible damages are not covered by the warranty. Changes and modifications to the unit are not permitted and lead to a loss of conformity, and any warranty and liability shall be excluded in this case. -
Page 23: Performance Data
Installation and Operation Instructions MiniVent M1/100/120 N / C Performance data The unit type plate gives an indication of the mandatory electrical values; which must be coordinated with the local supply network. The fan performances* were established on a test stand according to DIN EN ISO 5801. 1.10 Noise data Noise data that refers to certain distances apply to free field conditions. -
Page 24: Accessories
Installation and Operation Instructions MiniVent M1/100/120 N / C Accessories WES 100 Wall installation kit Ref.No. 0717 WES 120 Wall installation kit Ref.No. 0486 MF 100 Mounting flange Ref.No. 6188 TWH 100 Telescopic wall sleeve Ref.No. 6352 TWH 120 Telescopic wall sleeve Ref.No. -
Page 25: Chapter 4. Function
Installation and Operation Instructions MiniVent M1/100/120 N / C Functional description M1/100/120 N / C CHAPTER 4 With integrated, interval control, which enables automatic fan operation in preset intervals. The fan can be activated with an external switch (possibly connected to light) with approx. 45 sec. activation delay and approx. 6 minute over- FUNCTION run (time input)). -
Page 26: Chapter 5. Cleaning/Dismantling
Installation and Operation Instructions MiniVent M1/100/120 N / C CHAPTER 5 Cleaning m The safety instructions in chapter 1.2 must be observed! CLEANING/ – Before cleaning, isolate the fan from the mains power supply and secure against being switched on again! DISMANTLING –... -
Page 27: Chapter 6. Installation
Installation and Operation Instructions MiniVent M1/100/120 N / C All subsequent information and instructions are intended solely for ATTENTION authorised electricians! CHAPTER 6 Scope of delivery/Design Leave the delivery unit in its box until installation. Check that the fan is in good condition and has not been damaged INSTALLATION in transit. - Page 28 Installation and Operation Instructions MiniVent M1/100/120 N / C – Duct inside diameter M1/100 N / C = 100 mm or M1/120 N / C = 120 mm and distance to room corners: M1/100 at least 90 mm, M1/120 at least 110 mm â...
-
Page 29: Electrical Connection
Installation and Operation Instructions MiniVent M1/100/120 N / C 4. Mounting flange MF 100 (Accessories) If there are space restrctions in ceilings, in thin walls and in narrow shafts. Attach MF 100 to the wall or ceiling at a suitable angle (any number possible). Then fasten the fan to the MF 100 with the provided screws (fig. - Page 30 Installation and Operation Instructions MiniVent M1/100/120 N / C – Check all parts for tightness, particularly screws, protection guards. Do not loosen screws in the process! – Check fan for vibration and noise during test run WARNING – Compare power consumption to rating plate data fig.12 fig.13 ò...
-
Page 31: Operation
Installation and Operation Instructions MiniVent M1/100/120 N / C Operation WARNING m The safety instructions in chapter 1.2 must be observed! In order to ensure the smooth functioning of the fan, the following must be checked on a regular basis: –... - Page 32 Installation and Operation Instructions MiniVent M1/100/120 N / C – Type M1/100 N / C Position A - factory setting Cl. 1 = 75 m³/h, activated via time function Cl. 2 = 90 m³/h, manual activation Position B Cl. 1 = 90 m³/h, activated via time function Cl.
-
Page 33: Circuit Diagram Overview For M1/100/120 N /C
(X2 capacitor with 0,33 µF/250VAC withstrand / not provided by Helios) can be used in parallel with glow lamp. In order to not affect the electronics negatively, room lighting is to be generally connected via a... -
Page 34: Chapter 8. Servicing And Maintenance
Installation and Operation Instructions MiniVent M1/100/120 N / C SS-920,1 M1/... NC ab Platinen Ver. 006 SS-920.1 DIP switch settings DIP-Schalter Switch / Commutateur 0 sec 45 sec Einschaltverzögerung Delayed start Démarrage temporisé 90 sec 120 sec Nachlauf / 6 min Einschaltzeit 10 min Run on time /... -
Page 35: Fault Causes
Fan does not start Check connection according to circuit diagram – Impeller blocked Clear blockade, clean, replace impeller if neces. – Motor blocked Contact Helios customer services Fuse blows – Short-circuited coil in motor Contact Helios customer services – Supply line/connection damaged... - Page 36 Installation and Operation Instructions MiniVent M1/100/120 N / C Notes:...
- Page 37 Installation and Operation Instructions MiniVent M1/100/120 N / C Notes:...
- Page 38 FRANÇAIS Sommaire CHAPITRE 1. INFORMATIONS GÉNÉRALES ........... . Page 1 Informations importantes .
-
Page 39: Informations Importantes
Notice de montage et d’utilisation MiniVent M1/100/120 N / C Informations importantes CHAPITRE 1 Il est important de bien lire et de respecter les consignes suivantes pour le bon fonctionnement et pour la sécurité des utilisateurs. INFORMATIONS Conserver cette notice à proximité de l’appareil afin de garantir le bon fonctionnement du ventilateur. Toutes les règles GÉNÉRALES de sécurité... -
Page 40: Garantie - Réserves Du Constructeur
élevé de particules agressives, des phases d’arrêt longues, un encrassement important, un usage intensif lié aux conditions climatiques ou soumis à des contraintes techniques et électroniques, une demande d’approbation est re- quise par Helios : les modèles de série n’étant pas prévus pour cet usage. Idem pour le déplacement des ventilateurs (voitures, avions, bateaux, etc.). -
Page 41: 1.10 Données Acoustiques
Notice de montage et d’utilisation MiniVent M1/100/120 N / C Données des performances La plaque signalétique de l’appareil indique les valeurs de raccordement électrique nécessaires ; l’appareil doit être raccordé à l’alimentation électrique locale. Les performances du ventilateur ont été testées selon les normes DIN EN ISO 5801. -
Page 42: Accessoires
Notice de montage et d’utilisation MiniVent M1/100/120 N / C Accessoires WES 100 Kit de montage N° réf. 0717 WES 120 Kit de montage N° réf. 0486 MF 100 Entretoise N° réf. 6188 TWH 100 Manchon mural télescopique N° réf. 6352 TWH 120 Manchon mural télescopique N°... -
Page 43: Description Des Fonctionnalités M1/100/120 N / C
Notice de montage et d’utilisation MiniVent M1/100/120 N / C Description des fonctionnalités M1/100/120 N / C CHAPITRE 4 Avec une minuterie et une temporisation intégrée, le ventilateur peut fonctionner automatiquement pendant une durée définie à des intervalles réguliers. Commandé par un interrupteur externe (éventuellement l’interrupteur lumière), le FONCTIONNALITÉS ventilateur démarre après un délai d’env. -
Page 44: Entretien
Notice de montage et d’utilisation MiniVent M1/100/120 N / C Entretien CHAPITRE 5 m Bien suivre les consignes de sécurité de la section 1.2 ! – Avant de commencer toute opération d’entretien, vérifier que le ventilateur est hors tension et protégé contre tout ENTRETIEN/ redémarrage intempestif ! DÉMONTAGE... -
Page 45: Installation
Notice de montage et d’utilisation MiniVent M1/100/120 N / C Toutes les informations et consignes suivantes sont destinées à un ATTENTION électricien qualifié, certifié et autorisé ! CHAPITRE 6 Kit d’utilisation / Montage apparent Ne déballer qu’au moment de l’installation, afin d’éviter tous dommages et salissures lors du transport ou sur le INSTALLATION chantier. - Page 46 Notice de montage et d’utilisation MiniVent M1/100/120 N / C pièce : M1/100 min. 90 mm à partir du milieu du conduit, M1/120 min. 110 mm à partir du milieu du conduit. – En cas de montage apparent, il faut briser l‘encoche latérale d‘entrée de câble dans le boîtier (fig. 9, Pos â...
-
Page 47: Raccordement Électrique
Notice de montage et d’utilisation MiniVent M1/100/120 N / C 4. Entretoise MF 100 (accessoire) En cas d’espace restreint au plafond, dans des murs fins ou dans des gaines étroites. MF 100 permet de réduire la profondeur d’encastrement du ventilateur au mur ou au plafond (possibilité de surperposer plusieurs enretoise pour augmenter la hauteur). - Page 48 Notice de montage et d’utilisation MiniVent M1/100/120 N / C – Toutes les parties (vis, écrous et grille de protection inclus) doivent être fixées fermement. Ne desserrer aucune vis ! AVERTISSEMENT – Lors du test du ventilateur, contrôler les éventuels vibrations et bruits. –...
-
Page 49: Utilisation
Notice de montage et d’utilisation MiniVent M1/100/120 N / C Utilisation AVERTISSEMENT m Il convient de respecter les consignes de sécurité qui figurent au chapitre 1.2 ! Pour que le ventilateur fonctionne toujours correctement, il faut vérifier régulièrement ce qui suit : - Absence de poussière ou de saletés dans le boîtier, sur le moteur et les palles elles-mêmes. - Page 50 Notice de montage et d’utilisation MiniVent M1/100/120 N / C – Modèles M1/100 N / C Position A - Réglage usine Borne 1 = 75 m³/h, activation des minuteries Borne 2 = 90 m³/h, marche forcée Position B Borne 1 = 90 m³/h, activation des minuteries Borne 2 = 75 m³/h, marche forcée –...
- Page 51 Notice de montage et d’utilisation MiniVent M1/100/120 N / C Vue d’ensemble des schémas de raccordement pour M1/100/120 N /C ENSEMBLE DES SCHÉMAS ÉLECTRIQUES M1/... N, ... NC, Prinzip SS-931 M1/100 N / C Raccordement client Principe de fonctionnement / Jumper SS-931 M1/120 N / C M1/...
- Page 52 Notice de montage et d’utilisation MiniVent M1/100/120 N / C SS-920,1 M1/... NC ab Platinen Ver. 006 SS-920.1 Paramétrage de l’interrupteur DIP DIP-Schalter Switch / Commutateur 0 sec 45 sec Einschaltverzögerung Delayed start Démarrage temporisé 90 sec 120 sec Nachlauf / 6 min Einschaltzeit 10 min...
-
Page 53: Recyclage
– court-circuit dans le moteur Contacter le SAV Helios. déclenche – câble ou raccordement endom- Remplacer des pièces ou le moteur entier magé (Appeler le SAV de Helios). – mauvais raccordement Vérifier le raccordement, le modifier. Vibrations – encrassement Nettoyer. - Page 54 Notice de montage et d’utilisation MiniVent M1/100/120 N / C Notes :...
- Page 55 Notice de montage et d’utilisation MiniVent M1/100/120 N / C Notes :...
- Page 56 HELIOS Ventilateurs · Le Carré des Aviateurs · 157 av. Charles Floquet · 93155 Le Blanc Mesnil Cedex CH HELIOS Ventilatoren AG · Tannstrasse 4 · 8112 Otelfingen GB HELIOS Ventilation Systems Ltd. · 5 Crown Gate · Wyncolls Road · Severalls Industrial Park · Colchester · Essex · CO4 9HZ...
Need help?
Do you have a question about the MiniVent M1/120 N/C and is the answer not in the manual?
Questions and answers