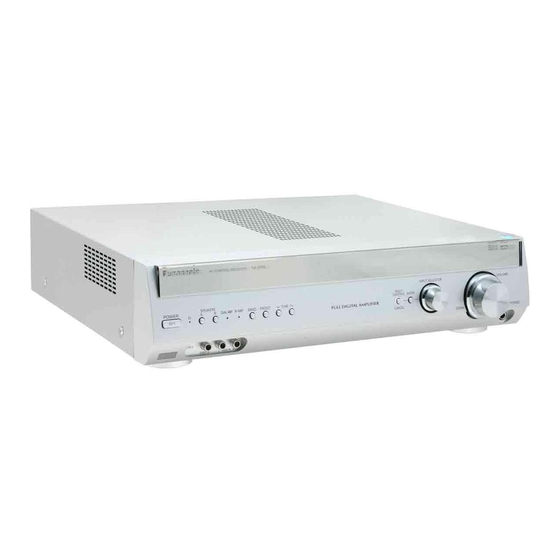
Panasonic SA-XR55 Operating Instructions Manual
Av control receiver
Hide thumbs
Also See for SA-XR55:
- Operating instructions manual (28 pages) ,
- Service manual (175 pages)
Table of Contents
Advertisement
Dear customer
Thank you for purchasing this product.
Before connecting, operating or adjusting this product, please
read the instructions completely.
Please keep this manual for future reference.
As
an
Panasonic has determined that this
product meets the ENERGY STAR
guidelines for energy efficiency.
∗
For Canada only: The word "Participant" is
used in place of the word "Partner"
If you have any questions contact
In the U.S.A.: 1-800-211-PANA(7262)
In Canada:
905-624-5505
For U.S.A. only
The warranty can be found on page 26.
For Canada only
The warranty can be found on page 27.
P
PC
®
ENERGY
STAR
Partner
AV Control Receiver
Table of contents
Before use
IMPORTANT SAFETY INSTRUCTIONS. . . . . . . . . . . . . . . . . . . . . . . 2
How to set up the Home Theater . . . . . . . . . . . . . . 3
Listening caution . . . . . . . . . . . . . . . . . . . . . . . . . . . . . . . . . . . . . . . . 3
Supplied accessories . . . . . . . . . . . . . . . . . . . . . . . . . . . . . . . . . . . . 3
∗
,
1. TV and DVD player . . . . . . . . . . . . . . . 4
®
• Basic connection. . . . . . . . . . . . . . . . . . . . . . . . 4
• High picture quality connection . . . . . . . . . . . . 5
• DVD ANALOG 6CH connection . . . . . . . . . . . . 5
2. Speakers . . . . . . . . . . . . . . . . . . . . . . . 6
Connections
• Bi-wiring connection . . . . . . . . . . . . . . . . . . . . 8
• Using speaker terminal B . . . . . . . . . . . . . . . . . 8
3. AC power supply cord . . . . . . . . . . . . 8
• DVD recorder . . . . . 9
• Cable box or satellite receiver etc. . . . . . . . . . 10
• CD player . . . . . . . 10
• Game player etc. . 10
The remote control . . . . . . . . . . . 11
Receiver settings - Basic . . . . . . 12
Settings - Test . . . . . . . . . . . . . . . 13
Settings
Playback . . . . . . . . . . . . . . . . . . . . . . . . 14
Using Surround effects . . . . . . . . . . . . 15
Basic
Operations
Operations
Control guide . . . . . . . . . . . . . . . . . . . . . . . . . . . . . . . . . . . . . . . . . 16
Sound quality/Sound field/Convenient functions . . . . . . . . . . . . 18
Making a recording . . . . . . . . . . . . . . . . . . . . . . . . . . . . . . . . . . . . . 20
Receiver settings - Advanced . . . . . . . . . . . . . . . . . . . . . . . . . . . 21
The radio . . . . . . . . . . . . . . . . . . . . . . . . . . . . . . . . . . . . . . . . . . . . . 22
Remote control mode . . . . . . . . . . . . . . . . . . . . . . . . . . . . . . . . . . . 24
Multi control menus and factory settings . . . . . . . . . . . . . . . . . . 24
Reference
Specifications . . . . . . . . . . . . . . . . . . . . . . . . . . . . . . . . . . . . . . . . . 25
Product Service . . . . . . . . . . . . . . . . . . . . . . . . . . . . . . . . . . . . . . . 25
Warranty (U.S.A.) . . . . . . . . . . . . . . . . . . . . . . . . . . . . . . . . . . . . . . 26
Warranty (Canada) . . . . . . . . . . . . . . . . . . . . . . . . . . . . . . . . . . . . . 27
Maintenance . . . . . . . . . . . . . . . . . . . . . . . . . . . . . . . . . . . . . . . . . . 27
Troubleshooting guide . . . . . . . . . . . . . . . . . . . . . . . . . . .Back cover
Operating Instructions
SA-XR55
Model No.
• VCR . . . . . . . . . . . . 9
• Tape deck . . . . . . 10
• Antennas . . . . . . . 11
RQT7994-2P
Advertisement
Table of Contents

Related Manuals for Panasonic SA-XR55


Summary of Contents for Panasonic SA-XR55
-
Page 1: Table Of Contents
Making a recording ........20 Receiver settings - Advanced ......21 The radio . -
Page 2: Important Safety Instructions
• Increase the separation between the equipment and receiver. • Connect the equipment into an outlet on a circuit different from that to which the receiver is connected. • Consult the dealer or an experienced radio/TV technician for help. important... -
Page 3: How To Set Up The Home Theater
How to set up the Home Theater Connections TV, DVD player, etc. 7.1/6.1-channel Speakers surround • 2 Front speakers • 1 Center speaker • 2 Surround speakers • 2 Surround back speakers (1 Surround back speaker) • 1 Subwoofer TV, DVD player, etc. 5.1-channel surround Speakers... -
Page 4: Home Theater Connections
Home Theater connections - Basic connection Preparation: Turn off all components before making any connections. Connection cable (All cables are sold separately) Audio cable Stereo connection cable White (L) You can enjoy analog sound. Red (R) Coaxial cable You can enjoy digital sound such as Dolby Digital, DTS and PCM. -
Page 5: High Picture Quality Connection
High picture quality connection Use this connection instead of the VIDEO IN/VIDEO OUT connections on page 4. A COMPONENT VIDEO connection provides a purer picture than a S-VIDEO connection. Select a S-VIDEO or COMPONENT VIDEO connection to match the peripheral equipment. Video input can only be output again through the same type of terminal. -
Page 6: Speakers
Home Theater connections - nPlacement of speakers The number of speakers 2 Front speakers (Left/Right), 1 Center speaker, 2 Surround speakers (Left/Right), 2 Surround back speakers (Left/Right) 2 Front speakers (Left/Right), 1 Center speaker, 2 Surround speakers (Left/Right), 1 Surround back speaker 2 Front speakers (Left/Right), 2 Surround speakers (Left/Right), 2 Surround back speakers (Left/Right) 2 Front speakers (Left/Right), 2 Surround speakers (Left/Right),... - Page 7 Preparation: Turn off all components before making any connections. Speaker cable (All cables are sold separately) Twist the wire Speaker cable Monaural connection cable Connect the cables so “L”, “R”, “+” and “-” are correct. Speaker impedance: 6-8 Ω Front A: 6-8 Ω...
-
Page 8: Bi-Wiring Connection
Home Theater connections - Preparation: Turn off all components before making any connections. Bi-wiring connection You can enjoy high quality sound by connecting to speakers designed for bi-wiring. BI-WIRE compatible speakers have separate terminals for the high frequency and low frequency signals. •... -
Page 9: Other Connections
Other connections DVD recorder DVD recorder FM ANT You can change the input settings for the digital terminals if necessary. LOOP ANT Note the equipment you OPTICAL1 have connected to the terminals, then change the settings. (ápage 13) SUBWOOFER nHigh picture quality connection Use this connection instead of the VIDEO IN/VIDEO OUT connections (áabove). -
Page 10: Cable Box Or Satellite Receiver Etc
Other connections Cable box or satellite receiver etc. When connecting to the video terminals, connect to the VIDEO, S VIDEO or COMPONENT VIDEO terminals to match the TV’s connection (ápages 4, 5) . Video input can only be output again through the same type of terminal. -
Page 11: Antennas
Antennas Adhesive tape FM indoor antenna (included) Fix the other end of the antenna where reception is best. FM ANT FM ANT FM ANT (TV/STB) LOOP ANT LOOP ANT LOOP ANT OPTICAL1 SUBWOOFER FM outdoor antenna (not included) • Disconnect the FM indoor antenna. •... -
Page 12: Receiver Settings - Basic
Turn on. • Any changes to settings remain as set even if the power is turned off. áFor more detailed information on settings refer to “Receiver settings - Advanced” on page 21. áPage 24 “Multi control menus and factory settings”. -
Page 13: Settings - Test
Changing the digital input terminals Change these settings to suit the connections you have made to the optical (OPT) and coaxial (COAX) digital input terminals. (ápages 4, 5, 9 and 10) You can only allocate one piece of equipment per terminal. Select “D-INPUT ”... -
Page 14: Basic Operations
Basic operations Playback Various kinds of playback n Playing DVD-Audio Playing DVD ANALOG 6CH You can enjoy high quality sound with DVD-Audio. áRefer to page 5 for “DVD ANALOG 6CH connection”. Preparation: • Turn SPEAKERS on. DVD ANALOG 6CH only works when either SPEAKERS A or BI-WIRE is on. -
Page 15: Using Surround Effects
Using Surround effects Adding surround effects. • This unit does not automatically recognize the Dolby Digital Surround EX signal. The surround back channel is added by using Dolby Pro Logic • Dolby Pro Logic , DTS NEO:6 and SFC modes remain in effect until you change them. •... -
Page 16: Control Guide
Control guide Main unit [8, POWER] Press to switch the unit from on to standby mode or vice versa. In standby mode, the unit is still consuming a small amount of power. Standby indicator [^] When the unit is connected to the AC mains supply, this indicator lights up in standby mode and goes out when the unit is turned on. - Page 17 Buttons not explained on this page are used only to operate other equipment. áRefer to the separate booklet, “Remote Control Operation Guide”, for remote control operation details. [^, RECEIVER] Standby/on button. [1, 2, 3, 4, 5, 6, 7, 8, 9, 0] To enter radio frequencies and channels.
-
Page 18: Sound Quality/Sound Field/Convenient Functions
Sound quality/Sound field/Convenient functions SPEAKERS POWER DUAL AMP BI-AMP BAND PRESET TUNE VCR 2 VIDEO IN AUDIO IN Basic operations with the MULTI CONTROL INPUT SELECTOR Turn to change. n To return to the previous setting/To cancel Press. n To select another settings MULTI Press several times to return to step 2 in the CONTROL... - Page 19 Use the MULTI CONTROL menus to change the settings. (ápage 18 “Basic operations with the MULTI CONTROL”) Enter the MULTI CONTROL. MULTI CONTROL Select the settings to change. CANCEL Adjusting the tone You can adjust the level of the bass and treble. Select “TONE ”...
-
Page 20: Making A Recording
Sound quality/Sound field/Convenient functions Adjusting the subwoofer level You can adjust the volume of the subwoofer while listening to a source. Sound can be distorted if you raise the volume while the subwoofer level is high. Reduce the subwoofer level if this occurs. Muting To mute the volume. -
Page 21: Receiver Settings - Advanced
Receiver settings - Advanced MULTI CONTROL CANCEL SPEAKERS MULTI POWER CONTROL DUAL AMP BI-AMP BAND PRESET TUNE CANCEL VCR 2 VIDEO IN AUDIO IN Basic operations with the MULTI CONTROL INPUT SELECTOR Turn to change. n To return to the previous setting/To cancel Press. -
Page 22: The Radio
The radio BAND PRESET TUNE SPEAKERS POWER DUAL AMP BI-AMP BAND PRESET TUNE VCR 2 VIDEO IN AUDIO IN Basic operations with the MULTI CONTROL INPUT SELECTOR Turn to change. MULTI n To return to the previous setting/To cancel CONTROL Press. -
Page 23: Reducing Excessive Noise
Preset tuning Presetting stations n Auto presetting Set the channel reception to FM 87.9 MHz or AM 530 kHz. Preset channels that are automatically assigned by this unit are: 1 to 30 21 to 30 Preset the FM stations first. If the AM stations are preset before the FM stations, they will be erased when the FM stations are preset. -
Page 24: Remote Control Mode
Remote control mode Other products may respond to this unit’s remote control. If this happens, change the remote control mode. Change the remote control mode on the main unit and the remote control. SPEAKERS POWER DUAL AMP BI-AMP BAND PRESET TUNE VCR 2 VIDEO IN... -
Page 25: Specifications
For product information or assistance with product operation: In the U.S.A., refer to “Customer Services Directory” on page 26. In Canada, contact the Panasonic Canada Inc. Customer Care Centre at 905-624-5505, or visit the website (www.panasonic.ca), or an authorized Servicentre closest to you MONO 100 W per channel (6 Ω) -
Page 26: Warranty (U.s.a.)
Warranty (U.S.A.) -
Page 27: Warranty (Canada)
5770 Ambler Drive, Mississauga, Ontario L4W 2T3 PANASONIC/TECHNICS PRODUCT—LIMITED WARRANTY Panasonic Canada Inc. warrants this product to be free from defects in material and workmanship and agrees to remedy any such defect, or at its option, replace the product for a period as stated below from the date of original purchase. -
Page 28: Troubleshooting Guide
Other products respond to the • Change this unit’s remote control mode to “REM2 ”. remote control. Panasonic Consumer Electronics Company, Division of Panasonic Corporation of North America One Panasonic Way Secaucus, New Jersey 07094 http://www.panasonic.com 2005 Matsushita Electric Industrial Co., Ltd.
Need help?
Do you have a question about the SA-XR55 and is the answer not in the manual?
Questions and answers