Table of Contents
Advertisement
Quick Links
WARNING - Reliance on this Manual Could Result in Severe Bodily Injury or Death!
This manual is out-of-date and is provided only for its technical information, data and capacities. Portions of this manual
detailing procedures or precautions in the operation, inspection, maintenance and repair of the product forming the subject
matter of this manual may be inadequate, inaccurate, and/or incomplete and cannot be used, followed, or relied upon.
Contact Conair at info@conairgroup.com or 1-800-654-6661 for more current information, warnings, and materials about
more recent product manuals containing warnings, information, precautions, and procedures that may be more adequate
than those contained in this out-of-date manual.
Advertisement
Chapters
Table of Contents

Related Manuals for Conair MPA


Summary of Contents for Conair MPA
- Page 1 Contact Conair at info@conairgroup.com or 1-800-654-6661 for more current information, warnings, and materials about more recent product manuals containing warnings, information, precautions, and procedures that may be more adequate...
- Page 2 UGH004/0999 Serial number(s): Model number(s): DISCLAIMER: The Conair Group, Inc., shall not be liable for errors contained in this User Guide or for incidental, consequential dam- ages in connection with the furnishing, performance or use of this information. Conair makes no warranty of any kind with regard to this information, including, but not limited to the implied warranties of merchantability and fitness for a particular purpose.
-
Page 3: Table Of Contents
....1-1 NTRODUCTION Purpose of the User Guide ......1-2 How the guide is organized . - Page 4 ABLE OF ONTENTS ....AINTENANCE Performing System Tests ......5-7 The Key/Display Test .
-
Page 5: Introduction
NTRODUCTION Purpose of the User Guide ..1-2 How the guide is organized ..1-2 Your responsibilities as a user .1-2 ATTENTION: Read this so no one gets hurt ...1-3 UGH004/0999 microKool Portable Chillers... -
Page 6: Purpose Of The User Guide
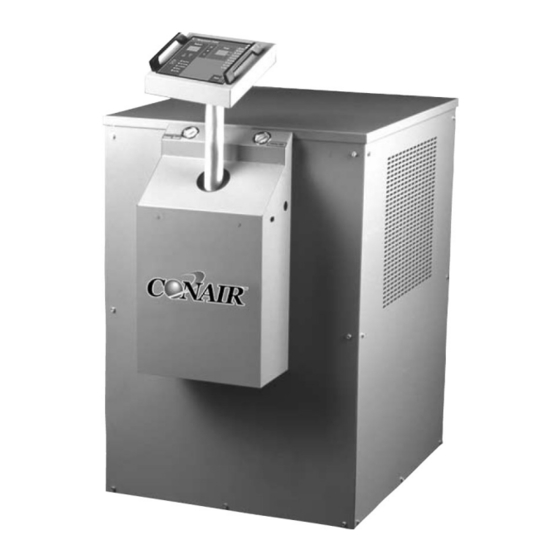
UIDE IS RGANIZED ESPONSIBILITY NTRODUCTION This User Guide describes the Conair microKool water-cooled and air-cooled portable chillers and explains step-by-step how to install, operate, maintain and repair this equipment. Before installing this product, please take a few moments to read the User Guide and review the diagrams and safety infor- mation in the instruction packet. -
Page 7: Ugh004/0999 Microkool Portable Chillers
We design equipment with the user’s safety in mind. You can avoid the potential hazards identified on this machine by following the procedures outlined below and elsewhere in the User Guide. WARNING: Improper installation, operation or servicing may result in equipment damage or personal injury. -
Page 9: Description
ESCRIPTION What is the microKool chiller? .2-2 Typical applications ..2-2 How it works: Water-cooled models ..2-3 How it works: Air-cooled models ...2-4 Features . -
Page 10: What Is The Microkool Chiller
HAT IS THE MICRO HILLER YPICAL PPLICATIONS ESCRIPTION The microKool portable chillers are designed to provide chilled water for industrial applications requiring 24-hour-a- day performance. Operation of air-cooled and water-cooled units differ only in the medium used to remove heat from the refrigerant in the condensers. -
Page 11: How It Works: Water-Cooled
Water-cooled models use tube-in-tube heat exchangers to condense the hot, compressed, refrigerant gas from the compressor to a cool liquid. The cool liquid refrigerant passes through a filter/dryer, which protects the system from moisture or other contami- nants. An in-line sight glass gives a visual indication of proper refrigerant charge and any dangerous moisture pre- sent in the system. -
Page 12: How It Works: Air-Cooled
ORKS OOLED Typical air-cooled plumbing diagram ESCRIPTION Air-cooled models use aluminum-finned, copper tube con- densers to condense the hot, compressed, refrigerant gas from the compressor to a cool liquid. The cool liquid refrigerant passes through a filter/dryer, which protects the system from moisture or other contami- nants. -
Page 13: Features
Water-cooled models are equipped with high efficiency, non-ferrous tube-in-tube condensers and water regulating valves. Air-cooled mod- els have aluminum fin, copper tube condensers. MPA models with compressors above 1.5 Hp have automatic fan cycling controls. UGH004/0999 Control Extension Controls can be extended approximately 11 inches from the control base. - Page 14 § Pressure at pump discharge. Control can be extended upward approximately 11 inches, which may or may not increase the overall height of the unit. Specifications may change without notice. Check with a Conair representative for the most current information. ESCRIPTION...
- Page 15 § Pressure at pump discharge. ** Control can be extended upward approximately 11 inches, which may or may not increase the overall height of the unit. Specifications may change without notice. Check with a Conair representative for the most current information. UGH004/0999...
-
Page 16: Freeze Protection Requirements
REEZE ROTECTION EQUIREMENTS ESCRIPTION Freeze Protection Requirements by Unit Set Temperature Ethylene Glycol, % by weight Freezing Points of Aqueous Ethylene Glycol Solutions Ethylene Glycol, % by weight microKool Portable Chillers UGH004/0999... -
Page 17: Installation
Unpacking the boxes ..3-2 Preparing for installation ..3-3 Connecting the water supply . .3-4 Connecting the main power . . .3-5 Testing the installation ..3-6 Entering setpoint deviation parameters . -
Page 18: Unpacking The Boxes
NPACKING THE OXES NSTALLATION MicroKool Portable Chillers come fully assembled. Carefully remove the chiller their shipping containers, and set upright. Remove all packing material, tape, and plastic. Check inside the electrical enclosure and behind the side panels for accessories or hardware that may have been placed there for shipping. -
Page 19: Preparing For Installation
The microKool chiller is easy to install, if you plan the loca- tion and prepare the area properly. Position the chiller as close to the process machine as possible. Process machine Alternate locations Make sure the installation area provides: A three-phase power source supplying the correct current for your chiller model. -
Page 20: Connecting Process And Water Supply Lines
Install pipe to the rear of the chiller. Use appropriately sized male NPT piping for the process connections and the MPW condenser water connections. Process connections (NPT): MPW-1.5 MPW-2 MPW-3 MPW-4 MPW-5 MPW-7.5 MPW-10 MPA-1.5 MPA-2 MPA-3 1 in. 1 in. -
Page 21: Connecting The Main Power
WARNING: Electrical shock hazard This equipment is powered by three-phase main voltage. Always disconnect and lock out the main power source before performing any work involving electrical connections. All wiring, disconnects and fusing should conform to your region’s electrical codes and should be installed only by qualified personnel. -
Page 22: Testing The Installation
ESTING THE NSTALLATION NOTE: Make sure the chiller tank is full of process fluid before you begin operating. NSTALLATION WARNING: Only qualified personnel should perform this procedure. Parts of this test require opening the unit while it is energized. Only qualified personnel who have been trained in the use of electrical testing devices and in avoiding the safety hazards involved in safely troubleshooting this type of equipment should per-... -
Page 23: Entering Setpoint Deviation Parameters
You can establish a normal operating range around the process temperature setpoint using the high and low deviation parame- ters. If the process temperature exceeds the high deviation limit, or falls below the low deviation limit for longer than 15 minutes, the chiller will alert you to the unacceptable tempera- ture variation with an alarm light. -
Page 24: Initial Setup
NITIAL ETUP NOTE: Dip switch 7 must be ON and dip switch 8 must be OFF for the chiller to work. Do not change the factory setting of these two dip switches. NSTALLATION WARNING: Electric shock hazard This equipment is powered by high voltage. Always disconnect and lock out the main power source before opening the unit or the electrical enclosure to modify factory settings. -
Page 25: Changing Temperature Units
WARNING: Electric shock hazard This equipment is powered by high voltage. Always disconnect and lock out the main power source before opening the unit or the electrical enclosure to modify factory settings. Failure to disconnect and lock out the main power source can result in severe personal injury. -
Page 26: Enabling And Disabling Passcode Protection
NABLING AND ISABLING ASSCODE ROTECTION 3-10 NSTALLATION WARNING: Electric shock hazard This equipment is powered by high voltage. Always disconnect and lock out the main power source before opening the unit or the electrical enclosure to modify factory settings. Failure to disconnect and lock out the main power source can result in severe personal injury. - Page 27 Press the RUN button to save the passcode. The control will display “Pr OFF” to prompt you to remove power to the unit. IMPORTANT: If RUN is not pressed, the new passcode will not be saved. Turn off power to the unit. the main power supply.
-
Page 28: Selecting The Temperature Control Point (Pc-2 Control)
ELECTING THE EMPERATURE ONTROL OINT (PC-2 CONTROL ONLY 3-12 NSTALLATION WARNING: Electric shock hazard This equipment is powered by high voltage. Always disconnect and lock out the main power source before opening the unit or the electrical enclosure to modify factory settings. Failure to disconnect and lock out the main power source can result in severe personal injury. - Page 29 Press the RUN button to save the control point. The control will display “Pr OFF” to prompt you to remove power to the unit. IMPORTANT: If RUN is not pressed, the new control point source will not be saved. Turn off power to the unit. the main power supply.
-
Page 30: Installing The Auto Start Feature
NSTALLING THE TART EATURE (PC-2 C ONTROL IMPORTANT: Always refer to the wiring diagrams that came with your unit before making electrical con- nections. The diagrams show the most accurate electrical component information. 3-14 NSTALLATION WARNING: Electric shock hazard This equipment is powered by high voltage. Always disconnect and lock out the main power source before opening the unit or the electrical enclosure to modify factory settings. - Page 31 Set dip switch 4 to the ON position. Close the electrical enclosure and restore power to the unit. When Auto Start is enabled: The Auto Start indicator light flashes to indicate that the Chiller can start at any time. The chiller will start whenev- er the remote switching or timing device sends a signal to start processing.
-
Page 32: Activating Spi Communication
CTIVATING OMMUNICATION NOTE: To disable SPI, use the setpoint arrow to select Address. Press the arrow until OFF is displayed in the setpoint window. See the for additional PPENDIX SPI programming information. 3-16 NSTALLATION MicroKool portable chillers provide SPI compatible support for RS-485 serial communications with a host machine. -
Page 33: Operation
PERATION PC-1 control features ..4-2 PC-2 control features ..4-3 Positioning the control panel . .4-4 Entering a passcode ..4-5 Starting the chiller . - Page 34 PC-1 C ONTROL EATURES Setpoint display The Setpoint display shows the setpoints entered for fluid temper- ature, high and low temperature deviation alarms, the SPI baud rate, and the SPI address. Setpoint and Actual value display windows also display some alarm codes and setup instructions.
- Page 35 All normal operating functions can be controlled from the microKool PC-2 control panel, including the optional pump- down feature. Setpoint display The Setpoint display shows the setpoints entered for fluid temper- ature, high and low temperature deviation alarms, the SPI baud rate, and the SPI address.
-
Page 36: Positioning The Control Panel
OSITIONING ONTROL ANEL PERATION CAUTION: Improper use of the swiveling control panel can damage the unit. Do not rotate the control panel 360 degrees. This will twist and possibly damage the control wiring and connections to the motherboard in the electrical enclosure. Do not use the control panel handles or control cables to move the chiller. -
Page 37: Entering A Passcode
PC-1 and PC-2 controls have a security feature that prevents accidental or unauthorized changes to the setpoint tempera- ture, high and low deviation limits, SPI address, and baud rate. If passcode protection is enabled, you must enter the correct passcode to change these parameters. To enter the passcode: Press and hold the Setpoint Select button for 5 seconds. -
Page 38: Starting The Chiller
TARTING THE HILLER IMPORTANT: If you are operating the chiller for the first time since installation, you should perform an Auto Tune after two hours of nor- mal operation. You should perform the Auto Tune peri- odically to ensure that the control correctly calculates how much heat and cooling should be applied to main-... -
Page 39: Stopping The Chiller
WARNING: Electrical shock hazard Before attempting maintenance of any kind on the chiller, you must stop the unit; disconnect and lockout the main power supply. You must shut down the chiller whenever you: Change water or process hookups. Shut down the process machine. Run the unit’s diagnostic tests. -
Page 40: Performing An Auto Tune
ERFORMING AN PERATION WARNING: Electric shock hazard This equipment is powered by high voltage. Always disconnect and lock out the main power source before opening the unit or the electrical enclosure to modify factory settings. Failure to disconnect and lock out the main power source can result in severe personal injury. - Page 41 Press (the Setpoint Select button) simultaneously to begin the Auto Tune. The Actual display will flash “At” and the current process temperature to indicate that an Auto Tune is underway. If Auto Tune is successful, the controller automatically starts controlling using the new PID parameters. If you press the STOP button or a fault occurs during the Auto Tune, the control enters stop mode and Auto Tuning immediately terminates.
-
Page 43: Maintenance
AINTENANCE Maintenance schedule ..5-2 Cleaning evaporators ..5-4 Cleaning condensers ..5-4 Filling the tank ... . .5-5 Checking refrigerant charge . -
Page 44: Preventative Maintenance Schedule
REVENTATIVE AINTENANCE CHEDULE AINTENANCE To maintain the best performance, we recommend the follow- ing maintenance schedule. Whenever process variables change Perform an Auto Tune. The Auto Tune ensures that the control continues to obtain good approximations of the PID constants used to compensate for the thermal lag of the system.. -
Page 45: Maintenance Schedule
Quarterly (every 3 months) Inspect power cords, wires and electrical connections. Check for loose or frayed wires, burned contacts, and signs of overheated wires. Check exterior power cords to the main power source and from the electrical box to the pump and heating elements. Check the ground wire and thermocouple connections. -
Page 46: Cleaning Evaporators
LEANING VAPORATORS LEANING ONDENSERS AINTENANCE Minerals and other water system contaminants produce deposits, scales, slime, or algae on the heat-transfer surfaces exposed to water. Fouled surfaces decrease cooling capacity. We recommend that you consult a water treatment specialist to develop a treatment program that will minimize fouling. To clean the evaporator: Consult a water treat- ment specialist... -
Page 47: Refilling The Tank
The process fluid, which can be water or a glycol mixture, is held in a tank inside the unit. This tank should be kept at least three-quarters full of the process fluid. You can check the fluid level in the tank using the sight glass on the back of the chiller. -
Page 48: Checking Refrigerant Charge
HECKING EFRIGERANT HARGE AINTENANCE All chillers are fully charged with refrigerant at the factory. Your chiller mode’s nameplate identifies the type and amount of total refrigerant charge required. While the unit is running, check the refriger- ant charge through the sight glass between the evaporator and the condenser. -
Page 49: Performing System Tests
The microKool portable chillers provide a Test Mode that tests displays and keys on the control panel, as well as inputs and outputs. The Test Mode also allows calibration of the supply and return line thermocouples. System tests and calibration should be performed annually. To enable Test Mode: Press to shut down the chiller. -
Page 50: Key/Display Test
ISPLAY AINTENANCE The Key/Display Test verifies the function of displays, LEDs and buttons on the control panel. Enable Test Mode. Press any key. If necessary, index to the Key/Display menu. Press and hold the Setpoint to each test menu until the controller displays “dSP”. Press any key to clear all displays. -
Page 51: Input Test
The Input Test verifies the function of inputs available on the various models of the microKool chiller. Not all inputs are used on all models. The performance evaluation of the inputs is based on the voltage sensing device (VSD). Connect all inputs to the system. Press any key to display the first test menus. -
Page 52: Output Test
UTPUT 5-10 AINTENANCE The Output Test verifies the function of outputs available on the various models of microKool chillers. Not all outputs are used on all models. The performance evaluation of the inputs is based on the output monitors (OM). Connect all outputs to the system. -
Page 53: Disabling Or Enabling Output Monitors
All output monitors on the microKool chiller can be enabled or disabled permanently through the OM Enable/Disable Menu in Test Mode. You need to use this feature if you have replaced the mother- board, or if dip switches 7 and 8 have been changed erro- neously. -
Page 54: Calibrating Temperature Sensors
ALIBRATING EMPERATURE ENSORS Special Tools Needed: thermocouple calibrator 5-12 AINTENANCE The microKool chillers use thermocouples to sense the tem- perature in the return and supply process lines. These thermo- couples should be calibrated annually, or when a new thermo- couple is installed, to ensure correct operation. The chiller’s Calibration Mode provides zero and span calibra- tion of both the supply and return line thermocouples. - Page 55 Press the up key to begin calibrating. The controller displays the name of the current calibration (examples: 32 SC.L; 32 rC.L; 510 SC.H; or 510 rC.H). Wait until the control displays “don” or “bad.” A “don” message in the Setpoint display indicates the cali- bration was successful.
-
Page 56: Logging Operating Hours
OGGING PERATING OURS 5-14 AINTENANCE You can see the total numbers of operation by accessing the Total Operating Hours Log in Test Mode. Enable Test Mode. Press any key to display the first test menus. Index through test menus to the operating log. Press and hold the Setpoint to each test menu until the Actual display indicates “Log”. -
Page 57: Troubleshooting
Before beginning ... .6-2 A few words of caution ..6-2 How to identify the cause of a problem ....6-3 IAGNOSTICS Shut down alarms . -
Page 58: Before Beginning
EFORE EGINNING ORDS AUTION ROUBLESHOOTING You can avoid most problems by following the recommended installation, operation and maintenance procedures outlined in this User Guide. If you do have a problem, this section will help you determine what caused it and tell you how to fix it. Before you begin troubleshooting: Find the wiring, plumbing and other diagrams that were shipped with your equipment. -
Page 59: How To Identify The Cause Of A Problem
Most chiller malfunctions are indicated by an illuminated alarm light and error codes displayed on the control panel. A problem can trigger three types of alarms: Shut Down Alarms: The chiller detected a problem that caused it to shut down automatically to prevent equipment damage or personal injury. -
Page 60: Shut Down Alarms
LARMS Alarm Pump The pump motor overload has tripped. The contact is open. WARNING: Only qualified electri- cal service personnel should examine and correct problems that require opening the unit's electrical enclosure or checking electrical current to diagnose the cause of a problem. - Page 61 The chiller has detected a problem that could lead to equipment damage or personal injury if it is not corrected. The Alarm LED lights and the STOP/RUN LED flashes red. The chiller automatically shuts down. The control displays a red LED or alarm code indicating the source of the problem.
- Page 62 LARMS Alarm The incoming power is out of phase. A leg may have failed or is disconnected. NOTE: This alarm is available only on PC-2 models. Pump fuse. Compressor fuse. Unloader valve fuse. Unloader valve fuse. Level Switch fuse. ROUBLESHOOTING The chiller has detected a problem that could lead to equipment damage or personal injury if it is not corrected.
- Page 63 Replace the compressor if supply voltage, wiring and overload settings are correct, but the pump continues to draw excessive current. ERFORMING and perform an the input is OK, call Conair service. ROUBLESHOOTING microKool Portable Chiller LARMS YSTEM ESTS . If...
- Page 64 LARMS Alarm Refrigerant Pressure Refrigerant pressure is either too low or too high. WARNING: The microKool should be tested and repaired only by qualified techni- cians equipped with the correct tools and trained in the mainte- nance and repair of electrical and refriger- ant systems used in industrial applications.
- Page 65 The chiller has detected a problem that could lead to equipment damage or personal injury if it is not corrected. The Alarm LED lights and the STOP/RUN LED flashes red. The chiller turns off the compressor, but normal operation resumes after you clear the alarm or the problem corrects itself. The control displays a red LED or alarm code indicating the source of the problem.
-
Page 66: Warning Alarms
ARNING LARMS Alarm Low Deviation The actual temper- ature of fluid sup- plied to the process is lower than the setpoint deviation limit allows. High Deviation The actual temper- ature of fluid sup- plied to the process is higher than the setpoint deviation allows. -
Page 67: System Alarms
Conair service technicians. You may need to replace the mother- board. Cycle power to the unit. Contact Conair service if an operating parameter such as the setpoint is not being saved or if this error persists. microKool Portable Chillers... -
Page 68: Chiller Will Not Power Up
HILLER OWER Symptom Applying power does not turn on the chiller or light the control panel. The control panel is lit, but the chiller will not operate when RUN is pressed. 6-12 ROUBLESHOOTING If you apply power to the chiller and the control panel does not light, you have a problem with the main power circuit or the unit’s microprocessor board. -
Page 69: Checking And Replacing Fuses
This procedure covers the factory-installed fuses on the unit’s motherboard. If you have installed an electrical disconnect or emergency stop switch, additional fuses and/or breakers may have been used elsewhere in the in the main power circuit. To replace a blown fuse: Disconnect and lockout the main power. -
Page 70: Resetting Overloads
ESETTING VERLOADS EPLACING THE VERLOAD MOTOR CON- Motor overload 6-14 ROUBLESHOOTING The pump motor overload is located inside the unit’s electri- cal enclosure. Disconnect and lockout the main power. Open the electrical enclosure door. screw on the front panel counterclockwise to open. Check the overload. -
Page 71: Replacing The Motherboard
Disconnect and lockout the main power supply. Open the electrical enclosure door. on the front panel counterclockwise to open. Mark or label each wire connected to the mother- board. The orange shield is labeled with the connection information. You must label the wires to ensure they are con- nected to the correct terminals on the new motherboard. -
Page 72: Replacing The Compressor Contactor
EPLACING THE OMPRESSOR ONTACTOR IMPORTANT: Always refer to the wiring dia- grams that came with your chiller to locate spe- cific electrical compo- nents. Illustrations in the User Guide are intended to be representative only. 6-16 ROUBLESHOOTING WARNING: Electrical Shock Hazard Only qualified service personnel who have been trained on electrical testing and the procedures for avoiding the hazards should diagnose or correct prob-... -
Page 73: Checking The Unloader Valve
The unloader valve is located between the compressor and the condenser on both air-cooled and water-cooled chillers. It works only during low demand conditions, when loads are up to 24% below normal. During low-load conditions, the compressor cycles off. To decrease the frequency of cycling, which is harmful to the compressor, the microKool uses an unloader valve to channel some of the hot refrigerant gas from the compressor directly... -
Page 74: Replacing The Freezestat
EPLACING THE REEZESTAT 6-18 ROUBLESHOOTING WARNING: Electrical shock hazard Before attempting maintenance of any kind, stop the unit and disconnect and lock out the main power supply. The freezestat unit is a bulb and capillary thermostat. To replace the unit: Shut down the chiller and disconnect the process fluid lines. -
Page 75: Before You
Conair has made the largest investment in customer support in the plastics industry. Our service experts are available to help with any problem you might have installing and operating your equipment. Your Conair sales representative also can help analyze the nature of your problem, assuring that it did not result from misapplication or improper use. -
Page 76: Warranty Information
Returns must be prepaid. Purchaser must notify Conair in writing of any claim and pro- vide a customer receipt and other evidence that a claim is being made. -
Page 77: Spi Commands
The SPI commands supported by Conair microKool portable chillers are listed in the following tables. The standard required commands and three optional com- mands are listed in the SPI Command Pairs table, along with the Select and Poll command pairs in hexadecimal format. - Page 78 SPI S TATUS Status, Process Poll: 0x21 0x40 SPI STATUS WORD Word BIT position EEprom error A/D converter error CJC Error RAM hardware ROM checksum Probe Failure E/M Hi temp safety Prog. Hi temp safety Output monitor failure Low water pressure High deviation alarm Low deviation alarm Prog.
- Page 79 SPI S TATUS Status, Machine 1 Poll: 0x21 0x42 SPI STATUS WORD Word BIT position EEprom error A/D converter error CJC Error RAM hardware ROM checksum Probe Failure E/M Hi temp safety Prog. Hi temp safety Output monitor failure Low water pressure High deviation alarm Low deviation alarm Prog.
- Page 80 SPI S TATUS Status, Machine 2 Poll: 0x21 0x44 SPI STATUS WORD Word BIT position EEprom error A/D converter error CJC Error RAM hardware ROM checksum Probe Failure E/M Hi temp safety Prog. Hi temp safety Output monitor failure Low water pressure High deviation alarm Low deviation alarm Prog.
-
Page 81: Pc-1 Wiring Diagram
ARTS IAGRAMS PC-1 Wiring Diagram ..PD-2 PC-1 Circuit Board ..PD-3 PC-2 Wiring Diagram ..PD-4 PC-2 Circuit Board ..PD-5 Parts Lists . -
Page 82: Wiring Diagram
PD-2 PC-1 W IRING IAGRAM UGH004/0999... -
Page 83: Circuit Board
4 3 2 1 6 5 4 3 2 1 PC-1 CIRCUIT BOARD WARNING! IT IS VERY IMPORTANT THAT SWITCHES # 7 AND #8 BE SET TO THE PROPER UNIT TYPE BEFORE OPERATING THIS UNIT CHILLER CONFIGURATION DIP SWITCH 1 2 3 4 5 6 7 8 UGH004/0999 4 3 2 1 3 PHASE INPUT... -
Page 84: Wiring Diagram
PD-4 PC-2 W IRING IAGRAM UGH004/0999... -
Page 85: Circuit Board
4 3 2 1 6 5 4 3 2 1 PC-2 CIRCUIT BOARD WARNING! IT IS VERY IMPORTANT THAT SWITCHES # 7 AND #8 BE SET TO THE PROPER UNIT TYPE BEFORE OPERATING THIS UNIT CHILLER CONFIGURATION DIP SWITCH 1 2 3 4 5 6 7 8 UGH004/0999 4 3 2 1 3 PHASE INPUT...
Need help?
Do you have a question about the MPA and is the answer not in the manual?
Questions and answers