Table of Contents
Advertisement
Quick Links
Advertisement
Table of Contents

Related Manuals for NEFF C29CR7K.0


Summary of Contents for NEFF C29CR7K.0
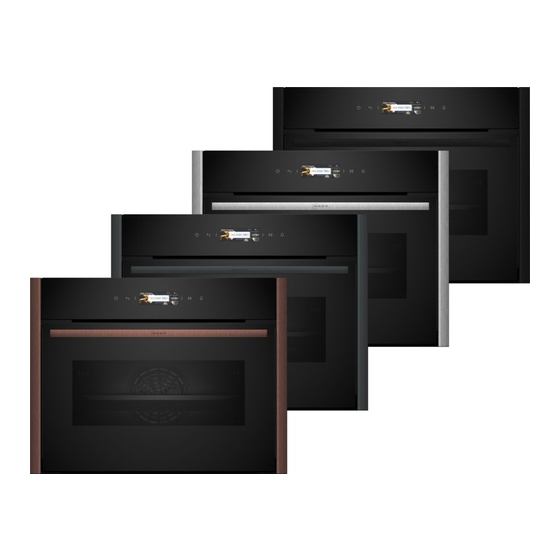
- Page 1 Oven [en] User manual and installation instructions C29CR7K.0...
-
Page 2: Table Of Contents
en Safety Futher information and explanations are available online: Table of contents 1 Safety INFORMATION FOR USE Observe the following safety instructions. 1.1 General information Safety .............. 2 ¡ Read this instruction manual carefully. Preventing material damage ...... 5 ¡ Keep the instruction manual and the Environmental protection and saving en- product information safe for future refer- ergy .............. 5... - Page 3 Safety en 1.4 Safe use The telescopic shelves become hot when the appliance is in use. Always place accessories in the cooking com- ▶ Allow hot telescopic shelves to cool down partment the right way round. before touching them. → "Accessories", Page 9 ▶ Only touch hot telescopic shelves with WARNING ‒ Risk of fire! oven gloves.
-
Page 4: Safety
en Safety If the insulation of the power cord is dam- 1.6 Cleaning function aged, this is dangerous. WARNING ‒ Risk of fire! ▶ Never let the power cord come into contact Loose food remnants, fat and meat juices with hot appliance parts or heat sources. may catch fire when the cleaning function is in ▶... -
Page 5: Preventing Material Damage
Preventing material damage en 2 Preventing material damage ▶ Do not keep moist food in the cooking compartment 2.1 General for a long time with the door closed. ▶ ATTENTION! Do not store food in the cooking compartment. ▶ Take care not to trap anything in the appliance Alcoholic vapours may catch fire in the hot cooking door. -
Page 6: Familiarising Yourself With Your Appliance
en Familiarising yourself with your appliance Remove any accessories that are not being used from Switch off the display in the basic setting. the cooking compartment. ¡ Energy is saved when the display is switched off. ¡ Accessories that are not being used do not need to Note: be heated. -
Page 7: Functions
Functions en 4.3 Buttons The buttons are touch-sensitive areas. To select a function, press the corresponding button. Symbol Name On/Off Switch the appliance on or off Back Navigate back Left arrow Decreases the adjustment values Right arrow Increases the adjustment values Start/stop Start or pause the appliance Timer Set the timer... - Page 8 en Functions 5.1 Heating functions This is where you will find an overview of the types of heating. You will find recommendations for using the types of heating. For temperatures above 275 °C, the appliance reduces the temperature to approx. 275 °C after around 40 minutes. Symbol Heating function Temperature...
-
Page 9: Accessories
Accessories en 5.3 Symbols You can find an overview of other symbols on the display here. Symbol Name Save Save the setting Close Close the message Reset Reset the cooking time Reset Reset the values Change Change the selection Information Display information Rapid heating Activate or deactivate the rapid heating function Home Connect... - Page 10 You will find a comprehensive range of products for your appliance in our brochures and online: www.neff-international.com Accessories vary from one appliance to another. When purchasing accessories, always quote the exact product number (E no.) of your appliance.
- Page 11 Basic operation en Press the month. Press to switch the appliance on. Use or to select the month. → "Switching on the appliance", Page 11 Press the day. Set the required type of heating and temperature for Use or to select the day. the heat-up process and press to start.
- Page 12 en Time-setting options Press the type of heating that you want to use. This will ensure that the light in the cooking com- Adjust the temperature or level, if required. partment is always off while the appliance is in oper- Press to start the operation.
-
Page 13: Dishes
Dishes en Press to confirm the setting. Press to confirm the setting. Press "Ready at". Cancelling the cooking time a The time at which your food will be ready will ap- Press . pear on the display. Press "Cooking time". Use the ... - Page 14 en Favourites ¡ Scones 10.4 Setting a dish ¡ Part-cooked bread rolls or baguette Press "Dishes". ¡ Bake, savoury, fresh, cooked ingredients Press the required dish. ¡ Potato gratin, raw ingredients, 4 cm deep Note: The setting options vary depending on the ¡ Lasagne, fresh dish.
-
Page 15: Favourites
Childproof lock en 12 Childproof lock You can secure your appliance to prevent children ¡ You can also activate the appliance door lock. → "Basic settings", Page 15 from accidentally switching it on or changing the set- tings. Press . Press . 12.1 Activating the childproof lock a "Childproof lock activated"... - Page 16 en Home Connect Personalisa- Selection Appliance in- Display tion formation Dishes ¡ All Appliance in- Display technical information about formation the appliance ¡ No pork ¡ Kosher only 13.2 Changing basic settings Childproof ¡ Keylock only lock ¡ Door lock + keylock Press to switch the appliance on.
- Page 17 Home Connect en Basic setting Possible settings Explanation Home Connect as- Start the assistant You can connect your appliance to the Home Connect app via sistant Disconnect the Home Connect assistant. Note: If you are using the Home Connect assistant for the first time, only the "Start assistant"...
-
Page 18: Cleaning And Servicing
en Cleaning and servicing 14.6 Data protection ¡ The current software and hardware version of your appliance. Please see the information on data protection. ¡ Status of any previous reset to factory settings. The first time your appliance is registered on a home This initial registration prepares the Home Connect network connected to the Internet, your appliance will functions for use and is only required when you want to... - Page 19 Cleaning and servicing en Area Suitable cleaning agents Information Stainless steel in- ¡ Stainless steel cleaner Discolouration can be removed using stainless steel cleaner. terior door frame Do not use stainless steel care products. Door handle ¡ Hot soapy water To avoid permanent stains, immediately remove any descaling agent that gets onto the surface.
-
Page 20: Pyrolytic Self-Cleaning Cleaning Function
en "Pyrolytic self-cleaning" cleaning function 16 "Pyrolytic self-cleaning" cleaning function 16.2 Setting the "Pyrolytic self-cleaning" With the "Pyrolytic self-cleaning" cleaning function, the cooking compartment is cleaned virtually automat- cleaning function ically. Use the cleaning function to clean the cooking com- WARNING ‒ Risk of harm to health! partment every 2 to 3 months. -
Page 21: Easy Clean Cleaning Aid
"Easy Clean" cleaning aid en The appliance door will remain locked until the ap- Slide the pull-out rails out and in several times. pliance has cooled down sufficiently and While the cleaning function is running, the rails may gone out. become discoloured. This discolouration does not compromise the functionality of the appliance. -
Page 22: Drying
en Drying 18 Drying 18.1 Drying the cooking compartment Leave the cooking compartment to dry with the ap- pliance door open for 1 hour or use "Drying func- tion". WARNING ‒ Risk of burns! → "Setting 'Drying function'", Page 22 The appliance becomes hot during operation. ▶ Allow the appliance to cool down before cleaning. -
Page 23: Rails
Rails en ¡ The pull-out rails can be installed at any level as re- Note: quired. Further information: ¡ If necessary, you can equip all levels with a pull-out rail. Push on the side of the tab marked PUSH behind the rail, and push the rail to the rear. 19.4 Attaching the pull-out rail Note: The pull-out rails only fit on the right or left. - Page 24 en Appliance door Release the PUSH tab. Pull the pull-out rail out as far as it will go and slide it back in. Note: Further information: a The retainer clicks into place. 20 Appliance door To clean the appliance door thoroughly, you can disas- WARNING ‒ Risk of injury! semble the appliance door.
-
Page 25: Appliance Door
Appliance door en Close the appliance door fully . Grab hold of the Using both hands, press down on the left and right appliance door with both hands (on the left and of the door cover from above to check whether the right) and pull it upwards and out ... - Page 26 en Appliance door Undo and remove the left- and right-hand screws 20.4 Fitting the door panes on the appliance door. Place a folded-up tea towel in the appliance door. WARNING ‒ Risk of injury! Pull the front pane up and out . The hinges on the appliance door move when the door is opened and closed, which could trap your fingers.
-
Page 27: Troubleshooting
Troubleshooting en Put the door cover in position and push down on it Close the appliance door. until you hear it click into place. Note: Do not use the cooking compartment again until the door panes have been correctly fitted. 21 Troubleshooting You can rectify minor faults on your appliance yourself. - Page 28 ▶ Next time, set lower or higher values. Tip: A lot of other information about the food preparation and corresponding adjustment values can be found in the Home Connect app or on our website www.neff-interna- tional.com. 21.2 Replacing the oven light bulb WARNING ‒ Risk of burns!
- Page 29 Disposal en Pull out the halogen bulb without turning it . WARNING ‒ Risk of injury! The glass cover may already have broken due to ex- ternal influences or it may break due to excessive pres- sure when being installed or removed. ▶...
-
Page 30: Source Software
Directive 2014/53/EU. A detailed Declaration of Conformity can be found on- A detailed RED Declaration of Conformity can be found line at www.neff-home.com/uk among the additional online at www.neff-international.com among the addi- documents on the product page for your appliance. -
Page 31: How It Works
How it works en 26.2 Baking tips Roasting in uncovered cookware ¡ Use a deep roasting dish. ¡ Dark-coloured metal baking tins are most suitable ¡ If you do not have any suitable cookware, you can for baking cakes, bread and other baked goods. use the universal pan. - Page 32 en How it works ¡ Follow the manufacturer's instructions on the pack- aging. 26.5 List of foods Recommended settings for a variety of foods, sorted into food categories. Recommended settings for various types of food Food Accessory/cookware Shelf pos- Heating Temperature in Cooking time in ition function...
- Page 33 How it works en Food Accessory/cookware Shelf pos- Heating Temperature in Cooking time in ition function °C mins Pot-roasted beef, 1.5 kg Covered cookware 200-220 140-160 Sirloin, medium, 1.5 kg Wire rack 220-230 60-70 Burger, 3–4 cm thick Wire rack 20-30 Leg of lamb, boned, medium, Wire rack 170-190 50-70...
- Page 34 en How it works Recommended settings for slow cooking Food Accessory/cook- Shelf pos- Searing Heating function Temperature Cooking ware ition time in in °C time in mins mins Duck breast, medium Uncovered cook- 45-60 rare, 300 g each ware Fillet of pork, whole Uncovered cook- 45-70 ware...
-
Page 35: Installation Instructions
Installation instructions en 27 Installation instructions Observe this information when installing the appliance. ¡ Cut-out work on the units should be carried out before installing the appliance. Remove any shavings. Otherwise, the correct opera- tion of electrical components may be ad- versely affected. - Page 36 en Installation instructions 27.3 Appliance dimensions 27.4 Installation below a worktop You will find the dimensions of the appliance here Observe the installation dimensions and the installation instructions when installing below a worktop. ¡ To ventilate the appliance, the intermediate floor must have a ventilation cut-out. ¡...
- Page 37 Installation instructions en 27.6 Installation in a tall unit ¡ Ensure that air exchange is guaranteed in accord- ance with the diagram. Observe the installation dimensions and the installation instructions when installing in a tall unit. ¡ Only fit appliances up to a height that allows ac- cessories to be easily removed.
- Page 38 en Installation instructions ¡ Contact protection must be guaranteed by the in- Check whether the silicone base is between the ‒ stallation. panel and the door handle. Attach the door handle . Electrically connect the appliance with the protective contact plug Note: The appliance must only be connected to a pro- tective contact socket that has been correctly installed.
- Page 39 Installation instructions en Screw the appliance into place. 27.11 Attaching the fastening elements In order to attach the panels, the four fastening ele- ments must be fitted beforehand. Fold together the fastening element. Insert the left- and right-hand panels until a clicking sound is heard.
- Page 40 en Installation instructions Loosen and remove the panels with a plastic tool, e.g. one of the other fastening elements. Turn the fastening element to the left or right to ad- just the alignment of the panels. Refit the panels. 27.13 Removing the door handle and side panels ATTENTION! Unsuitable tools may damage the surface of the appli-...
- Page 44 Valid within Great Britain: Imported to Great Britain by BSH Home Appliances Ltd. Grand Union House Old Wolverton Road Wolverton, Milton Keynes MK12 5PT United Kingdom *9001697006* Register your product online neff-home.com 9001697006 BSH Hausgeräte GmbH 030124 Carl-Wery-Straße 34 81739 München, GERMANY...
Need help?
Do you have a question about the C29CR7K.0 and is the answer not in the manual?
Questions and answers