zipwake S Series Installation Manual
Dynamic trim control system
Hide thumbs
Also See for S Series:
- Operator's manual (32 pages) ,
- Troubleshooting manual (13 pages) ,
- Installation manual (2 pages)
Advertisement
Quick Links
Advertisement

Related Manuals for zipwake S Series


Summary of Contents for zipwake S Series
- Page 1 DYNAMIC TRIM CONTROL SYSTEM FOR INTEGR ATION SERIES S INSTALL ATION GUIDE...
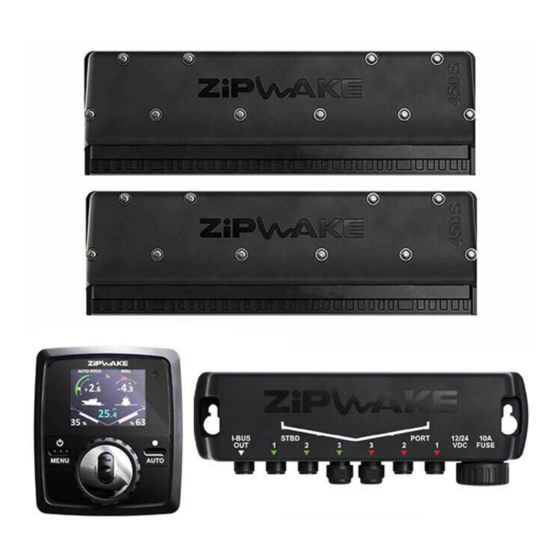
- Page 2 External GPS (optional) Ethernet NMEA 2000 DISTRIBUTION UNIT (DU) Ignition CONTROL key sense PANEL (optional) Additional control I-BUS (Can Bus) Supply 12-32 V DC panels (optional) INTERCEPTORS INTERCEPTORS Copyright © 2023 Zipwake AB, Sweden. All rights reserved. R1A, March 2023, English...
-
Page 3: Mounting Options
INTERCEPTOR 1 MOUNTING OPTIONS THRU-HULL CABLE FITTINGS Depending on preference, the Interceptors can be mounted with thru-hull cable fittings above the waterline (A) or below, concealed behind the Interceptors (B). ALLOWED SPRAY RAIL OVERLAP Max Extension E = 30 mm (1.2") NOTE! Chine Interceptor Not Ok! - Page 4 INTERCEPTOR PROPELLER CLEARANCE If the boat has an outboard engine or sterndrive, the Interceptors must be mounted with clearance to the propeller(s). NOTE! Intermediate Interceptor 75 mm (3") 100 mm (4") 0 mm (0") 0 mm (0") CONVEX BOTTOM CURVATURE 5 mm (0.2") CONCAVE BOTTOM CURVATURE 3 mm (0.1")
- Page 5 INTERCEPTOR 2 PREPARE THE TRANSOM ENSURE A FLAT SURFACE FOR EACH INTERCEPTOR The transom must be relatively flat where the Interceptors are mounted to ensure that they work properly. Max 2 mm (0.08") between parallel planes DRILLING TEMPLATE Start mounting the Interceptors as far outward as possible, although well inside the transom.
- Page 6 INTERCEPTOR 3 INSTALL THE BACK PLATES A. FOR THRU-HULL FITTINGS ABOVE THE WATERLINE GO STRAIGHT TO STEP B. Remove back plug Remove Servo unit: T25 (PT 5.0x18) (x3) B. MOUNT THE BACK PLATE B. MOUNT THE BACK PLATE Apply sealant NOTE! Sealant 300 S:...
- Page 7 INTERCEPTOR 4A INSTALL THRU-HULL FITTINGS ABOVE THE WATERLINE Drill hole for thru-hull fitting Align the hole with the Interceptor cable 1. Pilot hole Ø 3 mm (1/8") 2. Hole saw Ø 19 mm (3/4") Waterline Option: 1. Pilot hole Ø 3 mm (1/8") 2.
- Page 8 INTERCEPTOR Extension (optional) Place the cable cover on top of the Interceptor and cut it ~5 mm (0.2") above the mark If neccessary use the extension and cut it to desired length ~5 mm (0.2") Cable cover (standard) Interceptor Apply sealant Drill holes for the cable cover Use the cover as a drill template Ø...
- Page 9 INTERCEPTOR 4B INSTALL CONCEALED THRU-HULL FITTINGS UNDER THE WATERLINE NOTE! Sealant Fit the cable clip in the back plate or cut it off NOTE! Tighten: 27 mm (1 1/16") wrench M18 x 2.5 10 Nm (7.4 lb-ft) Hold: 13 mm (33/64") wrench NOTE! Servo unit: T25 (PT 5.0x18)
- Page 10 INTERCEPTOR 5 INSTALL THE INTERCEPTOR FRONTS Interceptor front: T30 (PT 6.0x48) 300 S: 450 S: 600 S: 5 Nm 750 S: (3.7 lb-ft) 6 PAINT THE INTERCEPTORS WITH ANTIFOULING Apply Antifouling Best tool 2nd Best tool Spray Roller Remove excess antifouling when the paint is dry Run a thin knife or a spatula along the blades...
-
Page 11: Distribution Unit
DISTRIBUTION UNIT 1 MOUNT THE DISTRIBUTION UNIT Mount the distribution unit inboard where it is easy to connect it to both interceptors and power supply (battery) e.g. the engineroom or other suitable compartment. NOTE! The maximum cable length (including extra cable) from an interceptor to the distribution unit is 6 m (20 ft). - Page 12 INTEGRATOR MODULE 1 MOUNT THE INTEGRATOR MODULE Mount the integrator module on a rigid surface where it is easy to connect it to the distribution unit and other equipment e.g. under the dash or another suitable compartment. If the system will be used with mobile devices, mount the integrator module for maximum signal strength.
- Page 13 Extension cable (optional) With the integrator module connected, the system can be controlled from one or several sources e.g. an MFD, a mobile device or a Zipwake control panel. NOTE! Detailed wiring diagram is available at the end of this folder.
-
Page 14: Initial Start
MFD. Refer to the MFD manufacturer or manual for detailed information on compatible models and how to launch integration applications such as the Zipwake Integrator Module interface on your MFD model. At first start-up, follow the steps on the MFD to complete system installation. -
Page 15: Wiring Diagram
WIRING DIAGRAM ACCESSORIES Model Part No. Description CP-S 2011238 CONTROL PANEL S WITH STANDARD CABLE 7 M IT300-S 2011232 INTERCEPTOR 300 S WITH CABLE 3 M & CABLE COVERS IT450-S 2011233 INTERCEPTOR 450 S WITH CABLE 3 M & CABLE COVERS IT600-S 2011234 INTERCEPTOR 600 S WITH CABLE 3 M &... - Page 16 WIRING DIAGRAM...
- Page 17 WIRING DIAGRAM...
- Page 18 Visit zipwake.com for additional information such as: • Operator’s Manual and Installation Guide in different languages • Product specifications, including a list of accessories and spare parts • Application examples and Interceptor mounting options • Drawings and 3D models of system components...
Need help?
Do you have a question about the S Series and is the answer not in the manual?
Questions and answers