Table of Contents
Advertisement
Available languages
Available languages
Quick Links
Eine aktuelle Version dieser Anleitung finden Sie auf:
https://www.paramondo.de/bedienungsanleitung/
A current version of these instructions can be found on:
https://www.paramondo.de/bedienungsanleitung/
paramondo
Aedis 2000 Kassettenmarkise
Montageanleitung / installation instructions
V4.01-10.2022
Advertisement
Table of Contents

Related Manuals for paramondo Aedis 2000


Summary of Contents for paramondo Aedis 2000
- Page 1 Eine aktuelle Version dieser Anleitung finden Sie auf: https://www.paramondo.de/bedienungsanleitung/ A current version of these instructions can be found on: https://www.paramondo.de/bedienungsanleitung/ paramondo Aedis 2000 Kassettenmarkise Montageanleitung / installation instructions V4.01-10.2022...
-
Page 2: Table Of Contents
Adjusting the inclination angle ..........................85-89 Aligning the articulated arms ..........................90-92 Usage of the roller valance ............................93 Operating the manual emergency crank ........................94 Declaration of performance ............................. 95 Declaration of conformity ............................96 Contact information ............................last page www.paramondo.de... - Page 3 Montage der Markise erforderlich. Wir empfehlen eine maximale Hebelast von 15 kg/weibliche Person bzw. 25 kg/männli- che Person. Ab einer Breite von 500 cm empfehlen wir 4 Personen für die Montage der Markise. Werte angelehnt an die Lastenhandhabungsverordnung. www.paramondo.de...
-
Page 4: Sicherheitshinweise
Erfordernissen der Anlage und des Monta- • Akkuschrauber geuntergrundes abgestimmt werden. • Bohrmaschine Hierbei sind die Angaben zu den erforderli- • Wasserwaage chen Dübelauszugskräften zwingend einzu- • Seile / Gurte halten. • Komplettes Werkzeugset www.paramondo.de... - Page 5 Arbeiten koordiniert manuelle Bedienung gesichert werden. werden. Bei manuell betriebenen Anlagen muss die Der Arbeitsbereich unter der Markise muss Bedienkurbel entfernt und sicher verwahrt abgesperrt und geschützt werden, damit werden. Personen nicht ungeschützt unter die hän- gende Last geraten können. www.paramondo.de...
- Page 6 Wissen benutzt werden, wenn sie beaufsich- tigt oder bezüglich des sicheren Gebrauchs Es sind alle mitgelieferten Konsolen zu ver- des Produktes unterwiesen wurden und die wenden, ebenso müssen die Konsolen an daraus resultierenden Gefahren verstehen. allen erforderlichen bzw. angegebenen Be- festigungspunkten montiert werden. www.paramondo.de...
- Page 7 Motors bzw. Steuergerätes erfolgen. Steuereinheiten / Schaltern (Mindesthöhe, Führen Sie alle Montage,- Anschluss- und Schutz vor Bedienung durch Kinder, Bedie- Wartungsarbeiten im spannungsfreien Zu- nung durch Personen mit körperlichen Be- stand aus. einträchtigungen etc.). Verwenden Sie niemals defekte oder beschä- digte Geräte. www.paramondo.de...
- Page 8 (falsche Installation, mäß DIN VDE 0700 seitens der Instal- Fehlbedienung etc.) zurückzuführen sind. lation eine Trennvorrichtung für jede Phase vorhanden sein. Als Trennvorrichtung gelten Schalter mit einer Kontaktöffnungsweite von mindestens 3 mm (z. B. LS-Schalter, Sicherungen oder FI-Schalter). www.paramondo.de...
-
Page 9: Hinweise Zur Entsorgung
Kunden Zugang zu einem euro- http://www.ear-system.de/ paweiten Netzwerk lokaler Recycling-Ein- ear-verzeichnis/sammel-und-ruecknah- richtungen (Wertstoffhöfe, Rücknahmestel- mestellen.jsf len o.ä.). Über diese lokalen Einrichtungen werden unsere Produkte fachgerecht recycelt. Da- durch verringert sich – zum Wohle der Um- welt - das Abfallaufkommen. www.paramondo.de... - Page 10 Unsere Pflicht als Hersteller besteht eben- falls darin, Sie über den Erfüllungsgrad zu der Sammel- und Verwertungsvorgabe zu infor- mieren. Da wir an einem qualifizierten Rück- nahmesystem angebunden sind, können wir auf den Erfüllungsgrad der Recycling-Betriebe verweisen. Diese Informationen finden Sie auf unserer Webseite. www.paramondo.de...
-
Page 11: Verbraucherinformationen
Finish imprägniert und reifter Produktions- und Verarbeitungstech- bleiben bei guter Pflege und einem Nei- nik möglich. gungswinkel von mindestens 15° während Solche Erscheinungen mindern den Wert und eines kurzen, leichten Regenfalls regenbe- die Gebrauchstauglichkeit der Markise nicht. ständig. www.paramondo.de... - Page 12 Stockflecken zu vermeiden. Weitere Informationen zu Eigenschaften von Markisentüchern sowie die wichtigsten Abb. 3 Abb. 4 Anwendungenfälle zum Stand der Technik finden Sie in den Richtlinien zur Beurteilung konfektionierter Markisentücher. Herausgeber: ITRS Industrieverband Technische Textilien - Rollladen-Sonnenschutz e.V. www.paramondo.de...
-
Page 13: Windwiderstandsklassen
DIN EN 13561 den bekannten Windstärken nach Beaufort zuge- ordnet. Windwiderstandsklasse Windstärke nach Beaufort < 4 Windgeschwindigkeit < 28 Vmax. (km/h) Windgeschwindigkeit < 7,8 10,6 13,6 Vmax. (m/s) Staudruck durch Wind < 40 q (N/m²) Quelle: DIN EN 13561 Markisen www.paramondo.de... -
Page 14: Dübelauszugskräfte
Zustand ab. Es liegt in der Verantwortung des Installateurs, vor der Installation der Markise den Zustand des Montageuntergrundes zu überprüfen. Die Berechnung der Dübelauszugskräfte erfolgte unter Berücksichtigung der Windwider- standsklasse 1 gemäß Norm EN 13561 und EN 1932. www.paramondo.de... -
Page 15: Produktbeschreibung / Komponenten
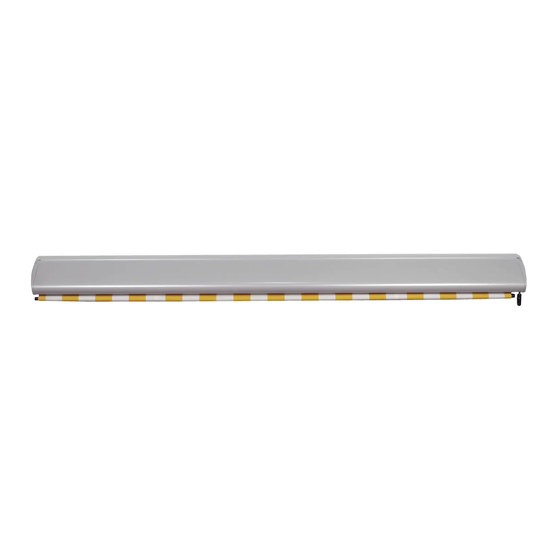
Produktbeschreibung / Komponenten Tragrohr Wand-Deckenkonsole (je nach Ausführung) Markisentuch Tuchwelle Armhalter Gelenkarme Ausfallprofil Wellenkonsolen (Tuchwellenhalter) Getriebe (bei handbetriebenen Anlagen) Motor (bei motorbetriebenen Anlagen) Kurbelöse (bei handbetriebenen Anlagen oder bei Anlagen mit NHK-Motor) Kurbel Volant www.paramondo.de... -
Page 16: Lieferumfang
Achten Sie auf einen Mindestabstand von 50 cm zwischen offener / ausgefahrener Markise und feststehenden Hindernissen. • Die Markise muss in einer Mindesthöhe von 250 cm montiert werden. Ist dies nicht möglich, ist bei mit Automatiksteuerun- gen ausgerüsteten Markisen der Einbau einer akustischen oder optischen Warneinrichtung empfohlen. www.paramondo.de... -
Page 17: Empfohlenes Werkzeug
Empfohlenes Werkzeug www.paramondo.de... -
Page 18: Korrekte Platzierung Der Halter
230 – 250 x 160 cm 251 – 350 x 160 cm 351 – 400 x 160 cm 401 – 450 x 160 cm L / 2 L / 2 451 – 600 x 160 cm L / 2 L / 2 www.paramondo.de... - Page 19 301 – 350 x 210 cm 351 – 400 x 210 cm 401 – 450 x 210 cm L / 2 L / 2 451 – 600 x 210 cm L / 2 L / 2 330 – 400 x 260 cm www.paramondo.de...
- Page 20 L / 2 451 – 500 x 310 cm L / 2 L / 2 501 – 550 x 310 cm L / 2 L / 2 551 – 600 x 310 cm L / 2 L / 2 www.paramondo.de...
- Page 21 Korrekte Platzierung der Halter 440 – 450 x 360 cm L / 2 L / 2 451 – 550 x 360 cm L / 2 L / 2 551 – 600 x 360 cm L / 2 L / 2 www.paramondo.de...
- Page 22 490 – 500 x 410 cm L / 2 L / 2 501 – 550 x 410 cm L / 2 L / 2 551 – 600 x 410 cm 510 – 550 x 435 cm 551 – 600 x 435 cm www.paramondo.de...
-
Page 23: Gewährleistung Bei Montage / Montage Der Markise
Ggf. zusätzlich vorhandene Bohrungen in den Konsolen werden zum Verschrauben der Konsolen miteinander benötigt und dürfen nicht als Befestigungspunkte an Wand oder Decke verwendet werden, da sich dadurch die Achsabstände der Anker verändert, was zu einer unzureichenden Festigkeit des Montageuntergrundes führen kann. www.paramondo.de... -
Page 24: Wandmontage
Bohrmehl lässt auf Kalksandstein schließen, während graues Mehl auf Beton hindeutet. Ziehen Sie die Schrauben (Muttern) zunächst gleichmäßig „handfest“ an und richten Sie dann die Konsolen aus. Achten Sie auf das vom Schrauben- bzw. Dübelhersteller angegebene Anzugsdrehmoment . www.paramondo.de... - Page 25 Wandmontage Die Konsolen müssen exakt ausgerichtet werden, da ansonsten das folgende Einhängen des Markisen-Tragrohres nicht möglich ist. www.paramondo.de...
- Page 26 Ziehen Sie die Schrauben (Muttern) zunächst gleichmäßig „handfest“ an und richten Sie dann die Konsolen aus. Achten Sie auf das vom Schrauben- bzw. Dübelhersteller angegebene Anzugsdrehmoment . Die Konsolen müssen exakt ausgerichtet werden, da ansonsten das folgende Einhängen des Markisen-Tragrohres nicht möglich ist. www.paramondo.de...
- Page 27 - die Stege wegbrechen können. Das Bohrmehl gibt Ihnen Hinweise auf die Struktur des Mauerwerks. Ist es rot, handelt es sich meistens um eine Ziegelwand; weißes Bohrmehl lässt auf Kalksandstein schlie- ßen, während graues Mehl auf Beton hindeutet. www.paramondo.de...
- Page 28 Wandmontage Ziehen Sie die Schrauben (Muttern) zunächst gleichmäßig „handfest“ an und richten Sie dann die Konsolen aus. Achten Sie auf das vom Schrauben- bzw. Dübelhersteller angegebene Anzugsdrehmoment . www.paramondo.de...
-
Page 29: Optional: Deckenmontage
- die Stege wegbrechen können. Das Bohrmehl gibt Ihnen Hinweise auf die Struktur des Mau- erwerks. Ist es rot, handelt es sich meistens um eine Ziegel- wand; weißes Bohrmehl lässt auf Kalksandstein schließen, während graues Mehl auf Beton hindeutet. www.paramondo.de... - Page 30 Ziehen Sie die Schrauben (Muttern) zunächst gleichmäßig „handfest“ an und richten Sie dann die Konsolen aus. Achten Sie auf das vom Schrauben- bzw. Dübelherstel- ler angegebene Anzugsdrehmoment . Die Konsolen müssen exakt ausgerichtet werden, da ansonsten das folgende Einhängen des Markisen-Tra- grohres nicht möglich ist. www.paramondo.de...
- Page 31 Ziegelsteinen - die Stege wegbrechen können. Das Bohrmehl gibt Ihnen Hinweise auf die Struktur des Mauerwerks. Ist es rot, handelt es sich meistens um eine Ziegelwand; weißes Bohrmehl lässt auf Kalks- andstein schließen, während graues Mehl auf Beton hindeutet. www.paramondo.de...
- Page 32 Optional: Deckenmontage Ziehen Sie die Schrauben (Muttern) zunächst gleichmäßig „handfest“ an und richten Sie dann die Konsolen aus. Achten Sie auf das vom Schrauben- bzw. Dübelhersteller angegebene Anzugsdrehmoment . www.paramondo.de...
- Page 33 Optional: Deckenmontage * optional Die Konsolen müssen exakt ausgerichtet werden, da ansonsten das folgende Einhängen des Markisen-Tragrohres nicht möglich ist. www.paramondo.de...
- Page 34 Optional: Deckenmontage * optional * optional www.paramondo.de...
- Page 35 Optional: Deckenmontage www.paramondo.de...
-
Page 36: Montage Der Markise
Prüfen Sie vor dem Einhängen der Markise nochmals alle Schraubverbindungen, speziell den festen Sitz aller Konsolen! Achten Sie auf einen festen Stand der Aufstiegshilfen und darauf, dass sich keine Personen unterhalb der Markise befinden. Markise in die Konsolen einhängen. Mindestens 2 Personen notwendig! www.paramondo.de... - Page 37 Montage der Markise www.paramondo.de...
- Page 38 Montage der Markise Sollten Sie eine Markise mit Motor haben, fahren Sie bitte hier mit der Anleitung des Motors fort. www.paramondo.de...
-
Page 39: Neigungswinkel Einstellen
Neigungswinkel einstellen www.paramondo.de... - Page 40 Neigungswinkel einstellen Wichtig! Bitte nur mit komplett ausgefahrener Markise einstellen. Eine zweite Person muss das Ausfallprofil entlasten (anheben). www.paramondo.de...
- Page 41 Neigungswinkel einstellen www.paramondo.de...
- Page 42 Neigungswinkel einstellen www.paramondo.de...
- Page 43 Neigungswinkel einstellen www.paramondo.de...
-
Page 44: Gelenkarme Ausrichten
Gelenkarme ausrichten Wichtig! Bitte nur mit komplett ausgefahrener Markise einstellen. Eine zweite Person muss das Ausfallprofil entlasten (anheben). www.paramondo.de... - Page 45 Gelenkarme ausrichten www.paramondo.de...
-
Page 46: Bedienung Des Volant-Rollos
Gelenkarme ausrichten / Bedienung des Volant-Rollos Bedienung des Volant-Rollos Das Volant-Rollo kann mit der im Lieferumfang enthaltenen Handkurbel ein- und ausgefahren werden. Die Abbildung zeigt das Volant-Rollo mit Standardvolant. www.paramondo.de... -
Page 47: Bedienung Nothandkurbel
Nach einer Bedienung mit der Nothandkurbel muss die Markise mit der Kurbel in eine Stellung zwischen den Endpunk- ten AUF und ZU (Markise ca. habl geöffnet) gebracht werden, bevor die Markise wieder mit der Steuerung (Schalter, Steuergerät, Funksender) bedient werden darf! www.paramondo.de... -
Page 48: Leistungserklärung
Schoenberger Germany Enterprises GmbH & Co. KG Zechstr. 1-7 82069 Hohenschäftlarn Tel.: +49 (0) 8178 932 932 info@schoenberger-group.com www.schoenberger-group.com Marke: paramondo Modell: Aedis 2000 Produkttyp: Vollkassettenmarkise nach Maß Eindeutiger Kenncode des Produkttyps:: 1000011415 Baujahr ab: 07/2021 Verwendungszweck: Anwendung im Außenbereich von Gebäuden und... -
Page 49: Konformitätserklärung
Schoenberger Germany Enterprises GmbH & Co. KG Zechstr. 1-7 82069 Hohenschäftlarn Tel.: +49 (0) 8178 932 932 info@schoenberger-group.com www.schoenberger-group.com Marke: paramondo Modellbezeichnung: Aedis 2000 Produkttyp: Vollkassettenmarkise nach Maß mit Motorantrieb Produkt Identifikations Code: 1000011415 07/2021 Baujahr ab: Verwendungszweck: Anwendung im Außenbereich von Gebäuden... -
Page 50: Safety Instructions
We recommend a maximum lifting weight of 15kg for females and 25kg for males. From a width of 500 cm we recommend 4 persons for the assembly of the awning. These values are based on the Load Handling Regulation. www.paramondo.de... - Page 51 Apply a maximum force of 20 Nm (= 2 kgm) spectorate approval or a European Technical when tightening all screws used for alumini- Approval (ETA). um components. www.paramondo.de...
- Page 52 (supporting tube, fabric roller, are secured accordingly and that warning joints, brackets) and ensure that the articula- devices are installed, if applicable (warning ted brackets cannot move uncontrolledly. lights, acoustic signals, warning signs). The articulated brackets are under great spring tension! www.paramondo.de...
- Page 53 Failure to comply and incorrect light. use can lead to damage to the awning and accidents. Information for the fitting and com- missioning of electrically operated Once the fitting company has obtained awnings. knowledge of the location and fitted the www.paramondo.de...
- Page 54 3 mm (e.g. circuit A 230 V / 50 Hz power connection with an breakers, fuses or FI switches). on-site activation device (fuse) must be constantly available at the place of installati- on for electrical connection. www.paramondo.de...
- Page 55 (improper fitting, http://www.ear-system.de/ ear-direc- incorrect operation, etc.). tory/collection-and take-back centres.jsf www.paramondo.de...
-
Page 56: Disposal Considerations
This applies in particular to information and telecommunications technology devices such as computers and smartphones. In your own interest, please note that each end user is responsible for deleting the data on the old devices to be disposed of! www.paramondo.de... -
Page 57: Consumer Information
But even with today‘s state of technology and environmental requirements, there is a limit to their perfection. They may contain certain marks in the cloth that sometimes get complained about that are impossible to prevent despite sophistica- ted production and processing technology. www.paramondo.de... - Page 58 For further information on the characte- ristics of awning fabrics and the most im- portant application cases of the state of technology, refer to the guidelines for the assessment of packaged awning materials. www.paramondo.de...
-
Page 59: Wind Resistance Classes
Beaufort. Wind resistance class Wind force according to < 4 Beaufort Wind speed (Vmax. (km/h)) < 28 Wind speed (Vmax. (m/s)) < 7,8 10,6 13,6 Dynamic pressure created < 40 by wind (q(N/m2) Source: DIN EN 13561 awnings www.paramondo.de... -
Page 60: Srew Anchor Pull-Out Forces
The fitter is responsible for checking the fitting base prior to fitting the awning. The screw anchor pull-out forces are calculated on the basis of Wind Resistance Class 1 in accordance with the EN 13561 and EN 1932 standards. www.paramondo.de... -
Page 61: Product Description / Components
Fabric roller Bracket holders Articulated brackets Front profile Shaft consoles (fabric shaft holder) Gears (for manually operated systems) Motor (for motorised systems) Crank grommet (for manually operated systems or systems with a motor with a manual emergency crank) Crank Valance www.paramondo.de... -
Page 62: Package Content
Ensure that you keep a minimum distance of 50 cm between the open / extended awning and fixed obstacles. • The awning must be fitted at a minimum height of 250 cm. If this is impossible, it is recommended to install an acoustic or optical warning device for awnings with an automatic controller. www.paramondo.de... -
Page 63: Recommended Tools
Recommended Tools www.paramondo.de... -
Page 64: Correct Positioning Of The Support
230 – 250 x 160 cm 251 – 350 x 160 cm 351 – 400 x 160 cm 401 – 450 x 160 cm L / 2 L / 2 451 – 600 x 160 cm L / 2 L / 2 www.paramondo.de... - Page 65 301 – 350 x 210 cm 351 – 400 x 210 cm 401 – 450 x 210 cm L / 2 L / 2 451 – 600 x 210 cm L / 2 L / 2 330 – 400 x 260 cm www.paramondo.de...
- Page 66 L / 2 451 – 500 x 310 cm L / 2 L / 2 501 – 550 x 310 cm L / 2 L / 2 551 – 600 x 310 cm L / 2 L / 2 www.paramondo.de...
- Page 67 Correct positioning of the brackets 440 – 450 x 360 cm L / 2 L / 2 451 – 550 x 360 cm L / 2 L / 2 551 – 600 x 360 cm L / 2 L / 2 www.paramondo.de...
- Page 68 490 – 500 x 410 cm L / 2 L / 2 501 – 550 x 410 cm L / 2 L / 2 551 – 600 x 410 cm 510 – 550 x 435 cm 551 – 600 x 435 cm www.paramondo.de...
-
Page 69: Warranty In Case Of Installation / Assembly Of The Awning
Any additional holes in the consoles are required to screw the consoles together and must not be used as fastening points on the wall or ceiling, as this changes the center distance of the anchors, which can lead to insufficient strength of the mounting surface. www.paramondo.de... -
Page 70: Wall Assembly
Initially tighten the screws (nuts) evenly by hand, then align the console. Ensure that you use the tightening torque specified by the screw or screw anchor manufacturer. www.paramondo.de... - Page 71 Wall assembly Align the console accurately, otherwise it is impossible to mount the supporting tube of the awning. www.paramondo.de...
- Page 72 Initially tighten the screws (nuts) evenly by hand, then align the console. Ensure that you use the tightening torque specified by the screw or screw anchor manufacturer. Align the console accurately, otherwise it is impossible to mount the supporting tube of the awning. www.paramondo.de...
- Page 73 The drill dust gives you an indication of the structure of the brickwork. If it is red, you are most likely drilling into a brick wall, white drill dust indicates lime sandstone and grey drill dust hints at concrete. www.paramondo.de...
- Page 74 Wall assembly Initially tighten the screws (nuts) evenly by hand, then align the console. Ensure that you use the tightening torque specified by the screw or screw anchor manufacturer. www.paramondo.de...
-
Page 75: Optional: Ceiling Assembly
The drill dust gives you an indication of the structure of the brickwork. If it is red, you are most likely drilling into a brick wall, white drill dust indicates lime sandstone and grey drill dust hints at concrete. www.paramondo.de... - Page 76 Initially tighten the screws (nuts) evenly by hand, then align the console. Ensure that you use the tightening torque specified by the screw or screw anchor manufacturer. Align the console accurately, otherwise it is impossible to mount the supporting tube of the awning. www.paramondo.de...
- Page 77 The drill dust gives you an indication of the structure of the brickwork. If it is red, you are most likely drilling into a brick wall, white drill dust indicates lime sandstone and grey drill dust hints at concrete. www.paramondo.de...
- Page 78 Optional: ceiling assembly Initially tighten the screws (nuts) evenly by hand, then align the console. Ensure that you use the tightening torque specified by the screw or screw anchor manufacturer. www.paramondo.de...
- Page 79 Optional: ceiling assembly * optional Align the console accurately, otherwise it is impossible to mount the supporting tube of the awning. www.paramondo.de...
- Page 80 Optional: ceiling assembly * optional * optional www.paramondo.de...
- Page 81 Optional: ceiling assembly www.paramondo.de...
- Page 82 Prior to mounting the awning, check all of the screw connections again, especially that all of the consoles are fixed securely! Ensure that the climbing aid is placed securely and that no persons are standing beneath the awning. Mount the awning in the console. This takes at least 2 persons“ www.paramondo.de...
- Page 83 Assembly of the awning www.paramondo.de...
- Page 84 Assembly of the awning If you have a motorised awning, please continue here with the motor instructions. www.paramondo.de...
-
Page 85: Adjusting The Inclination Angle
Adjusting the inclination angle www.paramondo.de... - Page 86 Adjusting the inclination angle Important! Please only adjust the tilt angle with a fully extended awning. A second person must take the load of (lift) the front profile. www.paramondo.de...
- Page 87 Adjusting the inclination angle www.paramondo.de...
- Page 88 Adjusting the inclination angle www.paramondo.de...
- Page 89 Adjusting the inclination angle www.paramondo.de...
-
Page 90: Aligning The Articulated Arms
Aligning the articulated arms Important! Please only adjust the tilt angle with a fully extended awning. A second person must take the load of (lift) the front profile. www.paramondo.de... - Page 91 Aligning the articulated arms www.paramondo.de...
- Page 92 Aligning the articulated arms www.paramondo.de...
-
Page 93: Usage Of The Roller Valance
Usage of the roller valance The roller-valance can be rolled in and out using the hand crank included in the delivery content. The figure shows the roller valance with standard valance. www.paramondo.de... -
Page 94: Operating The Manual Emergency Crank
After operating the awning with the manual emergency crank, it must be cranked into a position between the end- points OPEN and CLOSE (awning is approximately half open) before it may be operated again using the controller (switch, controller, remote control)! www.paramondo.de... -
Page 95: Declaration Of Performance
Zechstr. 1-7 82069 Hohenschäftlarn Tel.: +49 (0) 8178 932 932 info@schoenberger-group.com www.schoenberger-group.com Brand: paramondo Model: Aedis 2000 Product type: Cassette awning Unique product type identification code:: 1000011415 Year of manufacture from: 07/2021 Intended use: Application in the exterior of buildings... -
Page 96: Declaration Of Conformity
Zechstr. 1-7 82069 Hohenschäftlarn Tel.: +49 (0) 8178 932 932 info@schoenberger-group.com www.schoenberger-group.com Brand: paramondo Model: Aedis 2000 Product type: Cassette awning with motor drive Product type identification code: 1000011415 07/2021 Year of manufacture from: Intended use: Application in the exterior of buildings... - Page 97 Notizen / Notes www.paramondo.de...
- Page 98 Membership number: Switzerland for electrical devices: Stiftung SENS Membership number: VP11544 paramondo ist eine eingetragene Marke der / is a registered trademark of Schoenberger Germany Enterprises GmbH & Co. KG Zechstraße 1-7, 82069 Hohenschäftlarn Tel.: 08178 / 932 932 Fax: 08178 / 932 970 20 info@paramondo.de...
Need help?
Do you have a question about the Aedis 2000 and is the answer not in the manual?
Questions and answers