Table of Contents
Advertisement
Available languages
Available languages
Advertisement
Chapters
Table of Contents

Related Manuals for Shop-Vac SL Series


Summary of Contents for Shop-Vac SL Series
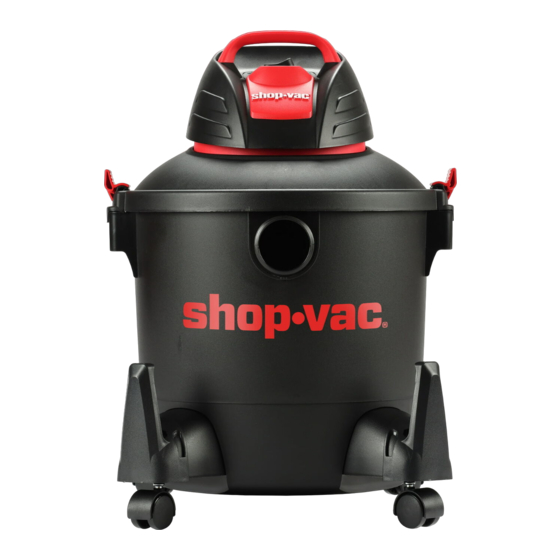
- Page 1 SERIES SL English HOUSEHOLD USE USER MANUAL • WET/DRY VAC U.S. GALLONS LITERS FOR YOUR SAFETY, READ ALL INSTRUCTIONS CAREFULLY BEFORE USE. SAVE THIS MANUAL FOR FUTURE REFERENCE. *Tank capacity refers to actual tank volume, and does not reflect capacity available during operation. 87560-09-D...
-
Page 2: Table Of Contents
TO BEGIN: PAGE TABLE OF CONTENTS: Catalog / Model Number Carton Contents Tools Required Safety Warnings and Instructions Assembly General Set Up Filter Installation and Cleaning 8-13 Dry Pick Up Operation 8-12 Wet Pick Up Operation 12-13 Blower Feature Emptying Liquid Waste Automatic Suction Shut Off 14-15 Lubrication... -
Page 3: Carton Contents
CARTON CONTENTS WARNING: REVIEW IMPORTANT SAFETY INSTRUCTIONS BEFORE USE. Check to make sure you have the following: Vacuum Caster Assembly (2) Rear Caster Dolly Hose Holder (2) Screws (4) Cartridge Filter Filter Retainer Filter Bag Foam Sleeve Hose Utility Nozzle Crevice Tool Floor Nozzle Extension Wands (3) - Page 4 ALWAYS WEAR EYE PROTECTION water, contact Shop-Vac for TO PREVENT ROCKS OR DEBRIS assistance. FROM BEING BLOWN OR 6. Do Not: pull or carry by cord,...
- Page 5 cartridge filter and collection not run appliance over cord. filter bag in place. These are Keep cord away from heated very fine particles that may surfaces. pass through the foam and Do not unplug by pulling on affect the performance of the cord.
- Page 6 WARNING! POLARIZATION INSTRUCTIONS To reduce the risk of electric shock, this appliance has a polarized plug (one blade is wider than the other). This plug will fit in a polarized outlet only one way. If the plug does not DO NOT LEAVE VACUUM fit fully in the outlet, reverse the UNATTENDED WHEN IT IS plug.
- Page 7 NOTE: STATIC SHOCKS ARE COMMON IN DRY AREAS OR WHEN THE RELATIVE HUMIDITY OF THE AIR IS LOW. THIS IS ONLY TEMPORARY AND DOES NOT AFFECT THE USE OF THE APPLIANCE. TO REDUCE THE FREQUENCY OF STATIC SHOCKS IN YOUR HOME, THE BEST REMEDY IS TO ADD MOISTURE TO THE AIR WITH A CONSOLE OR INSTALLED HUMIDIFIER.
-
Page 8: Assembly
ASSEMBLY CASTER/ 4. With tank inlet facing you, take the caster assembly marked DOLLY SYSTEM with the letter A (FIGURE 3) and place in the slot on left ASSEMBLY side of the tank, also marked with the letter A. Secure with screw provided. -
Page 9: General Set Up
13. Plug the cord into the wall outlet. Your cleaner is ready for use. I = ON, O = OFF. NOTE: Many more useful tools are available at your local dealer, or Shop-Vac® website. Questions? Visit www.shopvac.com FIGURE 8 24 hours a day. - Page 10 must be used with the without a filter will cause dust cartridge filter. to discharge from blower port and cause damage to motor. NOTE: If cartridge filter has been used for wet pick up, it INSTALLING AND must be cleaned and dried CLEANING THE before using it for dry pick up.
- Page 11 FIGURE 12 FIGURE 15 18. To remove the filter for 21. Or rinse (from inside of the cleaning, again hold the tank filter) with water. (FIGURE 16). cover and turn the filter retainer Dry completely (approximately counter-clockwise to loosen 24 hours) and remove.
- Page 12 INSTALLING THE DISPOSABLE FILTER BAG FIGURE 17 WARNING! 26. Remove the inlet deflector from the deflector guide. NOTE: Hose must be removed before the inlet deflector can be taken out. (FIGURE 18) ALWAYS DISCONNECT THE PLUG FROM THE WALL OUTLET BEFORE REMOVING THE TANK COVER.
-
Page 13: Wet Pick Up Operation
33. For vacuuming large quantities any type of cleaning. of liquid use a foam sleeve (Not standard with all models). A foam sleeve may be purchased at your local Shop-Vac® distributor, on the Shop-Vac® website, or by contacting Shop-Vac customer 12 Eng. - Page 14 service. To use the foam FOAM SLEEVE sleeve; follow the installation INSTALLATION instructions in this section. 34. Misting in the exhaust air or AND CLEANING dripping of liquid around the tank cover may occur if the filter becomes saturated during wet pick up.
-
Page 15: Blower Feature
BLOWER FEATURE BLOWN OR RICOCHETING INTO THE EYES OR FACE WHICH CAN RESULT IN SERIOUS INJURY. EMPTYING LIQUID WASTE FROM THE 42. This vacuum can be used as TANK a powerful blower. To use your unit as a blower, unscrew blower port cover located on 43. -
Page 16: Lubrication
shuts off suction will result in extensive damage to the motor. To continue use, empty the liquid waste from the tank as outlined in the previous section. NOTE: IF ACCIDENTALLY TIPPED OVER, THE VACUUM COULD LOSE SUCTION. IF FIGURE 24 THIS OCCURS, TURN THE UNIT OFF AND PLACE VAC 47. -
Page 17: Troubleshooting
Misting in the exhaust air. THIS PRODUCT HAS A LIMITED LIFETIME WARRANTY. FOR WARRANTY POLICY AND VACUUM REGISTRATION DETAILS GO TO: www.shopvac.com SHOP-VAC U.S. Patents issued and pending. 2323 Reach Road ©2022 Shop-Vac USA, LLC. Williamsport, PA 17701 All rights reserved. 16 Eng. - Page 18 SÉRIE SL Français USAGE DOMESTIQUE MANUEL DE L’UTILISATEUR • ASPIRATEUR DE DÉCHETS SECS/HUMIDES U.S. GALLONS LITRES* LITERS POUR VOTRE SÉCURITÉ, VEUILLEZ LIRE TOUTES LES INSTRUCTIONS ATTENTIVEMENT AVANT L'UTILISATION. CONSERVEZ CE MANUEL POUR RÉFÉRENCE ULTÉRIEURE. * La capacité de la cuve fait référence à son volume réel et non à la capacité disponible durant le fonctionnement. 87560-09-D...
- Page 19 POUR COMMENCER : PAGE TABLE DES MATIÈRES : Catalogue / Numéro de modèle Contenu du carton Outils nécessaires Avertissements de sécurité et instructions Assemblage Configuration générale Installation et nettoyage du filtre 8-13 Ramassage de débris secs 8-12 Ramassage de débris humides 12-13 Caractéristique de la souffleuse Vidange des déchets liquides...
-
Page 20: Contenu Du Carton
CONTENU DU CARTON ATTENTION : VEUILLEZ LIRE LES CONSIGNES DE SÉCURITÉ IMPORTANTES AVANT L'UTILISATION. Vérifier d'avoir ce qui suit : Aspirateur Assemblage des roulettes (2) Chariot à roulettes arrière Porte-tuyau (2) Vis (4) Cartouche filtrante Porte-filtre Sac-filtre Manchon de mousse Tuyau Tête d’... - Page 21 à l’extérieur ou s’il est tombé dans l’eau, communiquez avec la société Shop-Vac PORTEZ TOUJOURS DES LUNETTES pour obtenir de l’assistance. POUR ÉVITER QUE DES PIERRES OU DES Ne tirez et ne portez pas l'aspirateur DÉBRIS NE SOIENT SOUFFLÉS OU NE...
- Page 22 cordon. Gardez le cordon à l’écart des 19. Lorsque vous avez terminé vos travaux surfaces chauffées. de nettoyage, ne laissez pas le cordon Ne débranchez pas l’appareil en tirant trainer sur le plancher. Cela peut sur le cordon. Pour le débrancher, constituer un risque de trébuchement.
- Page 23 INSTRUCTIONS POUR AVERTISSEMENT! LA POLARISATION Pour réduire le risque de choc électrique, cet appareil est équipé d'une fiche polarisée (une lame est plus large que l'autre). Cette fiche ne peut être insérée dans une prise polarisée que dans un seul sens. Si la fiche NE LAISSEZ PAS L'ASPIRATEUR SANS ne s'insère pas complètement dans la prise, SURVEILLANCE LORSQU'IL EST BRANCHÉ...
- Page 24 REMARQUE : LES DÉCHARGES STATIQUES SONT FRÉQUENTES DANS LES RÉGIONS SÈCHES OU LORSQUE L'HUMIDITÉ RELATIVE DE L'AIR EST FAIBLE. CECI N'EST QUE TEMPORAIRE ET N'A AUCUNE INCIDENCE SUR L'UTILISATION DE L'APPAREIL. POUR RÉDUIRE LA FRÉQUENCE DES DÉCHARGES STATIQUES DANS VOTRE DEMEURE, LE MEILLEUR REMÈDE CONSISTE À...
-
Page 25: Assemblage
ASSEMBLAGE SYSTÈME L'admission de la cuve étant tournée vers vous, prenez l'ensemble de D’ A SSEMBLAGE DU roulettes marqué de la lettre A CHARIOT ET DES (ILLUSTRATION 3) et placez-le dans la fente du côté gauche de la cuve, ROULETTES aussi marqué... -
Page 26: Configuration Générale
Votre aspirateur est prêt à l'emploi. I = EN MARCH, O = À L’ARRÊT. REMARQUE : De nombreux autres outils utiles sont offerts chez votre revendeur local ou sur le site Web Shop-Vac Des questions? Consultez le site www.shopvac.com en tout temps. ILLUSTRATION 8 CONFIGURATION INSTALLATION ET GÉNÉRALE... - Page 27 un sac-filtre à haut rendement (non l'aspirateur sans filtre causera une standard sur tous les modèles) doit décharge de poussière depuis le être utilisé avec la cartouche filtrante. port du souffleur et pourrait endommager le moteur. REMARQUE : Si une cartouche INSTALLATION ET filtrante a été...
- Page 28 ILLUSTRATION 12 ILLUSTRATION 15 Pour retirer le filtre afin de le nettoyer, Ou rincez-la (à partir de tenez de nouveau le couvercle de la l'intérieur du filtre) avec de l'eau. cuve et tournez le dispositif de retenue (ILLUSTRATION 16). Laissez sécher du filtre dans le sens antihoraire complètement (environ 24 heures).
- Page 29 INSTALLATION D'UN SAC-FILTRE JETABLE : ILLUSTRATION 17 AVERTISSEMENT! Retirez le déflecteur d'admission du guide du déflecteur. REMARQUE : Le tuyau doit être retiré avant de pouvoir retirer le défecteur d'admission. (ILLUSTRATION 18) DÉBRANCHEZ TOUJOURS LA FICHE DE LA PRISE MURALE AVANT DE RETIRER LE COUVERCLE DE LA CUVE.
-
Page 30: Ramassage De Débris Secs
Web de d'admission doit être en place, peu Shop-Vac ou en communiquant avec importe le type de nettoyage. service à la clientèle de Shop-Vac. Pour utiliser le manchon de mousse, veuillez suivre les directives d'installation comprises dans cette rubrique. 12 Fr. - Page 31 INSTALLATION ET De la brumisation dans l'air d'échappement ou le déversement NETTOYAGE DU de liquide autour du couvercle de la cuve pourrait se produire si le filtre MANCHON devient saturé durant le ramassage de débris humides. Si cela se produit, retirez le filtre et laissez-le sécher, ou remplacez-le avec un autre filtre pour ramassage de débris sec.
-
Page 32: Vidange Des Déchets Liquides
NE SOIENT SOUFFLÉS OU NE CARACTÉRISTIQUE RICOCHÈTENT DANS LES YEUX OU DU SOUFFLEUR LE VISAGE ET AINSI ENTRAÎNER DE GRAVES BLESSURES. VIDANGE DES DÉCHETS LIQUIDES DE LA CUVE Cet aspirateur peut être utilisé comme une puissante souffleuse. Pour utiliser Votre aspirateur pour ramassage de l'appareil comme souffleuse, dévissez débris secs/humides peut être vidé... -
Page 33: Lubrification
moteur. Pour continuer à utiliser l'aspirateur, videz les liquides de la cuve comme décrit à la rubrique précédente. REMARQUE : SI L'ASPIRATEUR EST RENVERSÉ PAR ACCIDENT, IL POURRAIT PERDRE DE L'ASPIRATION. SI CELA SE PRODUIT, METTEZ L'ASPIRATEUR HORS TENSION ET REMETTEZ- ILLUSTRATION 24 LE EN POSITION VERTICALE. -
Page 34: Dépannage
LIMITÉE À VIE. POUR LA POLITIQUE DE GARANTIE ET LES DÉTAILS DE L'ENREGISTREMENT DE L'ASPIRATEUR, RENDEZ-VOUS SUR LE SITE : www.shopvac.com SHOP-VAC Brevets américains délivrés et en instance. 2323 Reach Road ©2022 Shop-Vac USA, LLC. Williamsport, PA 17701 Tous droits réservés. 16 Fr. - Page 35 SERIE SL Español USO DOMÉSTICO MANUAL DEL USUARIO • ASPIRADORA PARA LÍQUIDOS/SÓLIDOS EE.UU GALONES* U.S. GALLONS LITROS* LITERS PARA SU SEGURIDAD, LEA TODAS LAS INSTRUCCIONES DETENIDAMENTE ANTES DE USAR LA ASPIRADORA. GUARDE ESTE MANUAL PARA CONSULTAR EN EL FUTURO. *La capacidad del depósito se refiere al volumen real del depósito, y no refleja la capacidad disponible durante el funcionamiento de la aspiradora. 87560-09-D...
- Page 36 PARA COMENZAR: PÁGINA ÍNDICE: Número de Modelo / Catálogo Contenido de la caja Herramientas necesarias Instrucciones y Advertencias de Seguridad Ensamblado Instalación General Instalación y Limpieza de los Filtros 8-13 Operación de Aspiración en Seco 8-12 Operación de Aspiración de Líquidos 12-13 Función de Soplador Cómo Vaciar los Residuos Líquidos...
-
Page 37: Contenido De La Caja
CONTENIDO DE LA CAJA ADVERTENCIA: REVISE LAS INSTRUCCIONES IMPORTANTES DE SEGURIDAD ANTES DE USAR LA ASPIRADORA. Verifique que tiene lo siguiente: Aspiradora Conjunto de ruedas (2) Plataforma rodante trasera Sujetador de la manguera (2) Tornillos (4) Filtro de cartucho Retenedor del filtro Bolsa del filtro Funda de espuma Manguera... - Page 38 Si el aparato no funciona como debería, se cayó, sufrió daños, se dejó a la intemperie o cayó al agua, comuníquese con Shop-Vac para recibir asistencia. No se debe: tirar del cable o sostener el aparato con el cable, usar el cable como USE SIEMPRE GAFAS DE PROTECCIÓN...
- Page 39 nuevamente al aire. Se pueden No desenchufe tirando del cable. Para comprar bolsas recolectoras del filtro desenchufar, agarre del enchufe; no del adicionales. cable.No toque el enchufe o el aparato 19. No deje el cable en el suelo después de con las manos húmedas.
- Page 40 ¡ADVERTENCIA! INSTRUCCIONES DE POLARIZACIÓN Para reducir el riesgo de descarga eléctrica, este aparato tiene un enchufe polarizado (un aspa es más ancha que la otra). Este enchufe encajará en un tomacorrientes polarizado solo de una manera. Si el NO DEJE LA ASPIRADORA enchufe con encaja completamente en el DESATENDIDA CUANDO tomacorrientes, invierta el enchufe.
- Page 41 NOTA: LAS DESCARGAS DE ESTÁTICA SON COMUNES EN ZONAS SECAS O CUANDO LA HUMEDAD RELATIVA DEL AIRE ES BAJA. ESTO ES TEMPORARIO SOLAMENTE Y NO AFECTA EL USO DEL APARATO. PARA REDUCIR LA FRECUENCIA DE DESCARGAS DE ESTÁTICA EN SU HOGAR, LA MEJOR SOLUCIÓN ES AGREGAR HUMEDAD AL AIRE INSTALANDO UNA CONSOLA O HUMIDIFICADOR.
- Page 42 ENSAMBLAJE ENSAMBLAJE DEL Con la entrada al depósito mirando hacia usted, tome el conjunto de SISTEMA DE RUEDAS/ ruedas marcados con la letra A (FIGURA 3) y colóquelo en la ranura PLATAFORMA a la izquierda del depósito, también marcada con la letra A. Sujete con el tornillo proporcionado.
-
Page 43: Instalación General
La aspiradora está lista para ser usada. I = ON (Encendida), O = OFF (Apagada). NOTA: Se pueden adquirir muchas más herramientas útiles en su distribuidor local, o en el sitio web de Shop-Vac®. ¿Preguntas? Visite www.shopvac.com Las 24 horas del día. FIGURA 8 INSTALACIÓN INSTALACIÓN DEL... - Page 44 INSTALACIÓN Y NOTA: Si el filtro de cartucho se utilizó para aspirar LIMPIEZA DEL FILTRO líquidos, se deberá limpiar y DE CARTUCHO dejar secar antes de utilizarse para aspirar en seco. Con la cubierta del depósito dada vuelta, deslice el filtro de cartucho hacia abajo sobre la cesta de la tapa, jalando hasta que el filtro quede sellado contra la cubierta.
- Page 45 FIGURA 12 FIGURA 15 O enjuague con agua (desde el interior Para quitar el filtro para limpiarlo, del filtro). (FIGURA 16). Deje que se sostenga nuevamente la cubierta del seque por completo (aproximadamente depósito y gire el retenedor del filtro en 24 horas) sentido contrario a las agujas del reloj para aflojarlo y quitarlo.
- Page 46 INSTALACIÓN DE LA BOLSA DE FILTRO DESCARTABLE FIGURA 17 ¡ADVERTENCIA! Retire el deflector de entrada de la guía del deflector. NOTA: Debe retirarse la manguera antes de poder extraer el deflector de entrada. (FIGURA 18) SIEMPRE DESCONECTE EL ENCHUFE DEL TOMACORRIENTE DE LA PARED ANTES DE QUITAR LA CUBIERTA DEL DEPÓSITO.
- Page 47 (solo viene con algunos modelos). todos los tipos de limpieza. Las fundas de espuma pueden adquirirse en su distribuidor local Shop-Vac®, en el sitio web de Shop-Vac®, o poniéndose en contacto 12 Sp.
- Page 48 INSTALACIÓN Y de Shop-Vac®. Para usar la funda de LIMPIEZA DE LA espuma, siga las instrucciones de instalación en esta sección. FUNDA DE ESPUMA Si el filtro se satura durante la aspiración de líquidos puede aparecer rocío en el aire de salida o goteo...
-
Page 49: Función De Soplador
FUNCIÓN DE O REBOTEN EN LOS OJOS O EN EL ROSTRO LO CUAL PODRÍA SOPLADOR PROVOCAR LESIONES GRAVES. LOS RESIDUOS LÍQUIDOS DEL 10. Esta aspiradora puede usarse como DEPÓSITO un potente soplador. Para utilizar su unidad como un soplador, desatornille la cubierta del puerto del soplador que Los residuos líquidos de su aspiradora se encuentra en la parte posterior de... -
Page 50: Lubricación
de que el flotador se eleva y apaga la succión, ocasionará daños graves al motor. Para continuar usando la aspiradora, vacíe el contenido de residuos líquidos del depósito como se describe en la sección anterior. NOTA: SI LA ASPIRADORA SE VUELCA ACCIDENTALMENTE, FIGURA 24 PODRÍA PERDER SUCCIÓN. -
Page 51: Solución De Problemas
VIDA. PARA OBTENER DETALLES SOBRE LA PÓLIZA DE GARANTÍA Y EL REGISTRO DE SU ASPIRADORA, VAYA A: www.shopvac.com SHOP-VAC Patentes en EE.UU. emitidas y pendientes. 2323 Reach Road ©2022 Shop-Vac USA, LLC. Williamsport, PA 17701 Todos los derechos reservados. 16 Sp.
Need help?
Do you have a question about the SL Series and is the answer not in the manual?
Questions and answers