Table of Contents

Summary of Contents for LDG M-1000
- Page 1 M-1000 OPERATIONS MANUAL MANUAL REV A LDG M-1000 External Meter for AT-1000ProII LDG Electronics 1445 Parran Road St. Leonard MD 20685-2903 USA Phone: 410-586-2177 Fax: 410-586-8475 ldg@ldgelectronics.com www.ldgelectronics.com PAGE 1...
-
Page 2: Table Of Contents
Table Of Contents Introduction Jumpstart, or “Real hams don’t read manuals!” Specifications Getting to know your M-1000 Front Panel Back Panel Installation Full-Scale Calibration Basic Operation Meter Mode Selection Peak/Average Reading Selection Meter Scale Selection Dual Watch Capability Remote Control of AT-1000ProII... -
Page 3: Introduction
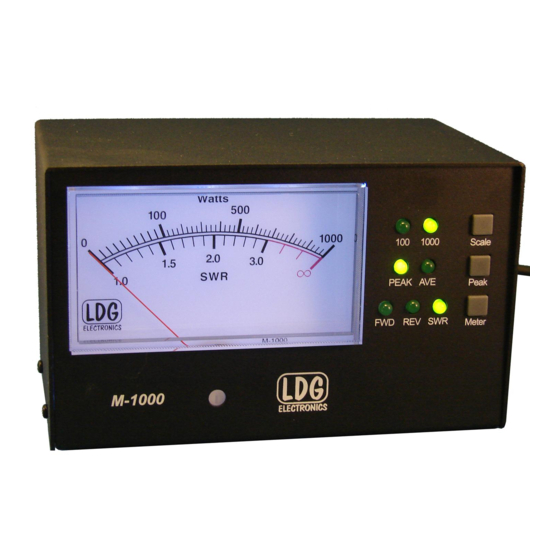
The M-1000 provides accurate and precise metering for forward and reflected power, as well as SWR readings when connected to an AT-1000ProII tuner. Peak and average readings are available, and the M-1000 may be set to display a different parameter from the one displayed on the AT-1000ProII’s built-in LED bargraph meters. -
Page 4: Getting To Know Your M-1000
GETTING TO KNOW YOUR M-1000 Your M-1000 is a quality, precision instrument that will give you many years of outstanding service; take a few minutes to get to know it. Front Panel The front panel of the M-1000 features three pushbuttons, seven indicator LEDs, and a 4.75”... -
Page 5: Back Panel
Back Panel The rear panel of the M-1000 has one jack and a potentiometer. Brightness: Adjust this potentiometer with a Philips (cross-point) screwdriver, to set the brightness of the meter backlight. Tuner jack: Connect the supplied 4-pin mini-DIN cable here, and connect to the AT-1000ProII. -
Page 6: Installation
INSTALLATION The M-1000 is intended for indoor use only; it is not water-resistant. If you use it outdoors, (Field Day, for example) you must protect it from rain. Place the M-1000 in a convenient location near the tuner. Always turn your tuner off before plugging or unplugging anything. -
Page 7: Full-Scale Calibration
Full-Scale Calibration Prior to the first use of the M-1000, it is important to calibrate the full-scale meter deflection of the meter movement also. To do this, first, turn off the AT1000ProII. Now, press and hold the Scale and Meter buttons simultaneously on the M-1000. -
Page 8: Basic Operation
Meter Scale Selection The M-1000 can display zero to 1000 watts on its forward and reflected power scale, or, for better detail of lower power readings, a zero to 100 watt scale can be selected. Press the Scale button to toggle between the 100W and the 1000W scales. -
Page 9: Technical Support
LDG products our website also has complete product specifications and photographs you can use to help make your purchase decision. Don’t forget the links to all of the quality LDG Dealers also ready to help you make that purchase decision. -
Page 10: Product Feedback
Ask your shipper for a tracking number or a delivery verification receipt. This way you know the product arrived safely at LDG. Be sure to give us your email address so our shipper can alert you online when your product is en-route back to you. Please be assured that our staff makes every effort to complete repairs ahead of our published wait time.


Need help?
Do you have a question about the M-1000 and is the answer not in the manual?
Questions and answers