Table of Contents
Advertisement
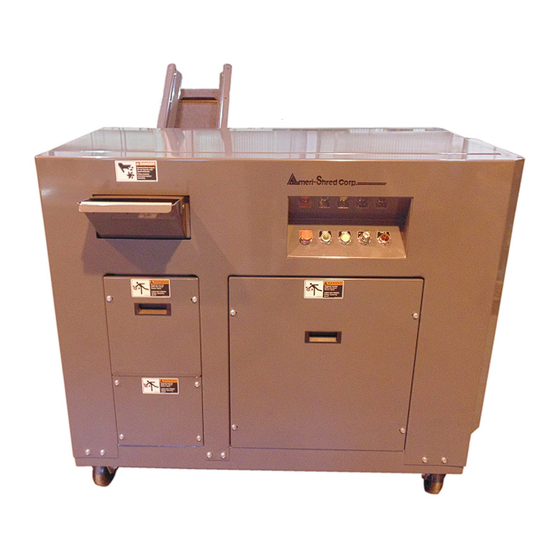
AMS-1000HD
SERIES 2 HARD DRIVE SHREDDERS
OWNER'S MANUAL
NOTICE: The infor mation contained within this manual is corr ect at time of pr inting, but due to the continuing development of
NOTICE: The information contained within this manual is correct at time of printing, but due to the continuing development of
products, changes in specifications are inevitable. Ameri-Shred reserves the right to implement such changes without prior notice.
products, changes in specifications are inevitable. Ameri-Shred reserves the right to implement such changes without prior notice.
AMS-1000 Hard Drive Shredder Manual 2016 v.1
1
Advertisement
Table of Contents

Related Manuals for Ameri-Shred 2 Series


Summary of Contents for Ameri-Shred 2 Series
- Page 1 NOTICE: The information contained within this manual is correct at time of printing, but due to the continuing development of products, changes in specifications are inevitable. Ameri-Shred reserves the right to implement such changes without prior notice. products, changes in specifications are inevitable. Ameri-Shred reserves the right to implement such changes without prior notice.
-
Page 2: Table Of Contents
APPENDIX I - REDUCER MANUAL Thank you for purchasing an Ameri-Shred Shredder. This model is made of the finest materials available and is manufactured in the United States by skilled craftsmen. The shredder has been designed with the operator in mind for both ease of operation and maintenance. -
Page 3: Unloading/Unpacking
UNLOADING/UNPACKING Your new Ameri-Shred shredder has been secured to a pallet for shipping. Please inspect equipment immediately for shipping damage. Using a lift truck with a minimum capacity of 2500 lbs., remove the machine from the carrier and transport to operation site. -
Page 4: Attached Output Conveyor
ATTACHED OUTPUT CONVEYOR With the assistance of an overhead crane, a second person, a fork lift, or any means available, rig a sling (just off center of conveyor so that flanged side is lower.) Lift conveyor assembly into place using the six (6) bolts supplied at rear of machine. -
Page 5: Electrical Installation
ELECTRICAL INSTALLATION All electrical installation and service must be accomplished by a qualified electrician. Follow all national and local electrical codes and ordinances. “WARNING” LOCK POWER IN OFF POSITION All internal wiring has been factory installed and tested prior to shipping. Electrical installation consists of providing adequate machine power only. -
Page 6: Safety Warnings
SAFETY WARNINGS Read and understand instruction manual and be aware of all warning stickers. Make sure that ALL guards and access panels are in place at all times, EXCEPT when the power is locked off for maintenance work or cleaning. ... -
Page 7: Start Up Procedure
START UP PROCEDURE PRESTART UP PROCEDURE Familiarize yourself with all controls and button locations. Ensure that all guards and covers are in place. Ensure the area is clean. Check input area for debris, discarded tools, etc. Shredder Control Panel Left to Right - Emergency Stop - Forward - Reverse - On/Off Key Switch - Power On Indicator Light Figure 2... -
Page 8: Clearing A Jam
CLEARING A JAM Should a jam occur, the machine will turn itself off. Ensure that all personnel are clear of both the input chute and the cutter head. Momentarily depress the yellow REVERSE pushbutton. This will cause the cutters to run backwards for as long as the Reverse pushbutton remains depressed. -
Page 9: Trouble Shooting
TROUBLE SHOOTING “WARNING” LOCK OUT POWER before performing any cleaning, oiling, maintenance, or trouble shooting. PROBLEM POSSIBLE CAUSE REMEDY Defective STOP button. Check continuity (N.C.) If bad, replace. Check each leg of forward side of Machine will not turn off using STOP contactor for continuity. -
Page 10: Maintenanace-Cleaning
MAINTENANCE CLEANING ALWAYS lock off power before cleaning, lubricating, maintaining, removal of any guard, and after shredding operation is complete. Daily Cleaning (After each 8 hours of operation) Remove debris and any magnets that have built up on cutters and combers (compressed air (maximum 40 psi for the AMS-1000HD) or vacuum may be used). -
Page 11: Maintenance-Lubrication
MAINTENANCE LUBRICATION ALWAYS lock off power before cleaning, lubricating, maintaining, removal of any guard, and after shredding operation is complete. Daily lubrication (After 8 hours of operation) Grease wear plates. Grease main bearings (see Lube Schedule below). Remove rear guard. - Page 12 REDUCER LUBRICATION Reducer Breather/ Fill Plug – Consult Appendix I at the end of this manual for oil quantities and oil type. AMS-1000 Hard Drive Shredder Manual 2016 v.1...
-
Page 13: Conveyor Belt Adjustment
CONVEYOR BELT ADJUSTMENT ALIGNMENT AND TENSIONING Read all safety warnings (see page 6) before proceeding. Lock power off. Mark the initial position. Make all adjustments in small increments. By design, the conveyor belt should have 1/16” or less clearance to side frames. This assists in preventing debris from getting under the belt but some side rubbing may be expected. -
Page 14: Cutter Head Adjustment
*Make sure machine is locked out before checking cutter clearance. Ameri-Shred recommends thoroughly cleaning the cutter head and ensuring that cutters move freely on the shafts before checking clearance. Cutter Clearance should be checked if any of the following conditions exist: ... -
Page 15: Shredder Operation
SHREDDER OPERATION OPTIONAL OUTPUT CONVEYOR CONTROL STATION INFEED CHUTE AMS-1000 Hard Drive Shredder Manual 2016 v.1... -
Page 16: Bearing Assembly
BEARING ASSEMBLY - 1-1/2”, 1” AND 3/4” SHRED WIDTH ITEM PART # DESCRIPTION 34664 ADJUSTABLE SIDE WEAR PLATE 34663 FIXED SIDE WEAR PLATE 34647 BEARING LOCK WELDEMENT DRIVE SIDE 34648 IDLE SIDE BEARING BLOCK WELDMENT 34659 TIE BAR 34809 WEARPLATE FILLER PLATE 112410 KEYSTOCK SPUR GEAR 112411... -
Page 17: Drive Package
DRIVE PACKAGE ITEM PART # DESCRIPTION 34813 10 HP REDUCER MOUNT PLATE 112409/112409-200 GEARDRIVE-SEE ELECTRICAL SCHEMATICS 35459 INSIDE PANEL ASSEMBLY 35461 COVER ASSEMBLY 34799 BOTTOM COVER 109057 OIL BATH SIGHT GAGE 112403 SPUR GEAR 112501 SEAL AMS-1000 Hard Drive Shredder Manual 2016 v.1... -
Page 18: Cutter Assembly
CUTTER HEAD ASSEMBLY - 1-1/2” SHRED WIDTH ITEM PART # DESCRIPTION 34713 TOP OUTSIDE COMBER 34714 7 GA. PLATE 34715 5/8” PLATE 34716 3/4” PLATE 34721-HEX OUTSIDE CUTTER SPACER 34723 1-1/2” HARD DRIVE CUTTER 33517 TOP OUTSIDE SPACER 34720 UPPER COMBER 34715 5/8”... - Page 19 CUTTER HEAD ASSEMBLY - 1” SHRED WIDTH ITEM PART # DESCRIPTION 34616 TOP OUTSIDE COMBER 34617 1/2” PLATE 34618 3/8” PLATE 34619 7 GA. PLATE 34623-HEX OUTSIDE CUTTER SPACER 33991 TOP OUTSIDE SPACER 34624 1” HARD DRIVE CUTTER 34620 TOP INSIDE COMBER 34621 1/2”...
- Page 20 CUTTER HEAD ASSEMBLY - 3/4” SHRED WIDTH ITEM PART # DESCRIPTION 34666 BOTTOM COMBER 34667 3/4” HARD DRIVE CUTTER 34668-HEX OUTSIDE CUTTER SPACER 34670-HEX INSIDE CUTTER SPACER 34126 1-1/16” CUTTERHEAD SPACER 34125 27/32” CUTTERHEAD SPACER 34671 UPPER OUTSIDE COMBER WELDMENT 34672 TOP COMBER 3/4”...
-
Page 21: Dual Head Cutter Package
DUAL HEAD CUTTER PACKAGE - 3/4” AND 3/8” SHRED WIDTH ITEM PART # DESCRIPTION 34874 3/8” HARD DRIVE CUTTERS 34667 3/4” HARD DRIVE CUTTER 34876 3/8” OUTSIDE COMBER 34125 27/32” CUTTERHEAD SPACER 34881 INSIDE CUTTER SPACER 34879 TOP COMBER 34880 BOTTOM COMBER 34778 3/8”... - Page 22 SSD—3/8” SHRED WIDTH (11” THROAT) ITEM PART # DESCRIPTION 34874 3/8” HARD DRIVE CUTTER 34881 INSIDE CUTTER SPACER 34879 TOP COMBER 34880 BOTTOM COMBER 34778 TOP OUTSIDE SPACERS 34776 INSIDE SPACERS 35709 TOP OUTSIDE COMBER 35712 OUTSIDE CUTTER SPACER AMS-1000 Hard Drive Shredder Manual 2016 v.1...
- Page 23 DUAL HEAD CUTTER PACKAGE - 1-1/2” & 3/8” SHRED WIDTH ITEM PART # DESCRIPTION 34723 1-1/2” HARD DRIVE CUTTER 34874 3/8” HARD DRIVE CUTTER—DUAL HEAD 34667 HARD DRIVE CUTTER 34876 TOP OUTSIDE COMBER 34125 CUTTERHEAD SPACER 34722-HEX INSIDE CUTTER SPACER 34720 UPPER COMBER 34881...
-
Page 24: Attached Output Conveyor
ATTACHED OUTPUT CONVEYOR (54”) ITEM PART # DESCRIPTION 33559 SIDE FRAME WELDMENT 111858 BELT 33558 CONVEYOR BED 111790 TAIL PULLEY 33542-SS STAINLESS STEEL SIDE GUIDES 10056 TAKE-UP WELDMENT AMS-1000 Hard Drive Shredder Manual 2016 v.1... -
Page 25: Electrical Diagrams
ELECTRICAL DIAGRAM - 10 HP, 460 V 3 PH-60 HZ ITEM PART # DESCRIPTION ITEM PART # DESCRIPTION 112409 GEAR DRIVE 10 HP 460V 110911 LEGEND PLT-SHREDDER STOP TRANS 104624 TRANSFORMER-50V A 460/230/120V 110912 LEGEND PLT-POWER ON 111253 CONTACTOR 104695 CONDUIT-1/2"... - Page 26 ELECTRICAL DIAGRAM - 10 HP, 460 V 3 PH-60 HZ WITH AIR FILTRATION ITEM PART # DESCRIPTION ITEM PART # DESCRIPTION 112409 GEAR DRIVE 10 HP 460V 110909 LEGEND PLT-OFF/ON TRANS 104624 TRANSFORMER-50V A 460/230/120V 110911 LEGEND PLT-SHREDDER STOP 111253 CONTACTOR 110912 LEGEND PLT-POWER ON...
- Page 27 ELECTRICAL DIAGRAM - 10 HP, 230 V 3 PH-60 HZ ITEM PART # DESCRIPTION ITEM PART # DESCRIPTION 112409 GEAR DRIVE 10 HP 230V 110911 LEGEND PLT-SHREDDER STOP TRANS 104624 TRANSFORMER-100V A 230/460/120V 110912 LEGEND PLT-POWER ON 111253 CONTACTOR 104695 CONDUIT-1/2"...
- Page 28 ELECTRICAL DIAGRAM - 10 HP, 230 V 3 PH-60 HZ WITH AIR FILTRATION ITEM PART # DESCRIPTION ITEM PART # DESCRIPTION 112409 GEAR DRIVE 10 HP 230V 110909 LEGEND PLT-OFF/ON TRANS 104624 TRANSFORMER-100V A 230/460/120V 110911 LEGEND PLT-SHREDDER STOP 111253 CONTACTOR 110912 LEGEND PLT-POWER ON...
- Page 29 ELECTRICAL DIAGRAM - 10 HP, 208 V 3 PH-60 HZ ITEM PART # DESCRIPTION ITEM PART # DESCRIPTION 112409-200 GEAR DRIVE 10 HP 208V 111747-J4 TERMINAL BLOCK TRANS 104626 TRANSFORMER-50V A 208/120V 104449 CONTACT BLOCK FU-1 104383 FUSE-1 AMP 104694 CORD GRIP-STRAIN RELIEF FU-2 104400...
- Page 30 ELECTRICAL DIAGRAM - 10 HP, 208 V 3 PH-60 HZ WITH AIR FILTRATION ITEM PART # DESCRIPTION ITEM PART # DESCRIPTION 112409-200 GEAR DRIVE 10 HP 208V 104699 CONDUIT FTG-1/2" STR MF-2 111281 STARTER-FAN 111747-J4 TERMINAL BLOCK TRANS 104626 TRANSFORMER-50V A 208/120V 104449 CONTACT BLOCK CB-1...
- Page 31 3490 US 23 N Alpena, MI 49707 Toll Free: 800-634-8981 Phone: 989-358-6121 Fax: 989-358-6122 info@ameri-shred.com www.ameri-shred.com AMS-1000 Hard Drive Shredder Manual 2016 v.1...
Need help?
Do you have a question about the 2 Series and is the answer not in the manual?
Questions and answers