ERGATTA Rower Assembly Manual
Hide thumbs
Also See for Rower:
- Owner's manual (24 pages) ,
- Assembly manual (20 pages) ,
- Assembly manual (20 pages)
Advertisement
Quick Links
Advertisement

Subscribe to Our Youtube Channel
Related Manuals for ERGATTA Rower


Summary of Contents for ERGATTA Rower
- Page 1 A S S E M B L Y M A U A L...
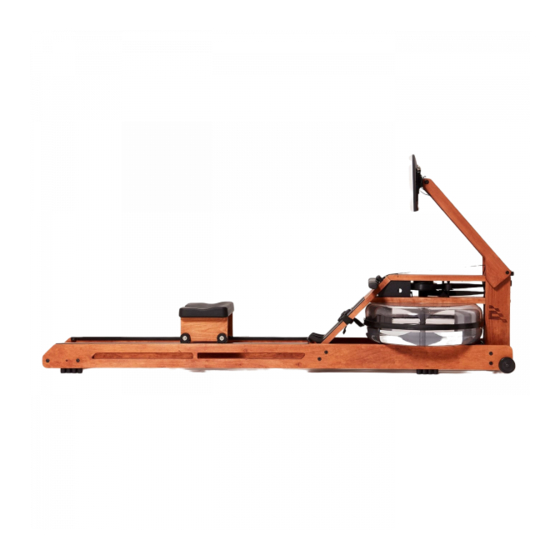
- Page 2 Pow r Button Touchscr n Mounting Arm Mounting Arm Handl Handl R st Handle (Attach d to Handl B lt) R ar Spac r S at (With Bung attach d) Forward Ris r Footpads Top & Bottom D ck Rails Footboard Tank...
- Page 4 Lay the rails on the floor parallel to one another. Make sure that the black extrusions are facing the inside of the rails.
- Page 5 Position the rear spacer so that the logo is facing upwards and the bolt with the bungee cord is facing down. Unscrew the JCN nuts from the rear spacer. JCN Nut (x4)
- Page 6 Connect the rear spacer to the rails, then secure using the JCN nuts. At this stage, the JCN nuts should be left hand-tight. JCN Nut Allen Keys (x4)
- Page 7 Place the seat between the rails. The indent on the seat should face the rear spacer. All four load wheels should sit on the black extrusion, with the guide wheels locked under the black extrusion such that the seat cannot be lifted off the rails. Note: It may be necessary to separate the rails slightly to fit.
- Page 8 Allen Keys JCN Nut Wheel Assembly (x2) (x2)
- Page 9 Raise the mounting arm by gently pulling the spring lock on the back of the forward riser, and lifting the arm until it locks in place. STEP 2 STEP 1...
- Page 10 Place the tank assembly onto the rails, then using the JCN nuts and bolts, attach the tank to the rails. At this stage, they should be left hand tight. Note: one Allen Key is located beneath the rear spacer. Allen Keys JCN Nut JCB Bolt (x4)
- Page 11 Loosen the 2 bolts on the top deck using the 5mm Allen key. Assemble the footboard between the rails to lean against the top deck. Attach the footboard to the rails using JCN nuts and JCB bolts, leaving them hand tight. Allen Keys JCN Nut JCB Bolt...
- Page 12 Place the provided Footboard Assembly Card on the opposite side of the straps, pushing it all the way through the slot for the Footpads. Using the Assembly Card as a ramp, install the Footpads onto the Footboard. Footpads (x2)
- Page 13 Screw the handle rests into position with the handle notch facing downwards using the handle rest bolts. Do not overtighten. Handle Rest Bolt Allen Keys (x2)
- Page 14 Using both 5mm Allen Keys, one to hold the nut and the other to screw the bolt, fully tighten the bolts left hand tight from Steps 4, 7 and 8 including the two JCB’s on the top deck. Place one Allen Key back under the rear spacer, for easy access later.
- Page 15 Lower the tablet arm and stand the machine upright. Release the recoil belt and connect the bunjee to the recoil strap. Note: the recoil belt should go under the pulley (center diagram)
- Page 16 (17 L). Insert the straight end of the syphon into your container, and the flexible end into the rower tank. Pump the syphon to fill the water tank with water to the level 17 marker on the side of the tank. Add a purification tablet (provided in your Ergatta bag), then add the stopper to the tank.
- Page 17 Before placing the touchscreen onto the rower, connect to USB cable to the touchscreen and mount as shown below. Back of Touchscreen USB Cable (USB-A End) USB Cable (Micro-USB End)
- Page 18 Slide the touchscreen onto the end of the mounting arm until it locks into place (the speakers should be on the top). Using the touchscreen bolt and 1/8" Allen key, secure the touchscreen to the arm. Touchscreen Bolt Allen Key...
- Page 19 Assemble the remainder of the wires as shown below. Back of Touchscreen Back of Arm USB Cable (USB-A End) Power Cable Sensor Cable USB Cable (Micro-USB End) Power Cable Mounting Arm...
-
Page 20: Contact Info
Assembly Manual PDF Contact Info If you require additional assistance with assembly or with any other troubleshooting, please contact us. For orders outside the US, please use the above QR code for relevant contact info. Phone: 718-866-4935 Email: support@ergatta.com Web: support.ergatta.com...
Need help?
Do you have a question about the Rower and is the answer not in the manual?
Questions and answers