Table of Contents
Advertisement
Quick Links
Advertisement
Table of Contents

Related Manuals for AEG FSE64637P


Summary of Contents for AEG FSE64637P
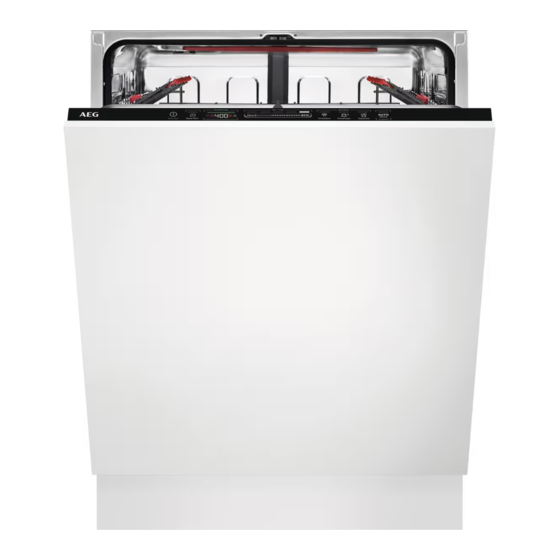
- Page 1 FSE64637P User Manual Dishwasher USER MANUAL...
-
Page 2: Table Of Contents
13. ENVIRONMENTAL CONCERNS..............28 FOR PERFECT RESULTS Thank you for choosing this AEG product. We have created it to give you impeccable performance for many years, with innovative technologies that help make life simpler – features you might not find on ordinary appliances. Please spend a few minutes reading to get the very best from it. - Page 3 ENGLISH of incorrect installation or usage. Always keep the instructions in a safe and accessible location for future reference. 1.1 Children and vulnerable people safety This appliance can be used by children aged from 8 • years and above and persons with reduced physical, sensory or mental capabilities or lack of experience and knowledge if they have been given supervision or instruction concerning the use of the appliance in a...
-
Page 4: Safety Instructions
Only a qualified person must install this appliance. www.youtube.com/electrolux www.youtube.com/aeg • Remove all the packaging. How to install your AEG/Electrolux • Do not install or use a damaged 60 cm Sliding Door Dishwasher appliance. • Follow the installation instructions supplied with the appliance. - Page 5 ENGLISH • Make sure that the parameters on the rating plate are compatible with the electrical ratings of the mains power supply. • Always use a correctly installed shockproof socket. • Do not use multi-plug adapters and extension cables. • Make sure not to cause damage to the mains plug and to the mains cable.
-
Page 6: Product Description
Please note that some of these spare information about the operational parts are only available to status of the appliance. They are not professional repairers, and that not all... -
Page 7: Control Panel
ENGLISH 3.1 Beam-on-Floor • The red light flashes when the appliance has a malfunction. The Beam-on-Floor is a light that is The Beam-on-Floor is off displayed on the floor below the when the appliance is appliance door. deactivated. • A red light comes on when a programme starts. -
Page 8: Programme Selection
Indicator Description Salt indicator. It is on when the salt container needs refilling. Refer to "Be‐ fore first use". Machine Care indicator. It is on when the appliance needs internal clean‐ ing with the Machine Care programme. Refer to "Care and cleaning". - Page 9 ENGLISH 5.4 Programmes overview Pro‐ Dishwasher Degree of Programme phases EXTRAS gramme load soil Quick Crockery, Fresh • Dishwashing 50 °C • ExtraPower cutlery • Intermediate rinse • GlassCare • Final rinse 45 °C • AirDry Crockery, Fresh, lightly • Dishwashing 60 °C •...
-
Page 10: Basic Settings
Consumption values Water (l) Energy (kWh) Duration (min) 1)2) Programme Quick 10.4 0.600 11.7 0.845 1h 30min 11.5 1.000 2h 40min 12.0 1.009 10.5 0.735 AUTO Sense 11.9 0.964 Machine Care 0.636 1) The pressure and the temperature of the water, the variations of the mains supply, the options, the quantity of dishes and the degree of soil can change the values. - Page 11 ENGLISH You can change the basic settings in To enter setting mode, press and hold setting mode. simultaneously about 3 seconds. When the appliance is in setting mode, The lights related to the Previous, OK the bars of the ECOMETER represent and Next are on.
- Page 12 Water hardness German de‐ French de‐ mmol/l mg/l (ppm) Clarke Water softener grees (°dH) grees (°fH) degrees level 47 - 50 84 - 90 8.4 - 9.0 835 - 904 58 - 63 43 - 46 76 - 83 7.6 - 8.3...
- Page 13 ENGLISH in the same cycle or at the beginning of Acoustic signals sound also the next programme. This activity when a malfunction of the increases the total water consumption of appliance occurs. It is not a programme by additional 4 litres and possible to deactivate these the total energy consumption of a signals.
-
Page 14: Before First Use
6.6 Key tones The latest programme that was completed before the appliance The buttons on the control panel make a deactivation is saved. It is then selected click sound when you press them. You automatically after you activate the can deactivate this sound. -
Page 15: Daily Use
ENGLISH 7.2 How to fill the rinse aid CAUTION! dispenser Only use rinse aid designed specifically for dishwashers. 1. Open the lid (C). 2. Fill the dispenser (B) until the rinse aid reaches the marking ''MAX''. 3. Remove the spilled rinse aid with an absorbent cloth to prevent excessive foam formation. - Page 16 The upper ends of the two Not all options are vertical ribs inside the compatible with each other. compartment (B) indicate the maximum level for filling Activating options often the dispenser with gel (max. increases the water and 30ml).
-
Page 17: Hints And Tips
ENGLISH 8.7 How to cancel a running If the door is opened for programme more than 30 seconds during the drying phase, the Press and hold for about 3 seconds. running programme ends. It The appliance returns to the programme does not happen if the door selection. - Page 18 9.3 What to do if you want to • To prevent limescale buildup inside the appliance: stop using multi-tablets – Refill the salt container whenever necessary. Before you start using separately – Use the recommended dosage of detergent, salt and rinse aid, complete the detergent and rinse aid.
-
Page 19: Care And Cleaning
ENGLISH • Put light items in the upper basket. 2. First remove items from the lower Make sure that the items do not move basket, then from the upper basket. freely. After the programme is • Put cutlery and small items in the completed, water can still cutlery basket. - Page 20 10.3 Removal of foreign objects Check the filters and the sump after each use of the dishwasher. Foreign objects (e.g. pieces of glass, plastic, bones or toothpicks, etc) decrease the cleaning performance and can cause damage to the drain pump.
- Page 21 ENGLISH 2. Wash the spray arm under running 7. Reassemble the filters (B) and (C). water. Use a thin pointed tool, e.g. a 8. Put back the filter (B) in the flat filter toothpick, to remove particles of soil (A). Turn it clockwise until it locks. from the holes.
- Page 22 10.8 Cleaning the ceiling 2. To detach the spray arm from the basket, press the spray arm upwards spray arm and simultaneously turn it clockwise. We recommend to clean the ceiling spray arm regularly to prevent soil from clogging the holes. Clogged holes can cause unsatisfactory washing results.
-
Page 23: Troubleshooting
ENGLISH sure that the mounting element locks into place. 11. TROUBLESHOOTING to contact an Authorised Service WARNING! Centre. Improper repair of the Refer to the below table for information appliance may pose a on possible problems. danger to the safety of the user. - Page 24 Problem and alarm code Possible cause and solution Malfunction of the wash • Switch the appliance off and on. pump or the drain pump. The display shows i51 - i59 or i5A - i5F. The temperature of the wa‐...
- Page 25 ENGLISH Problem and alarm code Possible cause and solution Rattling or knocking sounds • The tableware is not properly arranged in the baskets. from the inside of the appli‐ Refer to basket loading leaflet. ance. • Make sure that the spray arms can rotate freely. The appliance trips the cir‐...
- Page 26 Problem Possible cause and solution Poor drying results. • Tableware was left for too long inside the closed appli‐ ance. Activate the function AirDry to set the automatic opening of the door and to improve the drying perform‐ ance.
-
Page 27: Technical Information
ENGLISH Problem Possible cause and solution Limescale deposits on the ta‐ • The level of salt is low, check the refill indicator. bleware, on the tub and on the • The cap of the salt container is loose. inside of the door. •... -
Page 28: Environmental Concerns
Refer to appliance. the chapter "Product description". It is possible to find information related to For more detailed information about the the performance of the product in the EU... - Page 32 www.aeg.com/shop...
Need help?
Do you have a question about the FSE64637P and is the answer not in the manual?
Questions and answers