Table of Contents
Advertisement
Quick Links
Advertisement
Table of Contents

Related Manuals for LG WCEP6427 Series


Summary of Contents for LG WCEP6427 Series
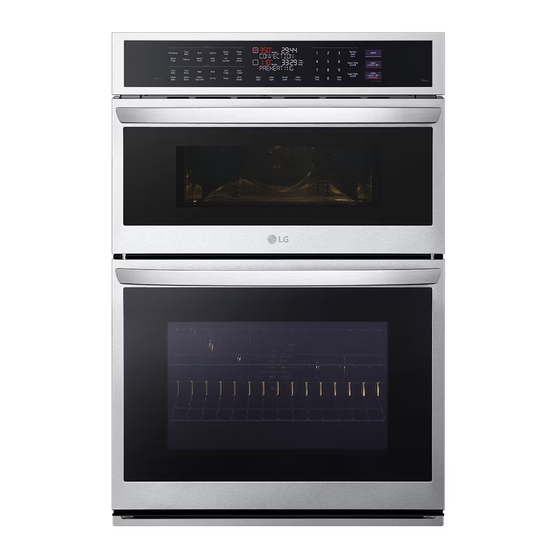
- Page 1 Scan to see the online manual. OWNER'S MANUAL COMBINATION WALL OVEN Read this owner's manual thoroughly before operating the appliance and keep it handy for reference at all times. ENGLISH WCEP6427* www.lg.com MFL70581906 Copyright © 2023 LG Electronics Inc. All Rights Reserved. Rev.02_022323...
-
Page 2: Table Of Contents
TABLE OF CONTENTS IMPORTANT SAFETY Operating the Upper Microwave Oven INSTRUCTIONS 21 Before Using 21 Microwave Cookware Guide READ ALL INSTRUCTIONS BEFORE USE 22 Cooking Tips 4 Precautions to Avoid Possible Exposure to 23 Microwave Power Levels Excessive Microwave Energy 24 Microwave Mode 4 Safety Messages 24 +30 Seconds Mode... - Page 3 Connecting an LG Appliance 55 RF Module Specifications 55 FCC Notice 55 Open Source Software Notice Information Smart Diagnosis Feature 56 Using LG ThinQ to Diagnose Issues 56 Using Audible Diagnosis to Diagnose Issues 57 MAINTENANCE Cleaning 57 General Cleaning Tips...
-
Page 4: Important Safety Instructions
IMPORTANT SAFETY INSTRUCTIONS IMPORTANT SAFETY INSTRUCTIONS READ ALL INSTRUCTIONS BEFORE USE Precautions to Avoid Possible Exposure to Excessive Microwave Energy (a) Do not attempt to operate this oven with the door open since open-door operation can result in harmful exposure to microwave energy. It is important not to defeat or tamper with the safety interlocks. (b) Do not place any object between the oven front face and the door or allow soil or cleaner residue to accumulate on sealing surfaces. - Page 5 IMPORTANT SAFETY INSTRUCTIONS • Children must not be allowed to play with accessories or hang down from the door or any part of the oven. Doing so can cause serious injury and damage. As with any appliance, close supervision is necessary when used by children.
-
Page 6: Installation
IMPORTANT SAFETY INSTRUCTIONS • Do not mount unit over or near any portion of a heating or cooking appliance. • Do not mount over a sink. • Do not store anything directly on top of the appliance surface when the appliance is in operation. Installation •... -
Page 7: Maintenance
IMPORTANT SAFETY INSTRUCTIONS shock hazard. Turn the oven off immediately and have the heating element replaced by a qualified service technician. • Do not leave children alone or unsupervised near the appliance when it is in use or is still hot. Children should never be allowed to sit or stand on any part of the appliance as they could be injured or burned. -
Page 8: Microwave Oven
IMPORTANT SAFETY INSTRUCTIONS • Wear proper apparel. Do not wear loose-fitting or hanging garments, which may ignite if they contact hot surfaces, and cause severe burns. • Do not use the oven for drying clothes. Only use the oven for its intended purpose. •... -
Page 9: Caution
IMPORTANT SAFETY INSTRUCTIONS installation. If this equipment does cause interference to radio or television reception, which can be determined by turning the equipment off and on, the user is encouraged to try to correct the interference by one or more of the following: - Reorient the receiving antenna of the radio or television. - Page 10 10 IMPORTANT SAFETY INSTRUCTIONS • Never keep pet birds in the kitchen. The health of birds is extremely sensitive to the fumes released during an oven self-clean cycle. Fumes may be harmful or fatal to birds. Move birds to a well-ventilated room.
-
Page 11: Product Overview
PRODUCT OVERVIEW PRODUCT OVERVIEW Product Features The appearance and specifications listed in this manual may vary due to constant product improvements. Exterior / Interior Oven Controller Steam Feeder Tank Upper Oven Door Air Fry Tray Spacer (2 ea) Standard Rack (2 ea) Lower Oven Door Gasket Rating Label, Model and Serial Number Plate... - Page 12 12 PRODUCT OVERVIEW Accessories for Lower Oven Accessories for Cooking Heavy Duty Standard Rack (2 ea) Meat Probe Air Fry Tray Accessories for Installation 4X14 6 wood screws for mounting (4 needed for installation and 2 extras) 4X24 6 wood screws for mounting (for flush installation) 4X22 2 self-tapping screws for cover bracket 2 cover brackets for flush installation 4X10 2 screws for bottom decorative trim...
- Page 13 : Alternative method -: Do not use NOTE • Contact LG Customer Service at 1-800-243-0000(1-888-542-2623 in Canada) if any accessories are missing • For your safety and for extended product life, only use authorized components. • The manufacturer is not responsible for product malfunction or accidents caused by the use of separately purchased, unauthorized components or parts.
-
Page 14: Operation
14 OPERATION OPERATION Operating Control Panel Control Panel Features oven temperature, the start time, and the Oven Functions length of operation for timed baking, etc. • Select various functions of the oven. See Operating the Oven. Start Time • Press the button to set the delayed timed Display cook. - Page 15 OPERATION • Avoid opening the oven door more than necessary during use. This helps the oven maintain temperature, prevents unnecessary heat loss, and saves on energy use.
-
Page 16: Changing Settings
16 OPERATION Changing Settings Timer On/Off The Timer On/Off serves as an extra timer in the Clock kitchen that beeps when the set time has run out. It does not start or stop cooking. The clock must be set to the correct time of day in The Timer On/Off feature can be used during any order for the automatic oven timing functions to of the other oven control functions. -
Page 17: Settings (Hour Mode, Convection Auto Conversion, Oven Temperature, Display Language, Preheat Alarm Light, Beeper Volume, Fahrenheit Or Celsius)
OPERATION Settings (Hour Mode, Convection Press START to accept the change. Auto Conversion, Oven Temperature, Display Language, Adjusting the Oven Temperature (Only Preheat Alarm Light, Beeper for Lower Oven) Volume, Fahrenheit or Celsius) Your new oven may cook differently from the one it replaced. -
Page 18: Control Lock
18 OPERATION Press and hold the Clock button until Press START to accept the change. appears in the display. Then press Clock repeatedly until appears in the display. Control Lock The Control Lock feature automatically locks most Press 1 for English, 2 for Spanish, or 3 for oven controls and prevents them from being French. -
Page 19: Cook Time (Timed Cook)
OPERATION Press Bake. 350 ℉ appears in the display. Set the temperature. Press 3, 0 and 0. Set the temperature: press 3, 0 and 0. Press Cook Time. Timed flashes in the display. Bake, 0:00 and 300 ℉ appear in the display. -
Page 20: Remote Start
Press Remote Start. The Wi-Fi icon appears in the display. • In this mode, the controls for both ovens are locked. Follow the instructions in the LG ThinQ application for using the Remote Start. NOTE • Remote Start is disconnected in the following... -
Page 21: Operating The Upper Microwave Oven
OPERATION Operating the Upper • Ovenproof Glass Microwave Oven - Ovenproof glassware that is treated for high intensity heat so it is heat-resistant is microwave-safe. Before Using - Use utility dishes, loaf dishes, pie plates, cake plates, liquid measuring cups, casseroles and WARNING bowls without metal rims. -
Page 22: Cooking Tips
22 OPERATION - Avoid colored paper products as the color may • Metal Twist Ties run. Do not use recycled paper products in the - Remove metal twist ties from plastic or paper microwave oven. They may contain impurities bags. which could cause arcing or fires when used in - They become hot and could cause a fire. -
Page 23: Microwave Power Levels
OPERATION so that microwaves can be absorbed by the - Slit the skins of frozen food such as sausage. underside and center of the foods. - Bend plastic pouches of food to ensure even - Shaping: Place the thickest portions of foods defrosting. -
Page 24: Microwave Mode
24 OPERATION Set the cook time: Press 7, 3 and 0. Power Level • Cooking veal Set the power level: Press Power Level and 7. • Cooking whole fish (60%) • Cooking puddings and custard Press START to start cooking. •... -
Page 25: Sensor Cook Mode
OPERATION Poultry (0.1 - 6.0 lbs) When defrosting is complete, press Upper CLEAR/OFF. • Poultry: Whole, cut-up, breast (boneless) • Cornish Hens: Whole NOTE • Turkey: Breast • The countdown appears in the display after • Rinse chicken with tap water and let stand for 60 START is pressed. - Page 26 26 OPERATION • Always use microwavable containers and cover † • 4. Pasta (½-2 cups them with lids or vented plastic wrap. - Cookware: Microwave-safe bowl on the glass • Never use tight-sealing plastic covers. They can tray prevent steam from escaping and cause food to - Food temperature: Refrigerated (precooked) overcook.
-
Page 27: Convection Bake Mode
OPERATION † 8 oz (240 ml) per cup Set the oven temperature: Press 3, 7 and 5. Convection Bake Mode Press Cook Time. During Convection Bake, a heating element is used to raise the temperature of the air inside the oven. The convection cooking temperature ranges from Set the cook time: Press 3, 0. -
Page 28: Speed Cook Mode
28 OPERATION Set the cook time: Press 1, 3 and 0. NOTE • For best results, use the rack when broiling in the upper oven. Press START. When cooking has finished or to cancel, press Upper CLEAR/OFF. Setting the Speed Broil Function Use this mode for steaks, chicken fillets, fish or seafood. -
Page 29: Warm Mode
OPERATION Warm Mode CAUTION This function maintains an oven temperature of • Never use a brown paper bag for popping corn less than 230 ℉. This function should not be used or attempt to pop leftover kernels. to reheat cold food. This function keeps cooked •... -
Page 30: Auto Cook Mode
30 OPERATION - Instructions: Place bacon slices on a Press START to start. microwave rack for best results. Use a plate lined with paper towels if rack is not available. • 2. Bagels (1 or 2-3 bagels) Press Upper CLEAR/OFF at any time to cancel. - Cookware: Metal tray NOTE - Food temperature: Frozen... - Page 31 OPERATION • 10. Frozen fries (1-2, 3-4 servings (3.5 oz / 100 g • 18. Nachos (1-3, 4-6 servings (8 ea / 1 serving)) per serving) - Cookware: Metal tray - Cookware: Metal tray - Food temperature: Room - Food temperature: Frozen •...
-
Page 32: More Modes (Soften, Melt, Air Fry, Dehydrate)
32 OPERATION Setting the Soften Mode - Instructions: Cover with vented plastic wrap. After cooking, let stand for 5-10 minutes. The oven uses low power to soften foods such as • 24. Salmon steak, 1″ thick (1, 2, 3-4 steaks) butter, cream cheese, frosting, and ice cream. - Page 33 OPERATION - Instructions: Remove lid and cover. Press 1 • 4. Chocolate (4, 8, 12 oz) for 1 pint or 2 for 1 quart. Ice cream will be soft - Cookware: Microwave-safe bowl on the glass enough to make scooping easier. tray - Food temperature: Room Setting the Melt Mode...
- Page 34 34 OPERATION Dehydrate Menu • Fresh shrimp (6 - 12 oz) - Set temp / Time (minutes): 425 ℉ / 17 - 23 • Bananas • Frozen chicken nuggets (5 - 10 oz) - Preparation: Cut into 1/4" (5 - 6 mm) slices. - Set temp / Time (minutes): 425 ℉...
-
Page 35: Operating The Lower Oven
OPERATION Operating the Lower Oven corners of the racks. Doing so can damage the racks. Before Using the Oven Removing Racks NOTE • Because the oven temperature cycles, an oven Pull the rack straight out until it stops. thermometer placed in the oven cavity may not show the same temperature that is set on the oven. -
Page 36: Instaview
36 OPERATION Rack Guides NOTE • Knocking twice on the glass panel turns the interior light on or off. Once the rack is secured in the back, pull the entire rack forward until the rack locks into • The light turns off automatically after 150 place. - Page 37 OPERATION time. Press the numbers to set the time • Bake cookies and biscuits on pans with no sides settings. or very low sides to allow heated air to circulate around the food. Food baked on pans with a dark finish will cook faster. Press START.
-
Page 38: Bake Mode
38 OPERATION Bake Mode To Stop Cooking Press Lower CLEAR / OFF. Bake is used to prepare foods such as pastries, breads and casseroles. NOTE The oven can be programmed to bake at any • It is normal for the convection fan to operate temperature from 170 ℉... -
Page 39: Broil Mode
OPERATION Broil Mode If baking with more than one pan, place the pans so that each one has at least 1” to 1 ½” of air space around them. Setting the Oven to Broil Broiling uses an intense, radiant heat to cook food. Both the inner and outer broil elements heat during full broiling. -
Page 40: Recommended Broiling Guide
40 OPERATION Press 1 for Full broil, 2 for Center broil. Press START. To Stop Broiling Press 1 for High, 2 for Medium, or 3 for Low Press Lower CLEAR / OFF. temperature setting. Tips for Reducing Smoke Due to the intense heat associated with broiling, it If desired, press Cook Time to set the cook is normal to experience smoke during the cooking time. - Page 41 OPERATION This guide is based on meats at refrigerator temperature. For best results when broiling, use a pan designed for broiling. Grid (sold separately) Broiler Pan (sold separately) First Second Quantity and/or Rack Side Side Food Comments Thickness Position Time Time (min.) (min.)
- Page 42 42 OPERATION First Second Quantity and/or Rack Side Side Food Comments Thickness Position Time Time (min.) (min.) Handle and turn very carefully. Brush with Fish Fillets lemon butter before " thick and during cooking, if desired. Increase time 5 to 10 Ham Slices minutes per side for 1 "...
-
Page 43: More Modes (Frozen Meal)
OPERATION • Seafood is best consumed immediately after cooking. Allowing seafood to rest after cooking can cause the food to dry out. • It is a good idea to rub a thin coating of oil on the surface of the broiling pan before cooking to reduce sticking, especially with fish and seafood. -
Page 44: More Modes (Favorite)
44 OPERATION Press the numbers to set the time settings. Press 4. Press START. The remaining proofing time Press More Modes repeatedly to select the appears in the display. desired recipe. Default NOTE Temp. (℉) • If the proofing time is not set, the oven Cooking Recipe (may be... -
Page 45: Air Fry
OPERATION Air Fry Tips for Air Fry • For best results, use the provided air fry tray. This feature automatically increases the entered temperature by 45 ℉ for optimal performance - The mesh section of the air fry tray can be when using Air Fry. -
Page 46: Recommended Air Frying Guide
46 OPERATION Recommendations When Air Frying • Open a window or sliding glass door, if possible, to make sure the kitchen is well-ventilated. High-Fat Foods • Clean the grease filters on your exhaust hood Foods high in fat will smoke when using the Air Fry regularly. -
Page 47: Probe Mode
OPERATION Quantity Rack Recommended Items Temp. (°F) Time Guide (oz) Position CHICKEN-Frozen Frozen Chicken Nuggets, 15-25 Crispy Frozen Chicken Strips 25-35 Frozen Hot Wings, Bone- 25-35 CHICKEN-Fresh, Skin on 25-35 Brush or lightly spray with † Fresh Chicken Wings 1 tbsp. of oil. Add salt and Fresh Chicken 30-40 pepper to taste. -
Page 48: Recommended Probe Guide
48 OPERATION • For thin cuts of meat, insert probe in thickest Press START. side of meat. When the set probe temperature is reached, the oven shuts off automatically. NOTE • Calculating a total cooking time by weight is no Using the Meat Probe Feature longer necessary using this feature. - Page 49 OPERATION Category Examples of Food Probe Placement Whole Chicken or Turkey Insert in the thickest part of thigh, Poultry Breasts or Roasts avoiding bone Poultry Duck, Goose, Pheasant Insert in the thickest part of the Stuffing (Alone or in Bird) dish Fresh Pork Insert in the thickest part, away...
-
Page 50: Steam Function
50 OPERATION Steam Function Steam cooking uses the moist heat of steam to cook food. This is an ideal cooking method for delicate food items such as seafood, which can lose nutrients when boiled. The oven provides 3 methods of steam cooking: Steam Bake, Steam Roast and Steam Sous Vide. -
Page 51: Steam Sous Vide
OPERATION Setting Steam Cook Mode Press START. Press Steam Bake or Steam Roast. To Stop Steam Cooking Press Lower CLEAR / OFF. Press Steam Level repeatedly to select the desired temperature and steam level: Low, Steam Sous Vide Medium, or High. Steam Sous Vide cooking uses steam to cook foods "low and slow."... -
Page 52: Sous Vide Cooking Guide
If the appliance is connected to a home Wi-Fi network, the preheating function of the oven can When Remote Start Ready appears in the be started or stopped using the LG ThinQ smartphone app. display, the Remote Start function is ready to use. -
Page 53: Sabbath Mode
OPERATION NOTE NOTE • Remote Start is disconnected in the following • If a cook time is set, the oven turns off situations: automatically at the end of the cook time, without chiming. The oven remains in Sabbath - Remote Start is never set up in the mode, but is turned off. -
Page 54: Smart Functions
LG ThinQ Application Features Installing LG ThinQ Application and • Product Upgrades Connecting an LG Appliance - On models with the LG UP Home Appliance feature, experience new features by Models with QR Code upgrading the product through the LG ThinQ app. -
Page 55: Rf Module Specifications
• To reconnect the appliance or add another user, press and hold the Wi-Fi button for 3 seconds. Any changes or modifications in construction of Run the LG ThinQ application and follow the this device which are not expressly approved by instructions in the application to connect the the party responsible for compliance could void appliance. -
Page 56: Smart Diagnosis Tm Feature
If you experience a problem with your Wi-Fi equipped appliance, it can transmit troubleshooting data to a smartphone using the LG ThinQ application. • Launch the LG ThinQ application and select the Smart Diagnosis feature in the menu. Follow the instructions provided in the LG ThinQ application. -
Page 57: Maintenance
MAINTENANCE MAINTENANCE Cleaning cleaner. Remove heavier soil with warm, soapy water. Do not use abrasives of any kind. General Cleaning Tips Painted and Decorative Trim • A plastic spatula can be used as a scraper to For general cleaning, use a cloth with hot soapy scrape off any chunks or debris before and water. -
Page 58: Easyclean (Lower Oven)
LG’s EasyClean enamel technology provides two Clean with a mild, abrasive cleaner. cleaning options for the inside of the oven. The EasyClean feature takes advantage of LG’s new • Food spilled into the tracks could cause the enamel to help lift soils without harsh chemicals, racks to become stuck. - Page 59 Compared to the cavity is above 150 ℉ (65 ℃), the EasyClean cycle more intense Self Clean process, your LG oven will not be activated until the oven cavity cools gives you the option of cleaning with LESS HEAT, down.
-
Page 60: Self Clean (Lower Oven)
60 MAINTENANCE Clean the oven cavity immediately after the EasyClean cycle by scrubbing with a wet, non- scratch scouring sponge or pad. (The scouring side will not scratch the finish.) Some water may spill into the bottom vents while cleaning, but it will be captured in a pan under the oven cavity and will not hurt the burner. - Page 61 MAINTENANCE running the Self Clean cycle, you may notice or breaker and have the oven serviced by a smoking or an odor. This is normal, especially if qualified technician. the oven is heavily soiled. During Self Clean, the • If the self cleaning mode malfunctions, turn the kitchen should be well ventilated to minimize the oven off and disconnect the power supply.
- Page 62 62 MAINTENANCE • Common food items that can soil your oven: NOTE Casseroles • If oven racks were left in the oven and do not slide smoothly after a Self Clean cycle, wipe NOTE racks and rack supports with a small amount of •...
-
Page 63: Cleaning The Steam Feeder Tank
MAINTENANCE During Self Clean If hard water is used in the steam feeder tank, the steam generator may become clogged with hard • The Self Clean cycle uses extremely hot water scale. In areas with hard water, run the temperatures to clean the oven cavity. While Descaling function frequently or use softened running the Self Clean cycle, you may notice water. -
Page 64: Drying The Lower Oven Interior
64 MAINTENANCE Unplug the oven or disconnect power. NOTE • The Rinsing function must be completed even if the Descaling function is canceled. Remove the oven racks. • If water remains on the oven bottom after descaling, it can leave a residue after the oven is used. -
Page 65: Troubleshooting
TROUBLESHOOTING TROUBLESHOOTING FAQs Frequently Asked Questions About the Upper Oven Can I use a rack in my upper oven to reheat or cook on two levels at once? Only use the rack that is supplied with your upper oven. Use of any other rack can result in poor cooking performance and/or arcing and may damage your oven. - Page 66 66 TROUBLESHOOTING The correct side of the tray should be facing up and the tray should sit firmly on the center hub. The support is not operating correctly. Reinstall the glass tray and restart the oven. Cooking without the glass tray can give you poor results. Why does the dish become hot when I microwave food in it? I thought that this should not happen.
- Page 67 TROUBLESHOOTING Do not cover racks with aluminum foil. Covering entire racks with foil restricts air flow, leading to poor cooking results. Use a sheet pan lined with foil under fruit pies or other acidic or sugary foods to prevent spillovers from damaging the oven finish. CAUTION •...
- Page 68 68 TROUBLESHOOTING Do I need to use all 1 ¼ cups (10 oz or 300 ml) of water for EasyClean? Yes. It is highly recommended that 1 cup (8 oz or 240 ml) of water be sprayed or poured on the bottom and an additional ¼...
-
Page 69: Before Calling For Service
TROUBLESHOOTING Before Calling for Service Review this section before calling for service; doing so will save you both time and money. Cooking Problem Possible Cause & Solution Arcing or Sparking Cookware is not microwave safe. • When in doubt, test cookware before use. Do not operate oven while empty. - Page 70 70 TROUBLESHOOTING Problem Possible Cause & Solution Oven smokes Grease has built up on oven surfaces. Old grease or food spatters cause excessive excessively during smoking. broiling. • Regular cleaning is necessary when broiling frequently. Food does not bake Oven controls improperly set. or roast properly •...
-
Page 71: Parts & Features
TROUBLESHOOTING Problem Possible Cause & Solution Oven will not steam The drain in the water tank may be clogged with hard water scale. cook (On some • If this happens, the descaling function must be run before the steam function can be used. models) Water pools in the During steam cooking, the water in the water tank is transferred to the bottom of the... -
Page 72: Noises
72 TROUBLESHOOTING Problem Possible Cause & Solution Oven door does not The control and door may be locked. open after a Self • Allow about one hour for the oven to cool after the completion of a Self Clean cycle. The Clean cycle door can be opened when the lock is no longer displayed. - Page 73 During Wi-Fi setup, the app is requesting a password to connect to the product (on certain phones). • Locate the network name which starts with "LG" under Settings > Networks. Note the last part of the network name. - If the network name looks like LGE_Appliance_XX-XX-XX, enter lge12345.
-
Page 74: Limited Warranty
Should your LG Electric Oven ("Product") fail due to a defect in materials or workmanship under normal and proper use, during the warranty period set forth below, LG will, at its option, repair or replace the Product. This limited warranty is valid only to the original retail purchaser of the Product (“You”) and applies only when purchased lawfully and used within the United States including U.S. -
Page 75: Procedure For Resolving Disputes
Notice of Dispute. In the event you intend to commence an arbitration proceeding, you must first notify LG in writing at least 30 days in advance of initiating the arbitration by sending a letter to LG at LG Electronics, USA, Inc. Attn: Legal Department- Arbitration 111 Sylvan Avenue, Englewood Cliffs, NJ 07632... - Page 76 The notice must provide your name, address, and telephone number; identify the product that is the subject of the claim; and describe the nature of the claim and the relief being sought. If you and LG are unable to resolve the dispute within 30 days, either party may proceed to file a claim for arbitration.
- Page 77 LIMITED WARRANTY www.lg.com/us/support/repair-service/schedule-repair-continued and clicking on “Find My Model & Serial Number”). You may only opt out of the dispute resolution procedure in the manner described above (that is, by e-mail or telephone); no other form of notice will be effective to opt out of this dispute resolution procedure.
- Page 78 78 Memo...
- Page 79 Memo...
- Page 80 80 Memo...
- Page 81 Memo...
- Page 82 82 Memo...
- Page 83 Memo...
- Page 84 LG Customer Information Center For inquiries or comments, visit www.lg.com or call: U.S.A. 1-800-243-0000 1-888-542-2623 CANADA Register your product Online! www.lg.com...
Need help?
Do you have a question about the WCEP6427 Series and is the answer not in the manual?
Questions and answers
HOW TO CHANGE FRENCH TO ENGLISH ON A COMBINATION MICROWAVE AND OVEN
To change the language from French to English on the LG WCEP6427 Series combination microwave and oven:
1. Press and hold the Clock button until "CLO" appears in the display.
2. Press the Clock button repeatedly until "LNG" appears.
3. Press 1 for English.
4. Press START to accept the change.
This answer is automatically generated