
Related Manuals for AEG FFB74707PM


Summary of Contents for AEG FFB74707PM
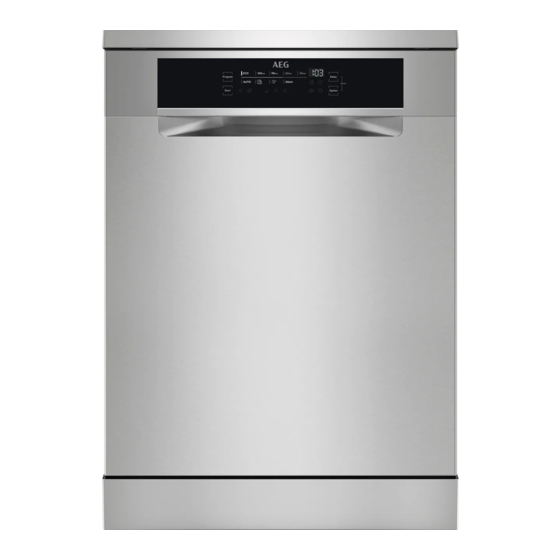
- Page 1 FFB74707PM User Manual Dishwasher FFB74707PW Manual de instrucciones Lavavajillas USER MANUAL...
-
Page 2: Table Of Contents
14. ENVIRONMENTAL CONCERNS..............27 FOR PERFECT RESULTS Thank you for choosing this AEG product. We have created it to give you impeccable performance for many years, with innovative technologies that help make life simpler – features you might not find on ordinary appliances. Please spend a few minutes reading to get the very best from it. - Page 3 ENGLISH responsible for any injuries or damage that are the result of incorrect installation or usage. Always keep the instructions in a safe and accessible location for future reference. 1.1 Children and vulnerable people safety This appliance can be used by children aged from 8 •...
-
Page 4: Safety Instructions
The operating water pressure (minimum and • maximum) must be between 0.5 (0.05) / 10 (1.0) bar (MPa) Follow the maximum number of 14 place settings. • If the supply cord is damaged, it must be replaced by •... - Page 5 ENGLISH 2.4 Use be replaced, this must be carried out by our Authorised Service Centre. • Do not put flammable products or • Connect the mains plug to the mains items that are wet with flammable socket only at the end of the products in, near or on the appliance.
-
Page 6: Product Description
2.6 Disposal separately: These lamps are intended to withstand extreme physical conditions in household appliances, WARNING! such as temperature, vibration, Risk of injury or suffocation. humidity, or are intended to signal • Disconnect the appliance from the information about the operational mains supply. -
Page 7: Control Panel
ENGLISH 4. CONTROL PANEL On/off button Option touch button Program touch button Indicators Programme indicators Start touch button Display Delay touch button 4.1 Indicators Indicator Description Salt indicator. It is on when the salt container needs refilling. It is always off while the programme operates. -
Page 8: Programmes
5. PROGRAMMES The order of the programmes in the table may not reflect their sequence on the control panel. Programme Dishwasher Degree of Programme phases Options load soil Crockery, Normal, • Prewash • ExtraPower cutlery, pots, lightly dried- •... - Page 9 ENGLISH Programme Dishwasher Degree of Programme phases Options load soil Crockery, Normal soil • Prewash cutlery • Dishwashing 60 °C • Intermediate rinse • Final rinse 50 °C • Drying • AirDry 1) This programme offers the most efficient use of water and energy consumption for crockery and cut‐ lery with normal soil.
-
Page 10: Options
5.2 Information for test institutes To receive the necessary information for conducting performance tests (e.g. according to: EN60436 ), send an email to: info.test@dishwasher-production.com In your request, include the product number code (PNC) from the rating plate. For any other questions regarding your dishwasher, refer to the service book provided with your appliance. -
Page 11: Settings
ENGLISH 7. SETTINGS 7.1 Programme selection How to enter user mode mode and user mode Make sure the appliance is in programme selection mode. When the appliance is in programme selection mode it is possible to set a To enter user mode, press and hold programme and to enter user mode. - Page 12 German de‐ French de‐ mmol/l Clarke de‐ Water softener lev‐ grees (°dH) grees (°fH) grees 4 - 10 7 - 18 0.7 - 1.8 5 - 12 <4 <7 <0.7 < 5 1) Factory setting. 2) Do not use salt at this level.
- Page 13 ENGLISH How to set the water softener door opens automatically during the drying phase and remains ajar. level Make sure the appliance is in user mode. 1. Press Program. • The indicator still flashes. • The remaining indicators are off. •...
-
Page 14: Before First Use
3. Press the on/off button to confirm the – = AirDry is activated. setting. 2. Press Delay to change the setting. 8. BEFORE FIRST USE 1. Make sure that the current level of the water softener agrees with the hardness of the water supply. -
Page 15: Daily Use
ENGLISH 8.2 How to fill the rinse aid CAUTION! dispenser Only use rinse aid designed specifically for dishwashers. 1. Open the lid (C). 2. Fill the dispenser (B) until the rinse aid reaches the marking ''MAX''. 3. Remove the spilled rinse aid with an absorbent cloth to prevent excessive foam formation. - Page 16 When the countdown is completed, the appliance door. programme starts and the indicator of the 4. Close the lid. Make sure that the lid running phase is on. The indicator locks into position.
-
Page 17: Hints And Tips
ENGLISH End of the programme automatically the appliance when it is not operating. When the programme is complete, the The function comes into operation: Auto Off function switches the appliance • When the programme is complete. off automatically. • After 5 minutes if a programme was All buttons are inactive except for the not started. - Page 18 • Make sure that glass items do not hardness. Refer to the instructions on touch each other. the detergent packaging. • Put light items in the upper basket. • Always use the correct quantity of Make sure that the items do not move rinse aid.
-
Page 19: Care And Cleaning
ENGLISH 11. CARE AND CLEANING 1. Disassemble the filters system as WARNING! instructed in this chapter. Before maintenance, 2. Remove any foreign objects deactivate the appliance and manually. disconnect the mains plug 3. Reassemble the filters as instructed from the main socket. in this chapter. - Page 20 2. Remove the filter (C) out of filter (B). 3. Remove the flat filter (A). 4. Wash the filters. CAUTION! An incorrect position of the filters can cause bad washing results and damage to the appliance. 11.5 Cleaning the lower spray...
- Page 21 ENGLISH toothpick, to remove particles of soil from the holes. 3. To install the spray arm back, press it downwards. 4. To install the spray arm back, press the spray arm upwards and simultaneously turn it counterclockwise until it locks into place.
-
Page 22: Troubleshooting
(B) counterclockwise and pull the spray arm downwards. 4. Wash the spray arm under running water. Use a thin pointed tool, e.g. a toothpick, to remove particles of soil from the holes. Run the water through the holes to wash soil particles away from the inside. - Page 23 ENGLISH Problem and alarm code Possible cause and solution You cannot activate the ap‐ • Make sure that the mains plug is connected to the mains pliance. socket. • Make sure that there is no damaged fuse in the fuse box.
- Page 24 Problem and alarm code Possible cause and solution The level of water inside the • Switch the appliance off and on. appliance is too high. • Make sure that the filters are clean. The display shows iF1. • Make sure that the outlet hose is installed at the right height above the floor.
- Page 25 ENGLISH For alarm codes not described in the WARNING! table, contact an Authorised Service We do not recommend using Centre. the appliance until the problem has been completely fixed. Unplug the appliance and do not plug it in again until you are certain that it operates correctly.
-
Page 26: Technical Information
Problem Possible cause and solution Traces of rust on cutlery. • There is too much salt in the water used for washing. Refer to "The water softener". • Silver and stainless steel cutlery were placed together. Do not place silver and stainless steel items close to‐... -
Page 27: Environmental Concerns
ENGLISH Voltage (V) 220 - 240 Electrical connection Frequency (Hz) Water supply pressure bar (minimum and maximum) 0.5 - 10 MPa (minimum and maximum) 0.05 - 1.0 Water supply max 60 °C Cold water or hot water Capacity Place settings 1) Refer to the rating plate for other values. - Page 28 14. ASPECTOS MEDIOAMBIENTALES..............55 PARA UNOS RESULTADOS PERFECTOS Gracias por elegir este producto AEG. Lo hemos creado para brindarle un rendimiento impecable durante muchos años, con tecnologías innovadoras que lo ayudan a simplificar la vida, características que quizás no encuentre en los electrodomésticos comunes.
-
Page 29: Información Sobre Seguridad
ESPAÑOL INFORMACIÓN SOBRE SEGURIDAD Antes de instalar y utilizar el aparato, lea atentamente las instrucciones facilitadas. El fabricante no se hace responsable de lesiones o daños producidos como resultado de una instalación o un uso incorrectos. Conserve siempre estas instrucciones en lugar seguro y accesible para futuras consultas. -
Page 30: Instrucciones De Seguridad
Este aparato está diseñado para uso doméstico en • interiores. Este aparato se puede utilizar en oficinas, • habitaciones de hotel, habitaciones de Bed&Breakfast, casas de campo y otros alojamientos similares donde dicho uso no exceda (en promedio) los niveles de uso doméstico. - Page 31 ESPAÑOL • Instale el aparato en un lugar seguro • Asegúrese de que no haya fugas de y adecuado que cumpla los requisitos agua visibles durante y después del de instalación. primer uso del aparato. • La manguera de entrada de agua 2.2 Conexión eléctrica tiene una válvula de seguridad y un revestimiento con un cable interno de...
- Page 32 • Tenga en cuenta que la juntas, brazos aspersores, filtros de autorreparación o la reparación no desagüe, rejillas interiores y profesional puede tener periféricos de plástico como cestas y consecuencias de seguridad y podría tapas. anular la garantía. • En cuanto a la(s) bombilla(s) de este •...
-
Page 33: Descripción Del Producto
ESPAÑOL 3. DESCRIPCIÓN DEL PRODUCTO Encimera Ventilación Brazo aspersor superior Dosificador de abrillantador Brazo aspersor intermedio Dosificador de detergente Brazo aspersor inferior Cesto inferior Filtros Cesto superior Placa de características técnicas Cajón de cubiertos Depósito de sal... -
Page 34: Panel De Mandos
4. PANEL DE MANDOS Botón de encendido/apagado Option botón táctil Program botón táctil Indicadores Indicadores de programa Start botón táctil Pantalla Delay botón táctil 4.1 Indicadores Indicador Descripción Indicador de sal. Se enciende cuando hay que rellenar el depósito de sal. -
Page 35: Programas
ESPAÑOL Indicador Descripción Indicador ExtraHygiene. 5. PROGRAMAS El orden de los programas en la tabla puede ser diferente a su secuencia en el panel de control. Programa Carga del la‐ Grado de Fases del programa Opciones vavajillas suciedad Vajilla, cu‐ Normal, li‐... - Page 36 Programa Carga del la‐ Grado de Fases del programa Opciones vavajillas suciedad Ninguna Limpieza • Limpieza a 70 °C del interior • Aclarado intermedio del aparato • Aclarado final • AirDry Todo Todo • Prelavado Vajilla, cuber‐ Suciedad •...
-
Page 37: Opciones
ESPAÑOL Agua (l) Energía (kWh) Duración (min) 1)2) Programa 11.9 0.980 1) La presión y temperatura del agua, las variaciones del suministro de energía, las opciones, la canti‐ dad de platos y el grado de suciedad pueden alterar los valores. 2) Los valores de los programas distintos de ECO son solo indicativos. -
Page 38: Ajustes
6.3 ExtraHygiene Cómo activar ExtraHygiene Esta opción asegura un mejor resultado Pulse Option hasta que se encienda el de limpieza al mantener la temperatura indicador entre 65 y 70 °C y durante al menos La pantalla muestra la duración del 10 minutos en la última fase de aclarado. - Page 39 ESPAÑOL Grados alema‐ Grados france‐ mmol/l Grados Nivel del descalci‐ nes (°dH) ses (°fH) Clarke ficador de agua 37 - 42 65 - 75 6.5 - 7.5 46 - 52 29 - 36 51 - 64 5.1 - 6.4 36 - 45 23 - 28 40 - 50 4.0 - 5.0...
- Page 40 Puedes ajustar la cantidad de en 4 litros adicionales y el consumo total abrillantador entre el nivel 1 (cantidad de energía de un programa en 2 Wh mínima) y el nivel 6 (cantidad máxima).
-
Page 41: Antes Del Primer Uso
ESPAÑOL PRECAUCIÓN! Si los niños tienen acceso al aparato, se aconseja desactivar AirDry. La apertura automática de la puerta puede suponer un peligro. Cómo desactivar AirDry Asegúrese de que el aparato se encuentra en modo de usuario. 1. Pulse el botón Delay. AirDry se activa automáticamente con •... -
Page 42: Uso Diario
Llenado del depósito de sal 8.2 Llenado del dosificador de abrillantador 1. Gire la tapa del depósito de sal hacia la izquierda y retírela. 2. Vierta 1 litro de agua en el depósito de sal (solo la primera vez). - Page 43 ESPAÑOL • Si el indicador de sal está Los extremos superiores de encendido, llene el depósito de las dos nervaduras sal. verticales dentro del • Si el indicador de abrillantador compartimento (B) indica el está encendido, llene el nivel máximo para llenar el dosificador de abrillantador.
-
Page 44: Consejos
Apertura de la puerta Pulse simultáneamente Delay y Option hasta que el aparato se encuentre en el mientras está funcionando el modo de selección de programa. aparato Cancelación de un programa Si abre la puerta mientras se realiza un programa, el aparato se detiene. - Page 45 ESPAÑOL comida cocinada u horneada pegada descalificada produce residuos de antes de lavarlos en el aparato. detergente en los platos. Ajuste la • Asegúrese de que los objetos de los cantidad de detergente en función de cestos no se tocan entre sí ni se la dureza del agua.
-
Page 46: Care And Cleaning
• Asegúrese de que las piezas de • Hay suficiente sal y abrillantador (a cristalería no estén en contacto. menos que utilice pastillas de • Coloque los objetos ligeros en el detergentes combinadas). cesto superior. Asegúrese de que los •... - Page 47 ESPAÑOL PRECAUCIÓN! Si no puede retirar los cuerpos extraños, póngase en contacto con un Centro de servicio técnico autorizado. 1. Desmonte el sistema de filtros como se indica en este capítulo. 2. Extraiga el filtro (C) del filtro (B). 2. Retire manualmente cualquier 3.
- Page 48 8. Vuelva a colocar el filtro (B) en el filtro plano (A). Gírelo hacia la derecha hasta que encaje. 3. Para instalar el brazo aspersor de vuelta, presiónelo hacia abajo. PRECAUCIÓN! Una posición incorrecta de los filtros puede dañar el...
- Page 49 ESPAÑOL 3. Lave el brazo aspersor bajo el agua corriente. Retire las partículas de suciedad de los orificios mediante un objeto afilado, como un palillo. 1. Suelte los topes de los lados de los carriles deslizantes del cajón de cubiertos y extraiga el cajón. 4.
-
Page 50: Solución De Problemas
5. Para instalar el brazo aspersor (C) de nuevo, inserte el elemento de montaje (B) en el brazo aspersor y fíjelo en el tubo de descarga (A) girándolo hacia la izquierda. Asegúrese de que el elemento de montaje encaje en su sitio. - Page 51 ESPAÑOL Problema y código de alar‐ Posible causa y solución El aparato no carga agua. • Compruebe que el grifo esté abierto. La pantalla muestra i10 o • Asegúrese de que la presión del suministro de agua no i11. es demasiado baja. Para esta información, póngase en contacto con la empresa local de suministro de agua.
- Page 52 Problema y código de alar‐ Posible causa y solución El aparato se detiene y se • Es normal. Proporciona resultados de limpieza óptimos pone en marcha más veces y ahorra energía. durante el funcionamiento. El programa dura demasia‐ •...
- Page 53 ESPAÑOL ADVERTENCIA! No recomendamos usar el aparato hasta que el problema se haya solucionado por completo. Desenchufe el aparato y no lo vuelva a conectar hasta que esté seguro de que funciona correctamente. 12.1 Los resultados del lavado y el secado no son satisfactorios Problema Posible causa y solución...
- Page 54 Problema Posible causa y solución Espuma inusual durante el la‐ • Utilice detergente diseñado específicamente para la‐ vado. vavajillas. • Utilice un detergente de otro fabricante. • No preenjuague los platos bajo el agua corriente. Rastros de óxido en los cu‐...
-
Page 55: Información Técnica
ESPAÑOL 13. INFORMACIÓN TÉCNICA Dimensiones Ancho / alto / fondo (mm) 598 / 850 / 603 Tensión (V) 220 - 240 Conexión eléctrica Frecuencia (Hz] Presión del suministro de barra (mínima y máxima) 0.5 - 10 agua MPa (mínimo y máximo) 0.05 - 1.0 Suministro de agua máx. - Page 56 www.aeg.com/shop...
Need help?
Do you have a question about the FFB74707PM and is the answer not in the manual?
Questions and answers