Table of Contents
Advertisement
Advertisement
Table of Contents

Related Manuals for Rapsodo MLM2PRO


Summary of Contents for Rapsodo MLM2PRO
- Page 1 USER MANUAL Powered by: Rapsodo...
- Page 2 Rapsodo PTE Ltd. All rights reserved. Under the copyright laws, this manual may not be copied, in whole or in part without the written consent of Rapsodo. Rapsodo reserves the right to change or improve its products and to make changes in the content of this manual without obligation to notify any person or organization of such changes or improvements.
-
Page 3: Table Of Contents
CONNECTION GUIDE (DIRECT WIFI CONNECTION) CONNECTION GUIDE (STARTING A SESSION AND DEVICE INFO) MLM2PRO™ DEVICE INFO FIRMWARE UPDATE MLM2PRO™ SET UP (RANGE AND NET) ALIGNMENT - SET YOUR TARGET LINE ALIGNMENT - PLACING THE BALL UNDERSTANDING PRACTICE SETTINGS SETTING UP MYBAG CLUB RECOGNITION MLM2PRO™... -
Page 4: General Information
Mobile Launch Monitor MLM2PRO™ is designed and produced by Rapsodo Pte. Ltd. Do not use the MLM2PRO™ in wet conditions. The MLM2PRO™ is not water-resistant. Do NOT use the device under rain, water exposure or wet environments as the product may get damaged. -
Page 5: What's Inside The Box
Callaway® RPT™ Chrome Soft X® Golf Balls In the MLM2PRO box, you will find a carrying case and a sleeve of Callaway RPT™ Chrome Soft X Golf Balls. Inside of the carrying case, you will find the MLM2PRO™, Tripod, and USB-C charging cable. -
Page 6: Device Overview
Integrated radar unit tracks ball speed and club speed for each shot. LED Indicator The LED indicator shows the MLM2PRO™ status so you know if the device is charging, ready for a shot, or processing data. View the LED Guide for all statuses. -
Page 7: Led Guide
LED GUIDE The LED on the front of the MLM2PRO™ indicates the device status. The LED on the front of the MLM2PRO™ indicates the device status. Solid Red Flashing Red The device is powered on, but not connected to the The device has low battery. -
Page 8: Charging The Devices
CHARGING THE DEVICE Before your first session, fully charge the MLM2PRO™ using the provided USB-C cable. Please allow up to four hours for a full charge. The LED indicator will turn amber while the MLM2PRO™ is charging. The LED indicator will turn off when the MLM2PRO™ is fully charged. -
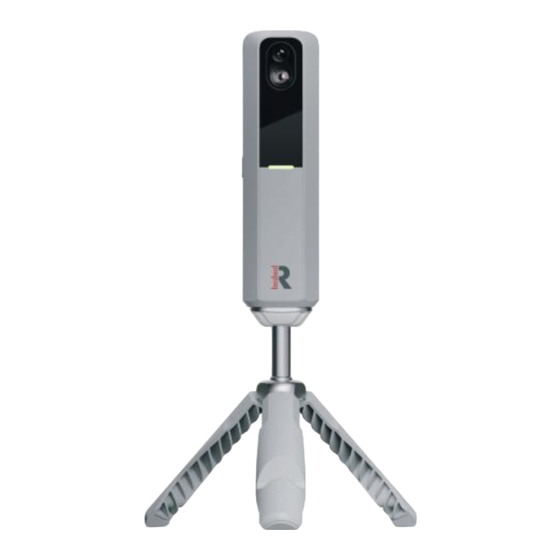
Page 9: Mlm2Pro™ Tripod
MLM2PRO™ TRIPOD The MLM2PRO™ tripod provides stability to ensure accurate data capture. It also functions as a stand for your phone or tablet. The phone or tablet does not need to be placed on the stand for the MLM2PRO™ to function. -
Page 10: Power Button
Press and hold the power button for 2 seconds to turn the device on. The LED indicator will turn red when the device is powered on. To turn off the MLM2PRO™, hold the power button until the LED turns off. -
Page 11: Rapsodo Mlm2Pro™ Mobile App
RAPSODO MLM2PRO™ MOBILE APP The MLM2PRO™ Mobile App is compatible with Android and iOS devices. To download the Rapsodo MLM2PRO™ Mobile App, scan the QR code from your phone/tablet or search ”Rapsodo MLM2PRO™” in the App Store or Google Play Store. -
Page 12: Mlm2Pro™ Getting Started
Once you’ve downloaded the MLM2PRO™ Mobile App, you will have two options: Login and Create Account. If you currently have an Rapsodo MLM2PRO™ app account, you can use your same credentials (email and password) to login to the MLM2PRO™ app. If you don’t remember your password, select “Forgot Password” to begin the reset process. - Page 13 MLM2PRO™ - GETTING STARTED If you’re new to Rapsodo, simply select “Create Account” and follow the on-screen prompts to create your account. Enter your contact information and create a strong password. Ensure your password is at least 8 characters including at least one number, uppercase and lowercase letter.
-
Page 14: Register Your Device & Claim 1-Year Premium Membership
REGISTER YOUR DEVICE & CLAIM 1-YEAR PREMIUM MEMBERSHIP All new MLM2PRO™ units come with a 1-year Premium Membership. To claim your MLM2PRO™ Premium Membership, you will first need to login to the MLM2PRO™ App or create an account. Once you login: Your device will display in the MLM2PRO™... -
Page 15: App Permissons
APP PERMISSONS To function properly, the MLM2PRO™ app requires permission to various functionality provided by your phone or tablet. Permissions vary by provider (iOS and Android). Location: Create GPS map and access local elevation data. Bluetooth: Search for available MLM2PRO™s, connect to third party applications. -
Page 16: Connection Guide
To begin using your MLM2PRO™, you will need to connect a compatible phone or tablet. Your phone or tablet will use Bluetooth to search for available MLM2PRO™’ s nearby. Once your unit is located, you will set up a WiFi connection that will be used to transfer data from the MLM2PRO™... -
Page 17: Connection Guide (Selecting Your Mlm2Pro™)
Ensure that Bluetooth and WiFi are enabled Once detected, your MLM2PRO™ will be a play mode from the Play tab (Practice, on your phone or tablet and the MLM2PRO™ shown on screen. If it’ s your first time Combines, or Simulation) or select is powered on (the LED indicator on the connecting, your MLM2PRO™... -
Page 18: Connection Guide (Local Network Connectoin)
CONNECTION GUIDE (LOCAL NETWORK CONNECTOIN) Follow the steps shown below to establish a Local Network Connection. Select your MLM2PRO™ from Your phone/tablet will scan Click ‘Connect’, then enter When the connection is the devices shown on screen. for local WiFi networks, then your WiFi password. -
Page 19: Connection Guide (Direct Wifi Connection)
CONNECTION GUIDE (DIRECT WIFI CONNECTION) Follow the steps shown below to establish a Direct WiFi Connection. Select your MLM2PRO™ from the devices You will then be prompted to establish a When the connection is successful, you will shown on screen. You will then see a Direct WiFi Connection. -
Page 20: Connection Guide (Starting A Session And Device Info)
If you select ‘View Device Info’, you will be taken to the Device Info screen. This screen can be accessed at anytime from the Profile tab when the MLM2PRO™ is connected to a phone/tablet. When your connection is successful, you... -
Page 21: Mlm2Pro™ Device Info
MLM2PRO™ DEVICE INFO Once you’ve connected your MLM2PRO™ to your phone or tablet, you can view the Device Info screen from the Profile tab. This will give you information on your MLM2PRO™ and give you the ability to take actions related to Connection and Firmware Upgrade: Rename MLM2PRO™:... -
Page 22: Firmware Update
FIRMWARE UPDATE To get the most out of your MLM2PRO™, always ensure your Firmware is up to date. To check for a Firmware upgrade, connect your MLM2PRO™ to a local network or in direct mode with cellular internet access (iOS only). An active internet connection is required to download the Firmware Update. -
Page 23: Mlm2Pro™ Set Up (Range And Net)
Place the device approximately 6.5-8.5 feet directly behind the ball with the alignment line on top of the device aimed directly at your intended target. If the MLM2PRO™ is in range mode, you need ~30 yards of ball flight. If the MLM2PRO™ is in net mode, you need at least 8 feet of ball flight. -
Page 24: Alignment - Set Your Target Line
The alignment aid on the top of the device is helpful when first setting the device up, however, once you start a session, you will see the MLM2PRO™’ s Shot Vision camera view to assist in your alignment. The target line shown in the app corresponds to a 0-degree launch direction. -
Page 25: Alignment - Placing The Ball
ALIGNMENT - PLACING THE BALL The MLM2PRO™ requires specific ball placement so the integrated cameras can pick up each shot. When setting your target line, you will see the ‘Hitting Area’. This yellow dotted line shows you where you can place the ball so it is visible by the Impact Vision camera. When the ball is placed within the hitting area the MLM2PRO™... -
Page 26: Understanding Practice Settings
UNDERSTANDING PRACTICE SETTINGS Customize your settings before each session to ensure accurate data capture. Net vs. Range Mode Depending on your set up, it is important to select the correct mode. Our algorithms are designed to provide accurate data based on the amount of ball flight our cameras and radar capture. -
Page 27: Setting Up Mybag
SETTING UP MYBAG MyBag allows you to track your data across multiple different clubs. To access and set up MyBag, click the Profile tab then select MyBag. To add a new club, click the Create new club. Enter the club type, color (to be shown in app), make, model, and any additional details (loft, lie, flex). -
Page 28: Club Recognition
To use club recognition, simply start a session and begin hitting shots. When you’re ready to change your club, show the sole of the club to the camera. You should hold the club roughly six inches from the MLM2PRO™’ s camera for approximately 2 seconds. Your club change will... -
Page 29: Mlm2Pro™ Specifications
MLM2PRO™ SPECIFICATIONS Dimensions 1.9” x 1.7” x 7.4” / 48 x 43 x 188mm (W x D x H) .7 Ibs / 300 grams Mass Camera 2k wide angle video, 240 fps high speed photo Rechargeable, built-in lithium-ion battery Battery type... -
Page 30: Important
Some features require an annual Premium subscription. The software in the MLM2PRO™ system is licensed and not sold to you, and is subject to the End User License Agreement and Rapsodo’ s Terms and Conditions. -
Page 31: Appendix
APPENDIX Additional content to be added later. -
Page 32: Premium Membership
PREMIUM MEMBERSHIP New MLM2PRO™ purchases come with a 1-year Premium Membership to help you get the most out of your game. Premium Members get access to: Session InsightS Rapsodo Combines Rapsodo Range Rapsodo Courses Measured Spin and Spin Axis (using the Callaway RPT Chrome Soft X golf ball)
Need help?
Do you have a question about the MLM2PRO and is the answer not in the manual?
Questions and answers
Where can I find a description of all of the data values that are reported for my shot data? There is nothing in the user manual. Thank you.
The Rapsodo MLM2PRO reports the following shot data values: carry, total distance, descent angle, apex, shot type, side carry, and smash factor.
This answer is automatically generated
I have lost my login password. I follow the procedure for lost password and they say they will send me login info to my email. I have tried for two days and receive nothing to my e mail address. Not regular e mail or junk.