Palm TX Start Here
Palm tx: install guide
Hide thumbs
Also See for TX:
- Getting started manual (172 pages) ,
- Read this first manual (12 pages) ,
- Manual (3 pages)
Table of Contents
Advertisement
Quick Links
Start here
Stylus
USB sync cable
®
T | X handheld
Palm
Software installation CD
Upgraders
Before going to step 1, synchronize your current handheld with your computer so
that the information is up-to-date.
Be sure to install the new software from the CD as described in step 3 below;
otherwise, your new handheld will not work correctly.
For more information on upgrading, go to www.palm.com/support.
3 3
Install software
To install Palm
®
Desktop software and other important software, insert
the CD into your computer's CD drive.
Mac:
Windows:
Double-click the CD icon,
Follow the installation instructions
that appear on your computer
and then double-click
screen.
PalmSoftware.pkg.
Tip: During the installation process on a Windows computer, you can
select to synchronize with Outlook.
Upgraders
To switch from synchronizing with Palm Desktop software
to Outlook, select Change your synchronization method
at the end of the installation process.
Problems? See Troubleshooting below.
Troubleshooting
Support information is available also at www.palm.com/support
Your handheld does not turn on, or does not respond when you tap it
1. Try turning it on by pressing one of the quick buttons on the front panel.
2. Do a soft reset. Use the stylus to gently press the reset button inside the hole
on the back of the handheld.
3. Make sure the AC charger is fully connected to the handheld and to a working
outlet. Charge for another three full hours.
Palm Desktop Installer does not start when you put the CD into the drive
Windows:
1. Click the Start button and select Run.
2. Click Browse to locate the drive containing the CD that came with
your Palm T | X handheld.
3. Double-click autorun.exe on the CD.
Mac:
1. Double-click the CD icon on the Mac desktop.
2. Double-click PalmSoftware.pkg.
1 1
Connect and charge
Note: Don't be surprised if your handheld doesn't respond at all to button presses
or taps before you fully charge it. This is normal.
a. Connect the sync cable to your handheld and to the USB port on
your computer.
b. Plug the AC charger into an outlet and connect it to the handheld.
c. Charge for three hours. Be sure to fully charge your handheld before
going on to the next step.
Flip cover
AC charger
Get answers, learn more
Take the tutorial
Get more information
Synchronization does not begin
Be sure the sync cable is plugged into your handheld and into a USB port on your computer.
Check your computer:
Windows:
1. Make sure the HotSync
right part of your screen.
If not:
a. Click the Start button and select Programs.
b. Select Palm, and then select HotSync Manager.
2. Check the connection type:
a. Disconnect and then reconnect the sync cable.
b. Make sure there is a checkmark next to Local USB.
If there is none, click Local USB.
Mac:
1. Make sure the HotSync Manager is enabled:
a. Double-click the HotSync Manager icon in the Palm folder.
b. From the HotSync Controls tab, click Enabled.
2. Make sure the USB connection is working:
a. Disconnect and then reconnect the sync cable.
b. Restart your computer.
USB
Sync cable
AC charger
Quickly learn to use your
handheld. Insert the installation
CD into your computer and click
here for an
interactive
tutorial.
Open Palm Desktop software on
your computer and click Help.
Click here for detailed handheld
and desktop software help.
Click
Online Support
for the latest
software updates and answers to
frequently asked questions.
®
Manager icon appears in the group of icons in the lower-
HotSync Manager icon
2 2
Set up
a. Press the power button.
b. Remove the stylus.
c. Follow the onscreen instructions
to set up your handheld.
Tip: Take the Quick Tour
to
learn more about the great features
of your Palm T|X handheld.
Problems? See Troubleshooting below.
Look for these great features
On your computer
Palm Desktop
software. Enter info in Palm Desktop software and
it shows up on your handheld the next time you synchronize.
Quick Install (Windows
only). Install applications on your
handheld the next time you synchronize.
Send To Handheld droplet (Mac
only). Install applications on
and copy other types of files to your handheld the next time
you synchronize.
On your handheld
®
Wi-Fi
technology. Set up wireless connections to a Wi-Fi
network to browse the web, send and receive email messages,
and synchronize with your computer.
®
Bluetooth
wireless technology.
Set up a connection with your
computer to synchronize wirelessly (computer must be enabled
with Bluetooth technology), or set up a connection with your
GSM mobile phone to browse the web or send and receive email
and SMS messages. (Requires phone enabled with Bluetooth
technology, data services, and an ISP, all sold separately.)
®
VersaMail
application. Send, receive, and manage email
messages wirelessly using your handheld's wireless capabilities
or by synchronizing with your Windows computer.
Check your handheld:
1. Tap Home
, and then tap HotSync
in Applications.
2. In the HotSync application, verify the following:
– Local is highlighted. If it isn't highlighted, tap Local.
– The term Cradle/Cable appears. If not,
tap the pick list, and then tap Cradle/Cable.
3. Tap the HotSync icon on the screen.
Local
HotSync icon
Cradle/Cable
Upgraders
Did you load any third-party applications on your previous handheld? You'll
have to update them if they are not compatible with your new handheld.
If any of the following symptoms occur on your new handheld after you
synchronize, remove these applications and contact the vendor for updated
versions: handheld freezes or resets when you open an application, slow
performance, unusual screen display, difficulties using handheld features,
uneven sound quality.
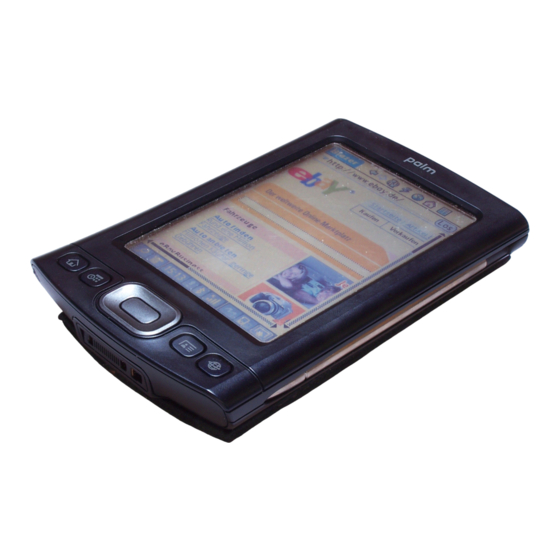
Stylus
Power button
Advertisement
Table of Contents

Related Manuals for Palm TX


Summary of Contents for Palm TX
-
Page 1: Troubleshooting
3. Make sure the AC charger is fully connected to the handheld and to a working outlet. Charge for another three full hours. Palm Desktop Installer does not start when you put the CD into the drive Windows: 1. Click the Start button and select Run. - Page 2 Palm, Inc. assumes no responsibility for any damage or loss resulting from the use of this guide. Palm, Inc. assumes no responsibility for any loss or claims by third parties which may arise through use of this software. Palm, Inc. assumes no responsibility for any damage or loss caused by deletion of data as a result of malfunction, dead battery, or repairs.
Need help?
Do you have a question about the TX and is the answer not in the manual?
Questions and answers