
Related Manuals for Philips D270


Summary of Contents for Philips D270
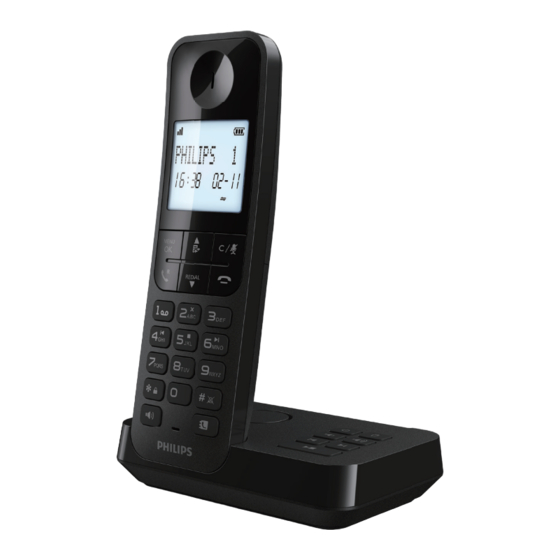
- Page 1 Dect Phone Dect Phone D270/D275 D270/D275 User manual User manual Register your product and get support at Register your product and get support at www.philips.com/support www.philips.com/support...
-
Page 2: Table Of Contents
Contents Make a conference call with the external callers/recipients Intercom and conference calls Important safety instructions Make a call to another handset 17 Your phone Make a conference call What is in the box Text and numbers Overview of the phone Enter text and numbers Overview of the base station Phonebook... - Page 3 Delete all call records Set dial mode Save a call record to the black Set flash time list Change PIN Redial list Set ECO mode View the redial records 14 Registration Redial a call Register additional handsets Save a call record to the 15 Restore default settings phonebook 16 Telephone answering ma-...
-
Page 4: Important Safety Instructions
1 Important safety • For pluggable equipment, the socket outlet shall be installed near the instructions equipment and shall be easily accessible. • Hands-free activation could suddenly increase the volume in the earpiece to a very high level: make sure the handset is Power requirements not too close to your ear. -
Page 5: Your Phone
2 Your phone Congratulations on your purchase and welcome to Philips! Charger (without telephone socket)** To fully benefit from the support that Philips offers, register your product at www.philips.com/welcome. What is in the box Your telephone package contains the Power adapter** following items. -
Page 6: Overview Of The Phone
• Turn the speaker phone on or off. • Make and receive calls through the speaker. • Press and hold to lock or unlock the keypad in standby mode. 10. Message Keys D270 D275 • Access voice mails. D275 Only • Delete messages in the answering machine. -
Page 7: Overview Of The Base Station
Overview of the base station D270 D275 Loudspeaker Press to find all handsets. Turn the answering machine on or off. • Delete the current playback message. • Press and hold to delete all old messages. Decrease or increase the speaker volume. -
Page 8: Get Started
3 Get started Connect each end of the line cord • The telephone socket at the back of Caution the base station; • The telephone socket on the wall. Make sure that you have read the safety instructions in Chapter 1 ‘Important safety instructions’... -
Page 9: Install The Supplied Batteries
• Charge the battery provided with this product only in accordance with the instructions and limitations specified in this manual. • Risk of decreased battery life! Never mix D270 different brands or types of batteries. Note • Charge the batteries for 8 hours before first use. -
Page 10: Check The Battery Level
Place the handset on the base station to Note charge the handset. When the handset is placed correctly on the base station, you hear • Placing the handset in the charger will bypass the set date and time, and voice a docking sound . -
Page 11: Configure Your Phone
Operating range Configure your phone Set the date and time When the handset is out of range, the handset displays Out of range. Before using the telephone system, set the If there is a call while the handset is out of date and time if prompted. -
Page 12: Check The Signal Strength
Icon Descriptions It remains steadily on when there are unread incoming calls When the handset is off the in the incoming call log base station or charger, the bars Press to clear a character or digit. indicate the battery level (from Press to stop the alarm. -
Page 13: Menu Navigation
Note Menu navigation In standby mode BS RINGER and RING VOLUME are available only for D275. 1. Press 2. Press ▼/▲ to scroll to a menu option. 3. Press to select. 4. You can also press to return to previous menu. -
Page 14: Calls
4 Calls Answer a call When there is an incoming call, the phone rings. Press to answer the call. Note Warning When the power fails, the phone cannot access emergency services. When the handset rings or when the hands- free mode is activated, keep the handset away from your ear to avoid ear damage. -
Page 15: Adjust The Earpiece Or Speaker 15
Adjust the earpiece or speaker Answer a second call volume Note Press to adjust the volume during a call. This service is network dependent. Check with your network provider for operation. The earpiece or speaker volume is adjusted and the phone is back to the call screen. -
Page 16: Make A Conference Call With
Make a conference call with the external callers/recipients Note This service is network and country dependent. Check with the service provider for operation and additional charges. When you are connected to two calls, press , then The two calls are combined and a conference call is established. -
Page 17: Intercom And Conference Calls
5 Intercom and Make a conference call conference calls A 3-way conference call is between you, another handset user and the outside callers. An intercom call is a call to another It requires two handsets to share the same handset that shares the same base station. base station. -
Page 18: Text And Numbers
6 Text and numbers You can enter text and numbers for handset name, phonebook records, and other menu items. Enter text and numbers Press once or several times on the alphanumeric key to enter the selected character. Press to delete a character. Press to move the cursor left or right. -
Page 19: Phonebook
7 Phonebook Enter the first character of a Phonebook contact The phonebook can store up to 50 entries, > [PHONEBOOK] Press or press which is shared with the black list and the > [ALL CONTACTS] > > to access VIP list. Each record can have a name up to 12 the phonebook list. -
Page 20: Add A Phonebook Record
Add a phonebook record Delete a phonebook record > [PHONEBOOK] Note Press or press > [ALL CONTACTS] > > to access • If your phonebook memory is full, a the phonebook list. notification message is displayed on the Select a contact, then press handset. -
Page 21: Add A Phonebook Record To
Add a phonebook record to VIP Check number of phonebook list records used > [PHONEBOOK] Press to access the phonebook list. Press or press > [ALL CONTACTS] > > to access and then select [PB STATUS]. Press the phonebook list. The number of phonebook records Select a contact, then press used displays (e.g. -
Page 22: View Vip Records
View VIP records Enter the first character of a VIP contact Note > [PHONEBOOK] > [VIP] to Press access the VIP list. • You can view the VIP records on one handset only each time. Press the alphanumerical key that •... -
Page 23: Call Log
8 Call log View the call records The call log stores the call history of all missed Note or received calls. The incoming call history includes the name and number of the caller, • You can view the call records on one call time and date. -
Page 24: Delete A Call Record
Delete a call record > [CALL LIST]. Press or press The incoming call log is displayed. Select a record, then press and select [DELETE]. A confirmation request is displayed on the handset. Press to confirm. The record is deleted. Delete all call records >... -
Page 25: Redial List
9 Redial list Delete a redial record The redial list stores the call history of dialed Press to enter the list of dialed calls. It includes the names and/or numbers calls. you have called. Select a record, then press This phone can store up to 10 redial confirm. -
Page 26: Call Blocker
10 Call blocker If you select [ALWAYS ON], the setting will end here. The telephone will not ring even the number is If you have subscribed to Caller ID service, added in the VIP list. you can access the call blocker menu to block If you select [TIMED], go to the next certain incoming calls automatically. -
Page 27: Add A Black List Record
Add a black list record Delete a black list record > [CALL BLOCKER] > [BLACK > [CALL BLOCKER] > [BLACK Press Press LIST] > to access the black list. LIST] > to access the black list. Select a contact, then press >... -
Page 28: Find Handset
11 Find handset This feature helps you find all system handsets. Caution • Do not press and hold for more than four seconds. It may lead to handset deregistration. • If the handset displays [REGISTER], refer to Chapter 13 ‘Registrations’ to register the handset back to the telephone base. -
Page 29: Handset Settings
Handset Tone settings settings Set the key tone You can customize the handset settings to Key tone is the sound made when you press a make it your own phone. key on the handset. Press Ring settings Select [HS SETTINGS] > [TONE SETUP] > [KEY TONE], then press to confirm each selection. -
Page 30: Rename The Handset
Rename the handset Set alarm You can rename the handset for your easy You can set the alarm alert with handset. reference with the base. The name of the handset can be up to 10 Set alarm on and alarm time characters. -
Page 31: Base Settings
13 Base settings Deregister the handsets Press Ring settings Select [BS SETTINGS] > [DELETE HS], then press to confirm each selection. Note [PIN? - - - -] displays; the “- - - -” cursor flashes. Default 4-digit PIN is Available only for D275. 0000. -
Page 32: Set Flash Time
Set ECO mode Set flash time You can reduce transmission power by setting Make sure that the recall time is set correctly the ECO mode. before you can answer a second call. In normal case, the phone is already preset for the recall duration. -
Page 33: Registration
14 Registration Register additional handsets You can register additional handsets to the base station. The base station can register up to 4 handsets. If the handset is in [REGISTER] status, press Select [REGISTRATION] , then press to confirm. [PIN? - - - -] displays; the “- - - -” cursor flashes. -
Page 34: Restore Default Settings
Restore default settings You can reset your phone settings to the original factory settings. Press Select [DEFAULT] , then press confirm. [PIN? - - - -] displays; the “- - - -” cursor flashes. Default 4-digit PIN is 0000. To erase a character, press The PIN will be masked as ****. -
Page 35: Telephone Answering Ma
Telephone Note answering When the answering machine is switched on, it answers incoming calls after a certain machine number of rings based on the ring delay setting. Note Set the answer mode Available only for D275. Your phone includes a telephone answering Press machine that records unanswered calls when Select [ANS. -
Page 36: Outgoing Messages
Outgoing messages Note You can no longer listen to the outgoing The outgoing message is the message your message when there is an incoming call. caller hears when the answering machine picks up the call. The answering machine has 2 pre-recorded outgoing message: [ANS & Restore the default outgoing REC] and [ANSWER ONLY]. -
Page 37: Incoming Messages
From the handset Incoming messages > [ANS. Machine] > [MSG • Press PLAYBACK], then press to confirm When you receive new TAM messages, the each selection. new message indicator flashes on the PLAYING MSG displays. handset. New messages start playing. Old If you have new messages, the telephone messages start playing if there is no plays only the new messages (oldest first). -
Page 38: Set The Answer Delay
Delete all old incoming messages When you access the answering machine From the base remotely, you are recommended to set the answer delay to [TIME SAVER] mode. Press and hold on the base station in This is a cost effective way to manage your standby mode. - Page 39 Note Activate or deactivate the remote access • The * must be entered while the outgoing message is still playing, and the PIN You can allow or block remote access to the should follow without any delays. • If the PIN is entered incorrectly, you will answering machine.
-
Page 40: Retrieve Voicemail
Retrieve voicemail When you received a voicemail, the handset displays To retrieve, you typically dial an access number provided by your telephone service provider, and then enter a security code. Contact your telephone service provider for instructions on how to configure the voicemail settings and listen to messages. -
Page 41: Technical Data
18 Technical data Weight and dimensions (D270) • Handset: 102.5 grams 48.10 × 24 x 154 mm (H x W x D) General specification and features • Base: 64.5 grams • Talk time: 14 hours 107.5 x 70.3 x 23.3 mm (H x W x D) •... -
Page 42: Notice
RED Directive 2014/53/EU and UK Radio Equipment Regulations SI 2017 No.1206. You can find the Declaration of Conformity on www.philips.com/support. This symbol on a product means that the product is covered by European Directive 2012/19/EU. -
Page 43: Frequently Asked Questions
Frequently The handset loses connection with the base or the sound is distorted during a call. asked • Check if the ECO mode is activated. Turn it off to increase the handset range and questions enjoy the optimal call conditions. •... - Page 44 The caller’s information is withheld or ress unavailable. Press for 5 times on D275, or The handset cannot display characters * 4 times on D270, then press and #. confirm. Characters * and # respectively appear as Press for 3 times, then press ‘...
-
Page 45: Appendix
21 Appendix Text and number input tables Upper case characters (for English/ French/German/Italian/Turkish/ Portuguese/Spanish/Dutch) 0 . , / : ; “ ‘ ! ¡ ? ¿ * + - % \ ^ ~ | space 1 @ _ # = < > ( ) & £ $ ¥ € [ ] { } ¤ A B C 2 Ä... - Page 46 Specifications are subject to change without notice. Please visit www.Philips.com/support for the latest updates and documents. Philips and the Philips Shield Emblem are registered trademarks of Koninklijke Philips N.V. and are used under license. This product has been manufactured by and is sold under the responsibility of MMD Hong Kong Holding Limited or one of its affiliates, and MMD...
Need help?
Do you have a question about the D270 and is the answer not in the manual?
Questions and answers