Advertisement
Quick Links
Advertisement

Related Manuals for Woodendot Alba L


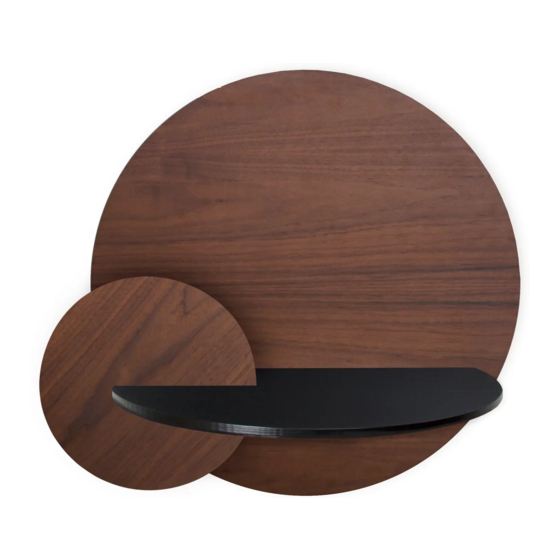
Summary of Contents for Woodendot Alba L
- Page 1 ASSEMBLY INSTRUCTIONS Alba L...
- Page 2 2 DIFFERENT POSSIBILITIES The drill bit required is Ø 6 mm or 15/64” We recommend two people Depth of the hole in wall: 50 mm / 1.96” for the installation For the hole to be the exact depth, measure 50mm/1.96” You will need a manual drill on the drill bit and place tape around it to mark the for the wall holes...
- Page 3 4º 1º 2º Use the level tool Mark the holes with a pencil 3º 5º 8º Place the “U” piece between the wall 7º Screw the “U” piece to the back panel 6º and the back panel. (x2 screws) Mark the three holes with a pencil 12º...
- Page 4 16º Take out the small Introduce the small 15º wooden piece wooden piece 14º Make a line at the intersection of the small piece of wood on the back. 17º Introduce the small wooden piece with 18º Screw to the set Screw on the L-shaped metal the metal piece towards the back.
- Page 5 ASSEMBLY INSTRUCTIONS Alba L...
- Page 6 2 DIFFERENT POSSIBILITIES The drill bit required is Ø 6 mm or 15/64” We recommend two people Depth of the hole in wall: 50 mm / 1.96” for the installation For the hole to be the exact depth, measure 50mm/1.96” You will need a manual drill on the drill bit and place tape around it to mark the for the wall holes...
- Page 7 4º 1º 2º Use the level tool Mark the holes with a pencil 3º 5º 8º 7º Place the “U” piece between the wall Screw the “U” piece to the back panel and the back panel. (x2 screws) Mark the three holes with a pencil 6º...
- Page 8 ASSEMBLY INSTRUCTIONS Alba L...
- Page 9 4 DIFFERENT POSSIBILITIES The drill bit required is Ø 6 mm or 15/64” We recommend two people Depth of the hole in wall: 50 mm / 1.96” for the installation 8 DIFFERENT POSSIBILITIES For the hole to be the exact depth, measure 50mm/1.96” You will need a manual drill on the drill bit and place tape around it to mark the for the wall holes...
- Page 10 4º 1º 2º Use the level tool Mark the holes with a pencil 3º 5º 8º Screw the “U” piece to the back panel (x2 screws) Place the “U” piece between the wall 7º and the back panel. 6º Mark the three holes with a pencil 9º...
- Page 11 Introduce the small Take out the small wooden piece 16º wooden piece 17º 15º Make a line at the intersection of the small piece of wood on the back. 18º Screw on the L-shaped metal piece using the marked line Introduce the small wooden piece with 19º...
- Page 12 Introduce the small Take out the small 16º wooden piece 15º wooden piece 14º Make a line at the intersection of the small piece of wood on the back. 17º Screw on the L-shaped metal Introduce the small wooden piece with piece using the marked line the metal piece towards the back.
- Page 13 ASSEMBLY INSTRUCTIONS Alba L...
- Page 14 4 DIFFERENT POSSIBILITIES The drill bit required is Ø 6 mm or 15/64” We recommend two people Depth of the hole in wall: 50 mm / 1.96” for the installation 8 DIFFERENT POSSIBILITIES For the hole to be the exact depth, measure 50mm/1.96” You will need a manual drill on the drill bit and place tape around it to mark the for the wall holes...
- Page 15 4º 2º 1º Use the level tool Mark the holes with a pencil 3º 5º 8º Screw the “U” piece to the back panel (x2 screws) 7º 6º Place the “U” piece between the wall and the back panel. Mark the three holes with a pencil 9º...
- Page 16 Introduce the small 16º Take out the small 17º 15º wooden piece wooden piece Make a line at the intersection of the small piece of wood on the back. 18º Screw on the L-shaped metal 19º piece using the marked line Introduce the small wooden piece with Screw to the set the metal piece towards the back.
Need help?
Do you have a question about the Alba L and is the answer not in the manual?
Questions and answers